

Use the Conditions Manager
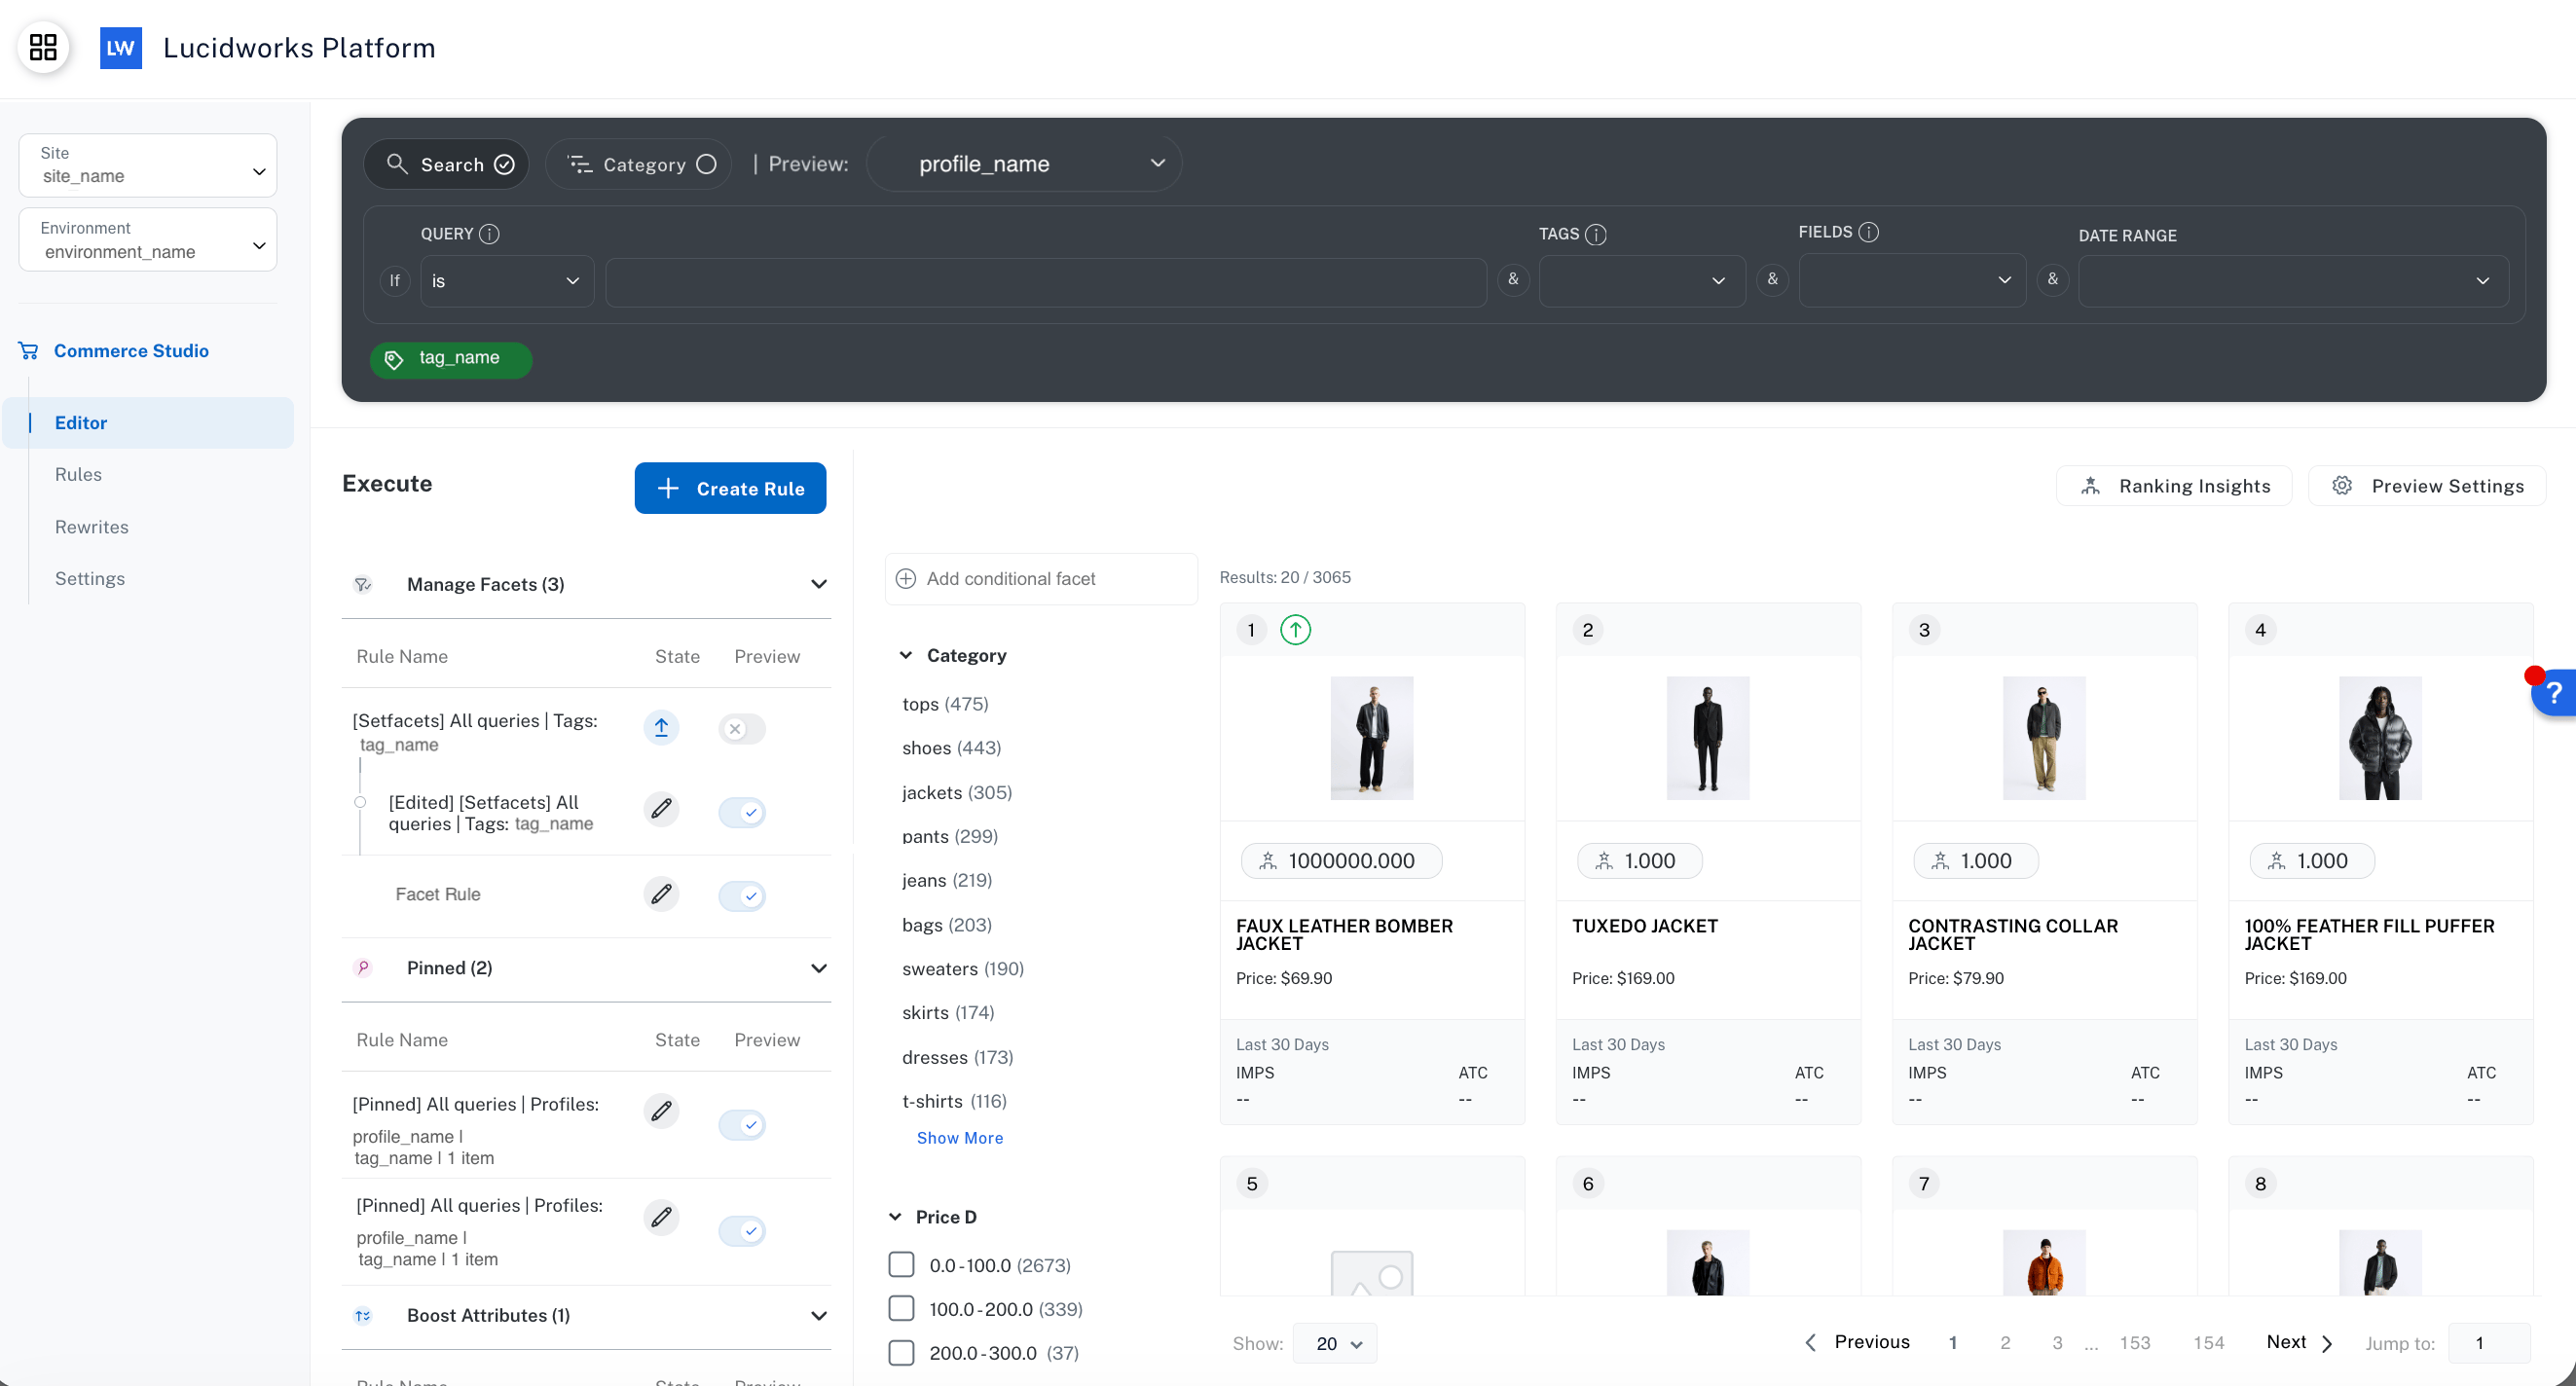
At the top of the Editor you’ll find the Conditions Manager. This is where you set the conditions for any rules you create in Commerce Studio, such as the query, timeframe, category, and more. The full page control displays in the Conditions Manager. To collapse the Conditions Manager, click the arrow below the Conditions Manager.
Select a search profile to preview
The Preview dropdown shows you the available search profiles. Query profiles represent different predefined search results that you can display on different pages of your customer-facing site, such as new items, seasonal items, sale items, and so on. You might also have experimental query pipelines for testing different configurations.
Select the search profile that represents the items you want to preview.
Use search conditions
When Search is selected in the Conditions Manager, you can enter queries and see the results in the live preview.
- is: The search query must match the defined term exactly. For example, if the rule is set to “[is] black shoes”, it only triggers when the user search is exactly “black shoes.”
- contains: The search query must include one or more of the defined terms anywhere within the query. Each word is evaluated independently. For example, if the rule is set to “[contains] black shoes”, it triggers for any query containing “black” (such as “black boots”) and any query containing “shoes” (such as “running shoes”). The words do not need to appear together or in a specific order.
- contains phrase: The search query must include the defined phrase in the exact word order entered. For example, if the rule is set to “[contains phrase] black shoes”, it triggers for “black shoes” or “men’s black shoes,” but not for “shoes black” or “black running shoes.”
- starts with: The search query must begin with the defined word or phrase. For example, if the rule is set to “[starts with] winter”, it triggers for “winter jackets” or “winter boots,” but not for “jackets for winter.” Multi-word phrases respect word order, so “[starts with] winter jackets” triggers for “winter jackets sale” but not for “jackets winter sale.”
- ends with: The search query must end with the defined word or phrase. For example, if the rule is set to “[ends with] manual”, it triggers for “installation manual” or “product manual,” but not for “manual installation guide.” Multi-word phrases respect word order, so “[ends with] near me” triggers for “pizza near me” but not for “near pizza me.”
Use category conditions
The Category condition in the Conditions Manager impacts all of the following aspects of information simultaneously on the Commerce Studio Editor screen:- Live preview, which displays the results returned for a user on that category page
- Rules (pin, boost, bury, redirects, and so on) created when the category is selected are saved and relate to that category, not to the entire site or in keyword searches
- Individual search result metrics such as impressions, CTR, conversion, and so on, are filtered based on the specified category so merchandisers can identify the individual search result’s performance
Configure the item card display
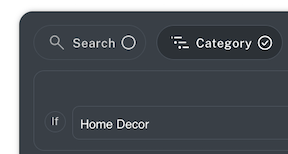
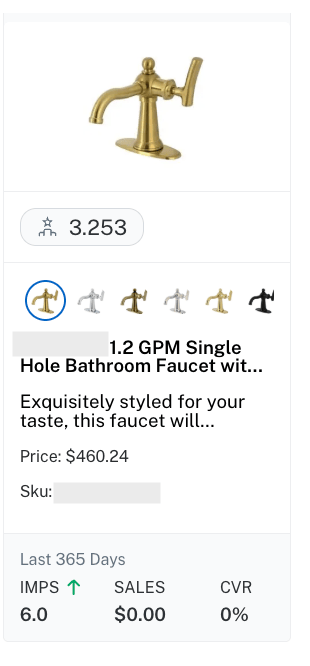
The fields displayed in the Editor for any search profile are configured on the Settings screen. Once those are configured, you can click Preview Settings in the Editor to toggle whether each field is displayed or hidden, including these:- Item fields, such as the title, description, image, and so on.
- Variants such as color or image variants
- Metric fields such as impressions, add-to-cart (ATC), conversion rate (CVR), revenue per visit (RPV), and more.
View and modify rules
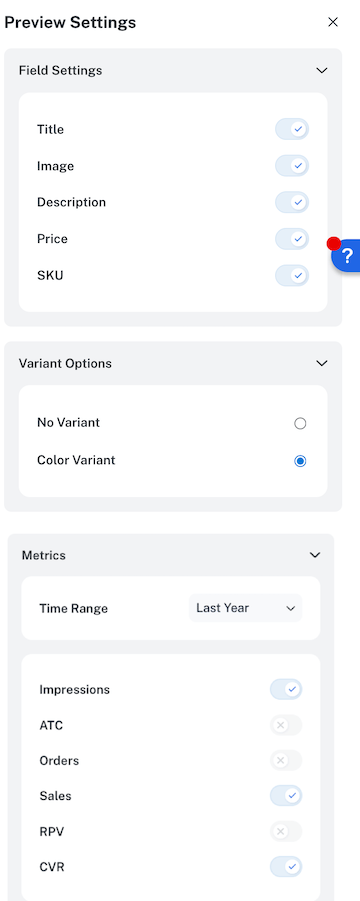
In the Execute panel on the left side of the Editor, you can view the rules that apply to the current query or category.
Rule state
Published rules are indicated by an up arrow in the State column. Draft rules are displayed with a pencil icon in the State column.Preview rule
The Preview feature lets you test to see the search results if a rule is removed from a query without actually deleting the rule. You can click the Preview toggleon to execute that rule in the query, or click Preview off to exclude it from the query. The query results display based on the rules included in the query.
Your live site is never affected by setting the Preview toggle to
off.Rule details
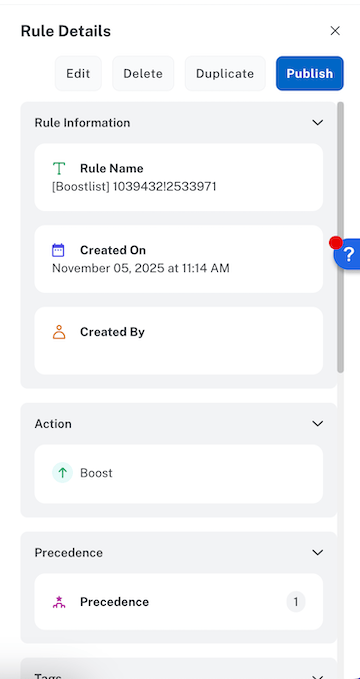
When you click a specific rule, the Rule Details section displays. You can view rule information such as name, creation information, and the action such as boost or bury. In addition, you can scroll to see other information such as the history of changes to the rule, conflicts with other rules, and items linked to the rule. You can edit, delete, or duplicate the rule. If the rule status isDraft, you can click Publish to make the rule active on your site. If the rule status is Published, you can click Unpublish to deactivate the rule, or click Edit to open the rule for editing, then click Save as Draft to save your changes as a draft attached to the published rule — the live version continues to serve your site until you publish the draft. For more information, see Manage rules.
Create new rules
When you create a new rule in the Editor, the rule is triggered by the current query or category in the Conditions Manager. For example, when “party supplies” is the current query and you create and publish a rule, the rule is triggered only when end users search for “party supplies”. Likewise, when “Rugs” is the current category, a new rule is triggered only when end users view the “Rugs” category on your site. There are several ways to create new rules in the Editor:- Click Create Rule in the Execute panel to open the Visual Builder and select a rule type.
- Hold the pointer over any facet and click to create a facet rule.
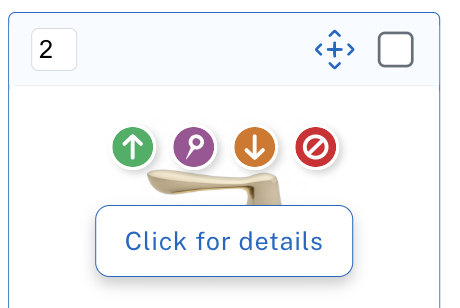
- Hold the pointer over any item card and click the controls to create a rule that applies that item.
- Select the checkboxes for multiple items, then click the controls to create a rule that applies to that set of items.
View product details
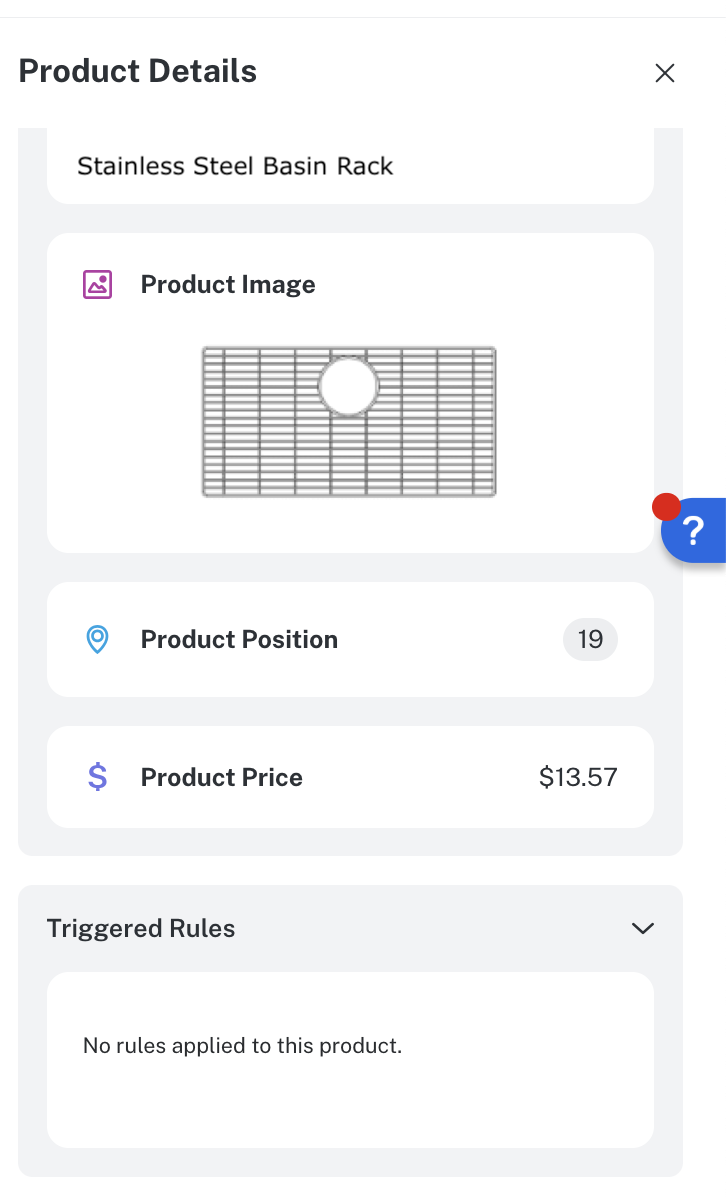
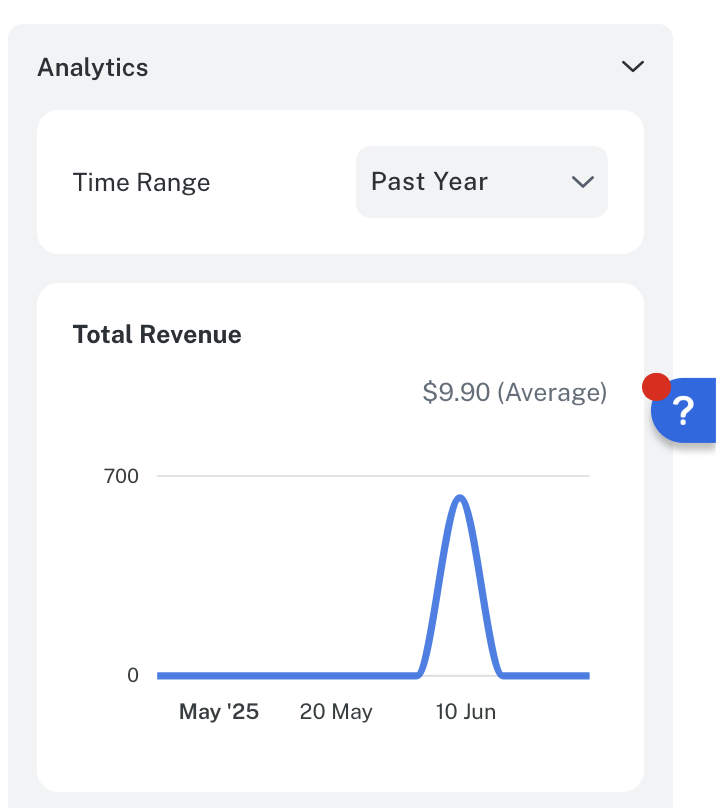
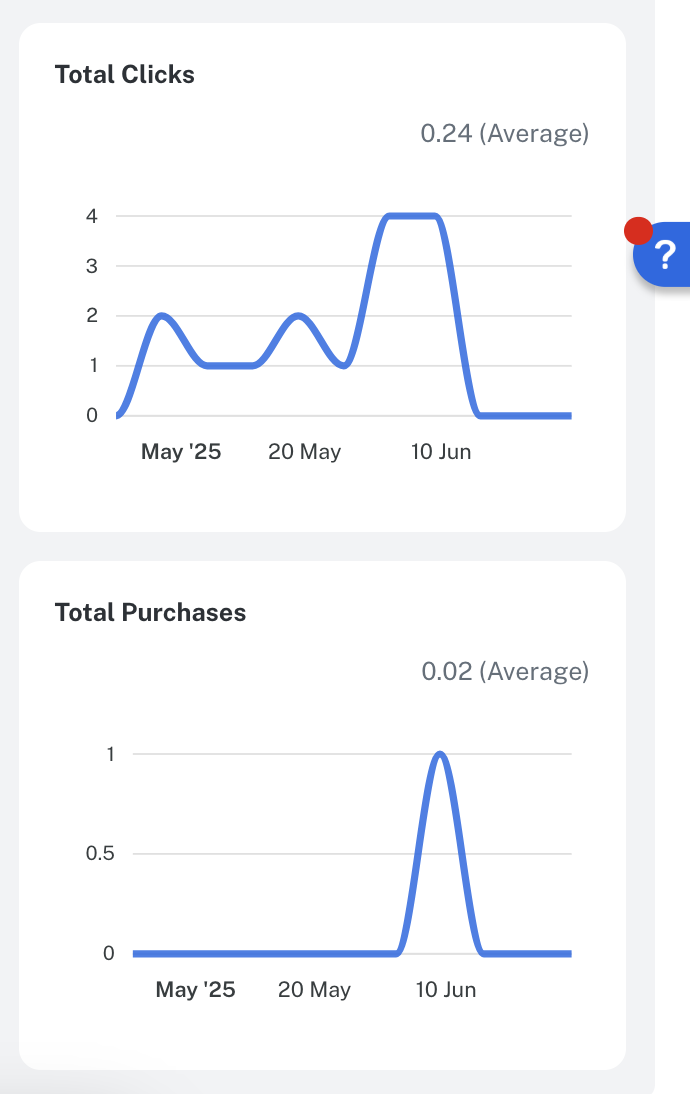
If you Click for details, the Product details panel displays and provides the following information: product name, image, position (ranking in results), triggered rules for the item, and the item analytics selected to view.- Product image, position, and price
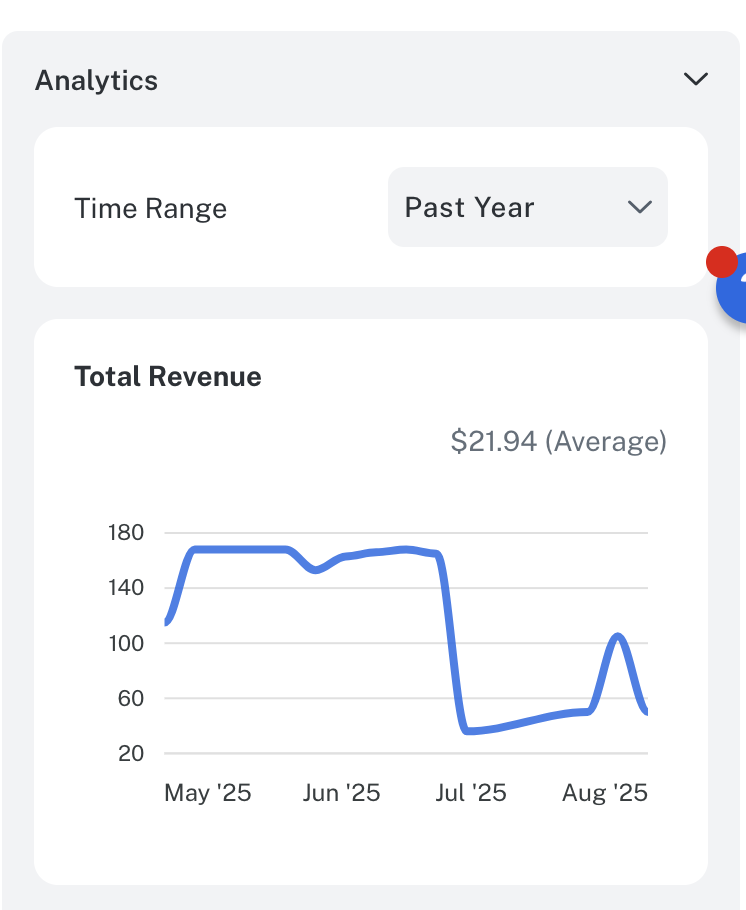
- Total revenue
- Total clicks and purchases
Ranking insights
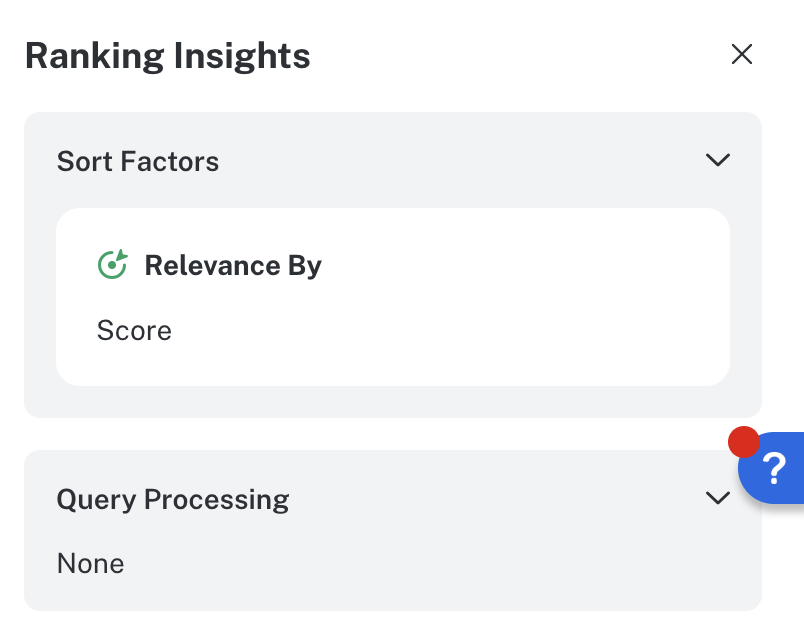
This section displays the ranking factors for the results. Factors include:- Sort: Ranking signals such as relevance score
- Query processing: Any rules that fired when creating the result set, such as phrase detections
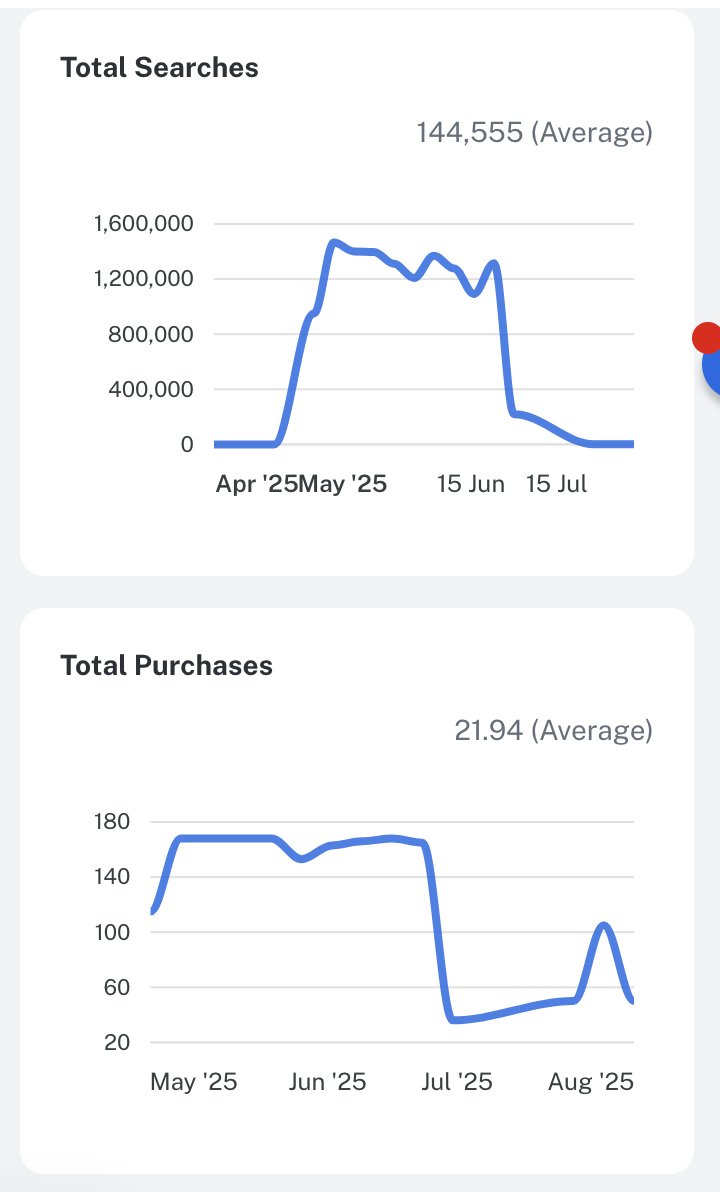
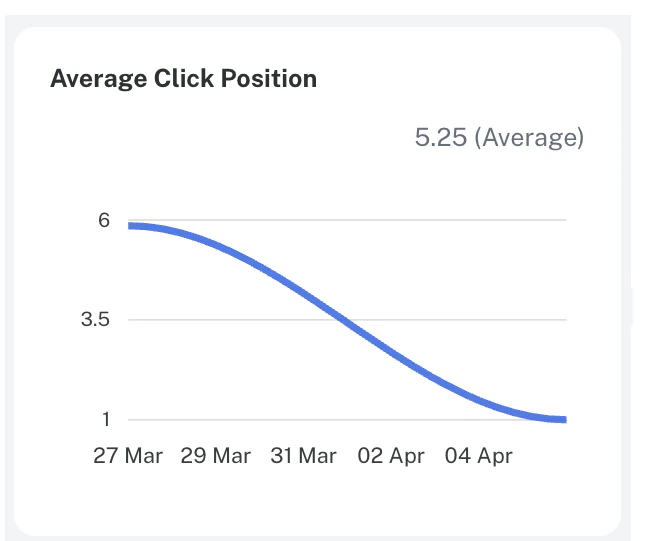
- Analytics: Selected performance metrics such as total revenue, total searches, total purchases, and average click position
- Sort factors
- Analytics
- Total searches and purchases
- Average click position
Impressions metrics
Product impressions measure the number of times a product displays in search results in response to user queries. The product is counted each time it displays, even if users do not interact further with the product. Impressions metrics can be displayed in Top Performing Products in Analytics Studio and Commerce Studio Editor on the search results cards. For information about how to use impressions metrics to enhance product visibility and conversions, see Impressions metrics usage.Analytics Studio Impressions metrics
Analytics Studio Impressions metrics
If you select Top Performing Products in Analytics Studio, the dashboard displays a column for the number of impressions per product.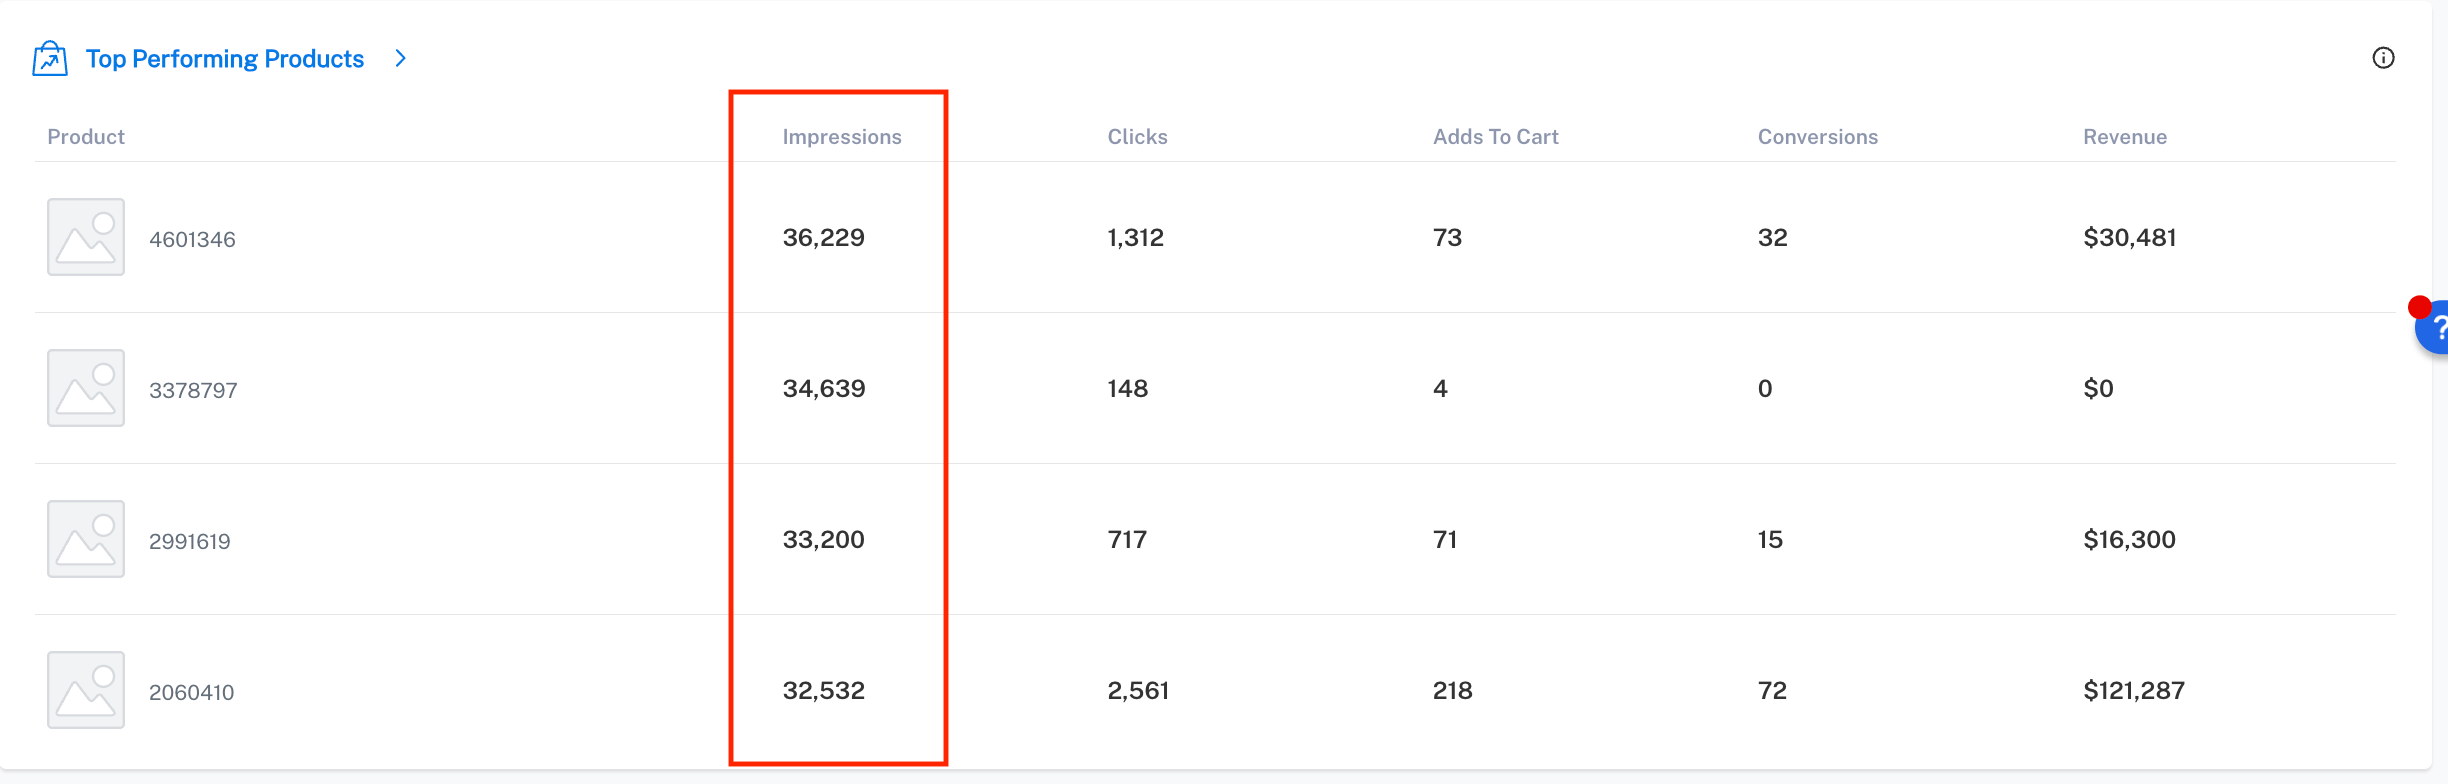
Commerce Studio Impressions metrics
Commerce Studio Impressions metrics
To enable impressions to display on product cards in Commerce Studio Editor, complete the following steps:
-
Navigate to Commerce Studio Settings and scroll to the Inline Analytics section. Click the toggle
onfor Inline Analytics. This setting is required to display the Metrics option in Commerce Studio Editor Preview Settings. If the toggle isoff, you cannot display any metrics on search results cards in Commerce Studio Editor.
Commerce Studio Setting enablement for Inline Analytics Metrics
- Metrics Duration. The timeframe selected in the Metrics Duration field sets the default. But you can override this duration by selecting a different timeframe in Commerce Studio Editor Preview Settings Metrics.
-
Document ID Field. Enter the name of the search result document field used as the document ID when retrieving metrics from the Signals Store. The default is
id.
For detailed information, see Commerce Studio inline analytics settings. -
Navigate to the Commerce Studio Editor screen and click Preview Settings. In the Metrics section, click the toggle to
onfor each metric you want to display on search results cards in Commerce Studio Editor.The search results cards reflect all of the metrics selected. Here is an example with Impressions, Sales, and CVR metrics.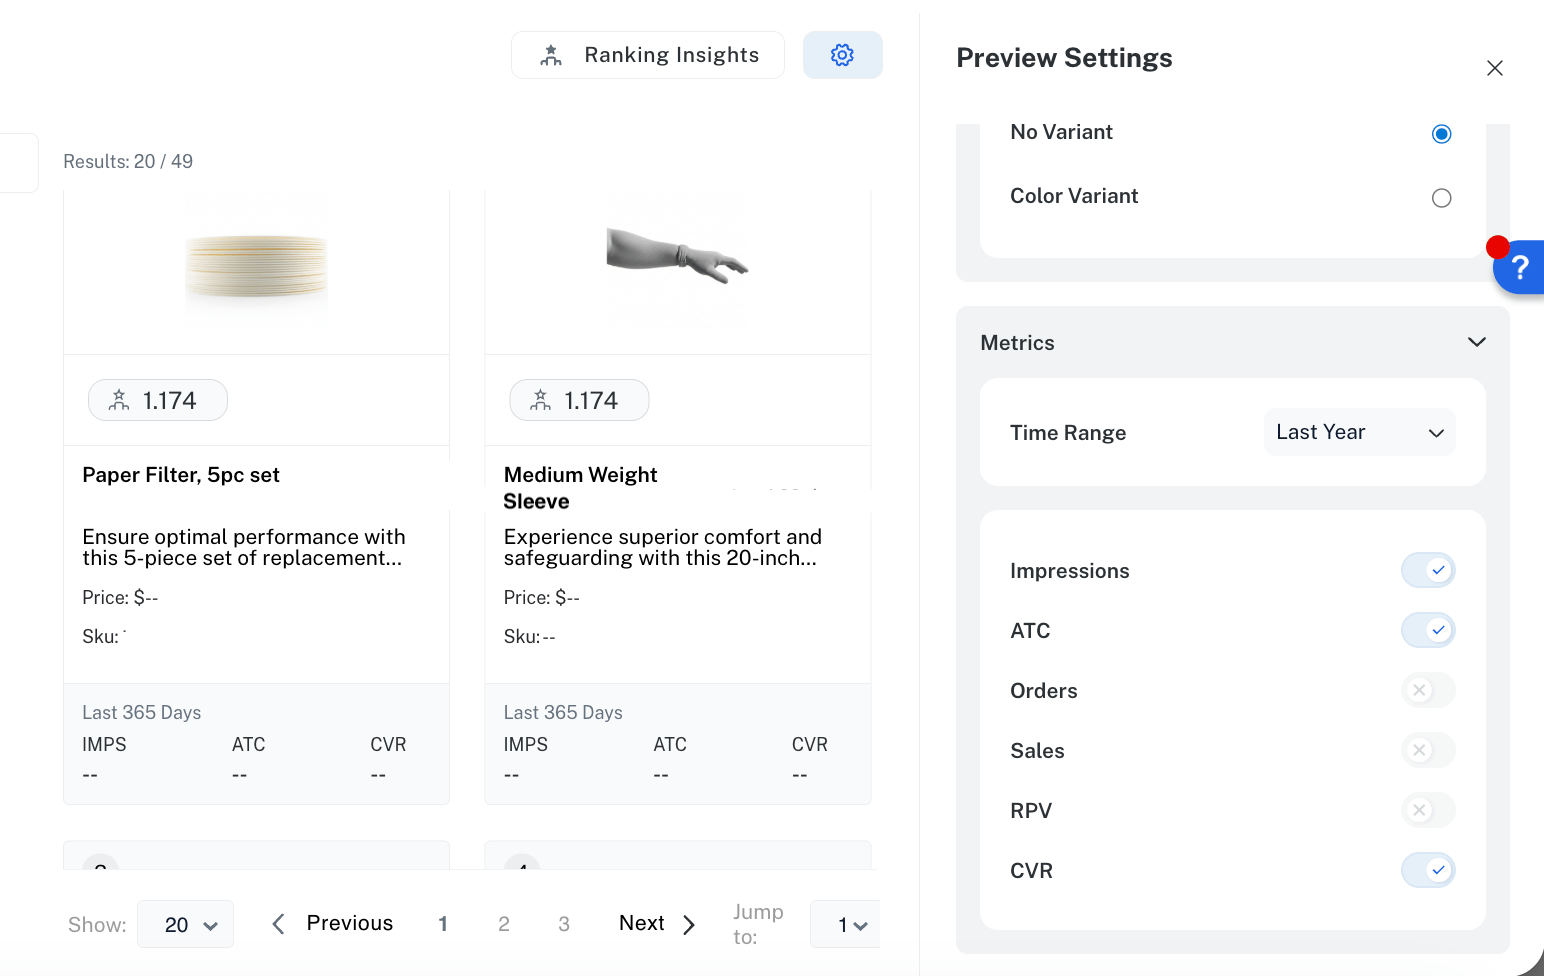
Commerce Studio Editor Preview Settings Metrics
Impressions metrics usage
Merchandisers can use impressions metrics information to help optimize and measure the effectiveness of customer search experiences. Ensuring the appropriate products display is essential to visibility and increased conversions. This section provides information about how merchandisers can use product impressions metrics to identify opportunities and take action in Commerce Studio.Understand the context for engagement metrics
For example, a product with 1,000 impressions and 50 clicks has a 5% click-through rate, while a product with 50 impressions and 50 clicks has a 100% click-through rate. Without impression data, these scenarios appear identical. If a product has thousands of impressions but few clicks, consider taking the following actions to improve the potential for conversions.- Review product title, description, and image quality.
- Check if the product is appearing for relevant search queries.
- Consider adjusting product positioning or boosting rules.
Identify product visibility gaps
For example, products with high conversion rates but low impressions may be underexposed and represent missed revenue opportunities. If a product has a high click-through rate and conversion rate but limited impressions, consider taking the following actions to improve product visibility and enhance the potential for even more conversions.- Boost the product in relevant search queries to increase visibility.
- Add merchandising rules to feature the product more prominently.
- Ensure the product is properly categorized and tagged.
Measure the impact of merchandising efforts
For example, impressions metrics track how boosting rules, pinning, and other merchandising actions affect product visibility over time. If a previously visible product shows decreasing impression trends, consider taking the following actions to improve product visibility and enhance the potential for conversions.- Investigate if new products are displacing that product in search results.
- Review relevancy rules and ensure the product matches user search intent.
- Check inventory status and product availability.
Expand the number of products with high impression-to-conversion ratios
If most of the impressions are concentrated on a few products while others receive minimal exposure, consider taking the following actions to improve impressions for a greater number of products to enhance the potential for conversions.- Diversify search results to expose a broader product range.
- Implement merchandising rules to rotate featured products.
- Balance automated relevance with strategic product visibility.