- Connector behavior differences. V1 and V2 connectors are not behaviorally equivalent, and similar settings can produce different crawl or ingestion results.
- Pipeline and mapping compatibility. V2 does not include the V1 field mapping stage, so any non-default V1 mappings must be recreated outside the connector. System fields, which are prefixed with
_lw_, change between V1 and V2, so any pipeline logic that references these fields must be updated. - Validation and comparison strategy. Define success criteria before you migrate.
- Migration setup and testing workflow. Use a sidecar or isolated target to support side by side comparison. Isolate connector output with a minimal pipeline first, then test with the full ingestion pipeline. Identify and fix gaps in non production environments before cutover.
- Scale and tooling readiness. Migrations involving a large number of V1 connectors require automation or assisted analysis. Ensure connector specific migration guidance is ready for the connectors in scope.
Connector behavior differences
V2 connectors can behave differently than V1 connectors. V2 connectors also receive more frequent updates because V1 connectors are deprecated and planned for removal. Plan for both major and minor differences during migration. To identify differences, compare configuration options side by side. Use the connector configuration specification documentation, or export both configurations in JSON format from the API and compare them.- In the Fusion UI
- For developers
This table highlights key differences between the connectors, but it is not comprehensive.
Pipeline and mapping compatibility
Identify what you must change to preserve behavior in V2. Focus on differences that affect how documents are enriched, routed, and indexed. Avoid implementing any totally new options you discover, unless you see them as a possible replacement for a removed option. For example, V2 connectors do not provide field mapping options in the data source configuration. Move field mappings to your index pipelines. V2 connectors may add the_lw_ prefix to certain fields that were unprefixed in V1 connectors. The _lw_ prefix identifies system fields managed by Fusion.
If your search application or index pipeline depends on the unprefixed field names, use the following workaround:
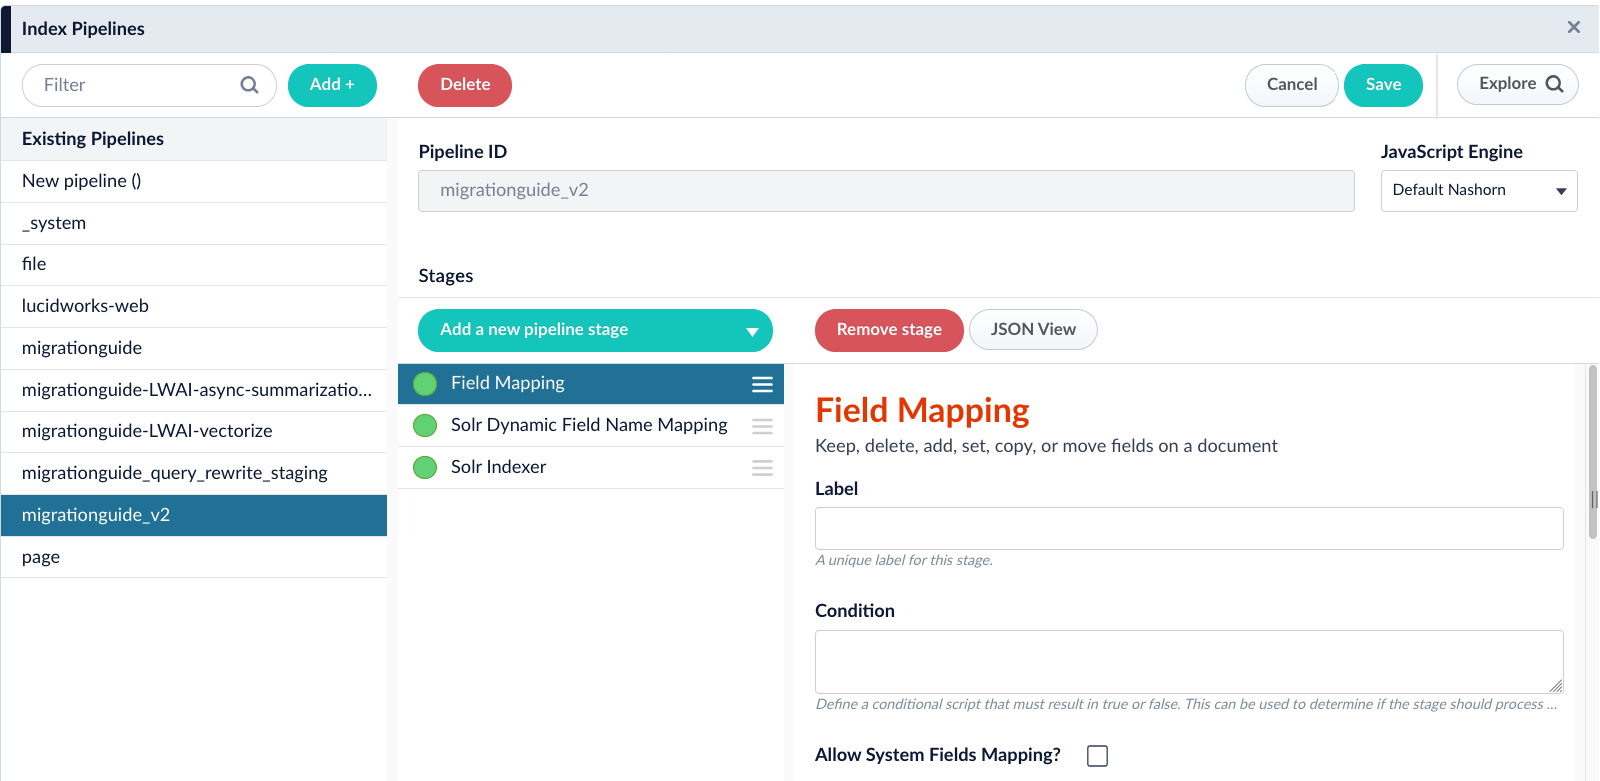
- Open your index pipeline.
- Add a new Field Mapping stage.
- In the Field Translations section, add a new field translation.
- Set the source field to the system field. For example,
_lw_SOURCE_FIELD. - Set the target field to the unprefixed name. For example,
SOURCE_FIELD. - Select the Copy operation.
_lw_SOURCE_FIELD to SOURCE_FIELD while preserving the original system field.
Validation and comparison strategy
Define success criteria before you start the migration. Use criteria that are measurable and that reflect how your system is used. Suggested success criteria include the following:- The V2 configuration matches V1 on schedule, coverage, and operational performance.
- The V2 configuration adopts improvements that matter for your use case, such as asynchronous parsing.
- Data source and pipeline configurations produce the same document fields, values, and value formats.
- Document counts match between V1 and V2, or you can explain and validate any count differences and confirm they are not caused by V2 configuration errors.
- Frontend applications and queries work without changes.
Testing order and environment discipline
These steps describe the high-level workflow for setting up the migration, sequencing tests, and managing environment risk. Use them as an overview before you begin detailed migration work.1
Set up an isolated target for comparison
Create a sidecar collection or equivalent isolated target so V2 ingestion does not overwrite V1 data, allowing side-by-side comparison of documents, fields, and formats throughout testing.
2
Create a new index profile for the sidecar collection
Create a new index profile that connects your datasource configuration to the new sidecar collection. The index profile defines which index pipeline and parser to use for processing documents from the V2 data source.
3
Run the V2 data source through a minimal pipeline first
Configure the V2 data source to use a basic vanilla pipeline that performs minimal processing and indexing.
4
Validate beyond document counts
Do not treat matching document counts as the primary success signal. Use counts as a secondary check, and investigate differences that may be caused by historical documents that were never deleted or by changes in connector behavior rather than by configuration errors.
5
Compare V1 and V2 outputs in the isolated target
Compare document content from V1 and V2 runs using JSON level inspection. Use a JSON diff approach that normalizes output, such as sorting keys, to identify meaningful differences in fields, values, and formats rather than differences caused by ordering.
6
Run the V2 data source through the full index pipeline
After validating connector output, rerun the V2 data source using the existing index pipeline. Use this run to uncover coupling issues, branching logic failures, and assumptions that only appear under full pipeline processing.
7
Validate query behavior and response format
Run representative queries against the V1 and V2 collections and compare responses. Confirm that returned fields, value formats, and response structure match expectations so applications and downstream integrations behave consistently after migration.
8
Plan and execute cutover with cleanup
When the V2 output is validated, cut over ingestion to the main collection. After cutover, identify any remaining V1 documents and remove them using an agreed retention rule, such as deleting documents older than a specific timestamp, to prevent stale data from skewing validation and search behavior.
Set up an isolated target for comparison
Use a sidecar collection to index documents from the V2 connector data source, even in development environments. This prevents the V2 run from overwriting documents produced by the V1 connector and makes it easier to compare outputs during validation. Consider creating two sidecar collections. Use one collection for the V2 data source and a second collection for the V1 data source. This lets you run the V2 data source through a minimal pipeline and compare V1 and V2 outputs without overwriting the original V1 documents. To create a sidecar collection, follow these instructions:- In the Fusion UI
- For developers
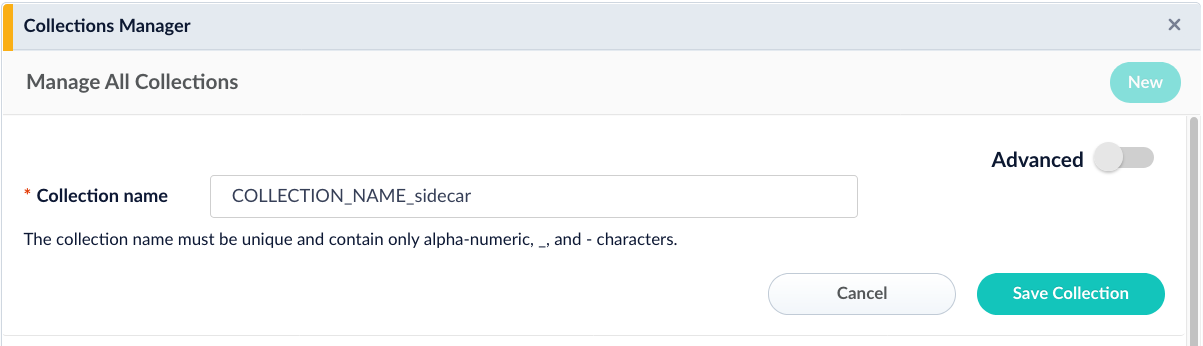
- Navigate to Collections > Collections Manager.
- Click New.
- Name and save the collection.
Create a new index profile for the sidecar collection
After creating the sidecar collection, you must create an index profile that connects your datasource to the collection. Create a separate index profile for the V2 datasource so you can point it to the sidecar collection without affecting the V1 datasource. To create an index profile, follow these instructions:- In the Fusion UI
- For developers
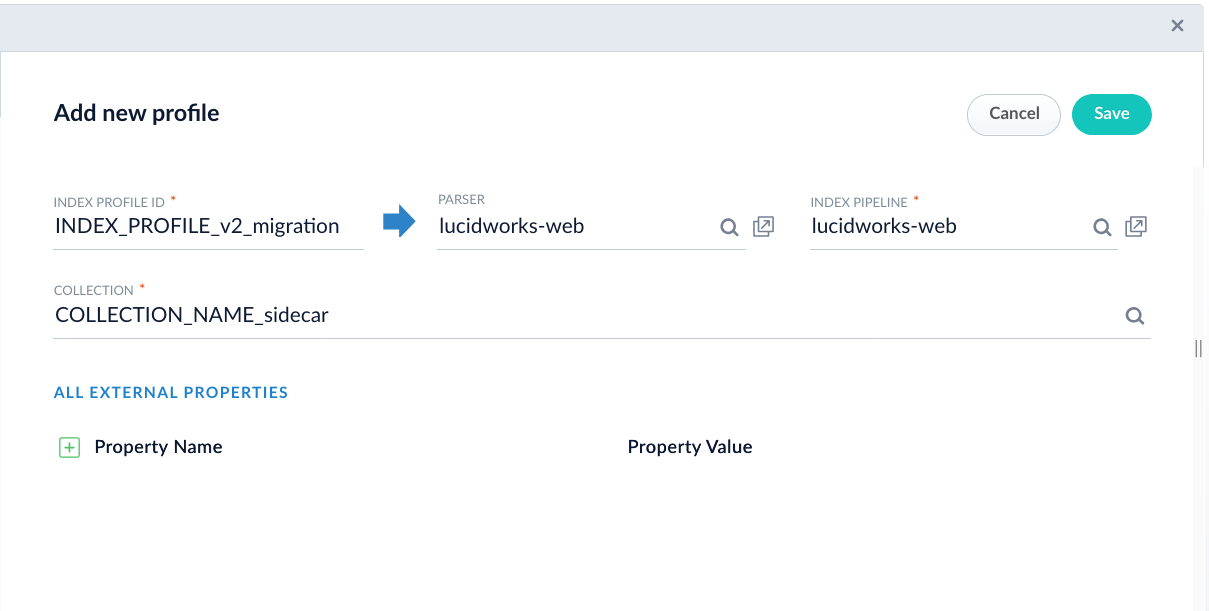
- Navigate to Indexing > Index Profiles.
- Click New.
- Select the sidecar collection as the target collection.
- Name and save the index profile.
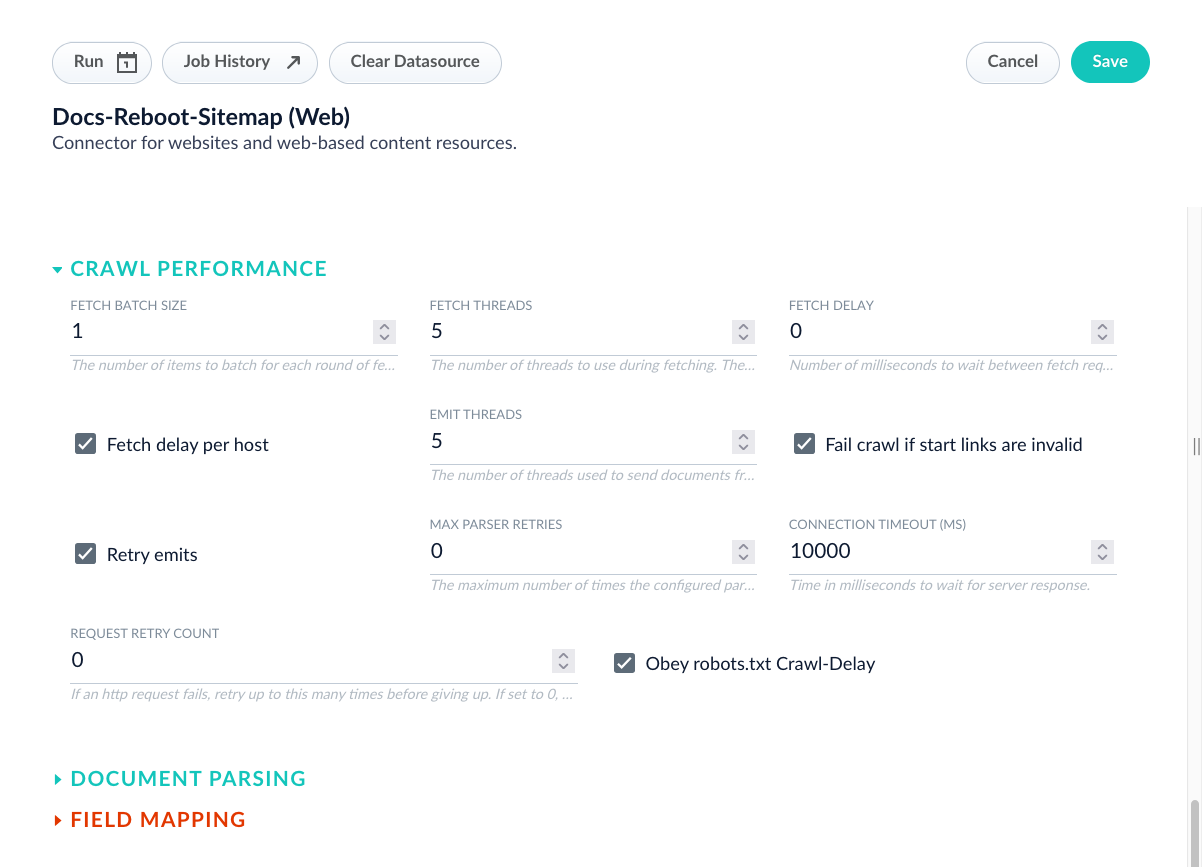
Run the V2 data source through a minimal pipeline first
Use a minimal pipeline early in the migration to identify issues with the V2 configuration before you introduce the complexity of your full ingestion pipeline. This step helps you focus on connector output differences first. If you created a sidecar collection for the V1 connector, update the V1 data source to index into that sidecar collection for this step. If you did not create a V1 sidecar collection, clear the V1 data source output so you can reindex those documents as new documents. Update the V1 data source to use a minimal pipeline, then run an indexing job. Next, update the V2 data source to use the same minimal pipeline and index into its sidecar collection.Validate beyond document counts
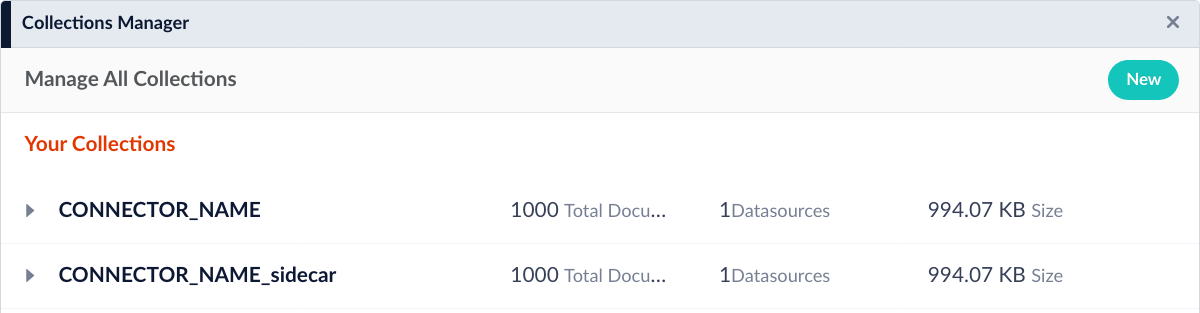
Document counts are a useful initial check. You can compare counts by navigating to Indexing > Collections and reviewing the document counts for your V1 and V2 data sources.- In the Fusion UI
- For developers
- Navigate to Indexing > Collections.
- Locate the collection containing the V1 datasource documents.
- Compare the count to the collection containing the V2 datasource documents.
- The V1 connector datasource may not be removing documents from the collection as expected. If possible, clear the collection and reindex the documents to get an accurate count. Alternatively, create a sidecar collection, and index documents to get an accurate count.
- The V2 connector datasource may have different URL filtering, depth limits, or inclusion/exclusion patterns. Review settings such as maximum crawl depth, URL pattern filters, and content type restrictions to ensure the V2 configuration matches the intended scope of the V1 connector.
- The source content may have changed between when the V1 and V2 crawls ran. If the crawls occurred at different times, additions, deletions, or modifications to the source data can result in count differences. To eliminate this variable, run both crawls as close together as possible or snapshot the source content before testing.
Compare V1 and V2 outputs in the isolated target
Compare the V1 and V2 outputs and identify key differences. Export document details in JSON format so you can inspect fields, values, and value formats. For example:indexed_tdt field, which records when the document was indexed into the search system, is absent. Five new fields are added: _lw_container_id_s, _lw_source_id_s, _lw_parser_max_parsing_depth_s, _lw_block_start_time_l, and name_t. Importantly, the body text is not changed.
Some differences may be acceptable. For example, your application may not make use of the indexed_tdt field, so its absence will not cause issues. Use your judgment to decide whether to continue to the next step or adjust the V2 data source and rerun this step.
Before you move to the next step, confirm the following at a minimum. These validations create a progression: counts, field structure and types, content quality, and functional behavior.
- Document counts are within an acceptable range of each other, accounting for known differences in crawl scope or timing.
- Critical fields required by your application are present in the V2 output with correct data types, such as strings as strings, integers as integers, and multi-value fields as multi-value fields.
- Body content and other key text fields contain the expected information without corruption or significant loss.
- Basic facets and search filtering behavior matches between V1 and V2 collections.
Run the V2 data source through the full index pipeline
After you have a V2 configuration that produces comparable results to V1 with the minimal pipeline, clear the sidecar collections and update both data sources to use the full index pipeline. The full index pipeline can significantly transform document data. As a result, differences in the output can reveal additional migration work. For example, some V1 connectors include field mapping in the data source configuration. V2 connectors might not include this capability, so you must implement equivalent behavior with index pipeline stages. Repeat the same workflow you used with the minimal pipeline. Index documents from the V1 and V2 data sources into their respective collections, then inspect the resulting documents for differences. Record differences and likely causes. Some differences are caused by the V2 configuration. Update the V2 configuration to address those inconsistencies, then rerun ingestion. Other differences are caused by the index pipeline. Duplicate the index pipeline so you can test changes safely. Use the following instructions:- In the Fusion UI
- For developers
Copying an index pipeline through the Fusion UI requires extensive manual work and increases the risk of mistakes. Lucidworks suggests using the “For developers” method to duplicate index pipelines.
- Navigate to Indexing > Index Pipelines.
- Click Add and provide a name for the new index pipeline.
- Rebuild the original pipeline one stage at a time, matching each stage configuration precisely.