Hierarchical facets
Hierarchical facets allow faster navigation through facet submenus and breadcrumbs. A “parent” facet specified as a general category can contain multiple “children” and “grandchildren” levels that are related. A user can click to open a facet that contains children, and then click a specific facet to bypass the results from the parent to display only the facet selected. In the following example for a clothing site, women is the parent. The children are pants, shirts (and its children), sports bras, coats & jackets, and shorts.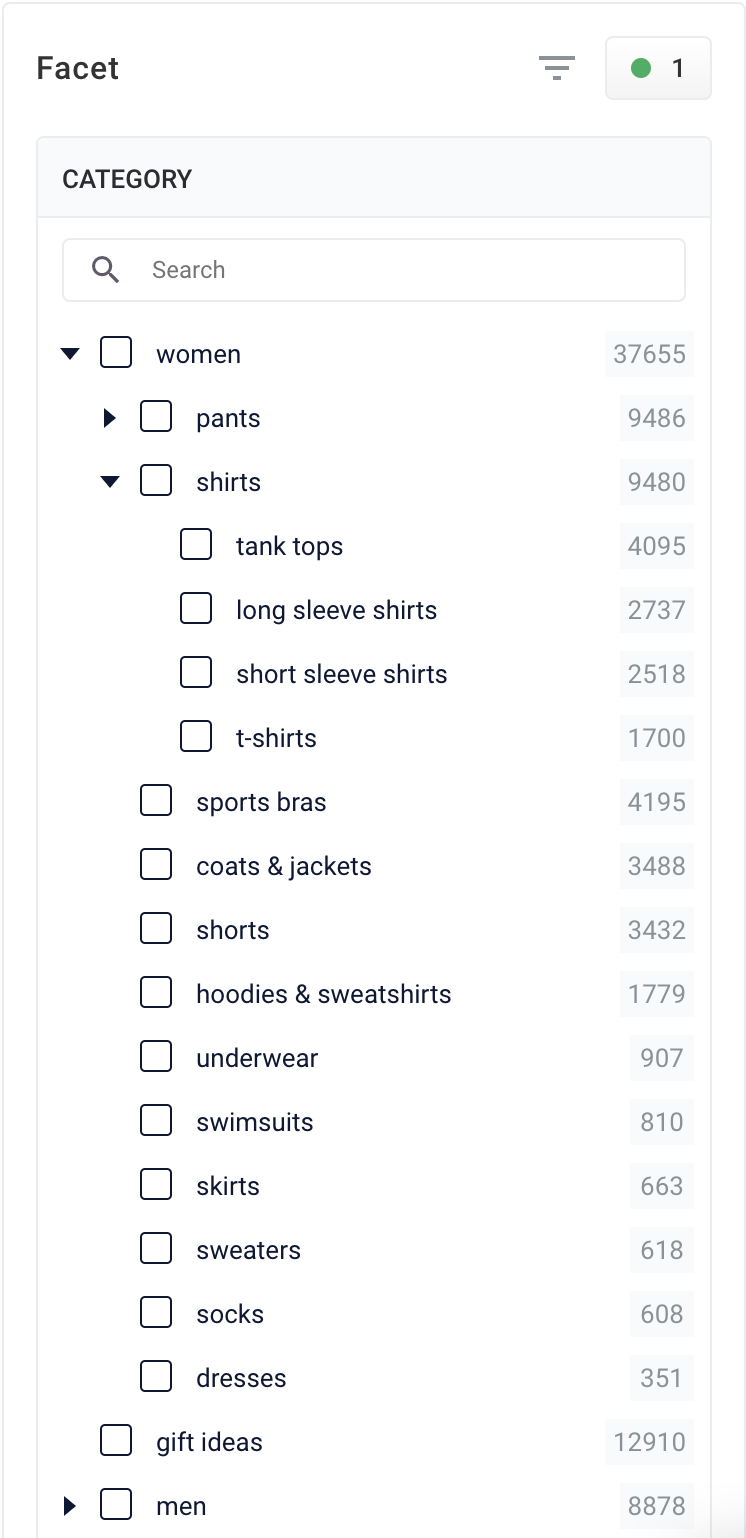
Use Hierarchical Facets
Use Hierarchical Facets
Lucidworks Search
To configure hierarchical fields settings:- Access the application and click Relevance > Rules > Templates.
-
Click the three vertical dots to the right of the application name to display the Hierarchical fields settings section.

-
Complete one of the following:
- To add a new field, click + Add. Enter values in the Field and Delimiter fields and click Apply.
Any symbol can be used as a delimiter.- To edit an existing field, click Field and select the value to edit. Enter the appropriate value in the Delimiter field and click Apply.
- To delete a field setting, select the value in Field, click X, and then click Apply.
- To cancel any changes before you apply them, click Cancel.
Product grouping
Product grouping lets you group products in different variations such as color, version, or size. Options to group products include:- Block or boost. For example, to promote a product group that is on sale, boost the group to the top of the results.
- Apply rules individually to products within a group. For example, boost the red color version of a product to the top of the group if a specific user typically searches for red.

Best practices
These parameters group products, and are defined in the Additional Query Parameters Stage:| Parameter Name | Parameter Value | Update Policy |
|---|---|---|
| group | true | default |
| group.format | grouped | default |
| group.ngroups | true | default |
| group.field | style_id_s | default |
- Add a Query Pipeline Stage
- Additional Query Parameters Stage
Add a Query Pipeline Stage
Add a Query Pipeline Stage
In the Query Workbench, click Add a Stage to add query pipeline stages that can perform query setup, results relevancy, troubleshooting, and more.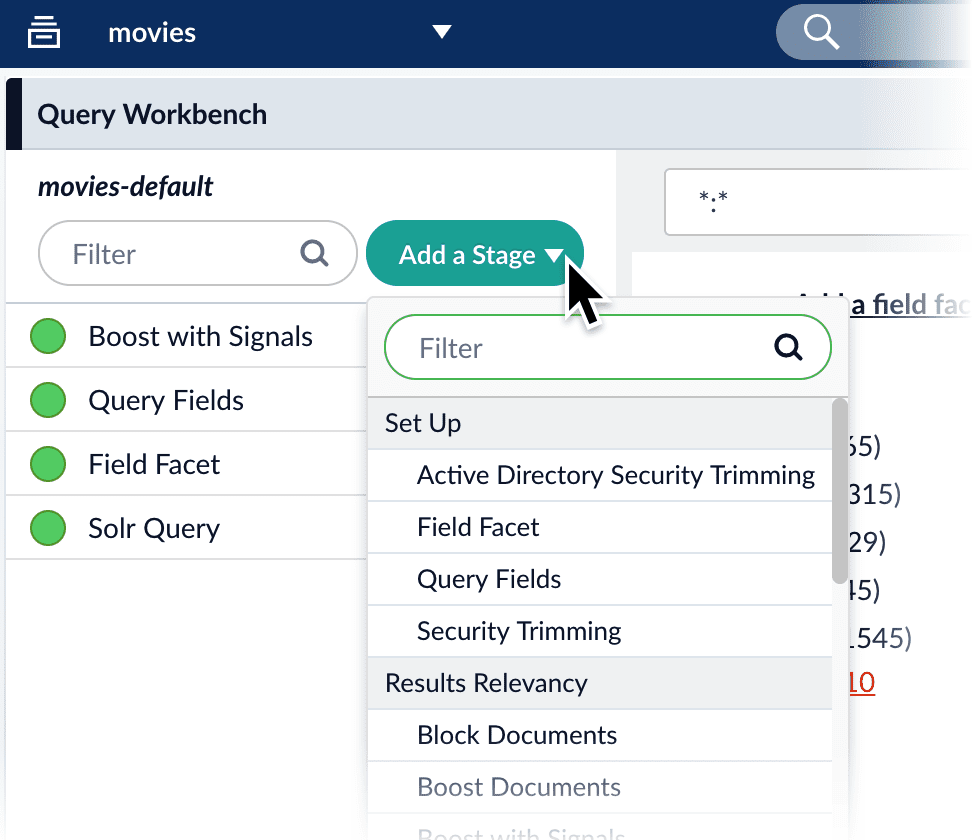
Collapse/Expand parser grouping
The Collapse/Expand parser allows grouping with the following parameters:| Parameter Name | Parameter Value |
|---|---|
| expand | true |
| enableElevation | true |
| group | false |
See Collapse and Expand Results for more information.
Page metadata
Metadata describe the content of a web page. The Page Metadata feature in Predictive Merchandiser lets you configure metadata using Use Predictive Merchandiser templates.Use Predictive Merchandiser templates
Use Predictive Merchandiser templates
This article teaches you how to use the Templates feature in Predictive Merchandiser, including how to: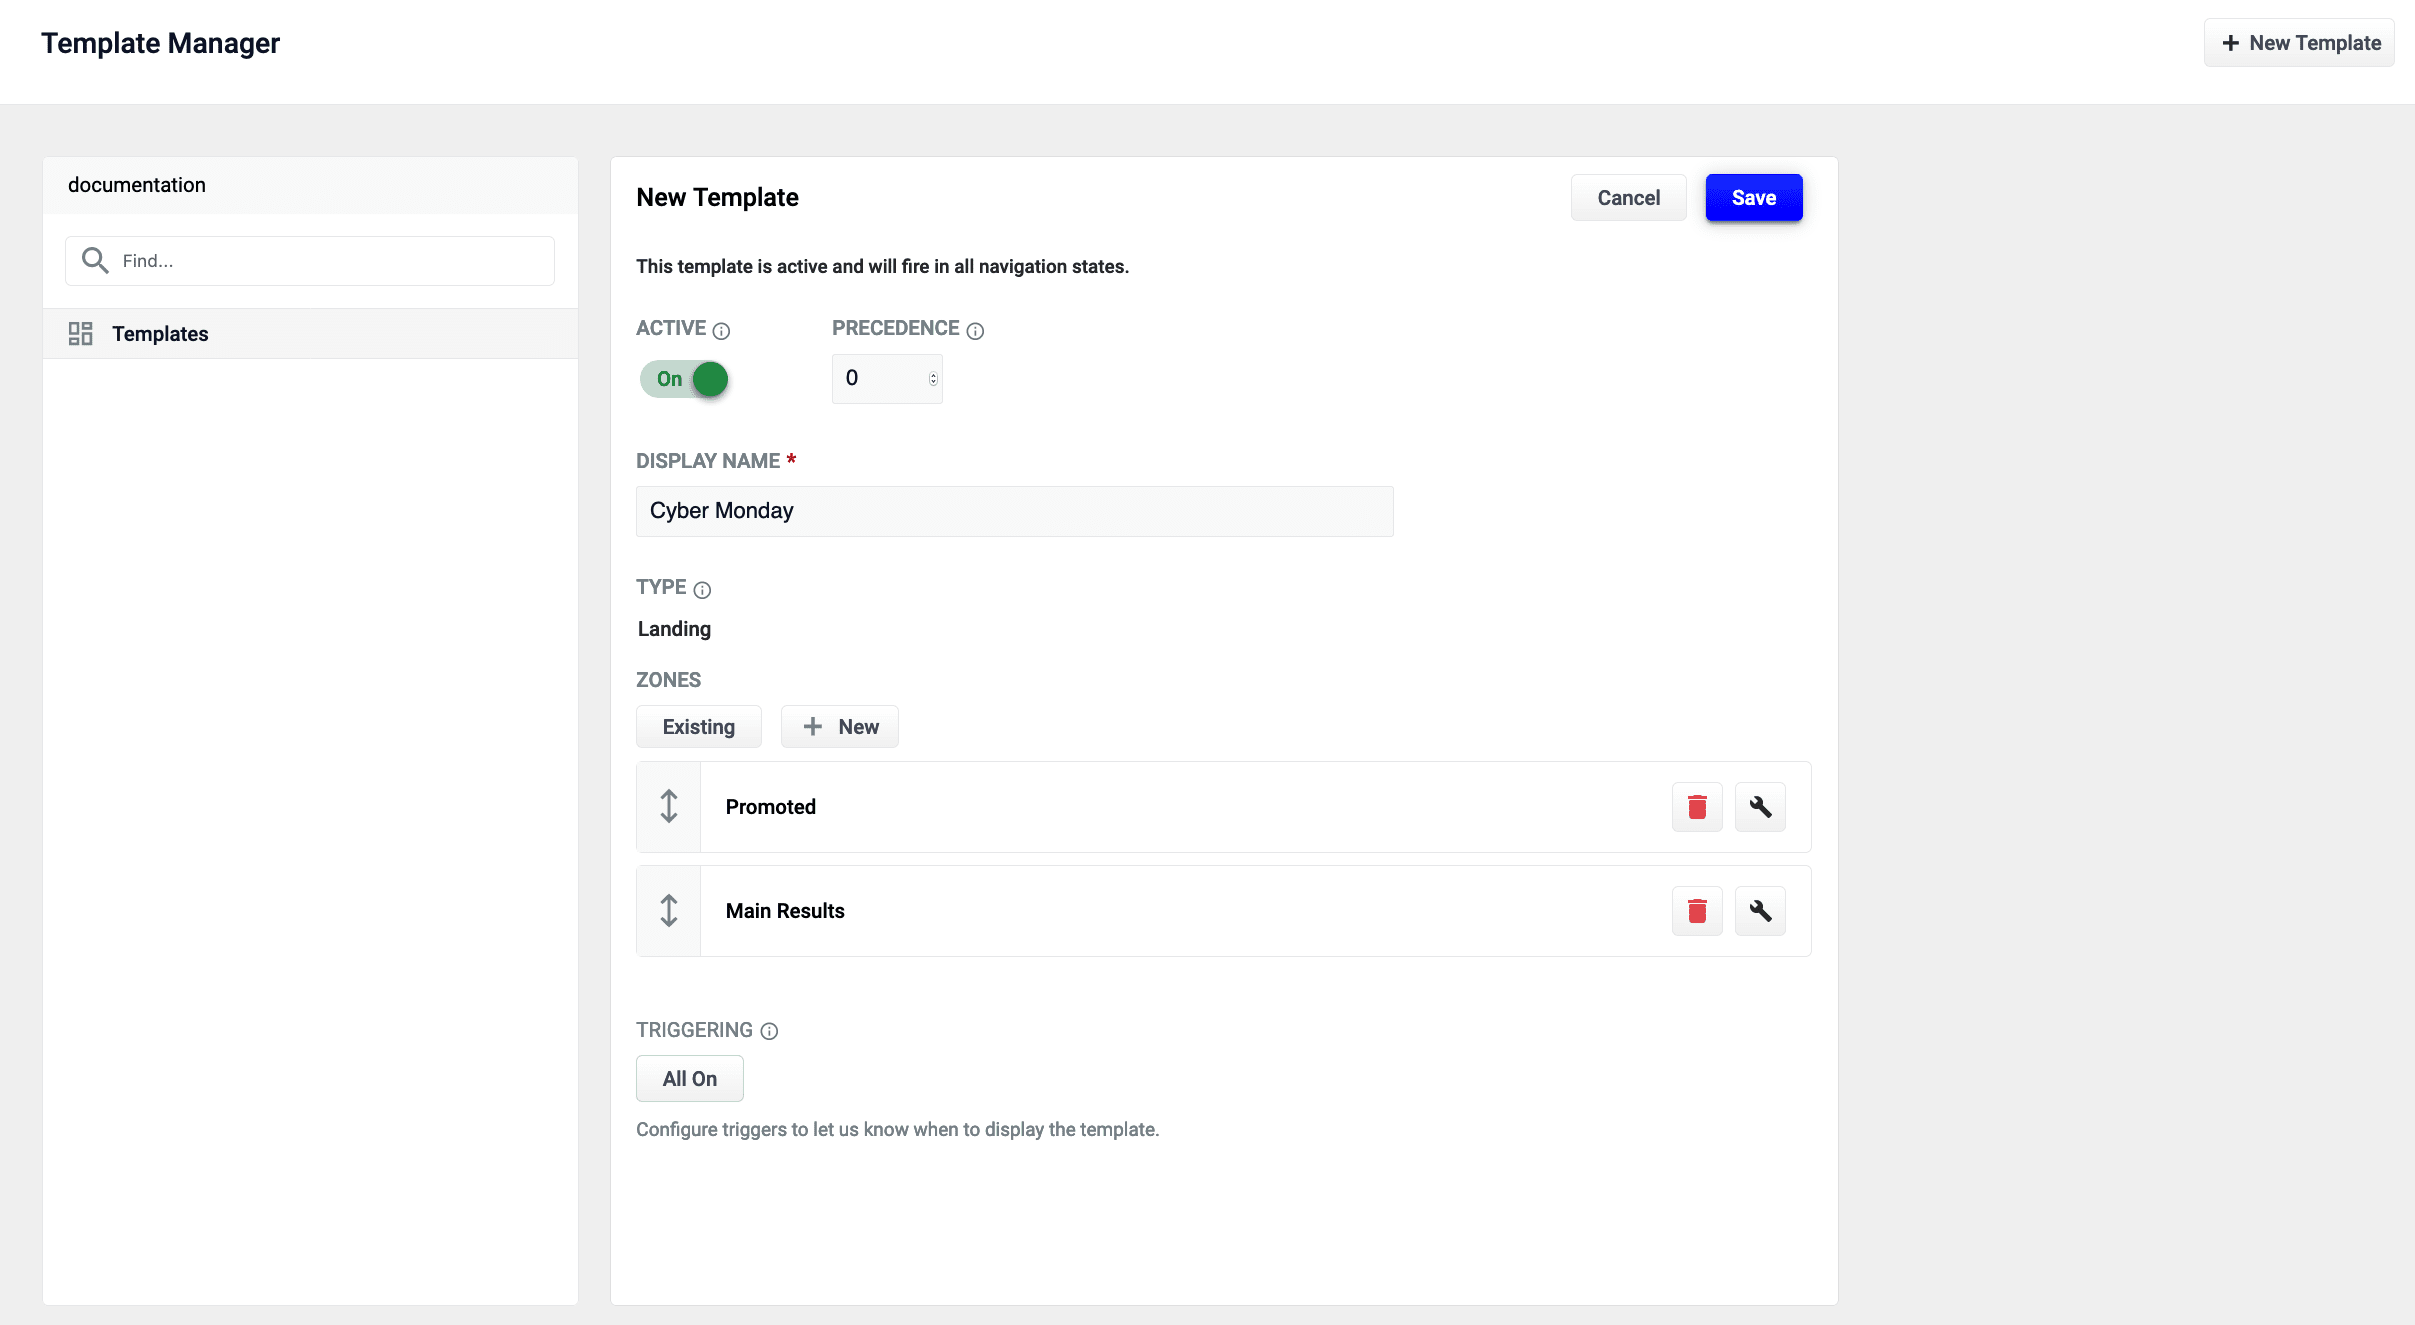
- Create a template
- Add zones to the template
- Conditionally trigger the template
- Test the template in the Predictive Merchandiser screen
Predictive Merchandiser: Template Manager
The course for Predictive Merchandiser: Template Manager focuses on how to use the templates included in Predictive Merchandiser and create your own custom templates.
Create a new template
- From the Templates screen, click the New Template button:
-
In the Template Name field, enter a unique name. In this example, the value
Cyber Mondayis assigned. -
Select a value in Template Type. This example uses the
landingtemplate type. This value is read-only and for informational purposes only. - Click the Save button to save the new template:
Add a zone to a template
Zones enable Lucidworks Search users to create rules designed for specific query profiles. Combined with templates, this allows a search application to display results from multiple query profiles in the same view.In this example, two new zones are created for the Cyber Monday template.-
Click Existing to add an existing zone. In this example, the Main Results List zone is added by selecting the zone and clicking Apply.
The Main Results List zone is the default zone. This zone can be edited but cannot be deleted.
- Create a new zone by clicking the New button:
- In the Display Name field, enter a unique name for the zone. For this example, the value is Promoted.
- In the Query Profile file, select a value. This example uses a query profile named promotional-results. This query profile is configured with rules that pin products to the top of the results.
- In the Zone Type field, select a value. This example uses main-results-list. This value is read-only and for informational purposes only.
- Set the configuration options for the product image, title, and description per your preference.
- Click the Save button to save the new zone:
Edit an existing zone
To edit a zone that is already added to a template, complete the following:- Click Start Task.
- Click the pencil icon to edit the page.
-
Click the wrench icon to edit the zone.
To delete a zone, click the trash can icon.
- Edit the zone as needed and click Save.
Set triggering options
Triggers describe conditions that must be met for a template to display. Trigger options include a set date range and specific search terms.For more information, see Triggering configuration options.Date range
-
In the Triggering section, click 0 Active.
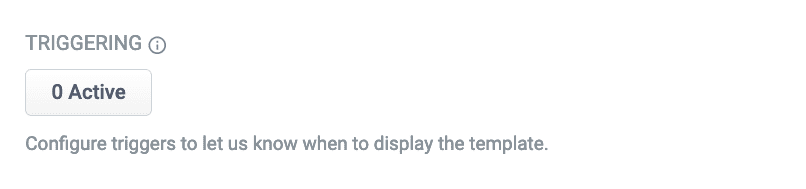 If there are active triggers, this button changes to reflect that number. For example, this button will read 3 Active when 3 triggers are active.
 - Click the date range selector and select a start and end date. For this example, choose a date range that includes today’s date.
- Click the Save button to save your changes:
Search terms
- In the Triggering section, click 0 Active.
- Click the Trigger button:
- In the Search Terms field, enter
cyber monday. - Set the Match Mode field to
phrase. - Click Add.
- Repeat the process to add a second trigger with Search Terms set to
sales eventand Match Mode tophrase. - Click the Save button to save your changes:
Test the template
- Access Predictive Merchandiser.
-
Enter one of the search terms you configured in set triggering options. This example used the search terms
cyber mondayandsales event.If today’s date does not fall within the template’s date range trigger, the template will not load.
Use page metadata
Use page metadata
Access and edit page metadata
You must be within an active template to use the More Menu.- Sign into Lucidworks Search and click your application.
- Click Relevance > Rules > Merchandiser.
- Click
- Click
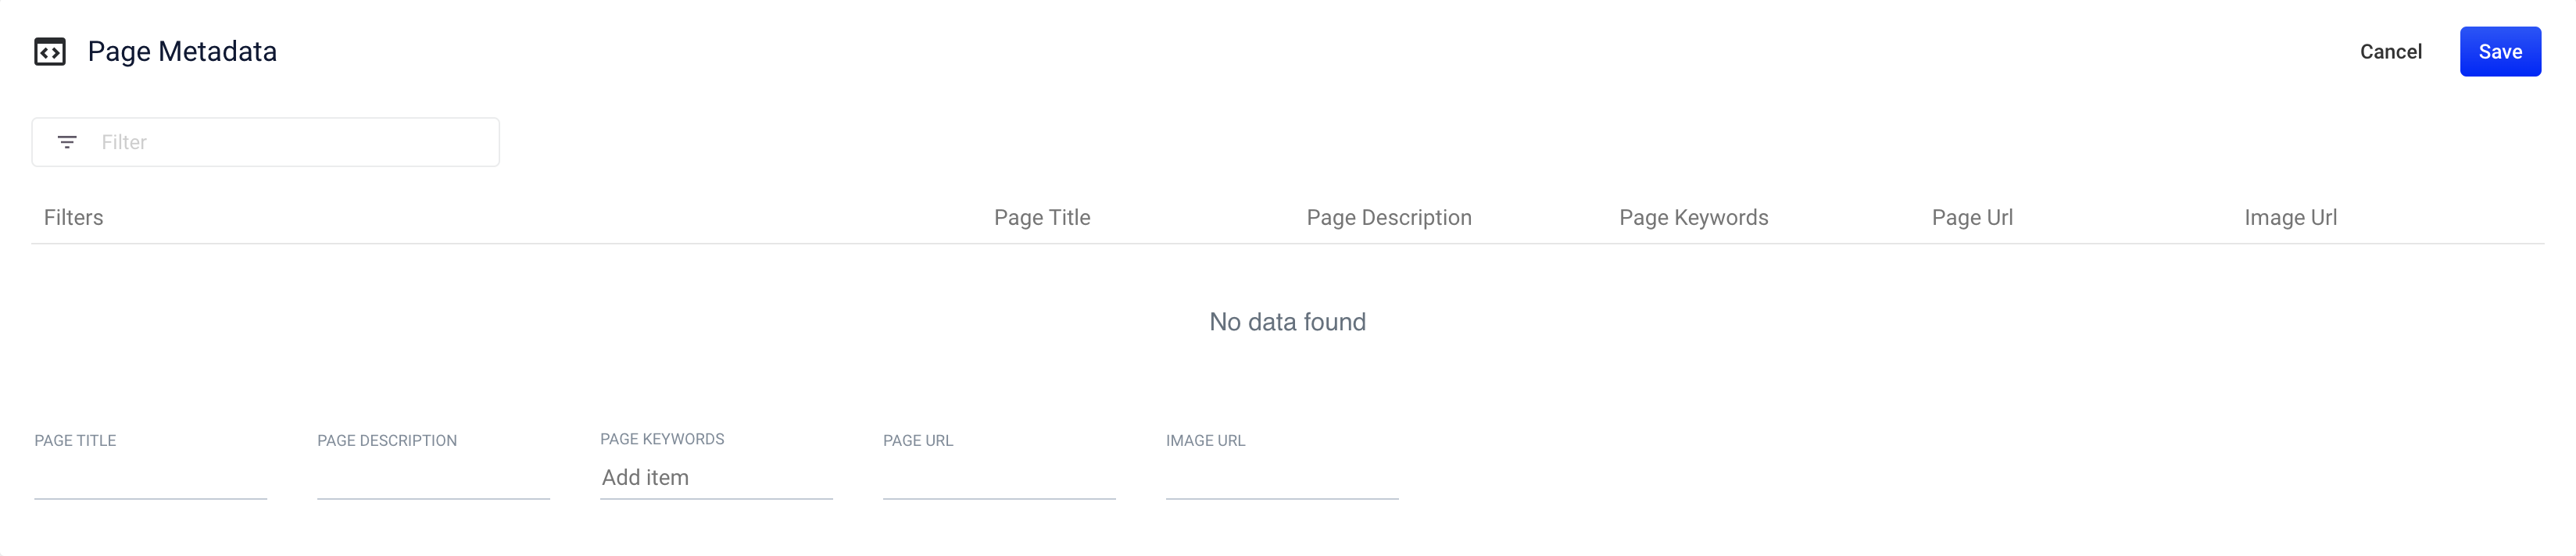
- On the Page Metadata screen, edit the information and click Save.
Publish a template
After editing your page metadata, your changes will not be applied until you publish the template. The Publish function is available from the Rules toolbar: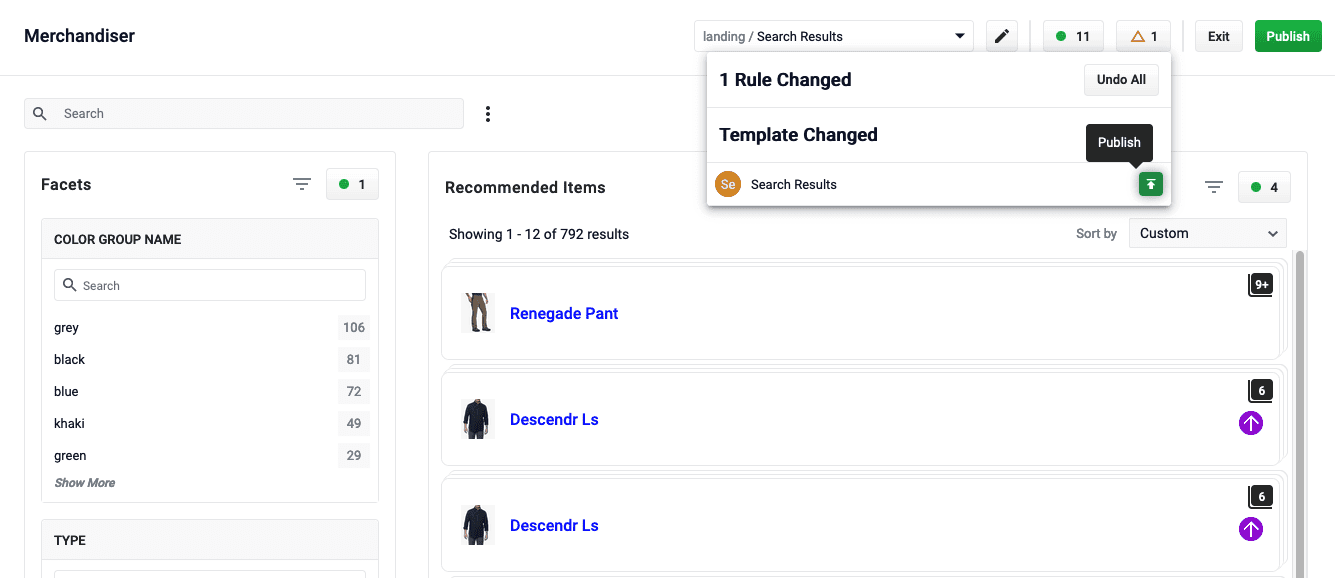
- Click In the Template Changed section, you will see short description of the page that you edited the metadata for.
- Hover to the right of the page description to see the button.
- Review the changes and click to apply metadata changes to your site.
Clone facet values
- On the Merchandiser screen, click
- Click
- Select one or more of your existing facets and click
Find a page using URL search
- On the Merchandiser screen, click
- Click
- In the Domain URL field, select the domain URL for the website you want to search. For example,
/https://www.lucidworks.com. - In the Path URL field, enter the URL you want to search. For example,
/products/managed-fusion. - Click Search.
Search rewrites
Search rewriting lets you modify search queries to more accurately reflect the intentions of your customers. These functions let you:- Create search rewrites manually.
- Edit, test, review and publish the search rewrites generated automatically from signals data.
- Head/Tail - improves poorly performing searches.
- Misspelling detection - corrects common spelling mistakes.
- Phrase detection - identifies products with matching phrases.
- Synonym detection - includes alternative words with the same meaning.
Use Predictive Merchandiser Query Rewrites
Use Predictive Merchandiser Query Rewrites
You can create query rewrite rules in Predictive Merchandiser. This is similar to using the Rules Editor to create query rewrite rules, except there are additional options in Predictive Merchandiser.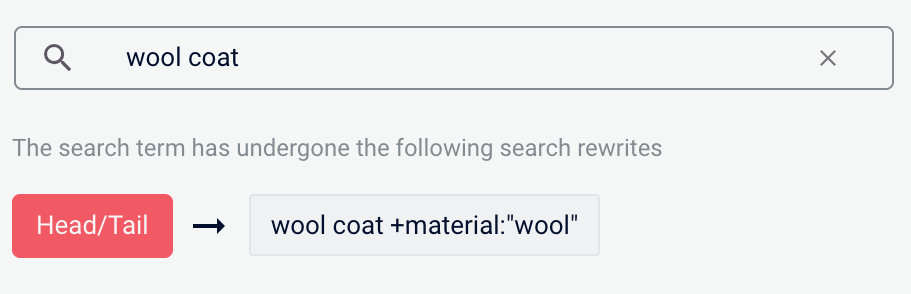

- In Fusion, navigate to Relevance > Rules > Merchandiser.
- Enter a search term or phrase in the search bar.
- Click Start Task.
- Hover your cursor next to the query. A + button appears:
- Click the + button. A list of query rewrites options will appear: Head/Tail, Misspelling, Phrase, Synonym, and Remove Words.
Head/Tail
You can create a Head/Tail rewrite to improve search results using methods other than correcting for misspellings or synonym expansion. When a poorly defined search term is identified, the original term is replaced by an improved search term.For example, a search foriphone case yellow could be improved by using the search term iphone case yellow +color:"yellow" (in this case making use of the color field in the data).Most Head/Tail rewrites are typically created automatically via machine learning. However, if desired, custom rewrites can be manually created using the following steps.-
From the list of query rewrite options, select Head/Tail. A form will appear:
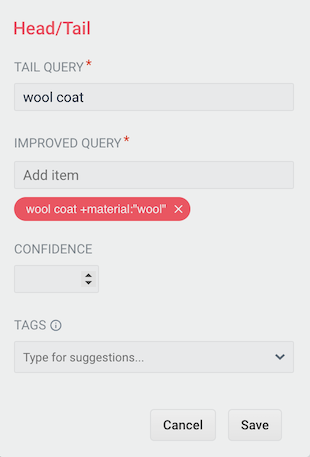
Parameter Description Example Value Tail Query The tail query itself. iphone case yellowImproved Query The query that will replace the tail query phrase. iphone case yellow +color:"yellow"Tags Optional metadata tags that can be used to identify and organize rewrites. blackfridaysale - Enter one or more improved search terms in the Improved Query field.
- Click the Save button.
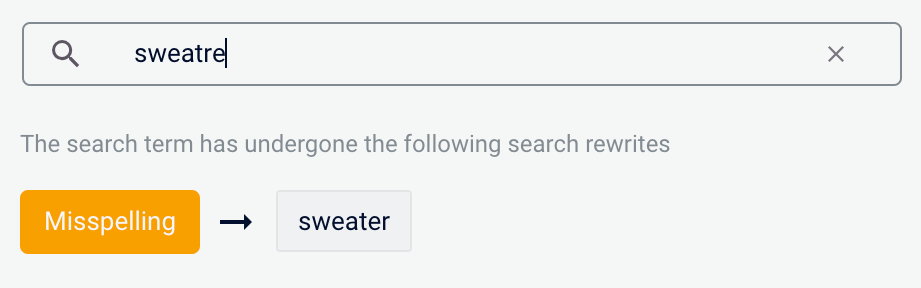
Misspelling
You can create a misspelling query rewrite to detect and correct common spelling mistakes. When a customer enters a search term containing a known misspelling, the incorrect spelling is replaced with the spelling correction.For example, if your customers frequently misspell or mistype the wordsweater as sweatre, you can set up a query rewrite to automatically correct it.-
From the list of query rewrite options, select Misspelling. A form will appear:
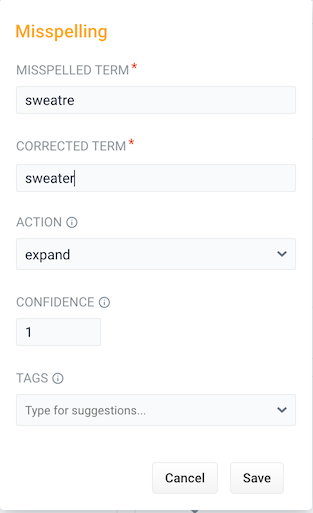
Parameter Description Example Value Misspelled Term The phrase itself. sweatreCorrected Term The term that will replace the misspelled term. sweaterAction Action to perform. Confidence Confidence score from the phrase job. A confidence level of 1represents 100% confidence. For rules created automatically via machine learning, the confidence level will reflect the output from the machine learning model.1Tags Optional metadata tags that can be used to identify and organize rewrites. blackfridaysale - Enter one or more spelling corrections in the Corrected Term field.
- Click the Save button.
Phrase
You can use query rewriting to identify phrases used in search terms so that products with matching phrases are boosted in the search results. This is helpful when users do not use quotation marks to identify phrases in their search terms.For example, without phrase detection a search for the wordsremote control would show results for both remote and control. With phrase detection, this search would correctly boost results for "remote control".-
From the list of query rewrite options, select Phrase. A form will appear:
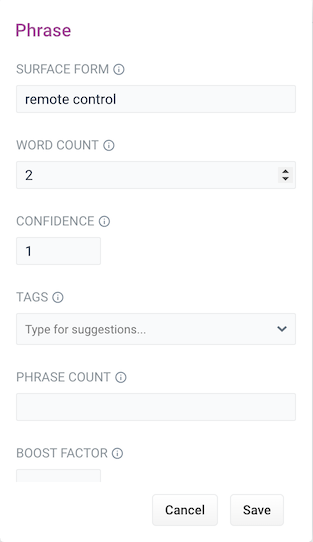
Parameter Description Example Value Surface Form The phrase itself. remote controlWord Count Indicates how many words are included in the phrase. 2Confidence Confidence score from the phrase job. A confidence level of 1represents 100% confidence. For rules created automatically via machine learning, the confidence level will reflect the output from the machine learning model.1Tags Optional metadata tags that can be used to identify and organize rewrites. blackfridaysalePhrase Count Denotes how many times this phrase was found in the source. This value is automatically set via machine learning. It does not need to be set manually. 5Boost Factor The factor to use to boost this phrase in matching queries. 2.0Slop Factor Phrase slop, or the distance between the terms of the query while still considering it a phrase match. 10 - Enter the number of words in the phrase in the Word Count field.
- Click the Save button.
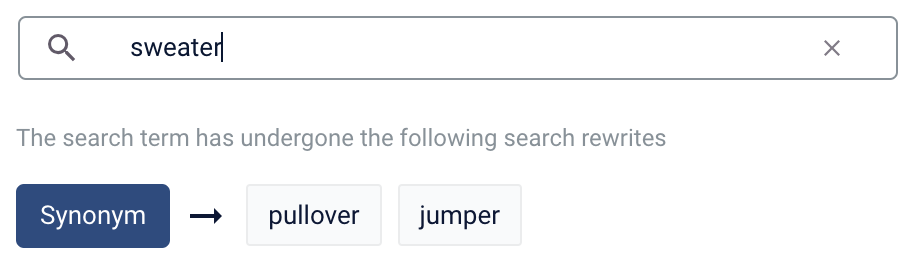
Synonym
You can specify synonyms for a specified search term so that alternative words with the same meaning are automatically used in the search query. When a customer enters a search term with a synonym match, the alternative words are used instead of, or in addition to, the original search term.For example, the search termsweater could have the synonyms pullover and jumper.-
From the list of query rewrite options, select Synonym. A form will appear:
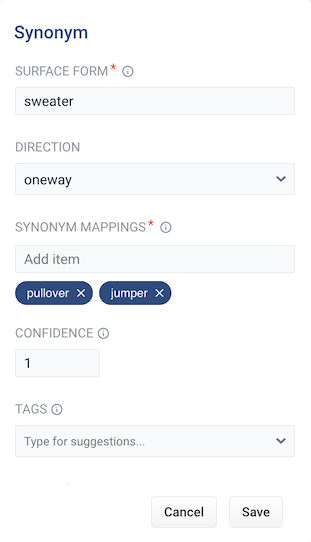
Parameter Description Example Value Surface Form The term that has synonyms. sweaterDirection With a oneway search, the original search term is replaced by the synonym. In the example above, sweaterwould be replaced by the alternative wordspulloverandjumper. With a symmetric search, the search query is expanded to include the original term and the synonyms, resulting in a greater number of potential hits. In the example above, this time the query would includesweater,pullover, andjumper.symmetricSynonym Mappings Synonyms for the surface form. pullover,jumperConfidence Confidence score from the phrase job. A confidence level of 1represents 100% confidence. For rules created automatically via machine learning, the confidence level will reflect the output from the machine learning model.1Tags Optional metadata tags that can be used to identify and organize rewrites. blackfridaysaleCount How many times this term occurred in the signal data when it was discovered. This value is optional when a rewrite is being defined manually. 5 - Choose whether the direction is oneway or symmetric.
- Enter one or more alternative words in the Synonym Mappings field.
- Click the Save button.
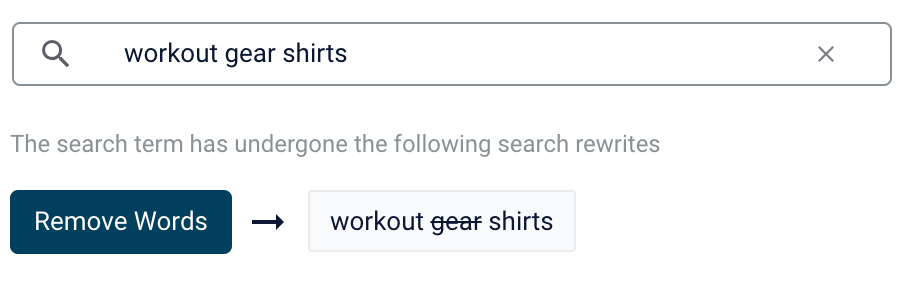
Remove Words
The Remove Words feature is available in Fusion 5.4 and later.
case study examples to remove examples and then display results for case study.-
From the list of query rewrite options, select Remove Words. A form appears:
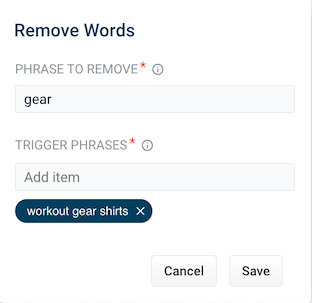
Parameter Description Example Value Phrase to remove The words to remove from the trigger phrase. examplesTrigger phrases The query that prompts the removal of the phrase. The trigger phrase is not necessarily a complete query. If the query contains the trigger phrase, then Fusion removes the phrase in the Phrase to Remove field. case study examples - Enter a phrase to remove and a trigger phrase. Note that the phrase to remove is auto-populated with the query.
- Click Save.
Learn more
Predictive Merchandiser: Rewrites Manager
The course for Predictive Merchandiser: Rewrites Manager focuses on using search rewrites to boost conversions and create better customer experiences by improving your relevancy.
Merchandise zero results
Search queries that return zero results can drive customers away from your site. You can set certain products to display when a customer search generates zero results. For more information, see Merchandising Zero Results.Merchandising Zero Results
Merchandising Zero Results
-
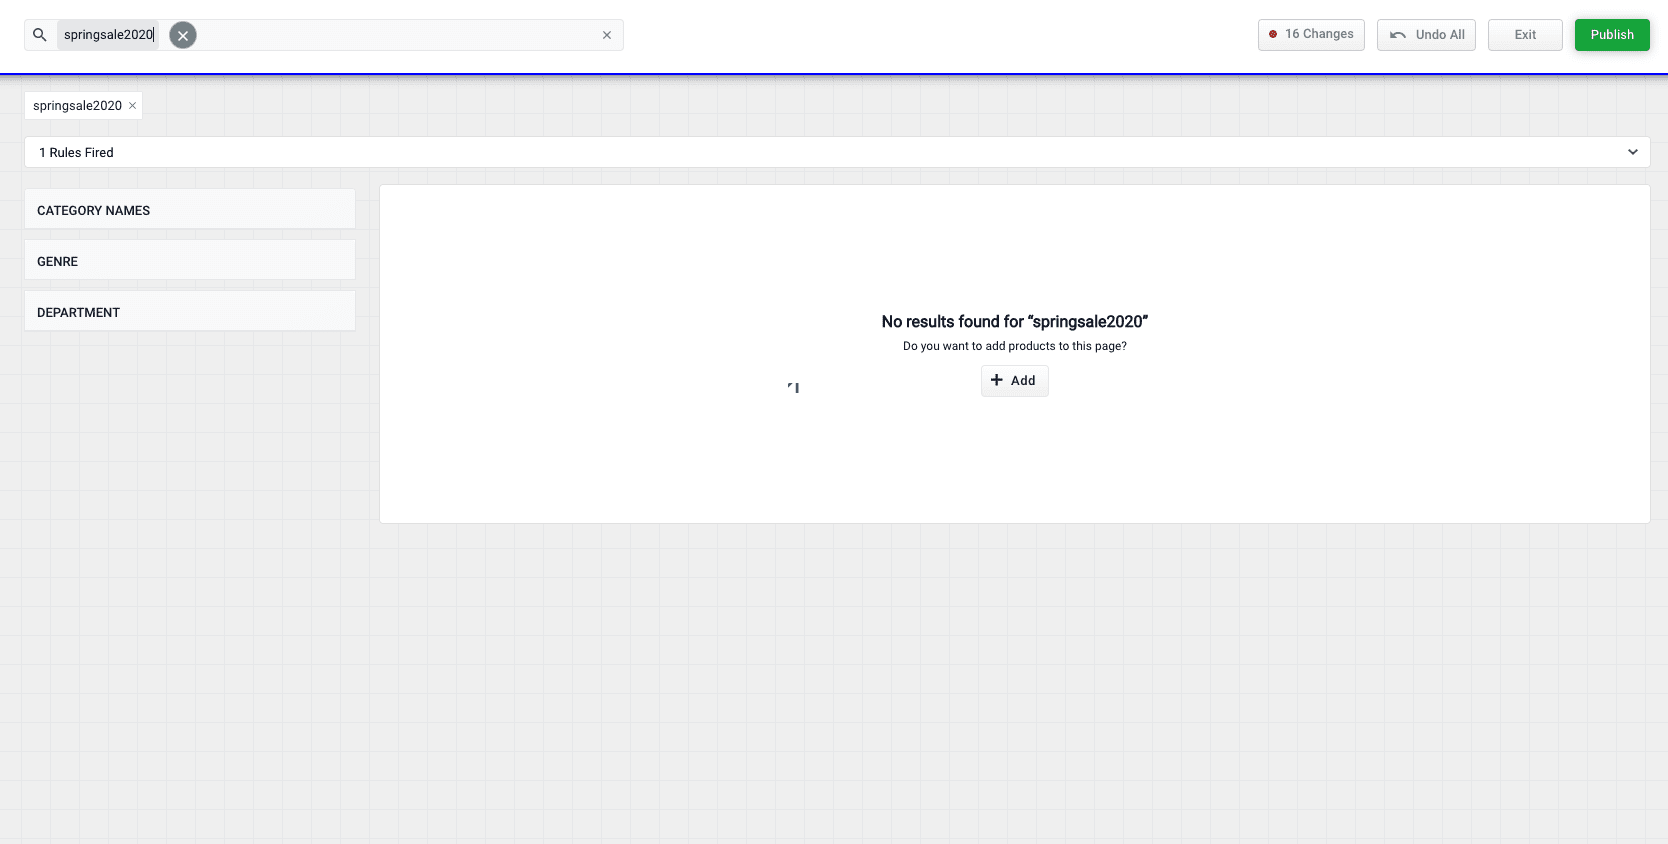
Enter a search query the generates 0 results:
-
Click the Add button:

-
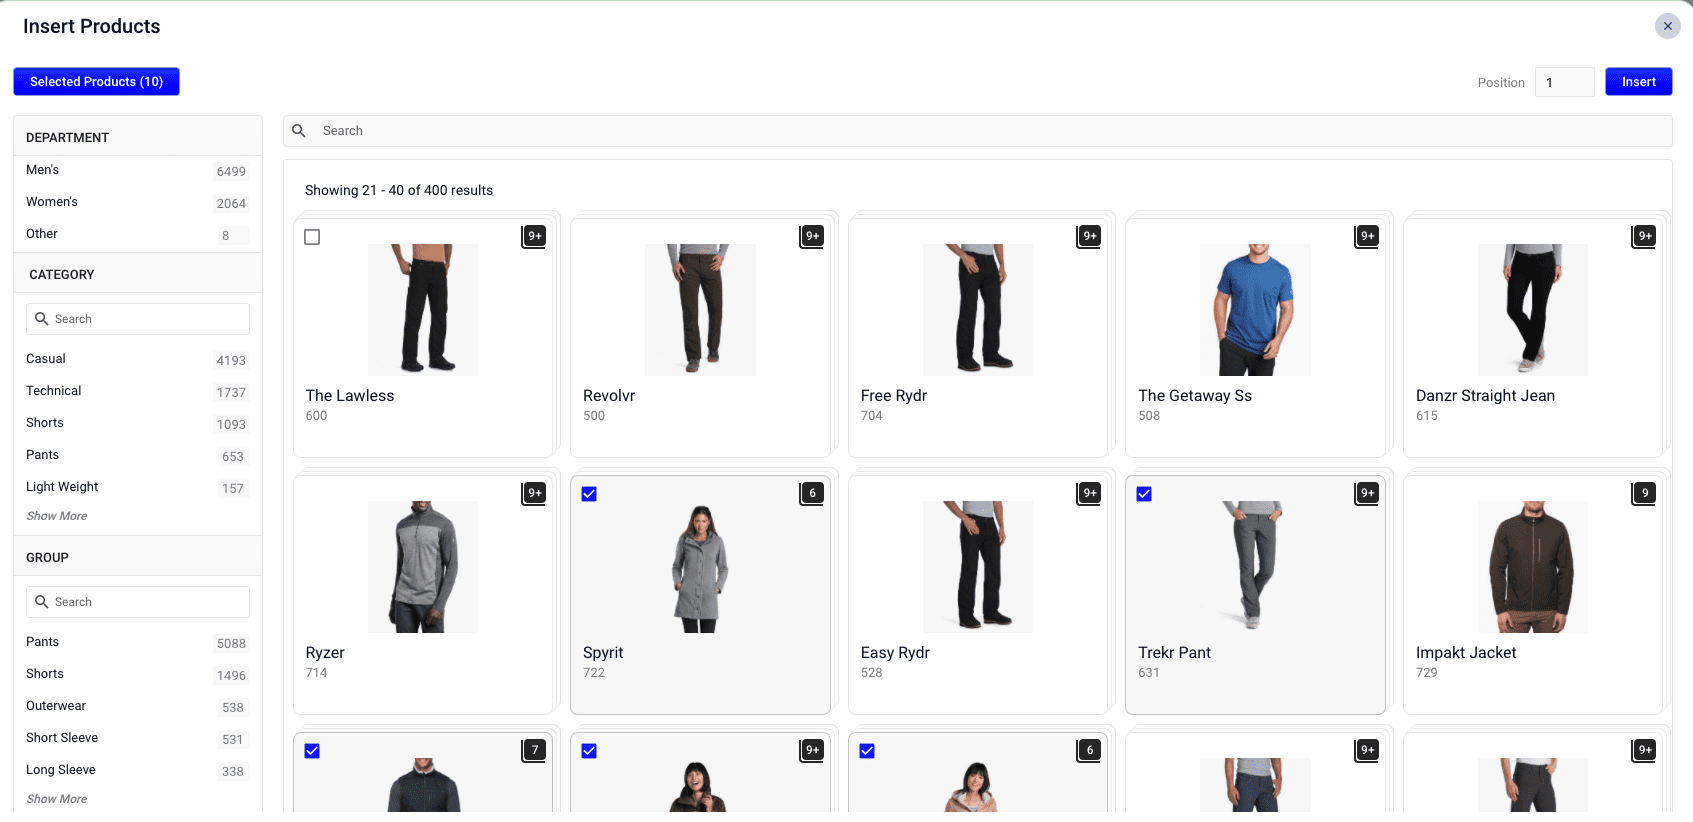
Select products or product groups that you want to associate with the 0 results query:
-
Click the Insert button. The selected products are now displayed when the search query is used, resolving the 0 results query:
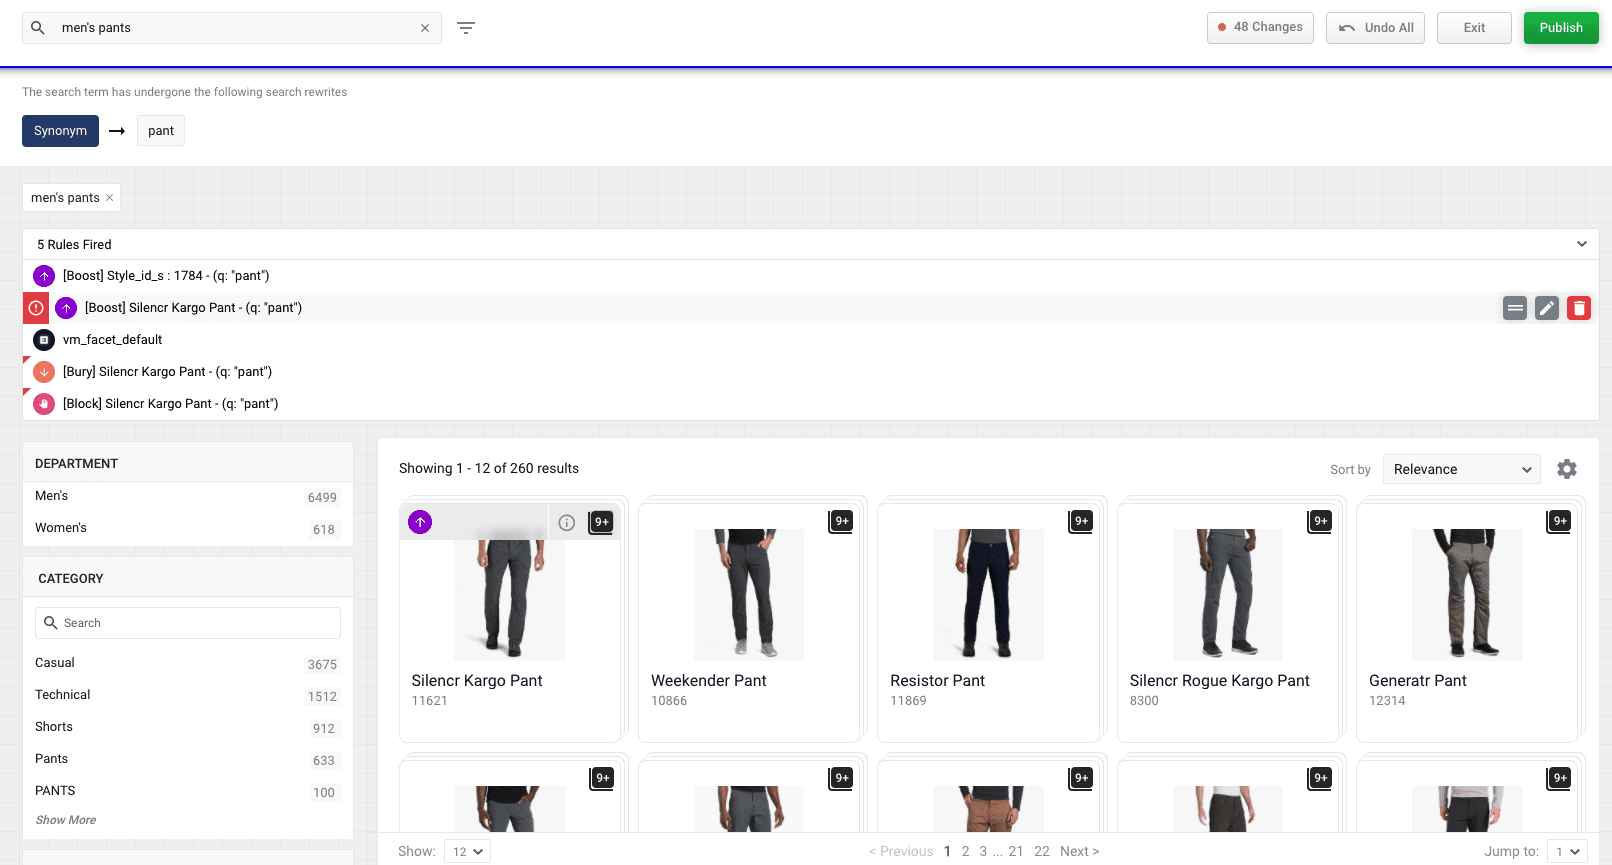
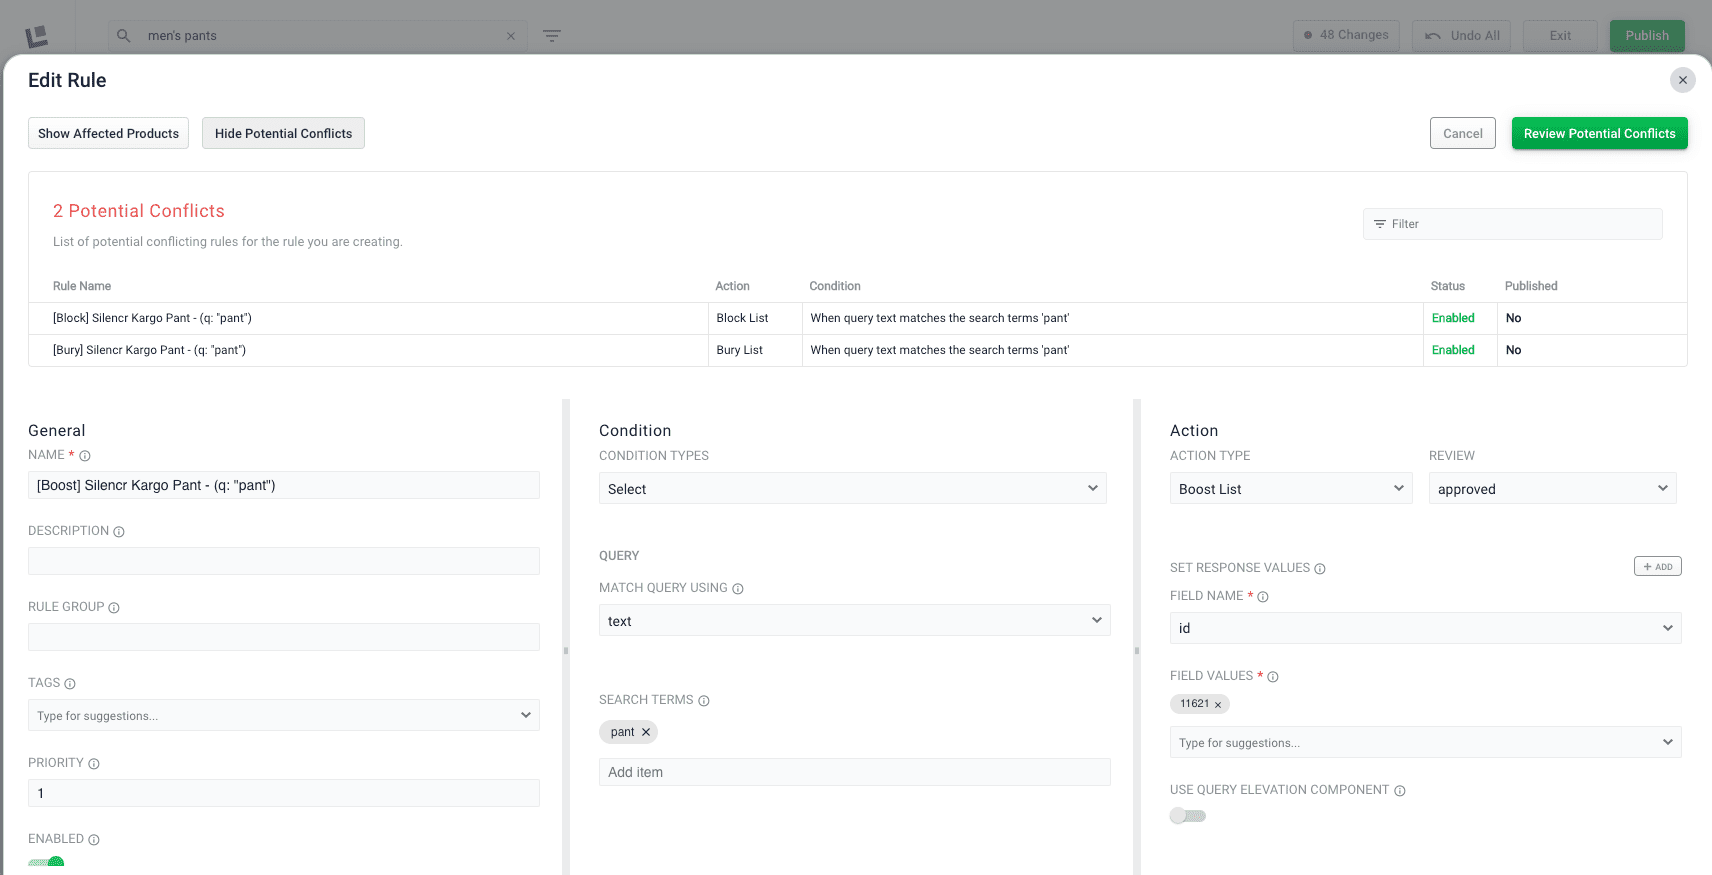
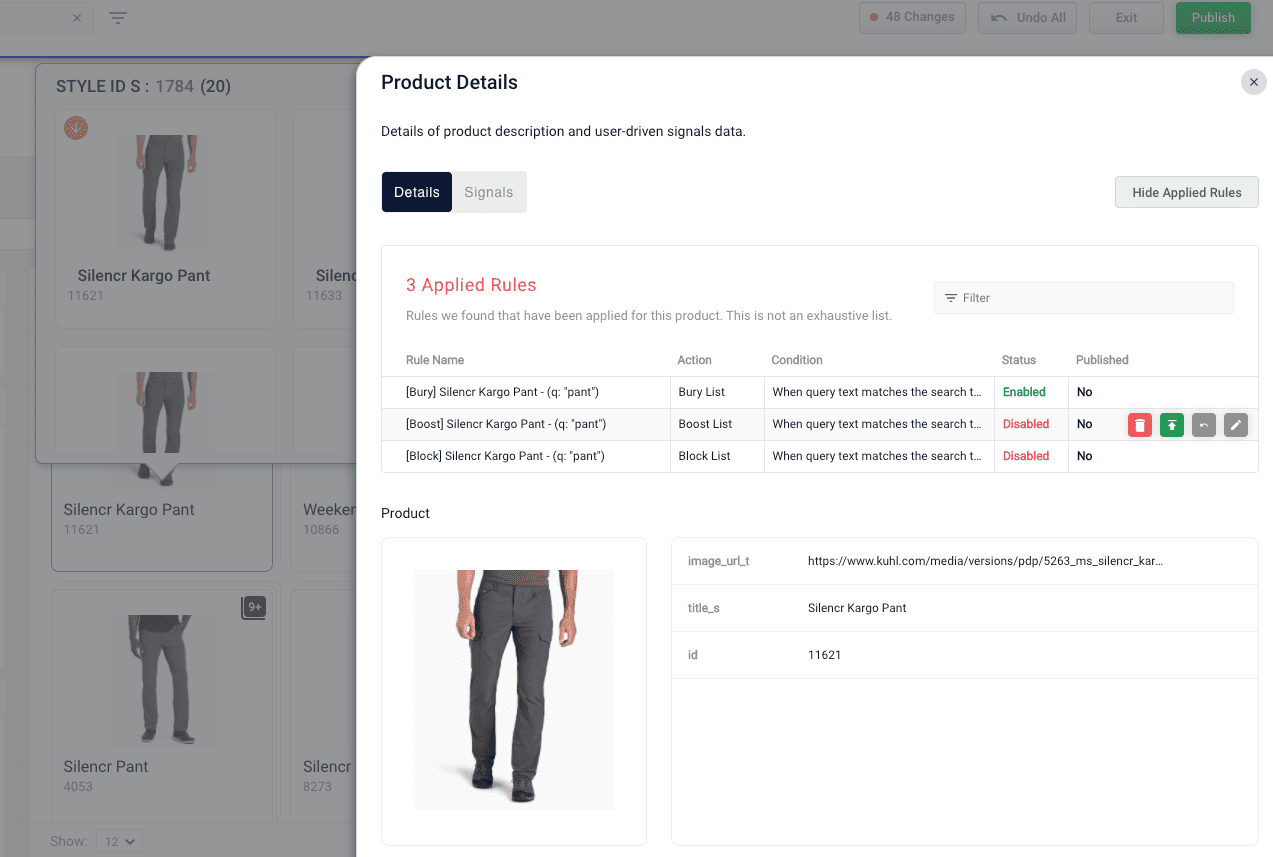
Rule conflict resolution
Sometimes, rules created in the Rules Editor and Predictive Merchandiser conflict with each other. For example, if you have three rules to boost, bury, and block the same product, Predictive Merchandiser highlights these conflicting rules so you can address them. To highlight conflicting rules, the Rules Fired section displays a red warning icon next to the dominant rule and a red flag on the conflicting rules.