Compatible with Fusion version: 4.0.0 through 5.12.0
Learn more
Configure Google Drive Authentication
Configure Google Drive Authentication
The Google Drive connector is used to index the documents in a Google Drive account.There are two methods of Google Drive authentication for Fusion:In order to access all the shared documents by users in your organization, you must configure the Google Drive API and the Admin SDK. See the instructions in the academy.How to configure authentication for access to site-side documents
- authentication for access to site-wide documents
Use a G-Suite account with admin-level access rights to configure access to all shared documents owned by the users in your organization. - authentication for access to per-user documents
This type of authentication gives you access to your own documents in Google Drive. Admin-level access rights are not required, but Fusion must be running in an authorized domain.
Authentication for access to site-wide documents
When connecting to Google Drive through a service account, the Viewed By Me timestamp is updated for any fetched files.
You need a G-Suite account in order to perform these steps.
- Log in to Google as a user with admin-level access rights.
- Go to https://console.developers.google.com/.
-
Create a Google project for Fusion:
-
In the upper left, open the Project menu and select Create Project:
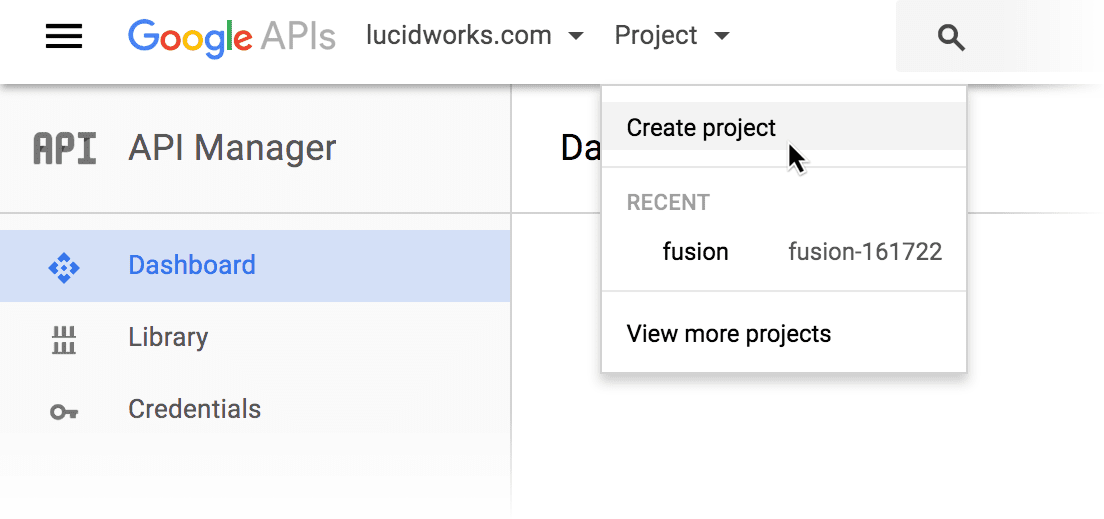
- Enter a new project name, such as “fusion”.
- Click Create.
- In the new project, click Enable API.
- Under “Google Apps APIs”, click Drive API.
- Click Enable. Google may prompt you to create credentials. Do not create credentials here; we will do that a few steps later.
- Click Library, then Admin SDK.
- Click Enable.
-
In the upper left, open the Project menu and select Create Project:
-
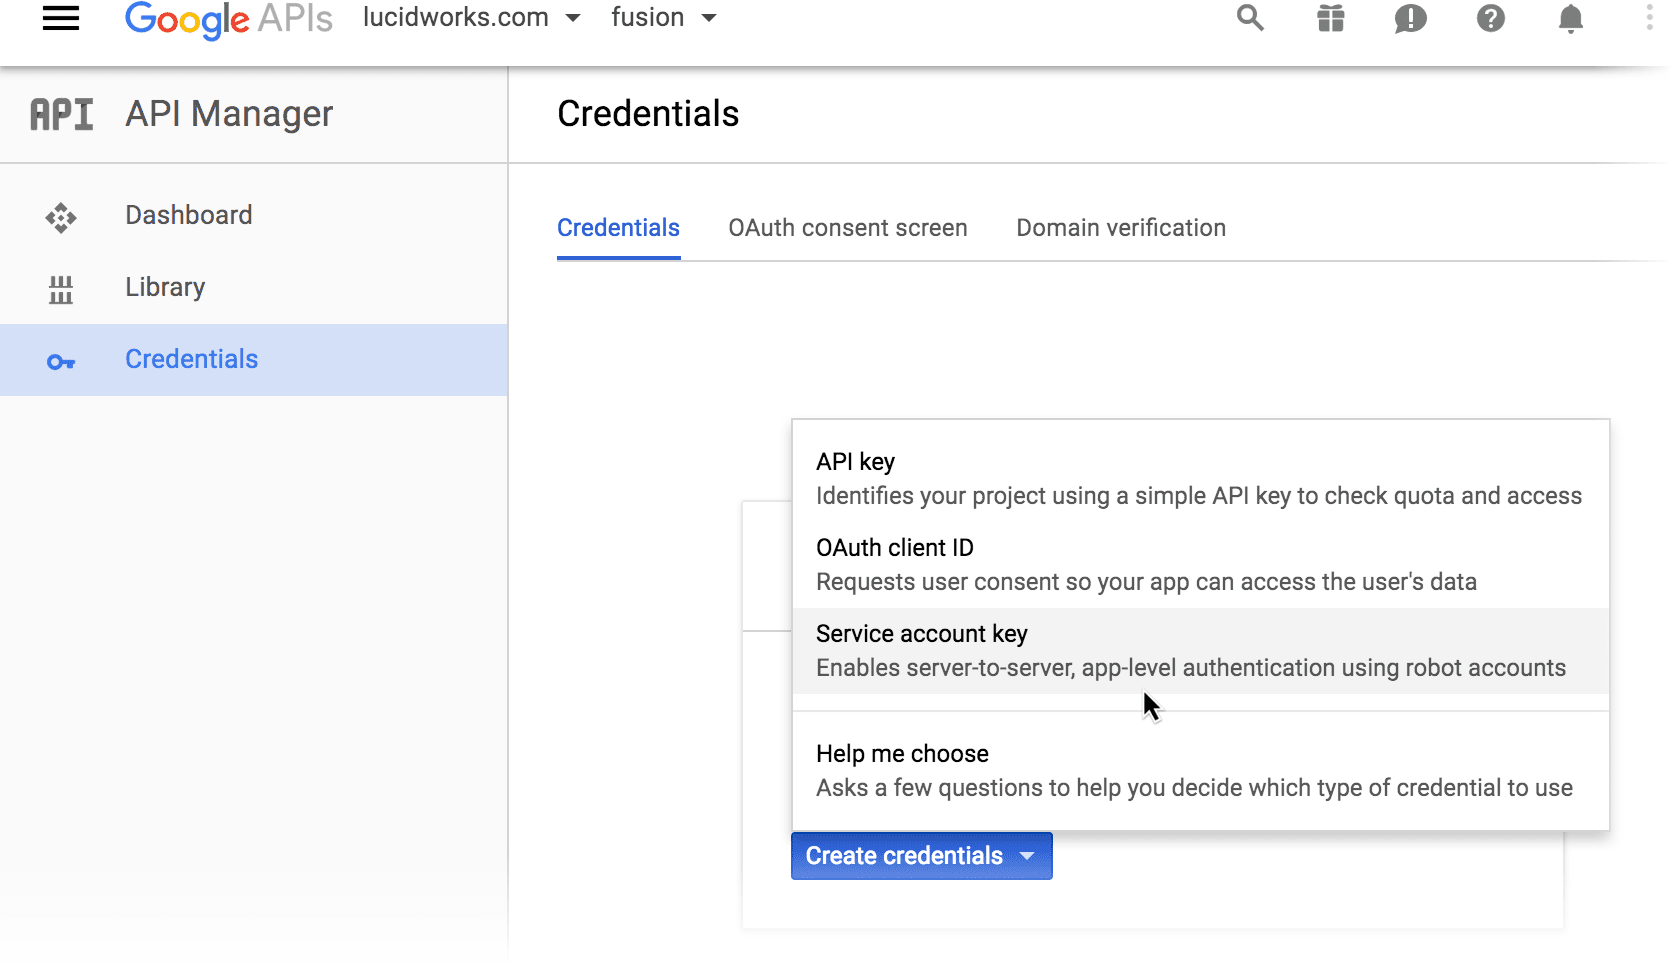
Create a service account key:
-
Navigate to Credentials > Create Credentials > Service account key:
- From the Service account list, select Compute Engine default service account.
- Under “Key type”, select P12.
-
Click Create.

-
Navigate to Credentials > Create Credentials > Service account key:
-
Create a service account:
-
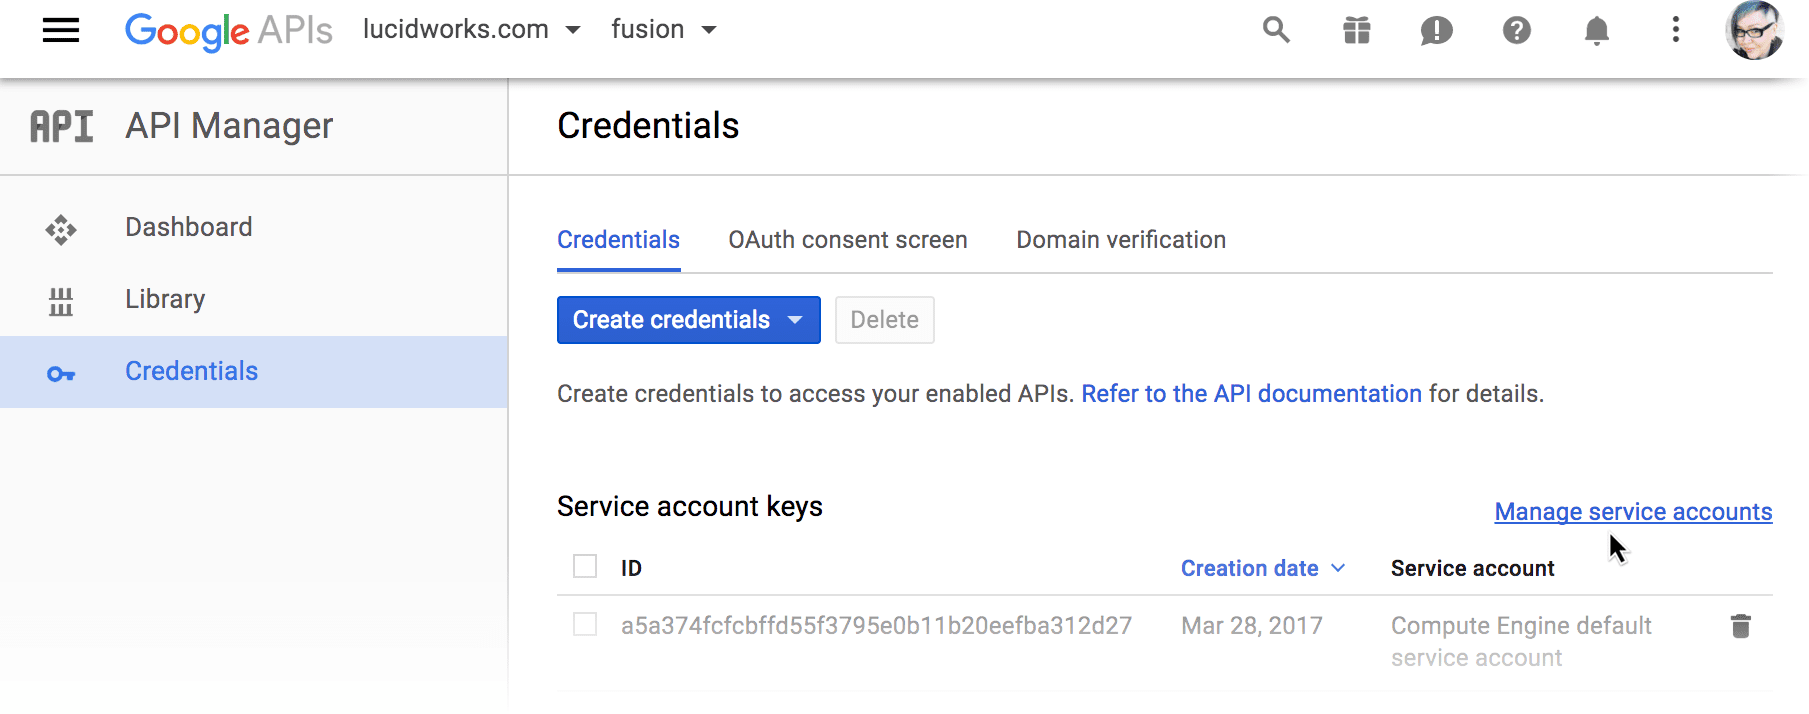
Click Manage service accounts:
- Click Create Service Account.
- Enter a service account name, such as “fusion-service-account”.
-
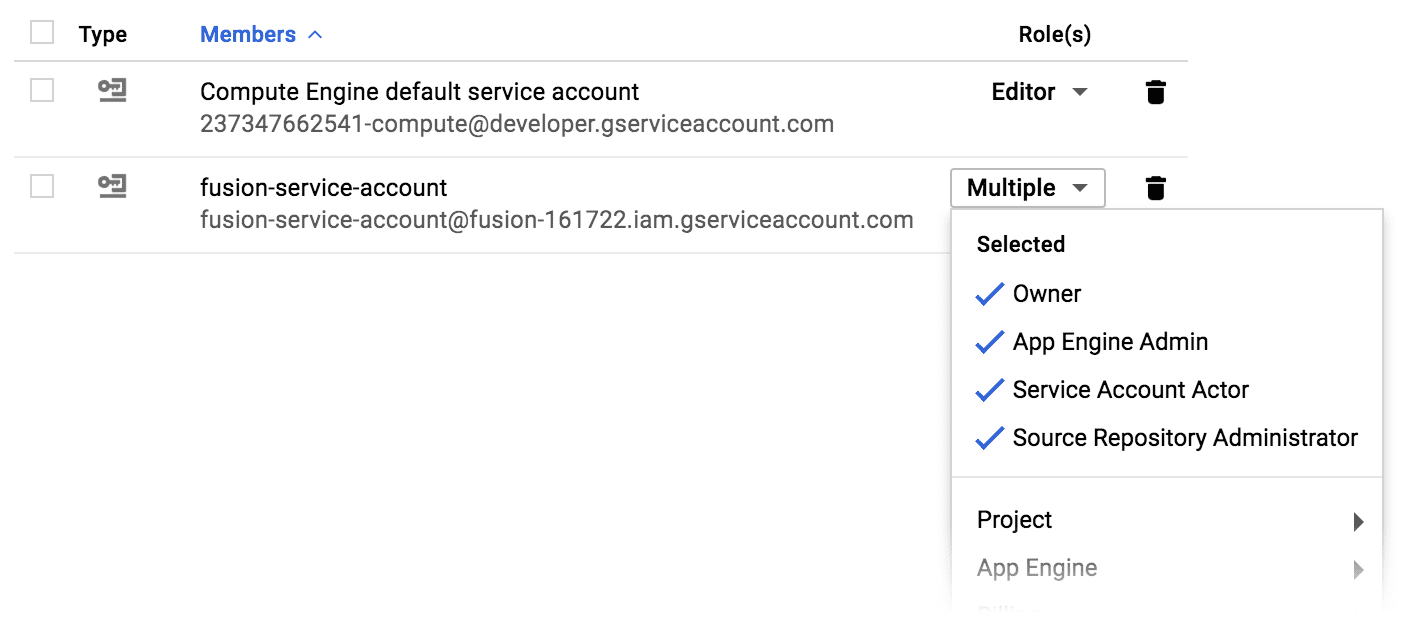
From the Role list, select Project > Service account actor:
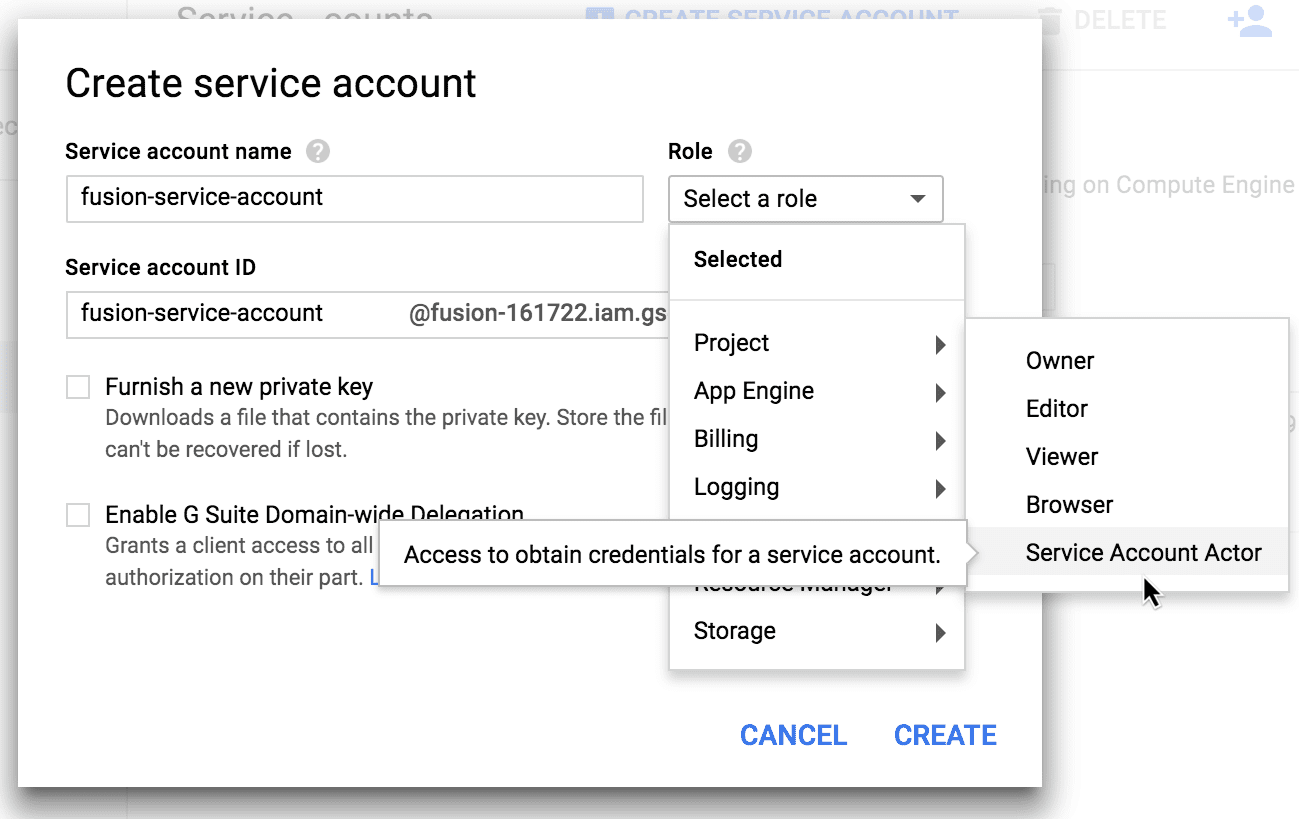
- Select Enable G Suite Domain-wide Delegation.
- Enter an arbitrary name under Product name for the consent screen.
- Click Create. Google displays the list of service accounts.
- Next to the “fusion-service-account”, click View Client ID. You may need to scroll to the right in order to see this link.
- Copy the client ID and service account name. Save them in a separate location.
- Click the menu in the upper left and select IAM & Admin.
-
Next to the “fusion-service-account” project, select its permissions as shown below:
-
Click Manage service accounts:
-
Go to
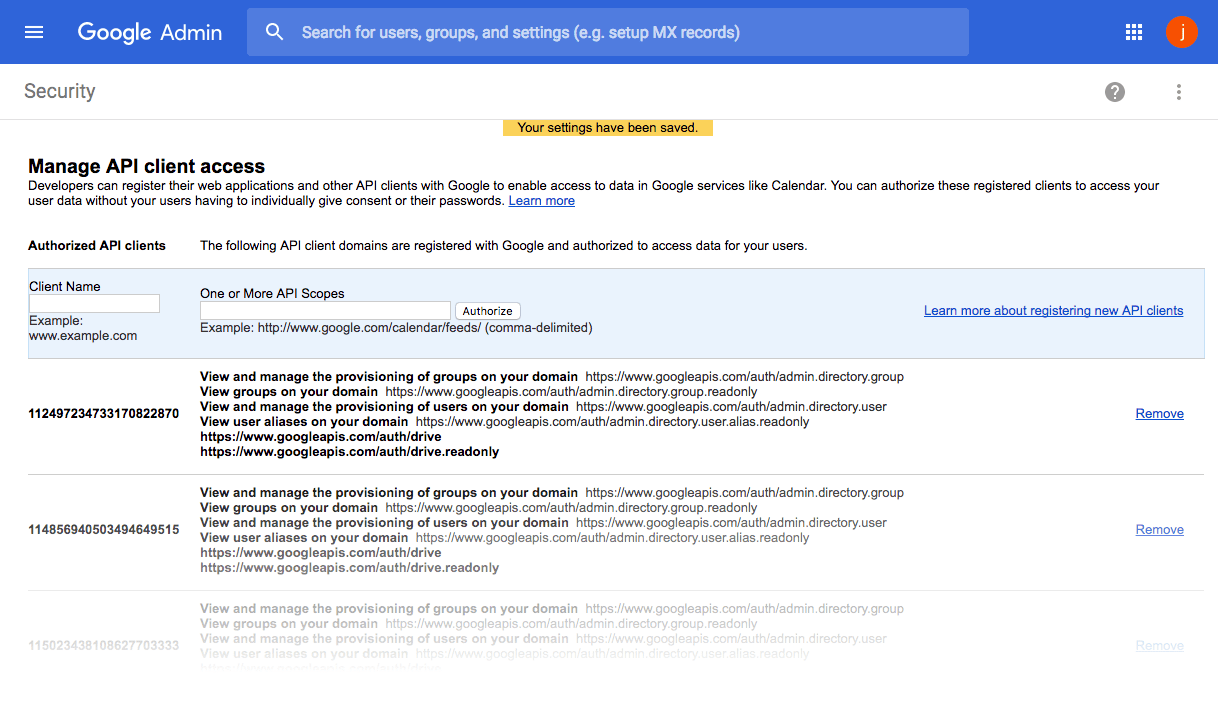
https://admin.google.comand log in with your G-Suite account. - Navigate to Admin Console > Security. Remember, you must be logged in as a user with admin-level access rights.
- Navigate to Show more > Advanced settings > Manage API client access.
-
Create a new API client:
- In the Client Name field, enter the client ID from your service account (above).
-
In the One or More API Scopes field, enter the following:
- Click Authorize.
Authentication for access to per-user documents
These instructions show you how to configure Google to allow Fusion to crawl a specific user’s Google Drive, including documents that other users have shared with them. Fusion must be running in an authorized domain.How to configure authentication for access to per-user documents- Log in to Google as a user with admin-level access rights.
- Go to https://console.developers.google.com/.
-
Create a Google project for Fusion:
-
In the upper left, open the Project menu and select Create Project:
- Enter a new project name, such as “fusion”.
- Click Create.
-
In the upper left, open the Project menu and select Create Project:
-
Create the client ID and client secret:
-
In the new project, click Enable APIs and Services.

- Under “Google Apps APIs”, click Drive API.
- Click Enable. Google may prompt you to create credentials, if this is the first time you have enabled this API.
- Click Credentials, then Create Credentials > Oauth client ID.
- Select Web application.
- Enter a name for this Web application, such as “Fusion search”.
- In the Authorized Javascript origins field, enter “https://developers.google.com”.
- In the Authorized redirect URIs field, enter “https://developers.google.com/oauthplayground” and press Return on your keyboard.
- In the Authorized redirect URIs field, enter “http://FUSION_HOST:8764/admin/oauth-redirect”, specifying the hostname of your Fusion instance.
- Click Create. Google displays the new client ID and client secret.
- Copy the client ID and client secret. Save them in a separate location.
- Click OK.
- Go to https://developers.google.com/oauthplayground/.
- In the upper right, click the gear icon. The OAuth 2.0 configuration window opens.
-
Select Use your own OAuth credentials.
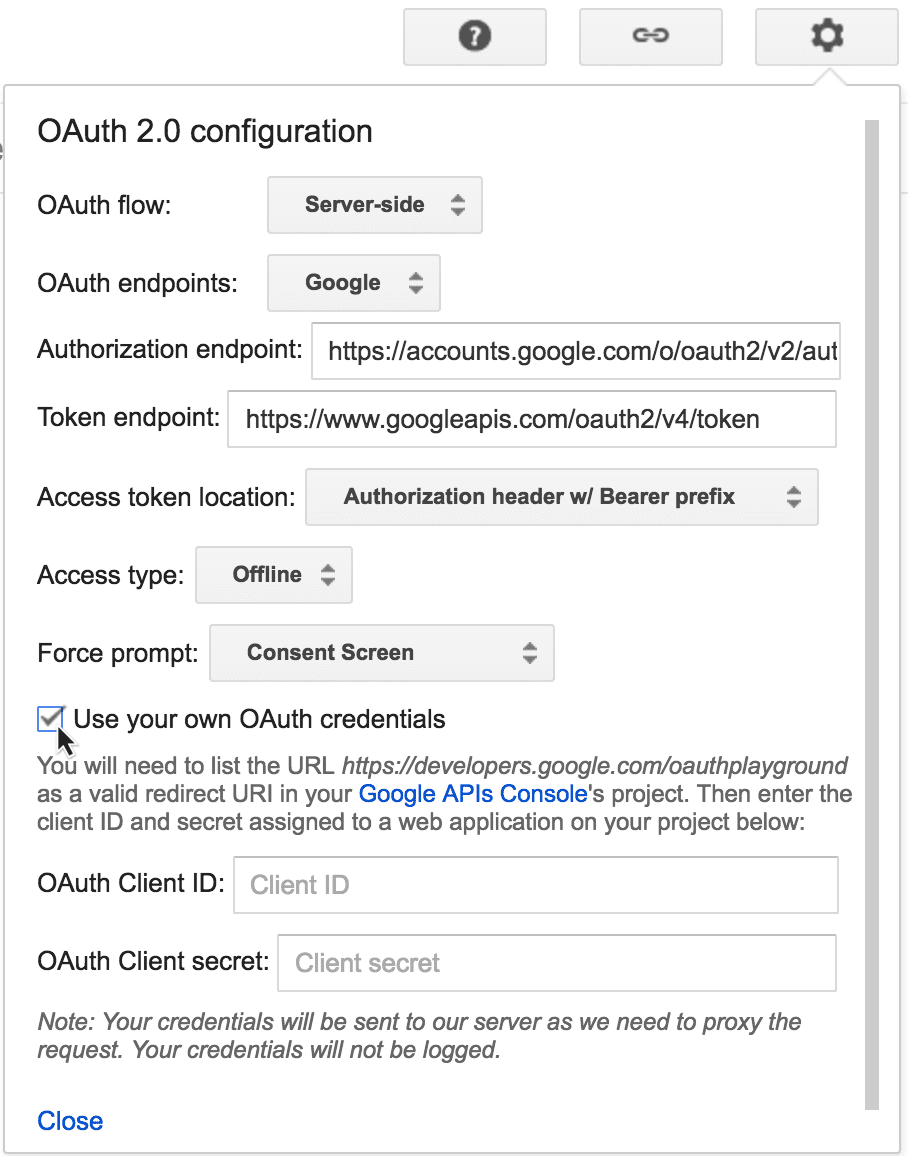
- Enter your client ID and client secret.
- Click Close.
-
In the new project, click Enable APIs and Services.
- Navigate to Credentials > Oauth Consent Screen.
- Under Authorized domains, enter the Google-verified domain under which Fusion is running.
- Click Save.
-
Add the credentials to the datasource configuration in the Fusion UI:
- In the Google Drive datasource configuration panel, enter a string for the Datasource ID.
- Enter the Google client ID and client secret.
-
Click Get Refresh Token.
A new browser window opens, and Google prompts you for permission to access the documents:
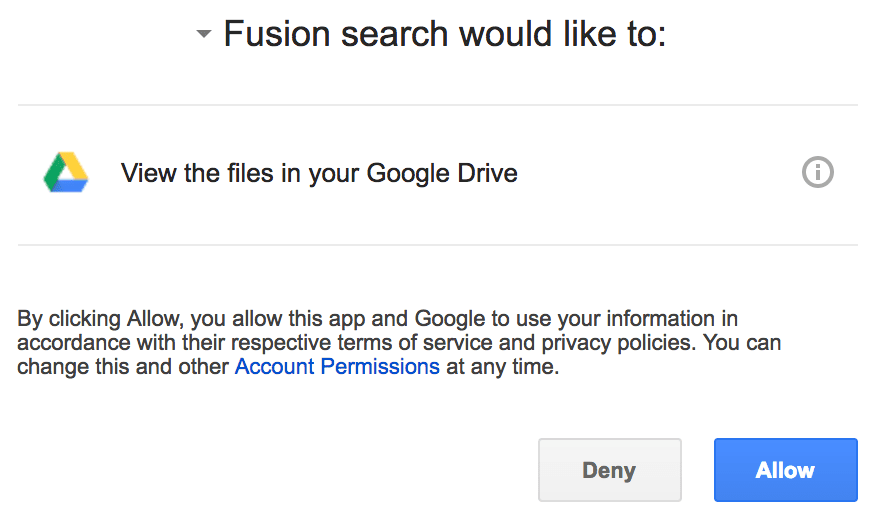
- Click Allow. Fusion automatically populates the Google Drive Oauth Refresh Token field.
- In the Startlinks field, enter a starting URL to which this user has access. See below for details about the format for this value.
- Click Save.
Configuration
The StartLinks values for this connector must be one of the following:rootto crawl the whole organization or per-user drive.- A folder ID.
For example, if your folder’s URL ishttps://drive.google.com/drive/folders/0B1u0p7N096R6MWgma3gwUj4jthen the start link in the connector configuration should be0B1u0p7N096R6MWgma3gwUj4j. - A document ID.
For example, if your document’s URL ishttps://docs.google.com/document/d/10HRr5gD0OetzgEL9fsyxryf_AfiKqDQ8cn12YXQ/editthen the start link in the connector configuration should be10HRr5gD0OetzgEL9fsyxryf_AfiKqDQ8cn12YXQ.
Debugging with HTTP is available in Fusion 4.2.6. You can enable
diagnosticMode to diagnose an issue with HTTP level traffic logging.