Get Data In
Get Data In
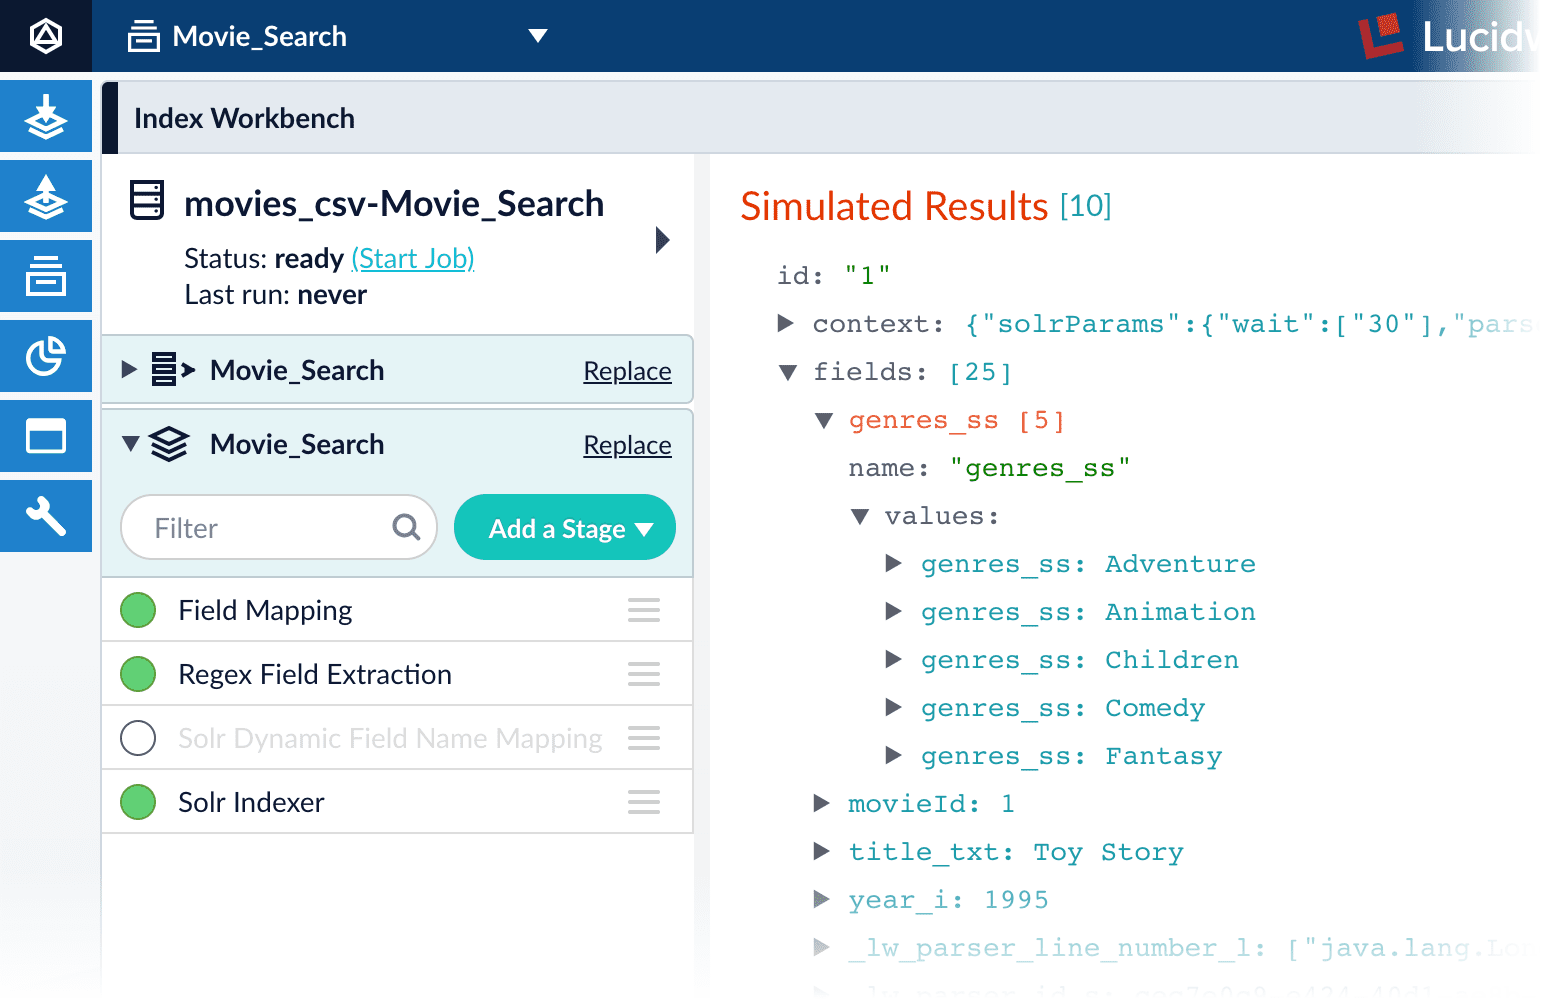
Fusion’s Index Workbench provides the tools to configure datasources, parsers, and index pipelines. It lets you preview the results of indexing before you load your data into the actual index.Index Workbench first sets up the necessary data extraction configuration, and then retrieves a small number of documents as sample data. You can use the sample documents to test and refine your index pipeline. All processing is simulated processing of the test data. No actual data ingestion takes place.After you have a complete configuration, Index Workbench saves this as a Fusion datasource.
To load your data into Fusion, use the Fusion Datasource tool to run the resulting configuration.Part 2 takes you through configuring a datasource using Index Workbench. In Part 3, you will load the data into Fusion and view it using Query Workbench.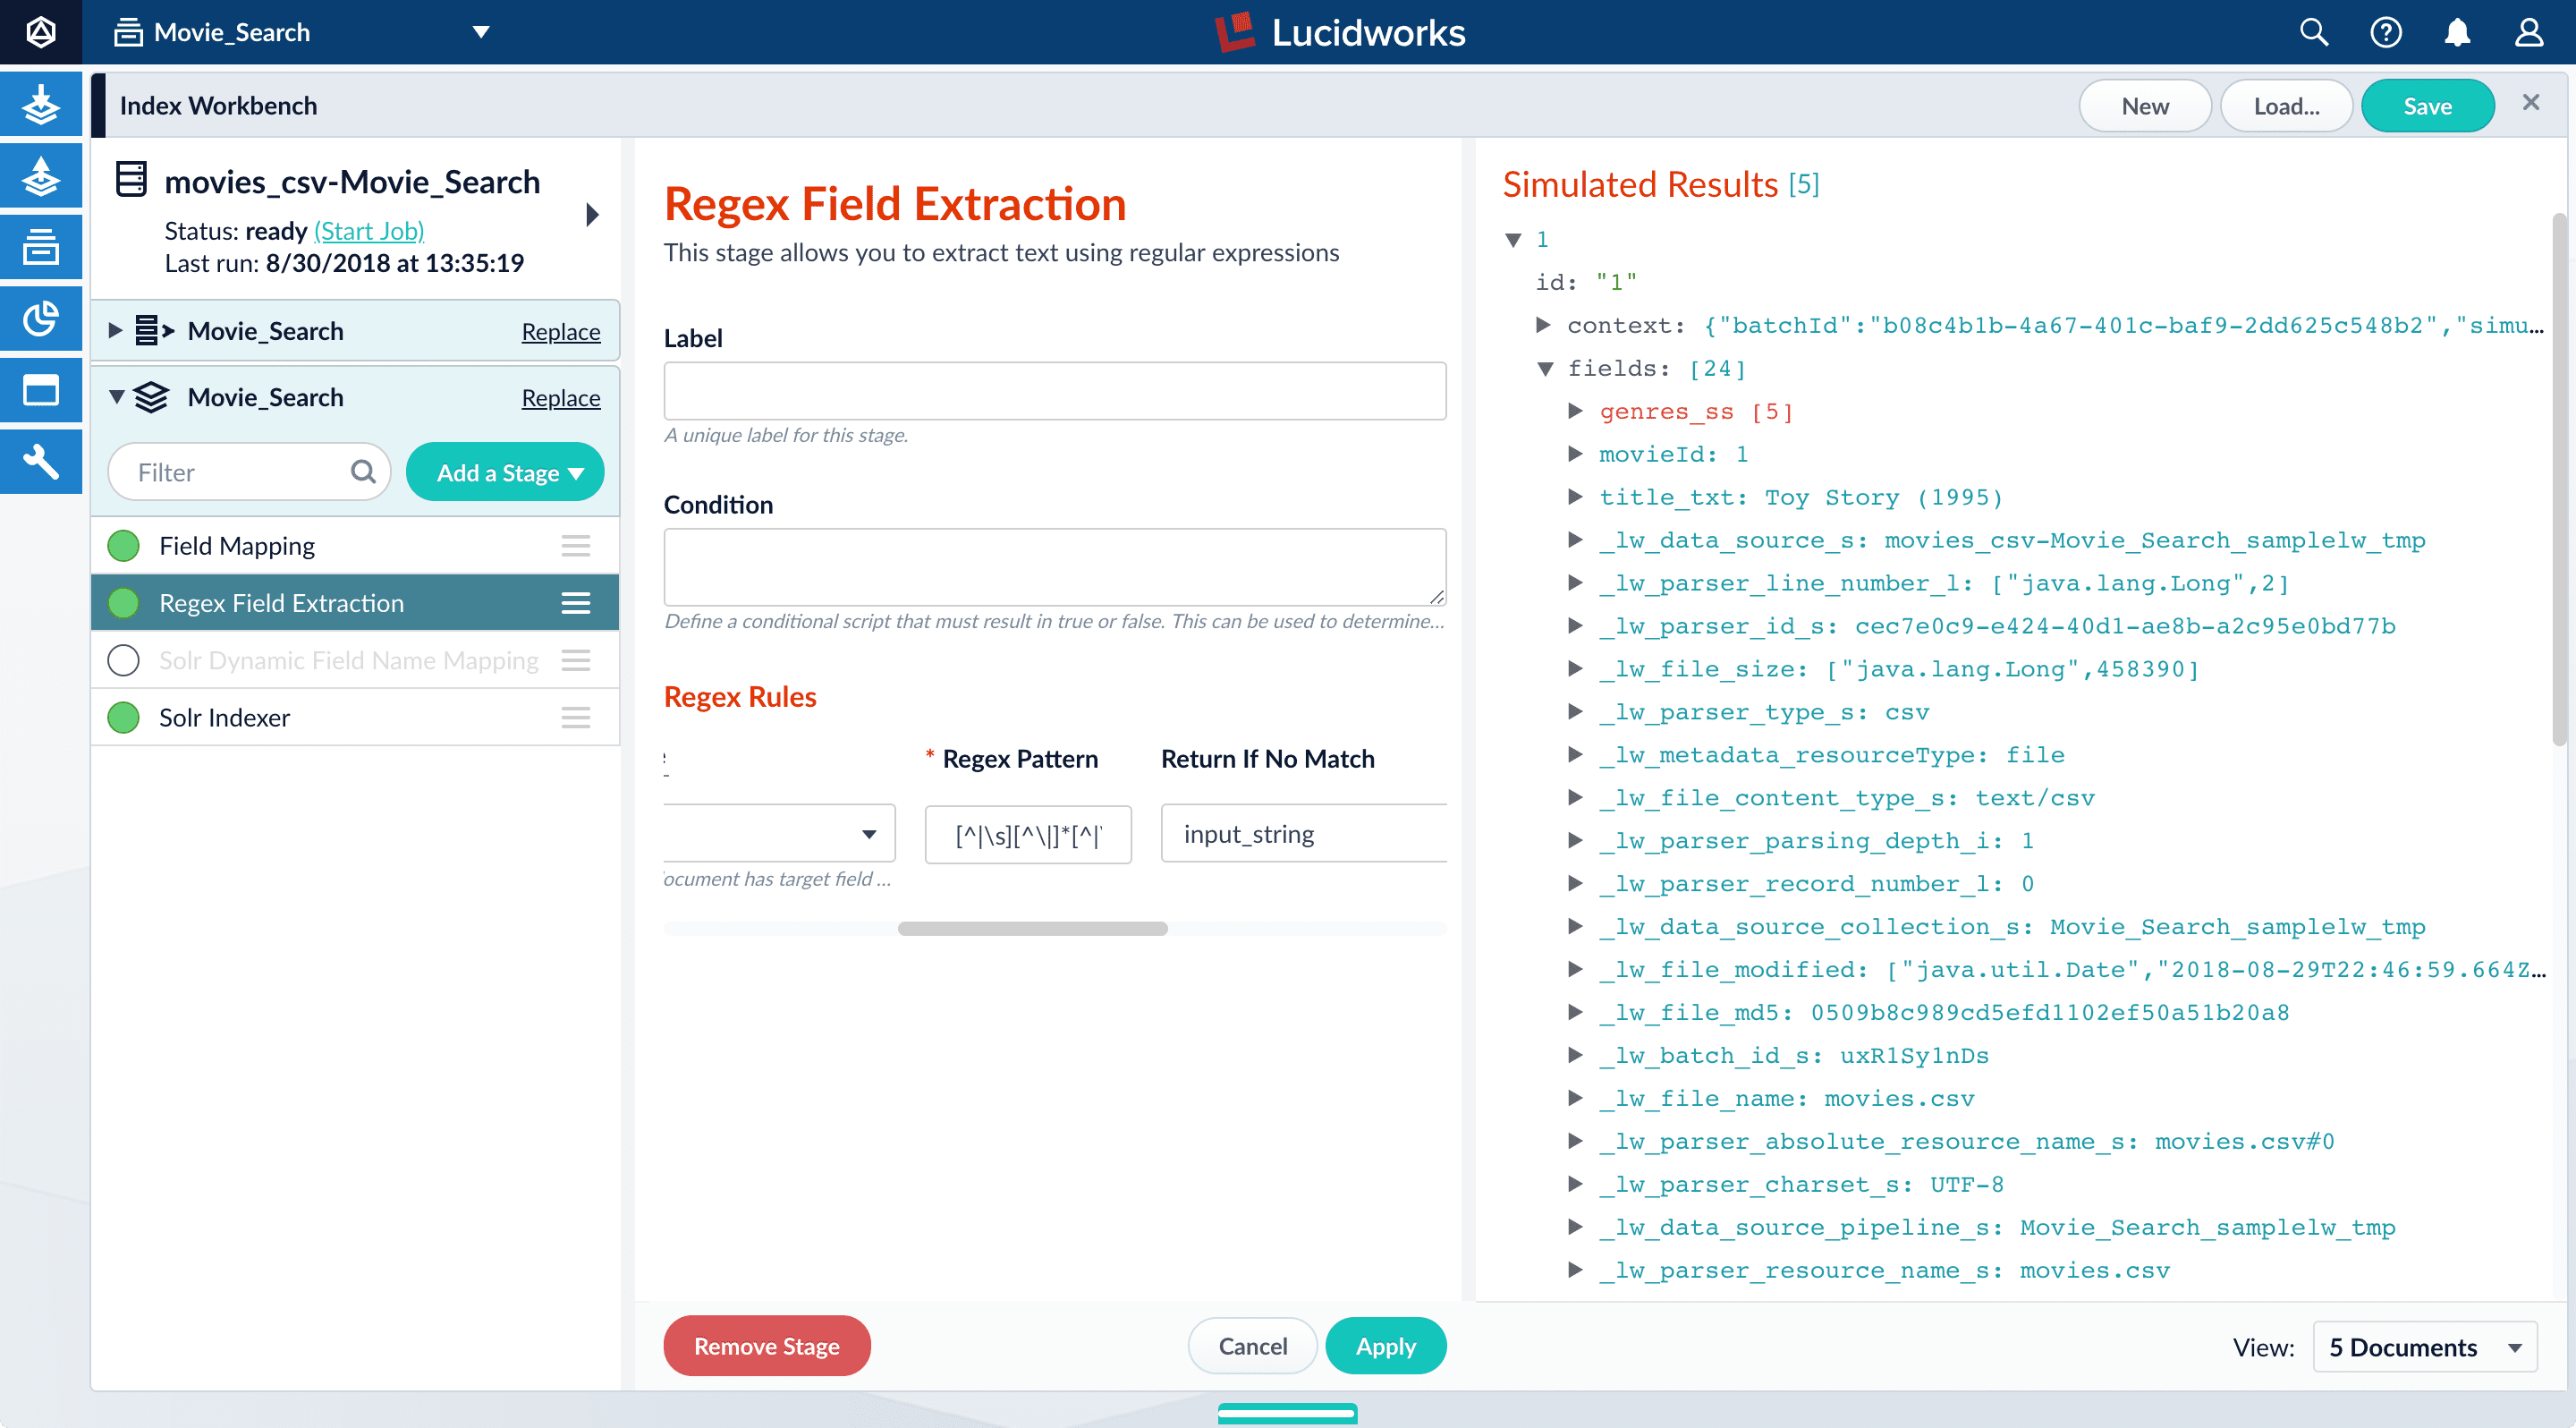
13. To view the values of the 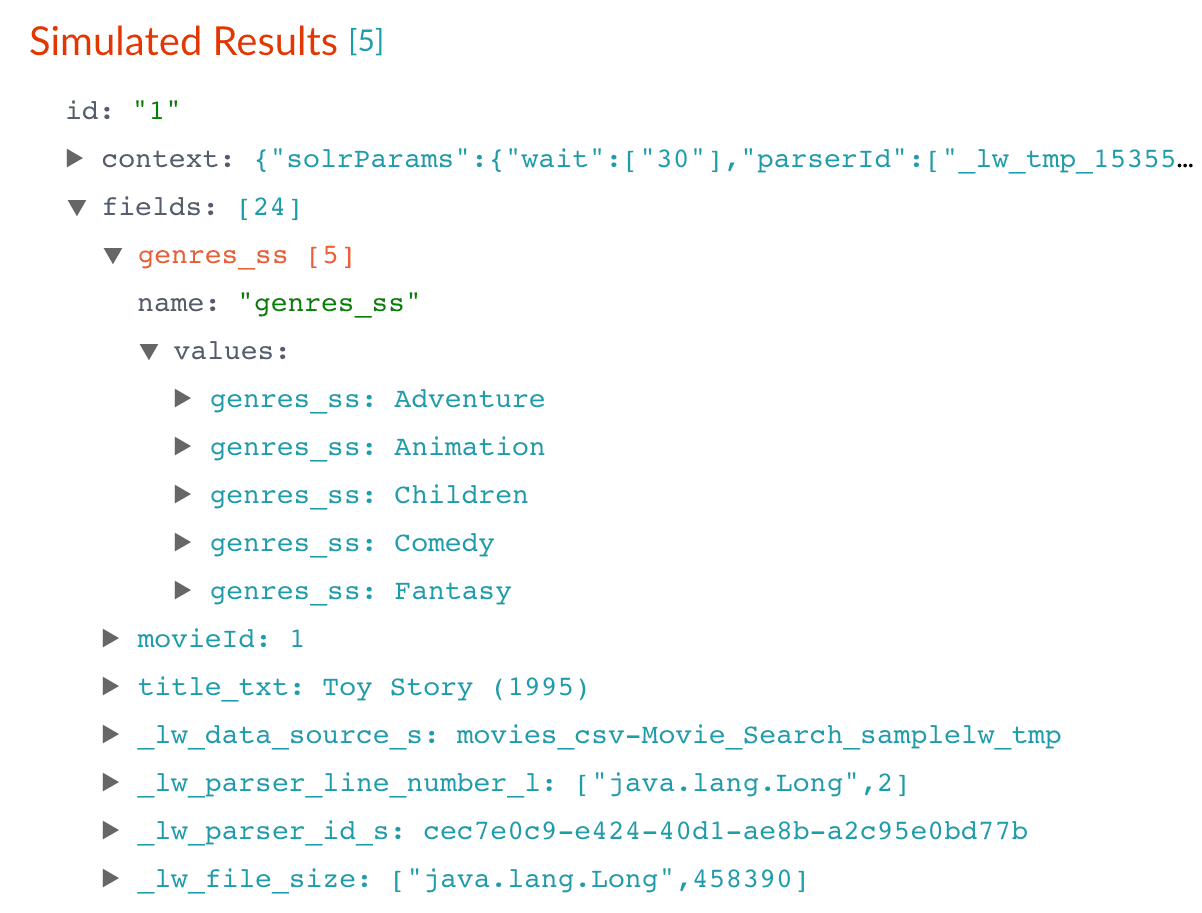
In Part 3, you will use Query Workbench to get search results from your collection and configure the query pipeline that customizes those results. You will add faceting using the
Before you begin
To proceed with this part of the tutorial, you must first complete Part 1, which gives you a running instance of Fusion and a Fusion app.Download the MovieLens dataset
- Download the dataset. This is a MovieLens dataset created by the Grouplens research lab.
-
Unpack the
ml-latest-small.zipfile. Fusion can parse.zipfiles, but for simplicity we will index just one file from the archive (movies.csv).
movies.csv file contains a list of 9,125 movie titles, plus a header row. Here is a truncated listing:Open the Movie Search app
- If the Fusion UI is not already open, then open it.
-
Enter the password for the user
admin, and then click Log in.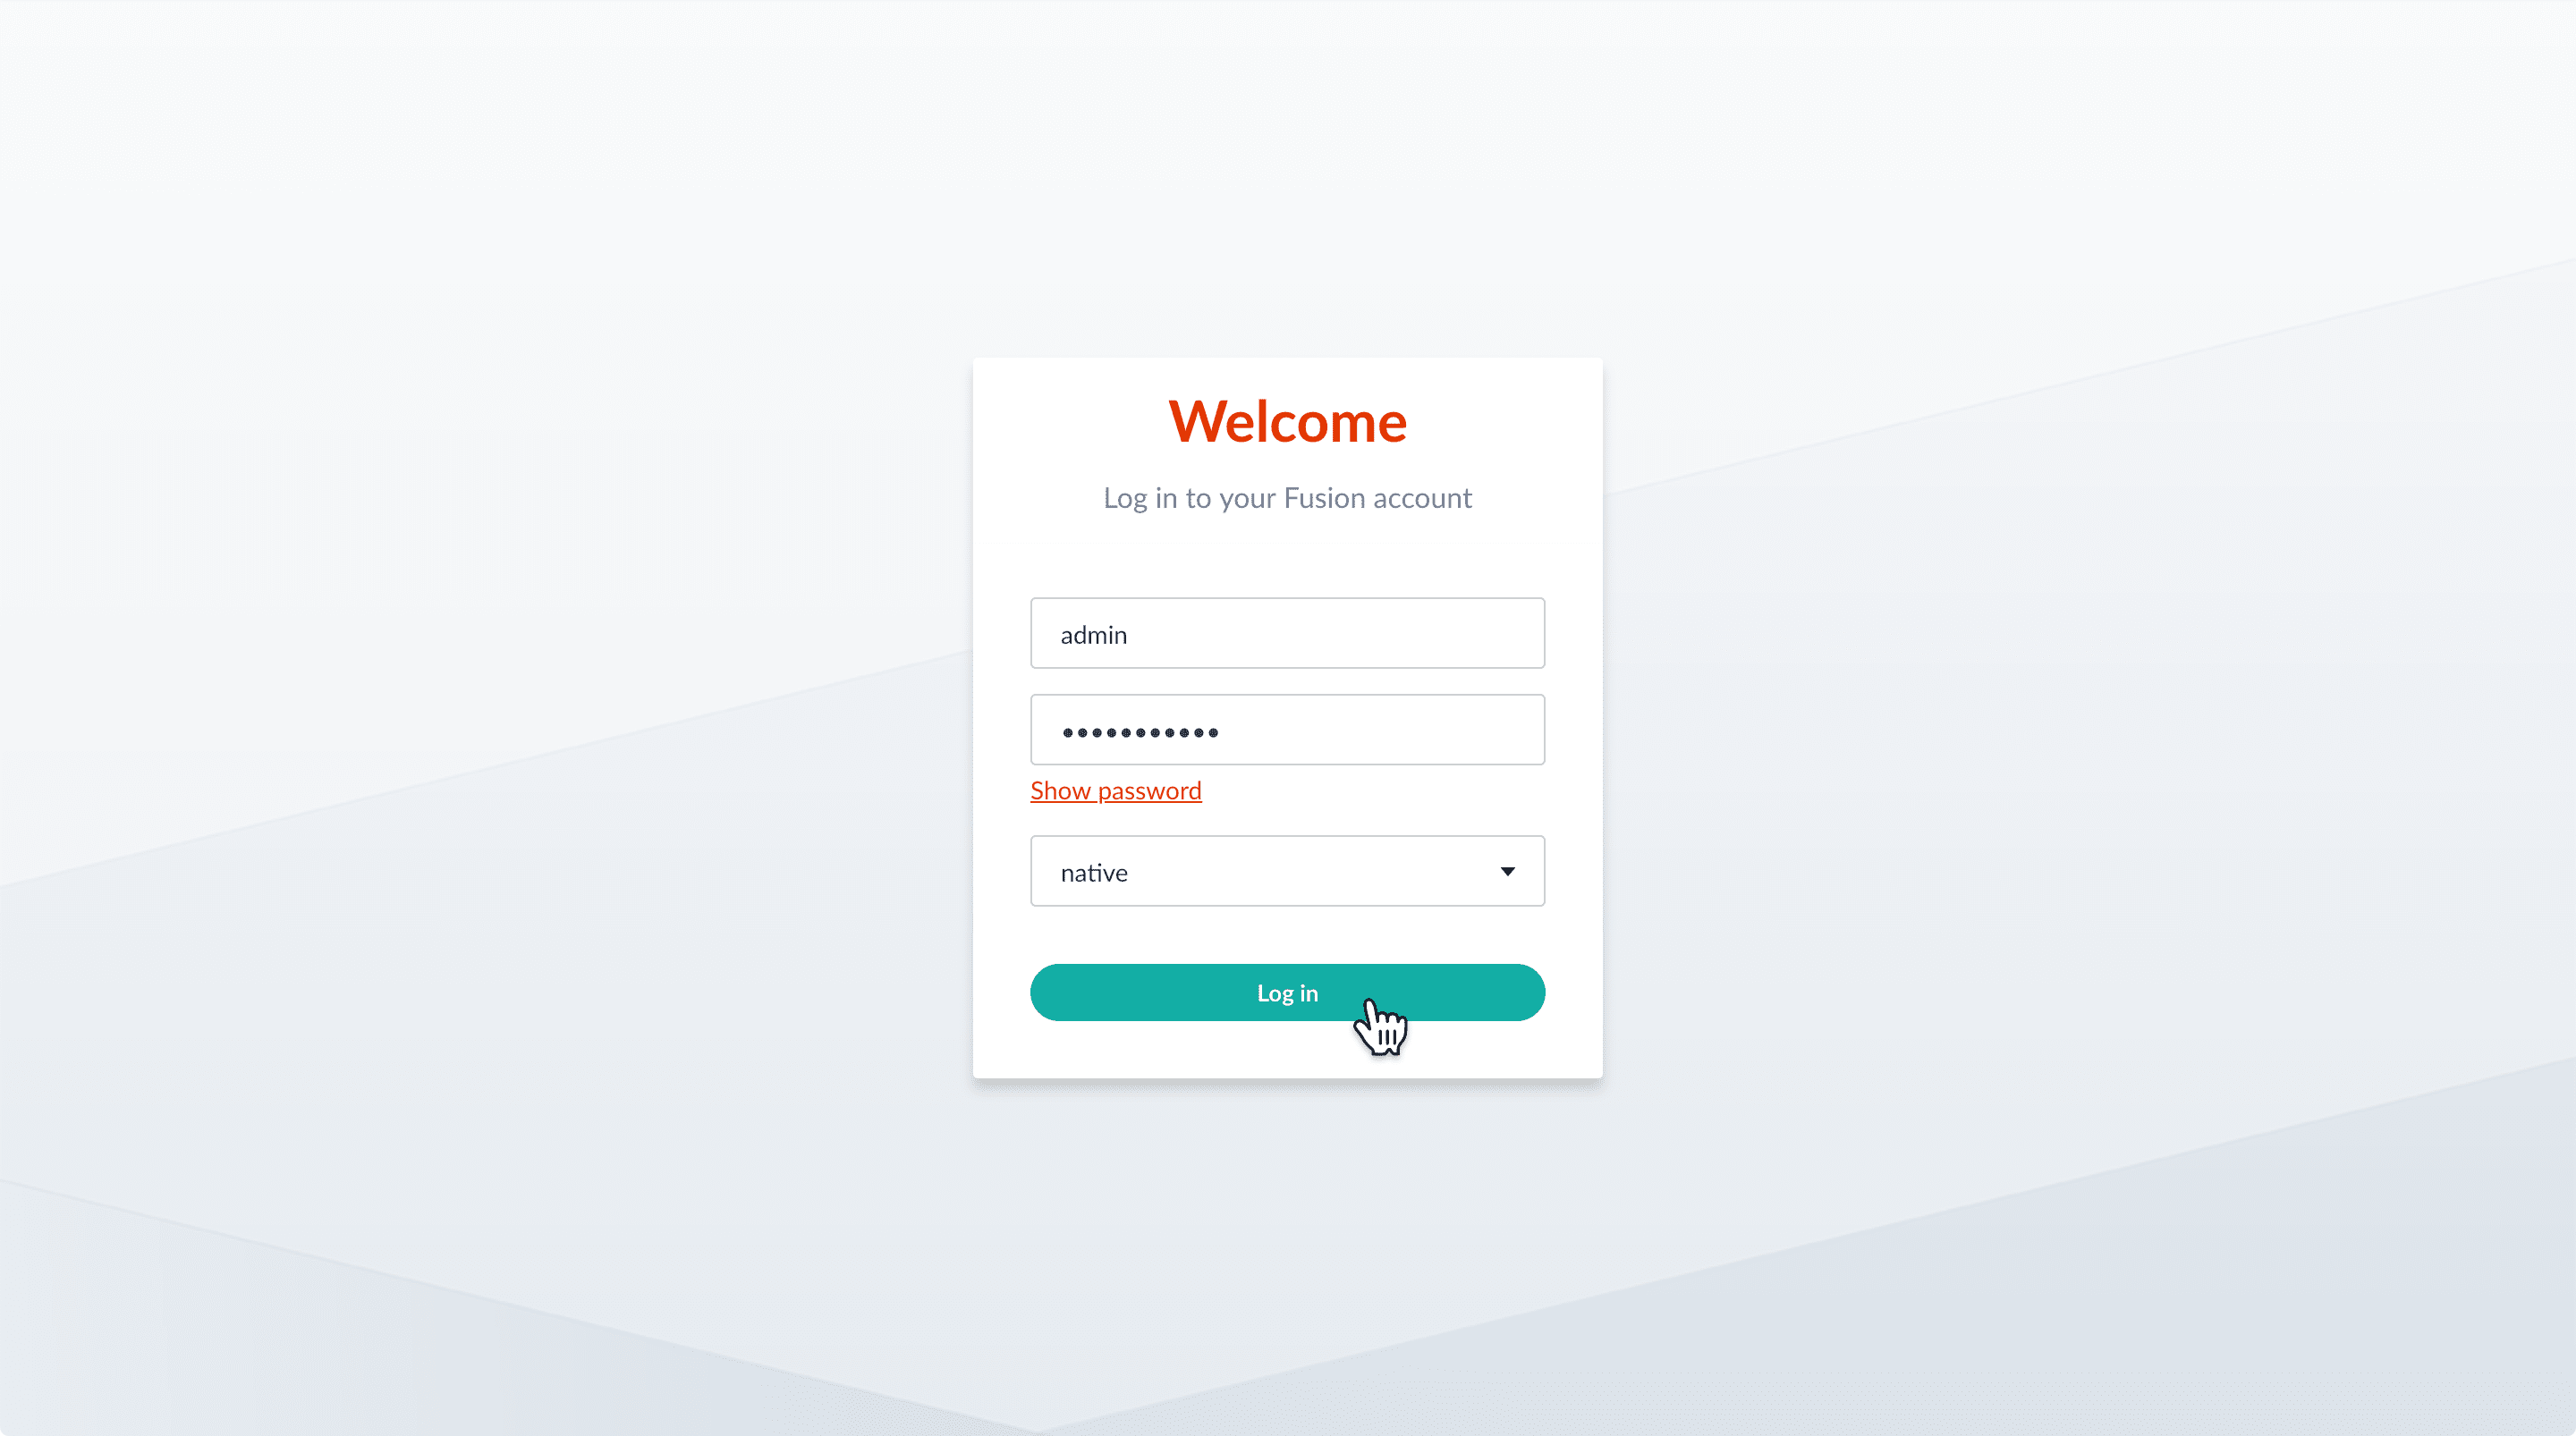
-
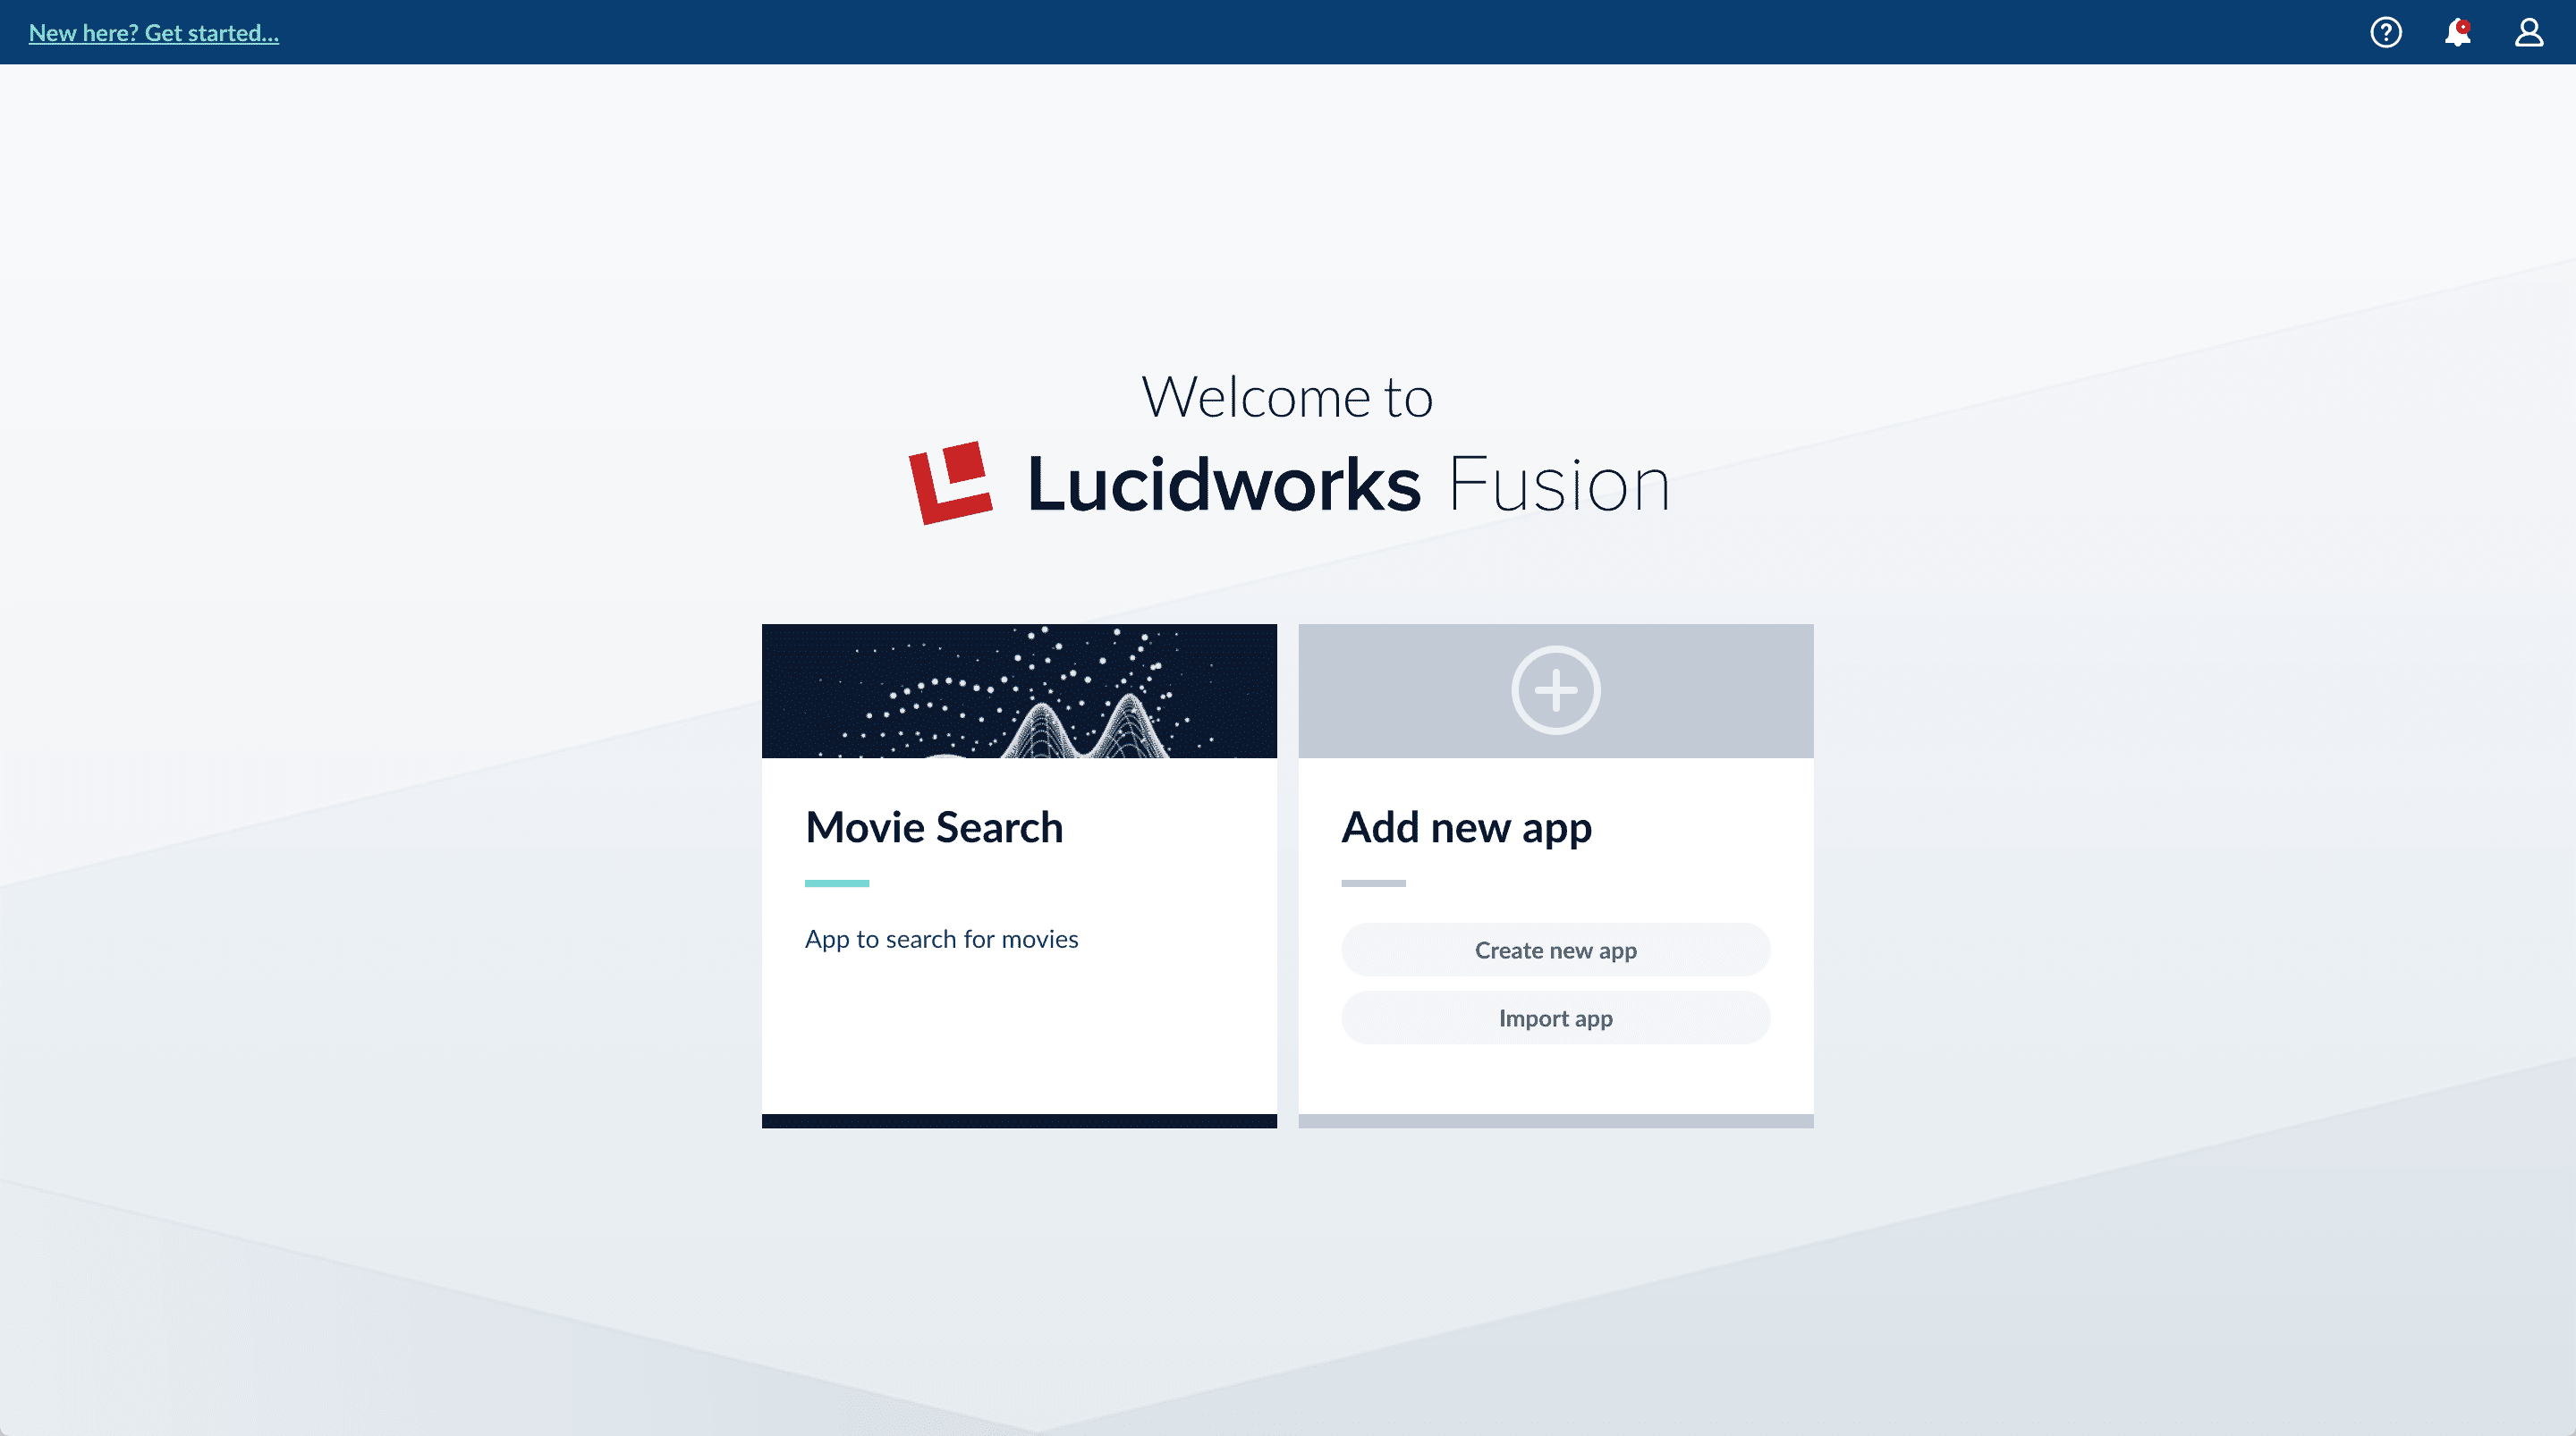
In the Fusion launcher, click the Movie Search app.
The Fusion workspace appears. It has controls along the left and top sides.
-
In the upper left, hover over Apps . You can see that Movie Search is the currently selected app.
Also, the user collection
Movie_Searchis selected in the collection picker. This is the default collection for the Movie Search app, and where Fusion will place index data.
Configure the datasource
A collection includes one or more datasources. A datasource is a configuration that manages the import, parsing, and indexing of data into a collection. You will use Index Workbench to configure a datasource for the movie data.-
In the collection picker, verify that the collection Movie_Search is selected.

- Open Index Workbench. Navigate to Indexing > Index Workbench. Initially, no data preview appears because no datasource has been configured. When you configure a datasource, Fusion samples the data and displays a preview of how it would be formatted in the index using the default parsing and index pipeline configurations.
- In the upper right, click New.
- Select Or, upload a file.
- Click Choose File.
-
Navigate to the
movies.csvfile, select it, and then click Open.
-
Click Add New Datasource.
The Datasource (File Upload) configuration panel appears, with the default datasource ID
movies_csv-Movie_Searchand the default file IDmovies.csv. These default values are fine. -
Enter the Description
Movies CSV file.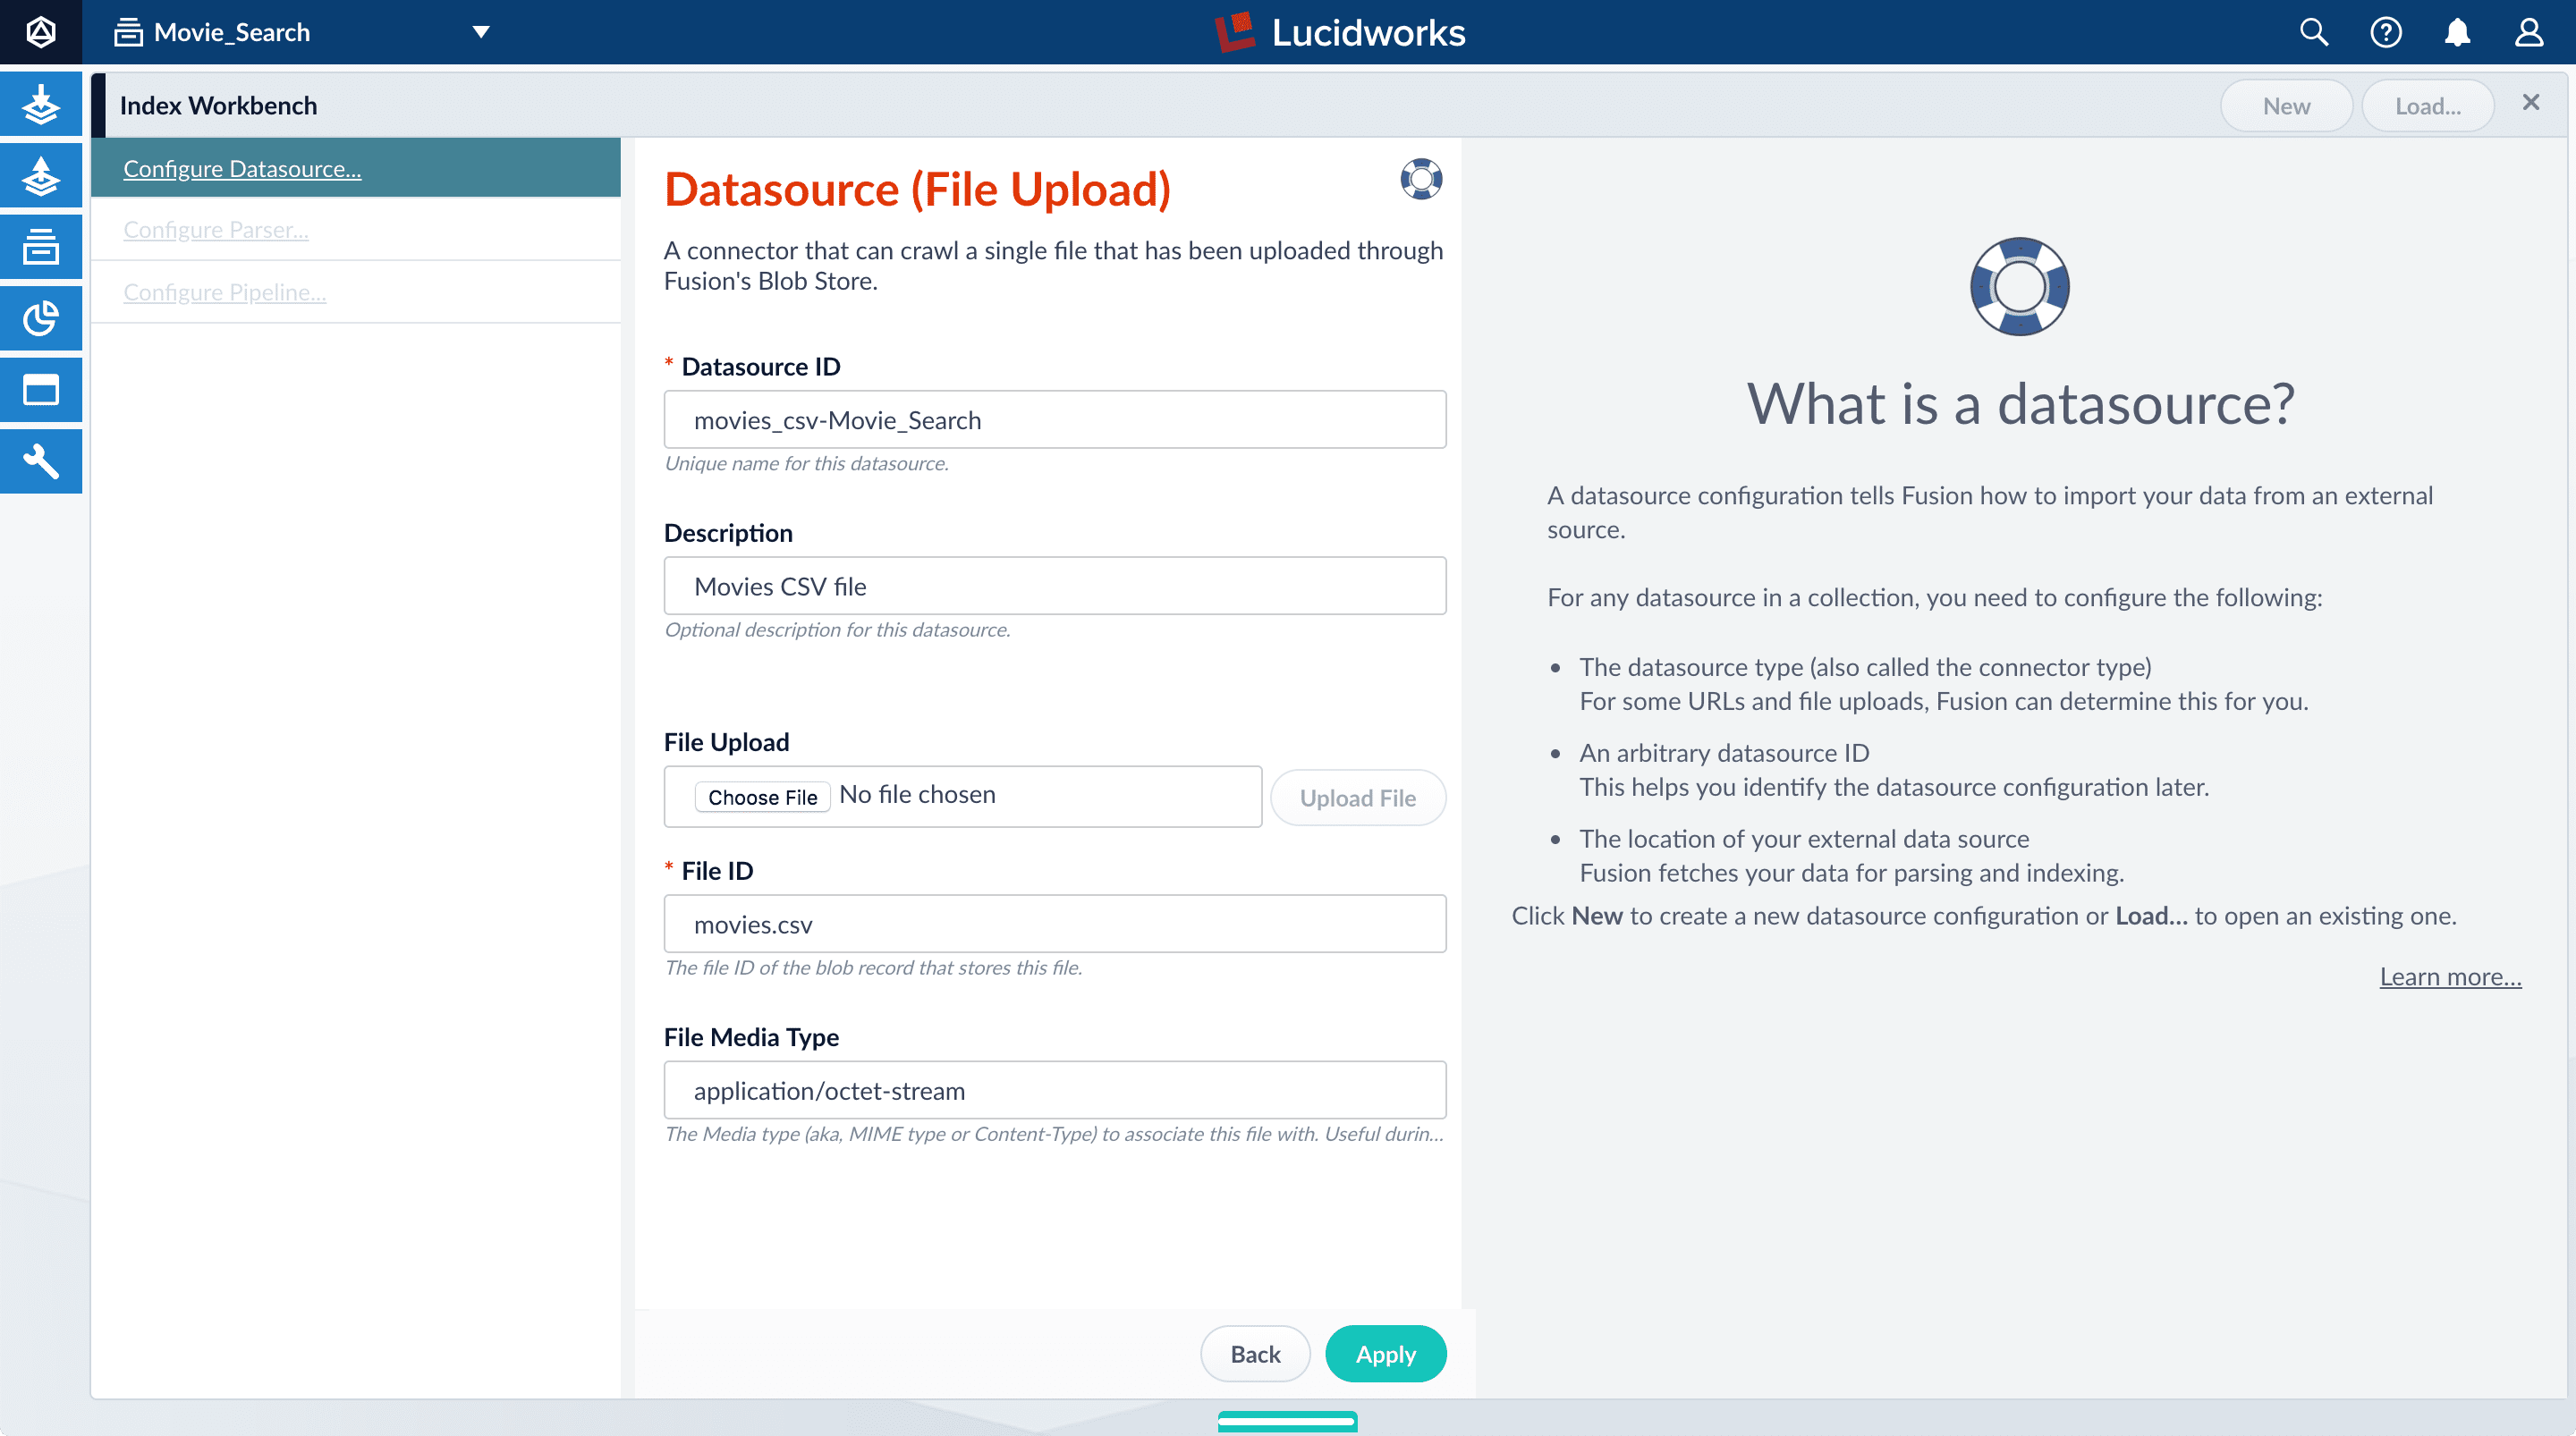
-
Click Apply.
Index Workbench reads up to 20 documents into memory from the
movies.csvfile, and then displays a preview of how they would be indexed. You have finished configuring the datasource. At the bottom of the page, click Cancel.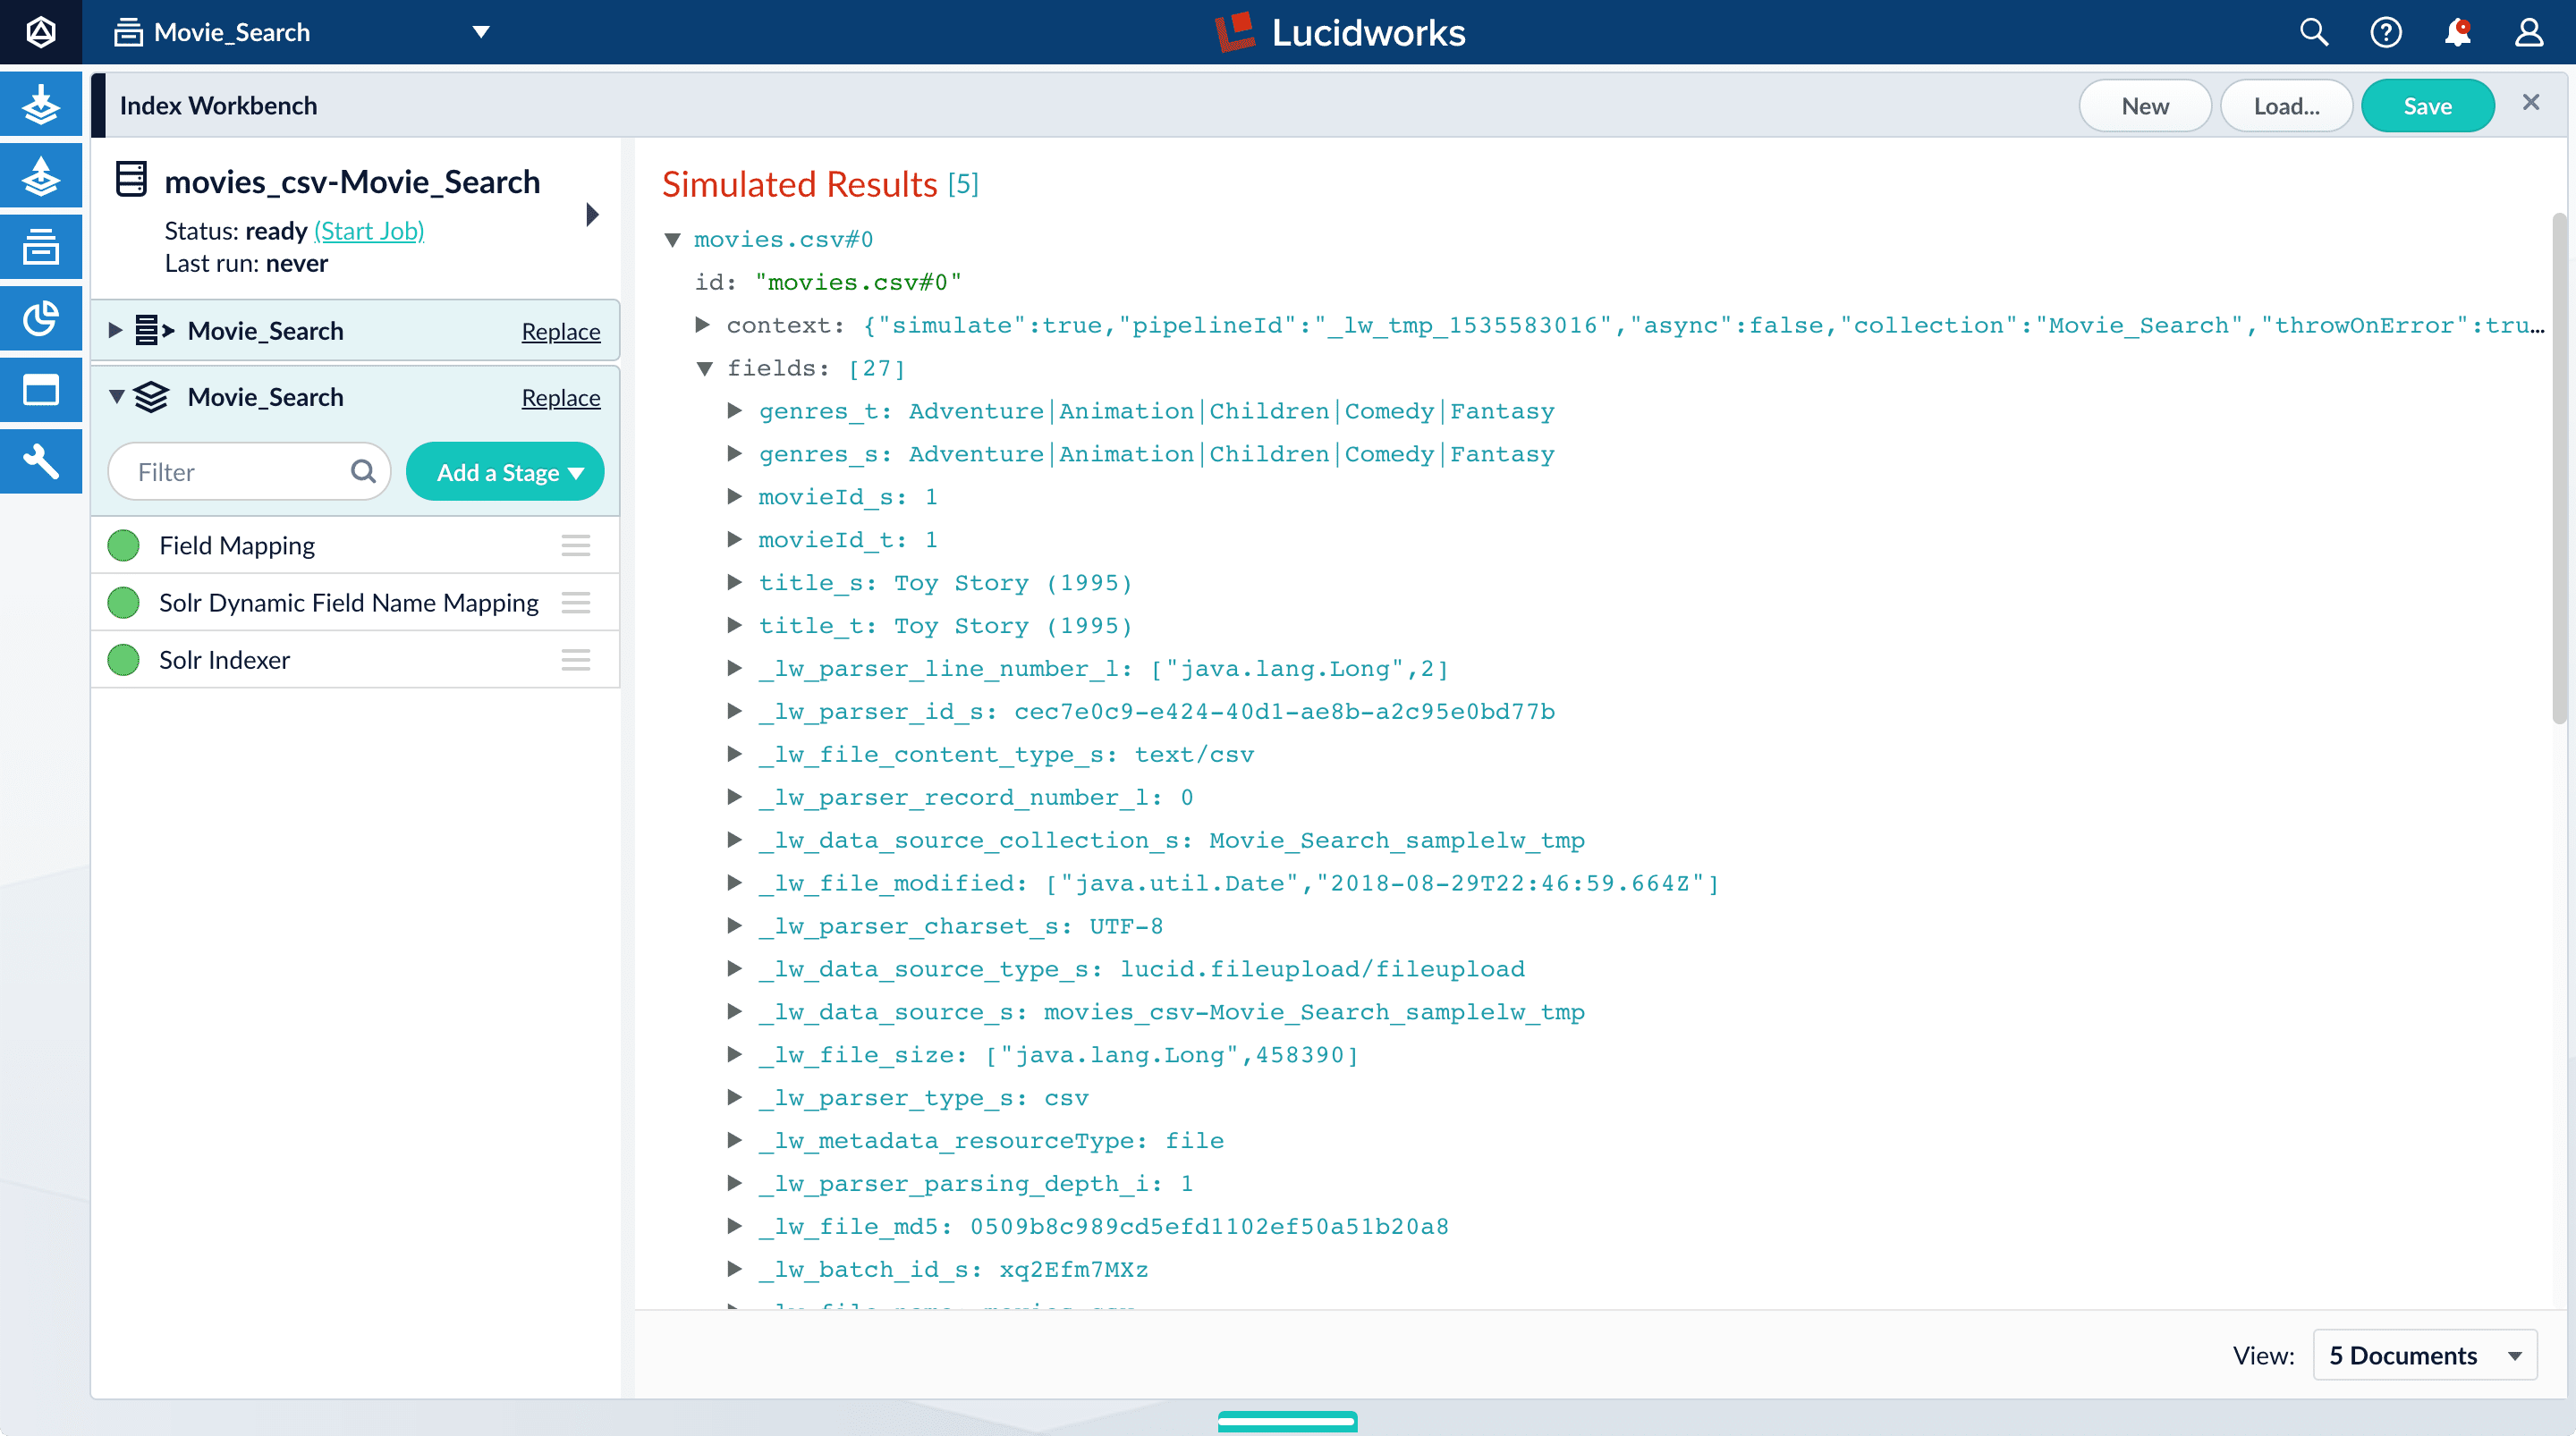
Analyze the default output
-
Notice that Fusion made some assumptions about your original fields:
genresbecamegenres_t(thetext_generalfield type) andgenres_s(thestringfield type). String fields are useful for faceting and sorting, while text fields are for full-text search. At this point, Fusion does not know whether you intend to use this field for faceting and sorting, for full-text search, or for both.titlebecametitle_tandtitle_sfor the same reason.movieIdbecamemovieId_tandmovieId_sfor the same reason. This might seem odd, because the original field contains numbers. But, at this stage, Fusion createstext_generalandstringfields. To use the contents of this field as an integer, you would map the field to an integer field.
_lw. These fields contain data that Fusion creates for its own housekeeping. You can ignore them. These fields are created by the Solr Dynamic Field Name Mapping stage in the default index pipeline. This stage attempts to automatically detect field types, and renames fields accordingly. For this tutorial, you will manually configure the fields instead. -
Turn off the Solr Dynamic Field Name Mapping stage by clicking the green circle next to it.
Your data’s original fields reappear:
genres,movieId, andtitle.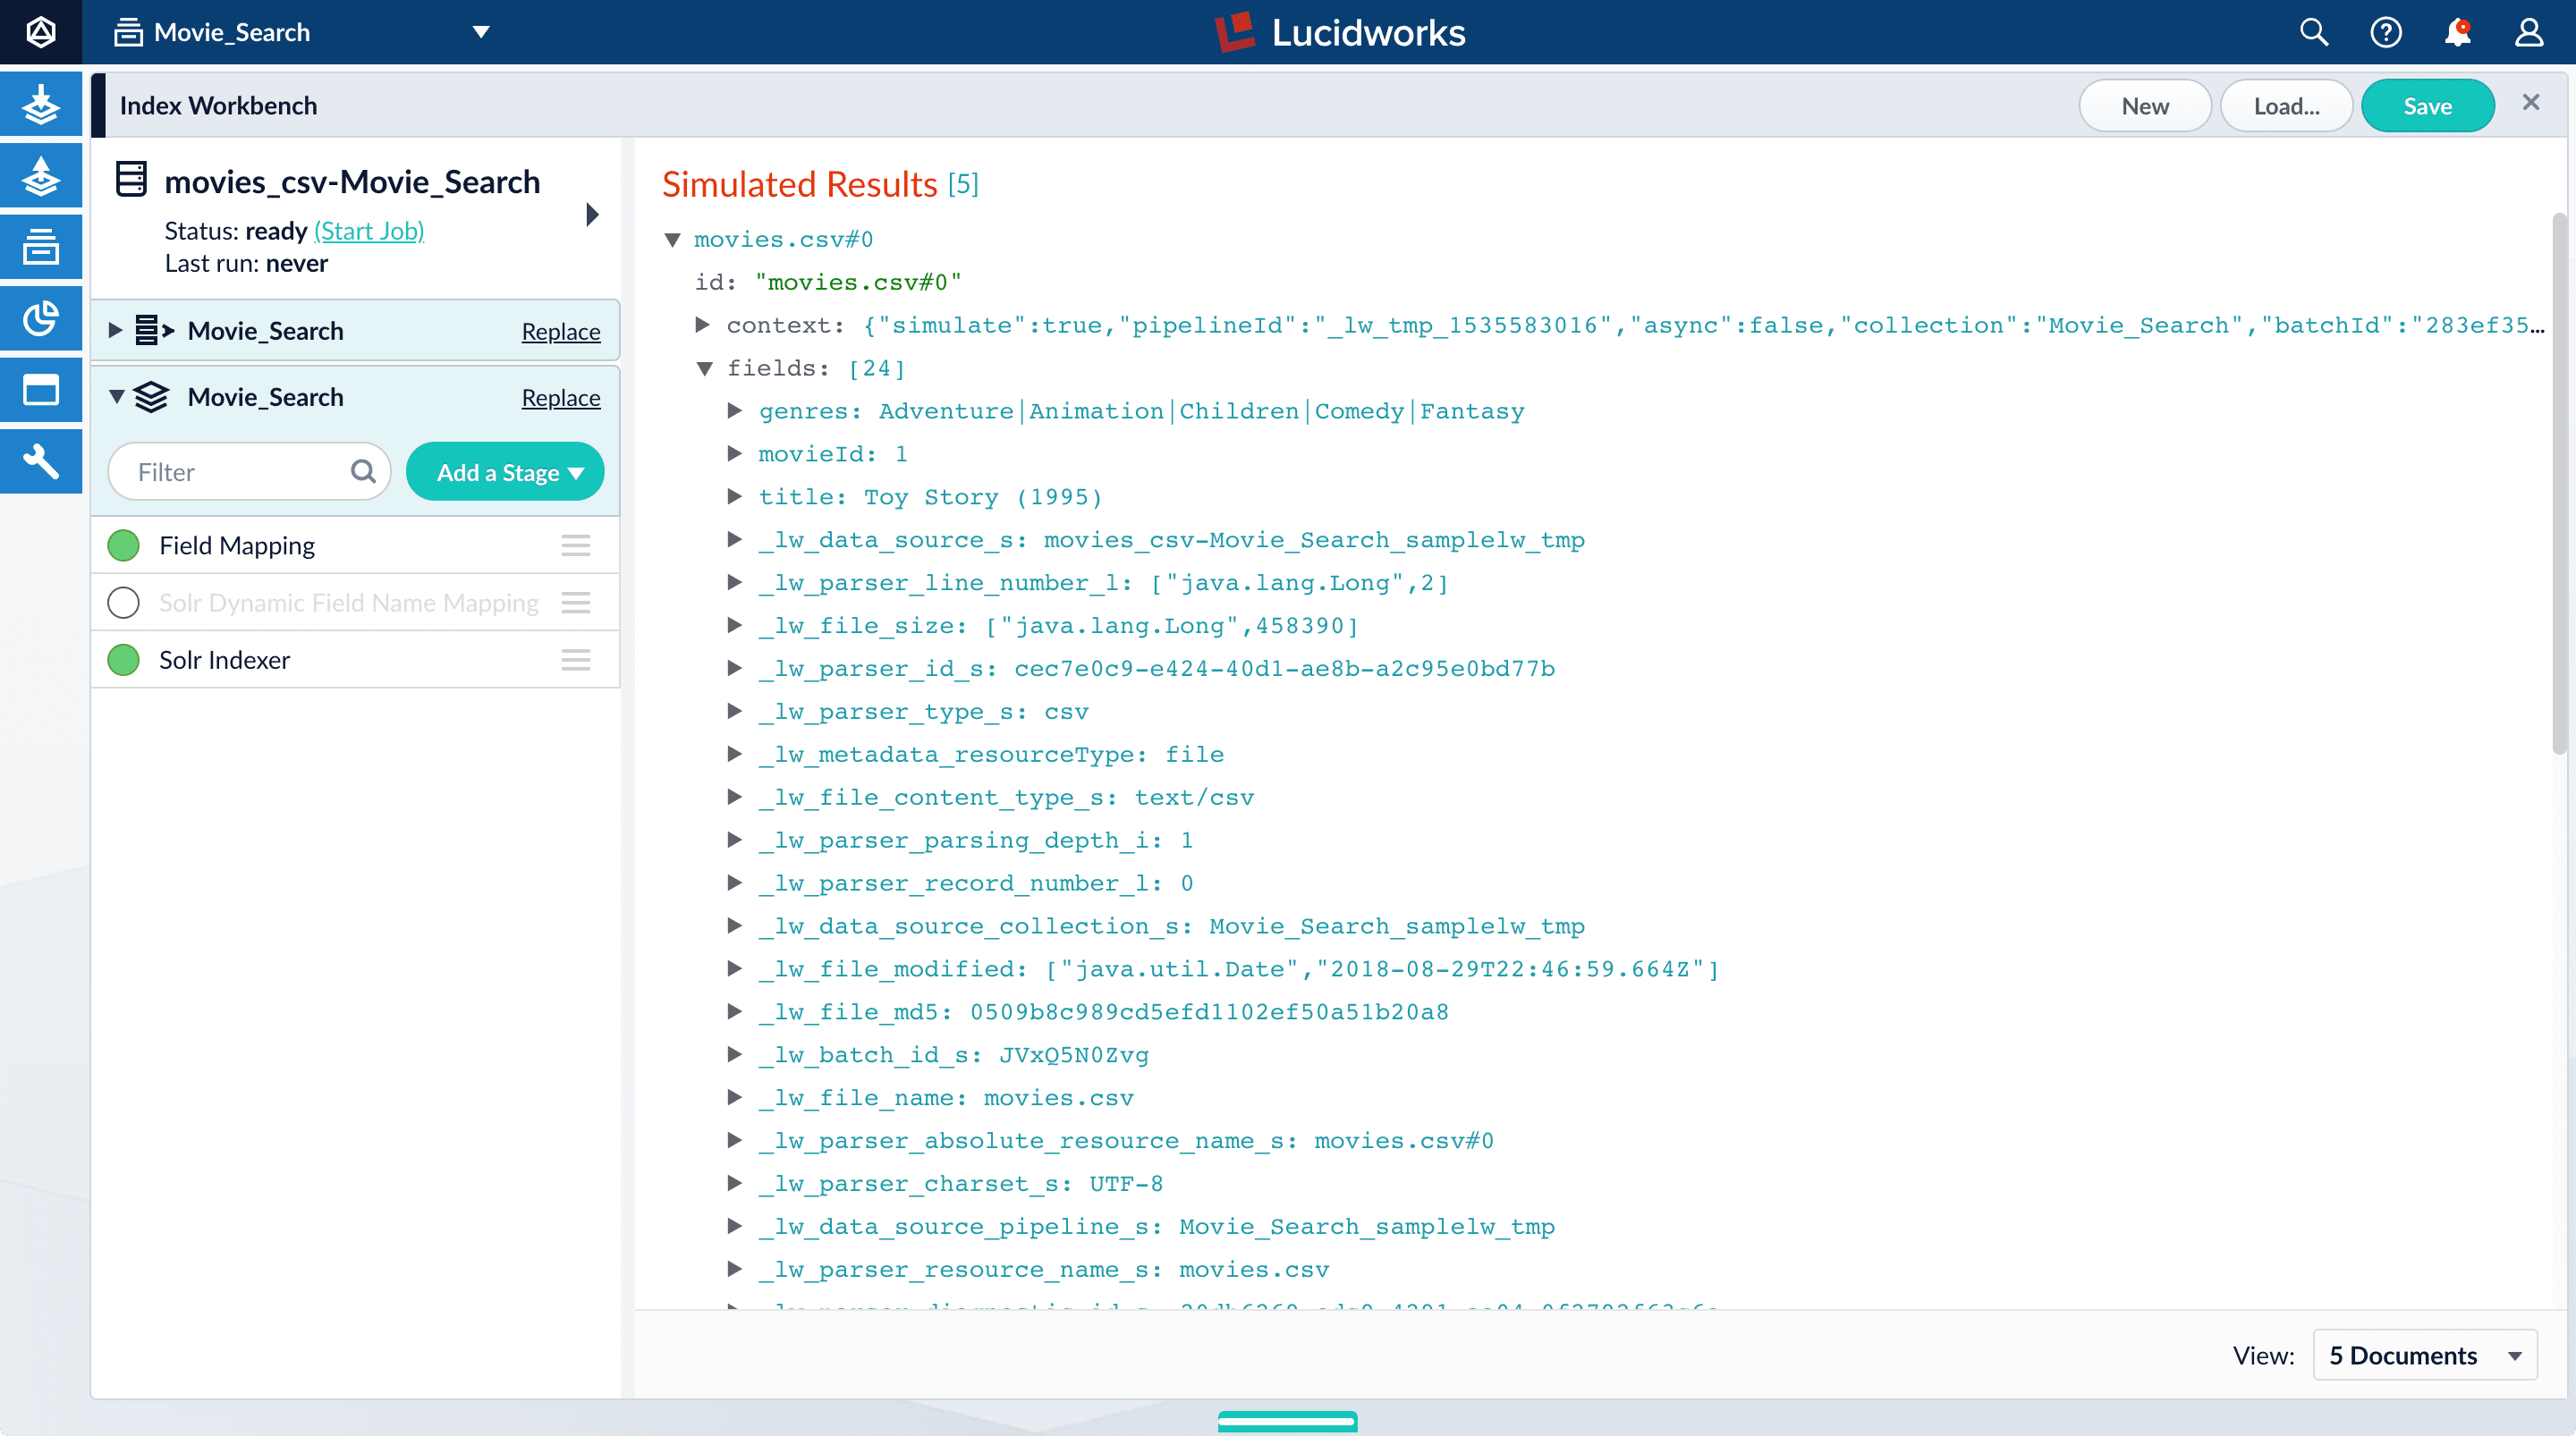
Configure the index pipeline
First you will configure the field mappings in the index pipeline so each field has the correct data type. Then you will split thegenres field into multiple values so each value can be used as a facet in Part 3 of this tutorial.Configure field mappings
Configure field mappings to control the field types of Fusion documents. Fusion uses field name suffixes to determine field types. When a field name has no suffix, Fusion stores it as a string field and treats it as an unanalyzed whole. For precise analysis and search, most fields need suffixes to indicate their specific types. You will see how this relates to the fields in the dataset.- In the list of index pipeline stages on the left, click Field Mapping to open the Field Mapping stage configuration panel.
- In Field Translations, click Add to create a new field mapping rule.
-
Under Source Field, enter
genres. -
Under Target Field, enter
genres_ss. The field suffix_ssmeans that this field is a multi-valued string field.Fusion currently interprets this field as having a single value. You can see that the field actually contains a pipe-delimited array of values. You will fix this after you finish configuring field mappings. -
Under Operation, select move.
The move operation means that the resulting document no longer has a
genresfield; it only hasgenres_ss.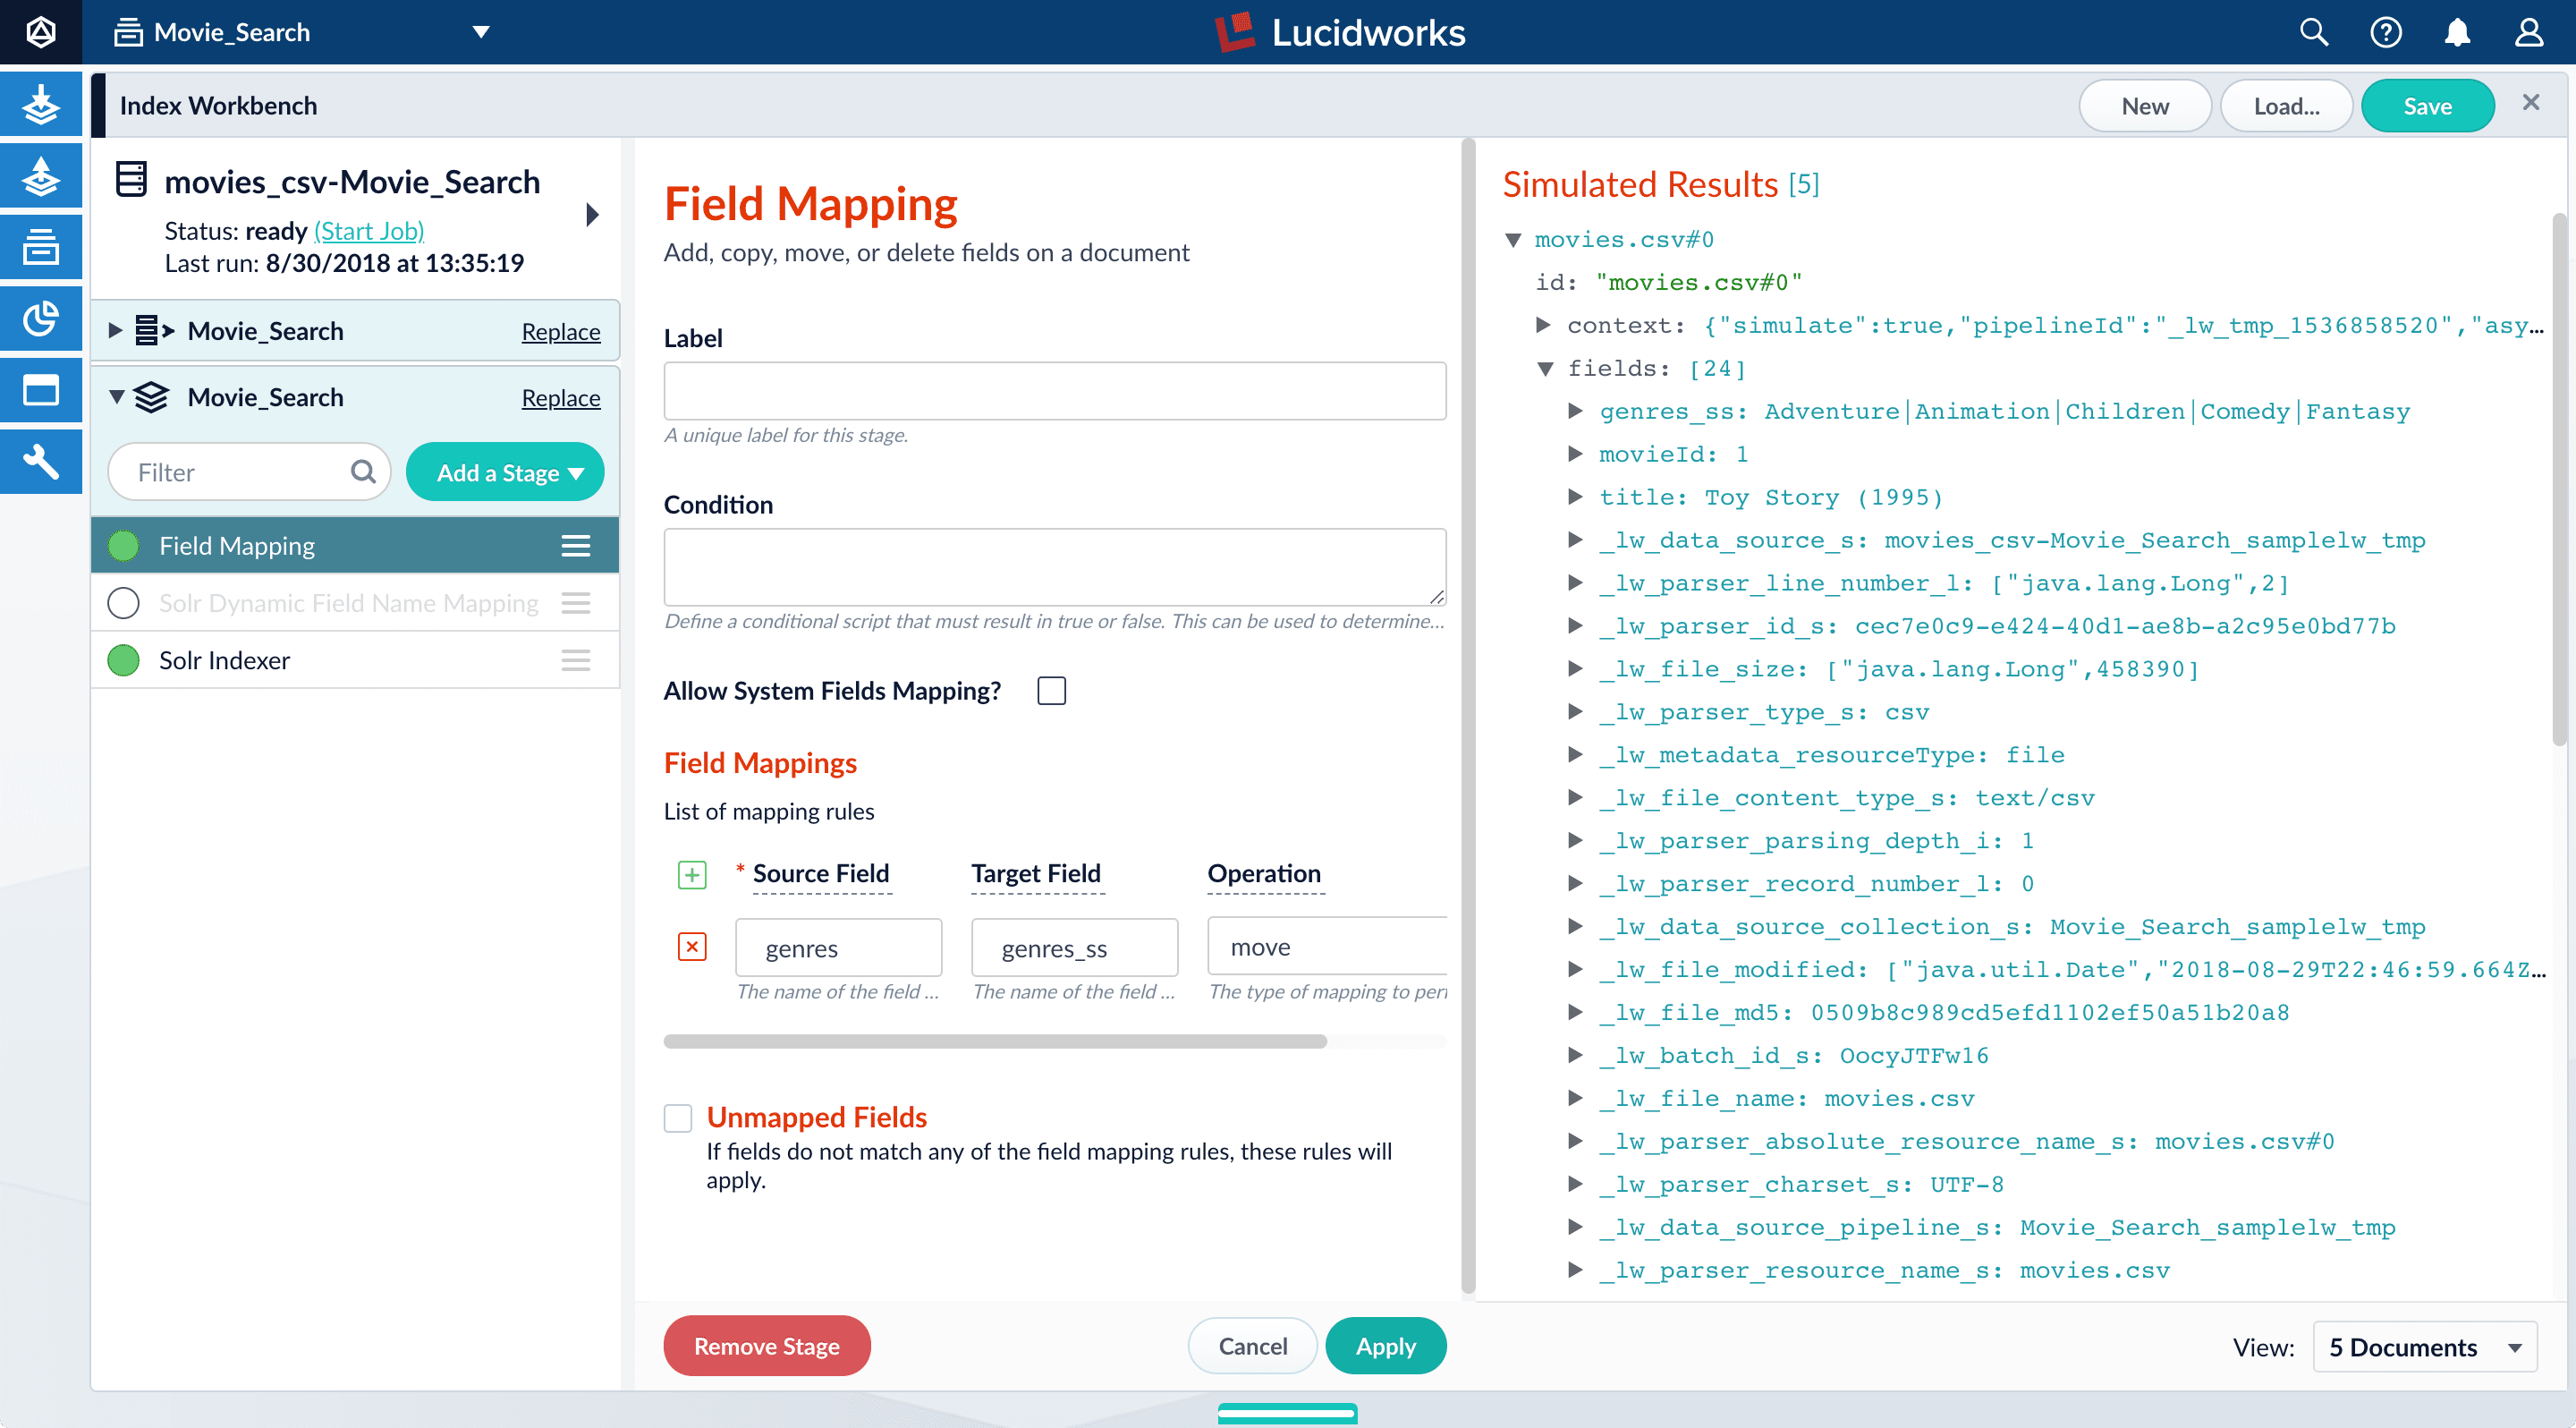
-
Click Apply.
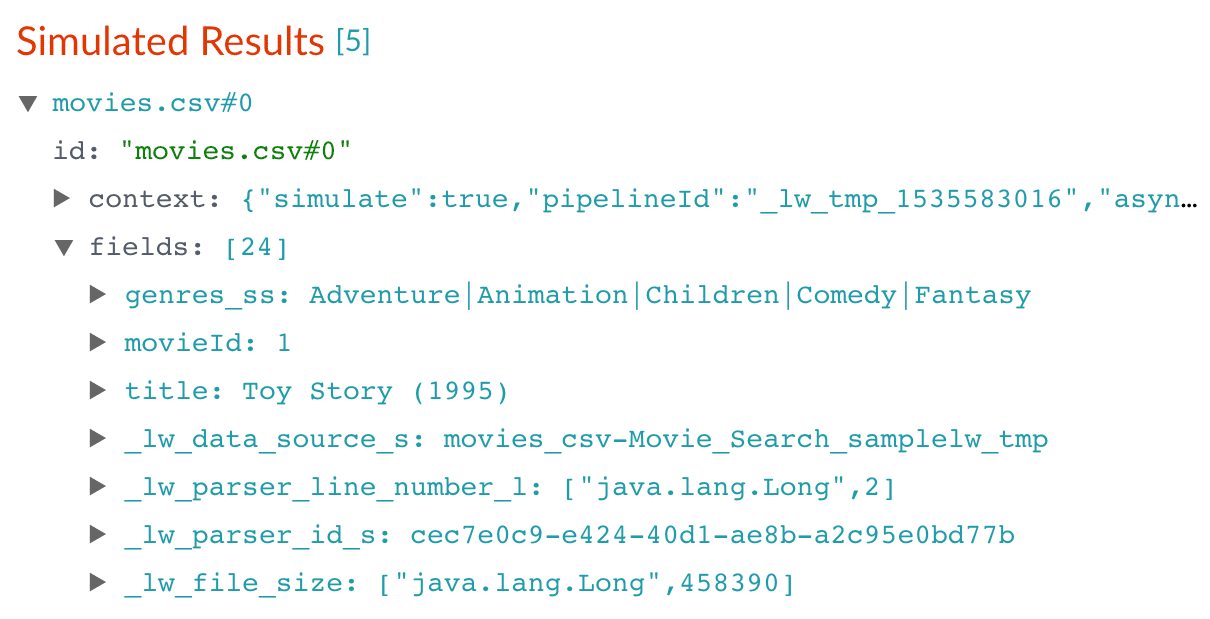
Applying the new configuration re-runs the simulation and updates the contents of the preview panel. Notice the change in the field name from
genrestogenres_ss:Before After 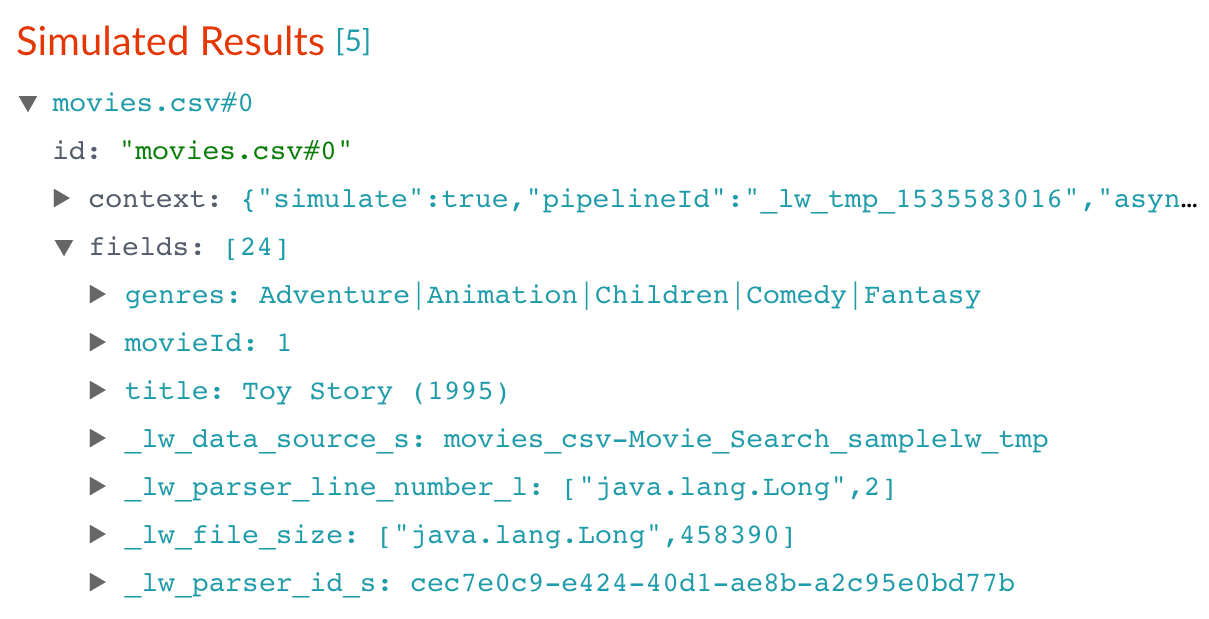
-
Click Add to add more field mapping rules as follows:
- The
movieIdfield is a unique document identifier. It should be copied into the document’sidfield. - The
titleshould be searchable as a text field, so you move it to the fieldtitle_txt.
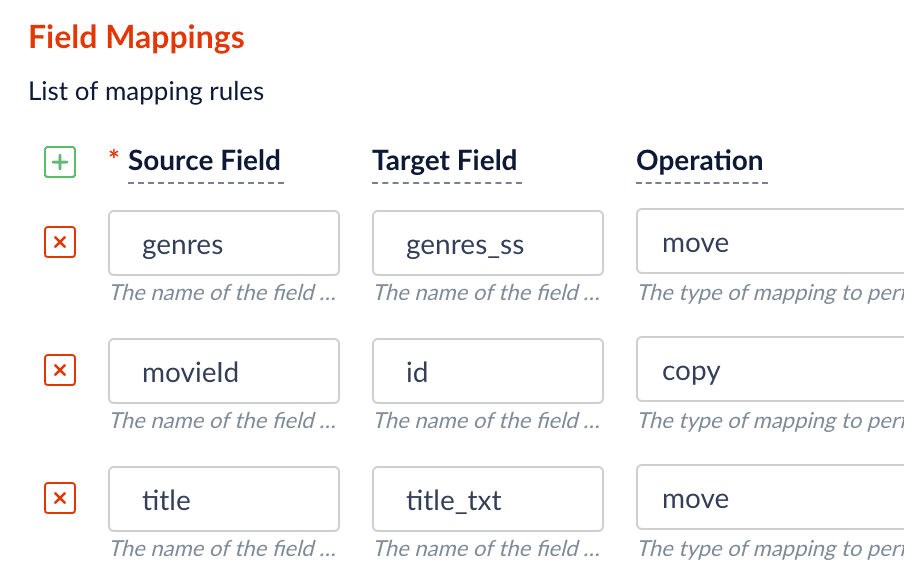
- The
-
Click Apply.
After you have specified these explicit field mapping rules, you can browse the resulting documents
in the preview panel to check your work.
Before After 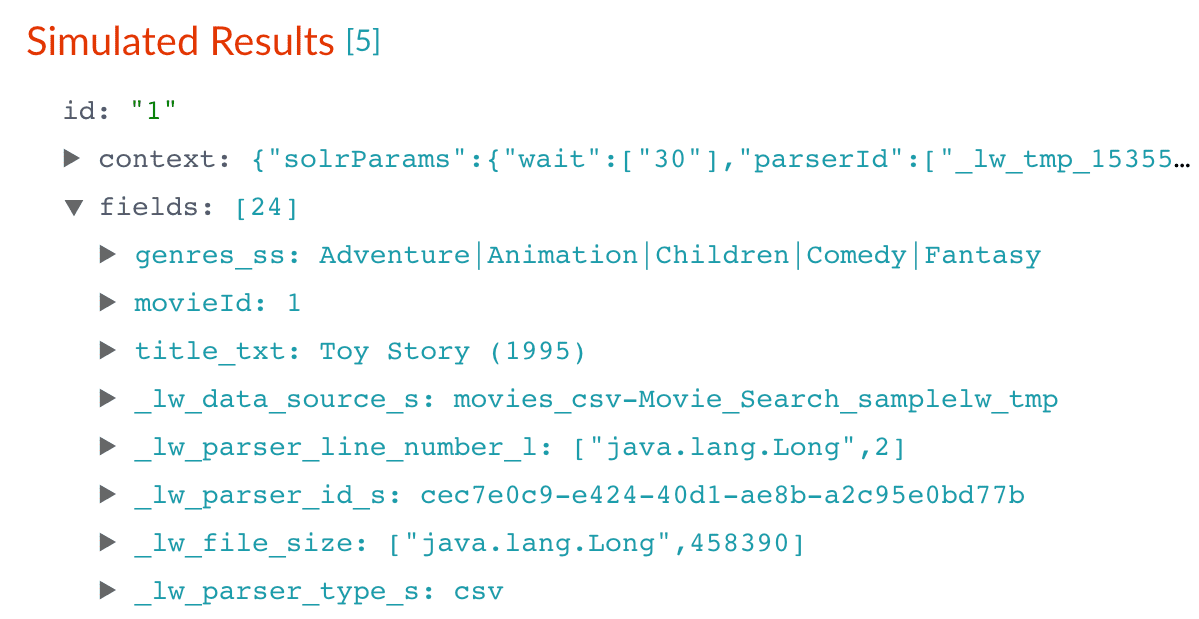
- In the upper right, click Save. This saves your modified index pipeline. Get in the habit of saving your work as you work.
Split a multi-value field
Thegenres_ss field has been parsed as a single-value field, but you can see that it is really a pipe-delimited array of values. To split this field into its constituent values, you will add a Regex Field Extraction stage to your index pipeline. This stage uses regular expressions to extract data from specific fields. It can append or overwrite existing fields with the extracted data, or use the data to populate new fields.- Click Add a stage.
-
Scroll down and select Regex Field Extraction (under Field Transformation).
The Regex Field Extraction stage configuration panel appears.
- Under Regex Rules, click Add .
-
On the new line, hover over the
[...]under Source Fields, and then click Edit . The Source Fields window opens. - Click Add .
-
Enter
genres_ss, and then click Apply. -
Under Target Field, enter
genres_ss. - In the Write Mode field, select overwrite.
-
In the Regex Pattern field, enter this expression:
The first bracketed term in the regex matches any character that is not a vertical bar or a space. The second term matches any character that is not a vertical bar, zero or more times. The last term matches any character that is not a vertical bar, zero or more times.
-
In the Return If No Match field, select
input_string. - Click Apply.
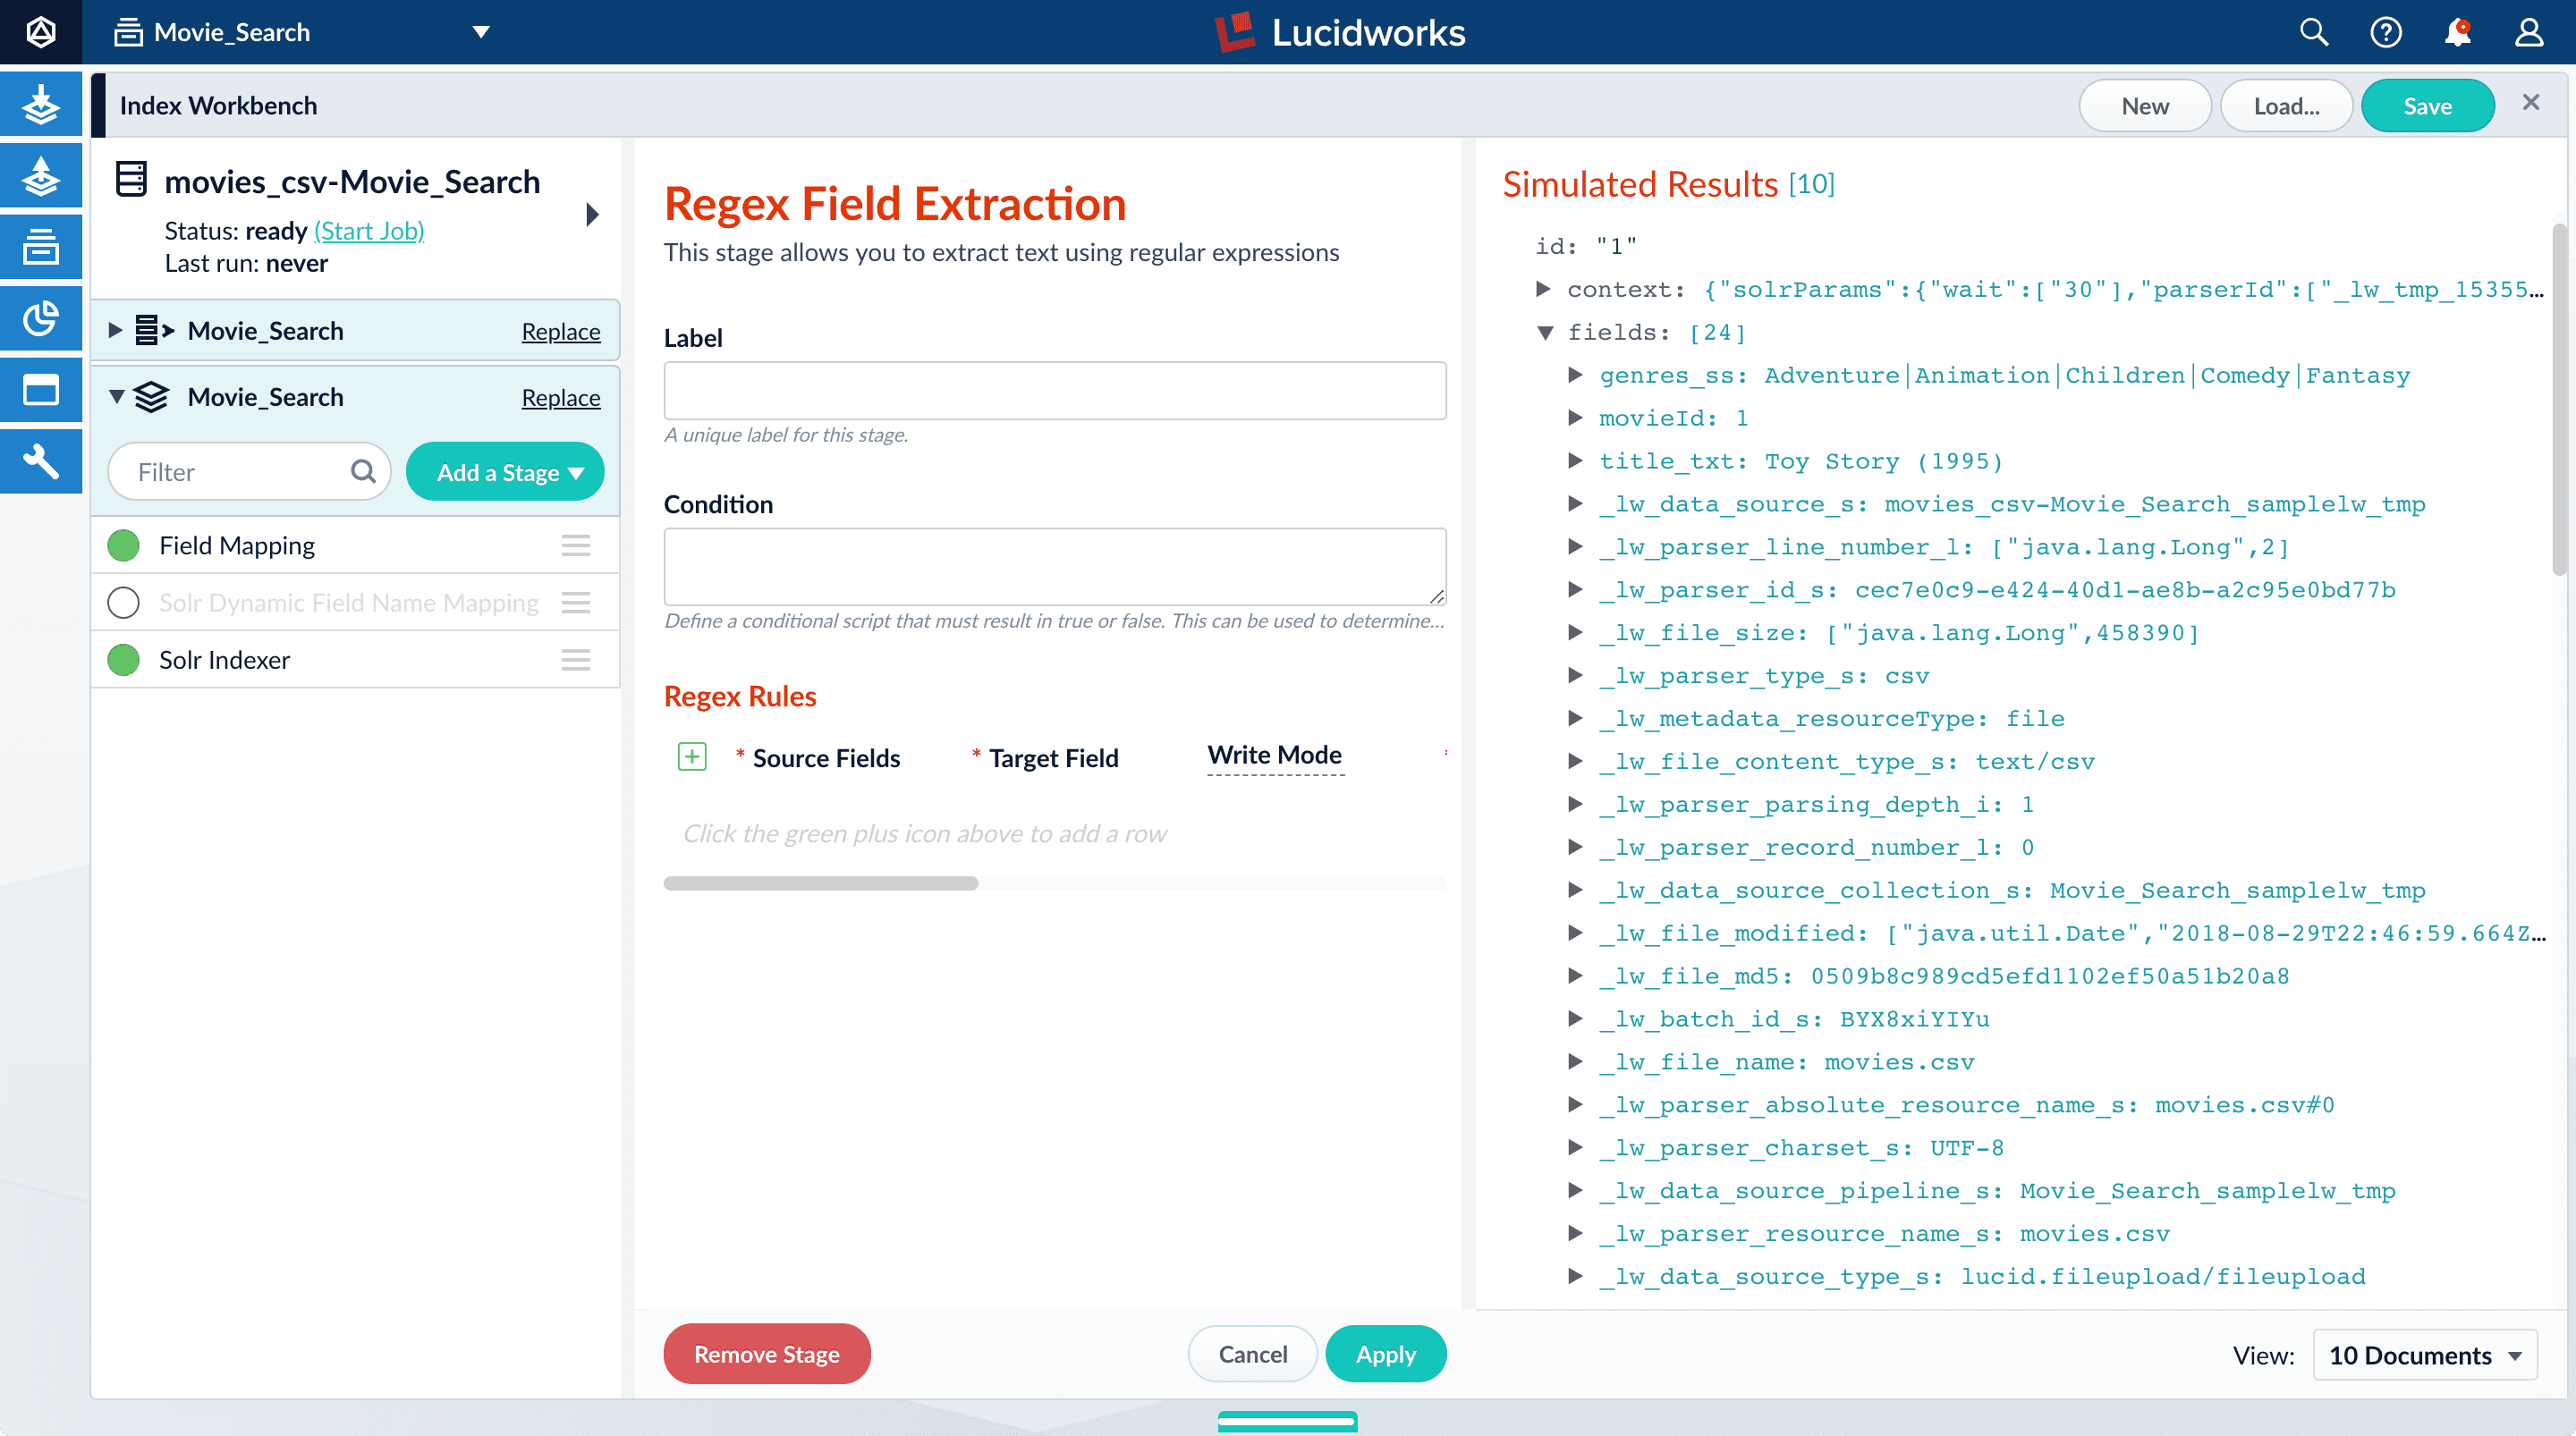
genres_ss field:| Before | After |
|  |
genres_ss field, expand it and values under it by clicking the right triangle :Create a new field from part of an existing one
Notice that thetitle_txt field also contains the year in which the movie was released. Instead of including the year in your full-text search field, it would be more useful as a separate field that you can use for faceting. This is another job for the Regex Field Extraction stage.- In the list of index pipeline stages, click Regex Field Extraction.
- In the Regex Field Extraction configuration panel, under Regex Rules, click Add .
-
On the new line, hover over the
[...]under Source Fields, and then click Edit . The Source Fields window appears. - Click Add .
-
Enter
title_txt, and then click Apply. -
Under Target Field, enter
year_i. The_isuffix indicates an integer point field (specifically, that the field is a dynamic field with apintfield type). Fusion will create this new field whenever the regular expression matches the contents of the source field. -
In the Regex Pattern field, enter this expression to match the digits inside the parentheses at the end of the
title_txtvalue: -
In the Regex Capture Group field, enter
1. This lets the index pipeline stage transfer the year into theyear_ifield. -
Click Apply.
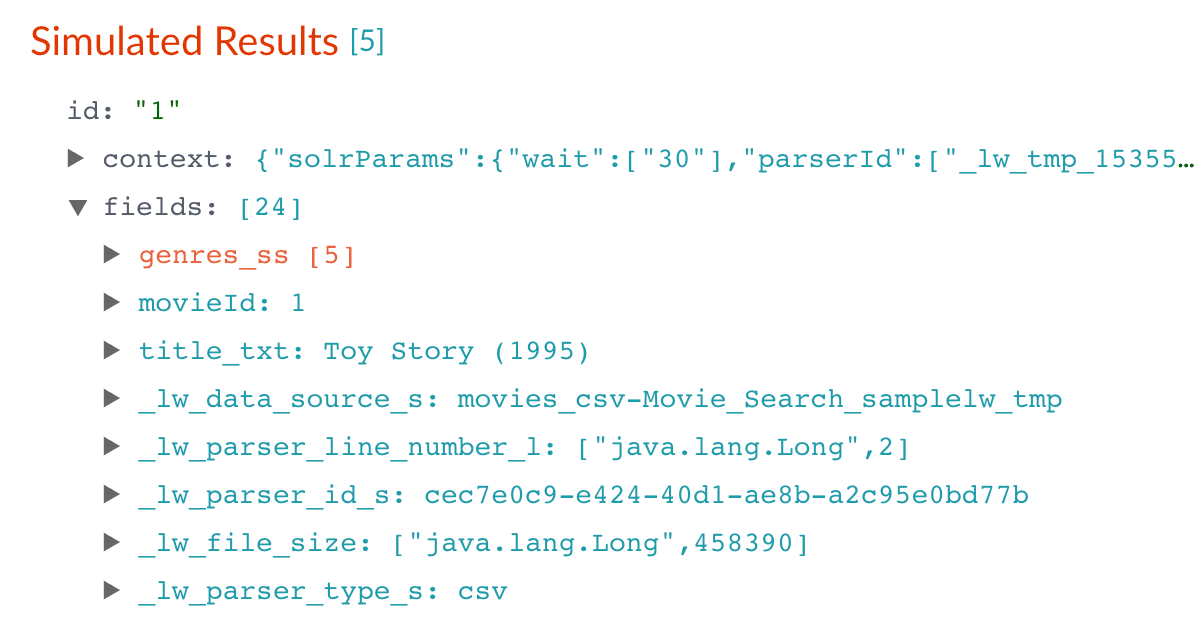
Now the preview includes the new
year_ifield:Before After 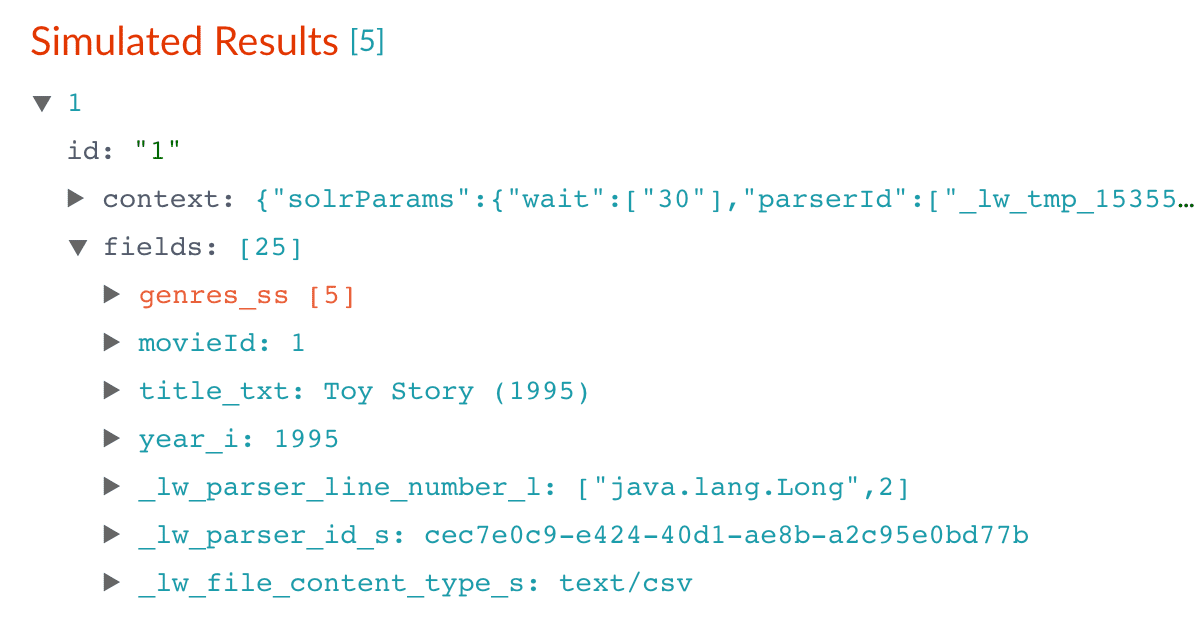
- In the upper right, click Save. This saves your modified index pipeline.
Trim a field’s value
Thetitle_txt field still includes the year of the film’s release, which you have extracted into its own field, year_i. Let us trim that information from the title_txt values so that only the title text remains.- In the list of index pipeline stages, click Regex Field Extraction.
- In the Regex Field Extraction configuration panel, under Regex Rules, click Add .
- On the new line, hover over Source Fields, and then click Edit . The Source Fields window appears.
- Click Add .
-
Enter
title_txt, and then click Apply. -
Under Target Field, enter
title_txt. -
In the Write Mode field, select
overwrite. -
In the Regex Pattern field, enter this expression to match the digits inside the parentheses at the end of the
title_txtvalue: -
In the Regex Capture Group field, enter
1. - Click Apply.
title_txt field with only the title string:| Before | After |
 |  |
- In the upper right, click Save. This saves your modified index pipeline.
Run the datasource job
Now you have a correctly-configured index pipeline appropriate to your data. You are ready to index the data.-
In the upper left, click Start job.
movies.csvfile, using the configuration you just saved. Your datasource job is finished when the Index Workbench displaysStatus: successin the upper left. If the status does not change, go back to the launcher and relaunch your app.
Close panels you no longer need open
Fusion opens panels beside already open panels. Close all of the panels that are open by clicking Close .Reindexing
Documents are associated with a collection through the name of the datasource. The datasource name is stored as a value in the_lw_data_source_s field. For various reasons, you may wish to remove all documents associated with a datasource from a collection before using CrawlDB to add relevant documents back to the collection. This process is known as reindexing.To accomplish this, navigate to Indexing > Datasources, select the datasource name, and then click Clear Datasource. This will remove all documents with the selected datasource name in the _lw_data_source_s field. After the documents are removed from the collection, you can repeat [the steps above”/> to reindex the data.What is next
Now you have 9,125 movie listings from the MovieLens database in Fusion’s index, customized to indicate the data type for each field. You also split a multi-valued field so that its values can be treated individually, created a new field to contain partial contents of a different field, and trimmed that content from the original field.Let us compare the initial indexing of your data with the indexing after field mappings and extractions:| Before | After |
|---|---|
|  |
genres_ss and year_i fields so that users can easily filter their search results.See also
Field Mapping Stage Properties
A Field Mapping stage specification consists of three things:- a unique ID
- a set of mapping rules that specify operations applied to named fields as a triple:
{ source, target, operation }. - a set of rules called “unmapped” rules which specify operations applied to fields whose name does not match any of the mapping rules, also a triple
{ source, target, operation }.
Mapping Rules and Unmapped Rules
Each rule has the following properties:| Property | Description |
|---|---|
| source | The name of the source field. This will be the name of the field in the Pipeline document that should be mapped to another field. Java regular expressions can be used in the source field by surrounding the regular expression with forward slashes (’/’). For example, /(.*)text(.*)/ is a valid expression that will find field names in the incoming document that contain the string ‘text’ between any number of preceding or succeeding characters. If a regular expression is not used, the value supplied for the source will be treated as a literal field name and will be matched ignoring the case (for example, “text” will match “tExt” or “Text”, etc.). |
| target | The name of the target field. If the value for the source was a regular expression, then this can also be a regular expression. It can also contain substitutions using references to capture groups (using Java’s Matcher.replaceAll). Otherwise, the source field name will be simply substituted by the value of target according to the operation rules described below. |
| operation | What to do with the field during mapping. Several options are available: ● copy. Content contained in fields matching source will be copied to target.● move. Content contained in fields matching source will be moved to target (it may also help to think of this as the field name being replaced by the value of target).● delete. Content contained in fields matching source will be dropped from the document and not indexed. In this case, the target can be null or not defined at all.● add. The literal value of target will be added to the source if source is a regular expression. If source is not a regular expression, target will be added as a new field.● set. The literal value of target will be set as the new value of source if source is a regular expression. If source is not a regular expression, target will be set as a new field.● keep. Content contained in fields matching source will be retained and unchanged, and the fields will be added to a list of known fields and they will not be affected by however the renameUnknown rule has been set. |
- Field Retention -
keepordelete - Field Value Updates -
addorset - Field Translations -
copyormove
keep and delete rules are always applied before add, set, copy, or move rules. Likewise, add and set rules are always applied before copy or move rules.
In some cases, you may wish to delete fields after they are processed by other operations. To accomplish this, you can add another Field Mapping stage which deletes the fields.
Field Mapping Behavior
The field mapping rules are applied in a specific order.- A copy of the Pipeline document is prepared. All further operations are applied to this copy.
- The rules are traversed only once, in the order of their declaration in the
mappingproperty. This means it is possible to do multiple operations on a field. However, note that if fields are moved (renamed), further operations should reference the new field name. - Before each rule is evaluated, the current list of field names is prepared and sorted in alphabetic ascending order.
- The current rule is applied to field values for each matching name from the list of names prepared in step 3. New field names resulting from the current rule do not affect the snapshot list of field names; in order for a rule to be applied to a new field name, it will be included in a later round of the evaluation cycle.
- The process is repeated for each rule, and a list of matching source fields is noted.
- If the document contains any fields that were not affected by any mapping rule, the
renameUnknownoption is applied if it has been set to true. - Finally, the resulting transformed document is returned to the next stage of the index pipeline.
Examples
Map several fields:urlX field based on the value of the employee_id field: