The Blob Store REST API allows storing binary objects in Solr. The primary use case for this is to store entity extraction models, lookup lists or exclusion lists for use in index pipelines. This may include the entity extraction models and lookup lists included with Fusion in theDocumentation Index
Fetch the complete documentation index at: https://doc.lucidworks.com/llms.txt
Use this file to discover all available pages before exploring further.
https://FUSION_HOST:FUSION_PORT/data/nlp directory, or files that you have created on your own.
You can also work with blobs in the Fusion UI using the blob manager.
Blobs uploaded to Solr with this REST API are stored in the system_blobs collection.
Blob Types
AresourceType query parameter can be used to specify the a blob type. For example, specify plugin:connector when uploading a connector, like this:
resourceType is below:
| Type | Description |
|---|---|
banana | A Banana dashboard |
catalog | An analytics catalog |
driver:jdbc | A Upload a JDBC Driver to Fusion Server |
file:js-index | A JavaScript file for use with a Managed Javascript index stage. |
file:js-query | A JavaScript file for use with a Managed Javascript query stage. |
file | Any uploaded file, such as from the Quickstart or the Index Workbench. |
model:ml-model | A machine learning model (Fusion AI only) |
model:open-nlp | An OpenNLP model (Fusion AI only) |
other | A blob of unknown type If no resourceType is specified on upload, “other” is assigned by default. |
plugin:connector | A Fusion 4.x connector |
Upload a JDBC Driver to Fusion Server
Upload a JDBC Driver to Fusion Server
The JDBC connector fetches documents from a relational database via SQL queries. Under the hood, this connector implements the Solr DataImportHandler (DIH) plugin.Fusion stores JDBC drivers in the blob store. You can upload a driver using the Fusion UI or the Blob Store API.
- The JDBC V1 connector is supported in Fusion releases 5.3 and earlier.
- The JDBC V2 connector is supported in Fusion releases 5.4 and later.
How to upload a JDBC driver using the Fusion UI
- In the Fusion UI, navigate to System > Blobs.
- Click Add.
-
Select JDBC Driver.
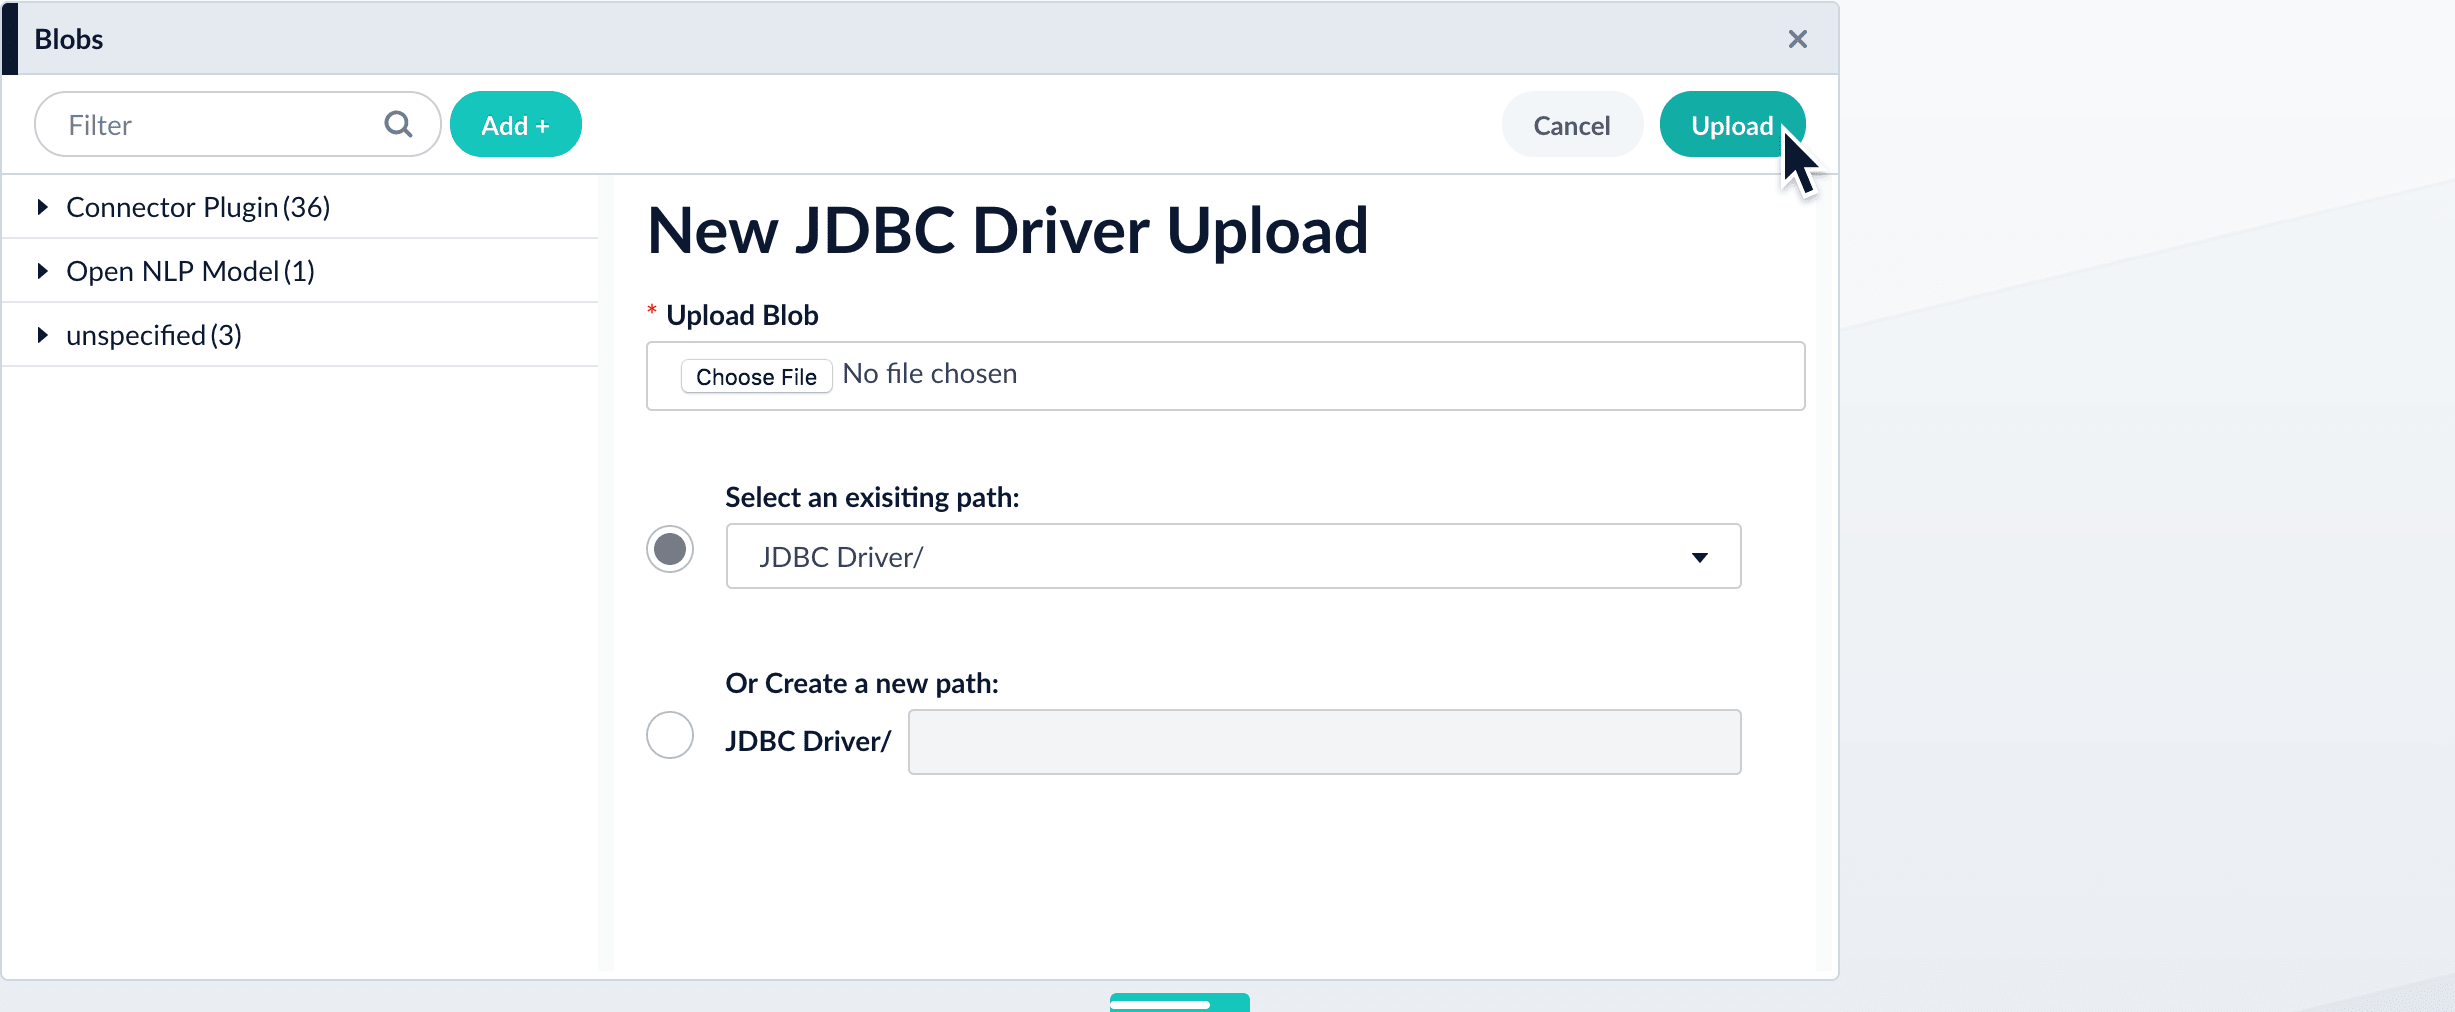
The “New ‘JDBC Driver’ Upload” panel appears.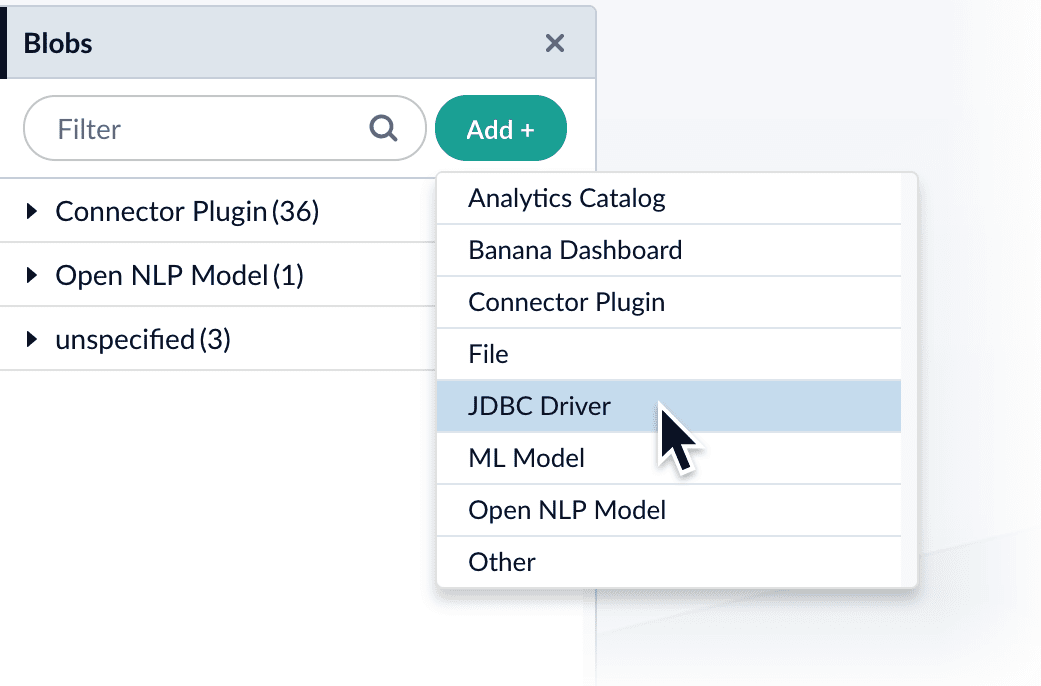
-
Click Choose File and select the .jar file from your file system.
-
Click Upload.
The new driver’s blob manifest appears.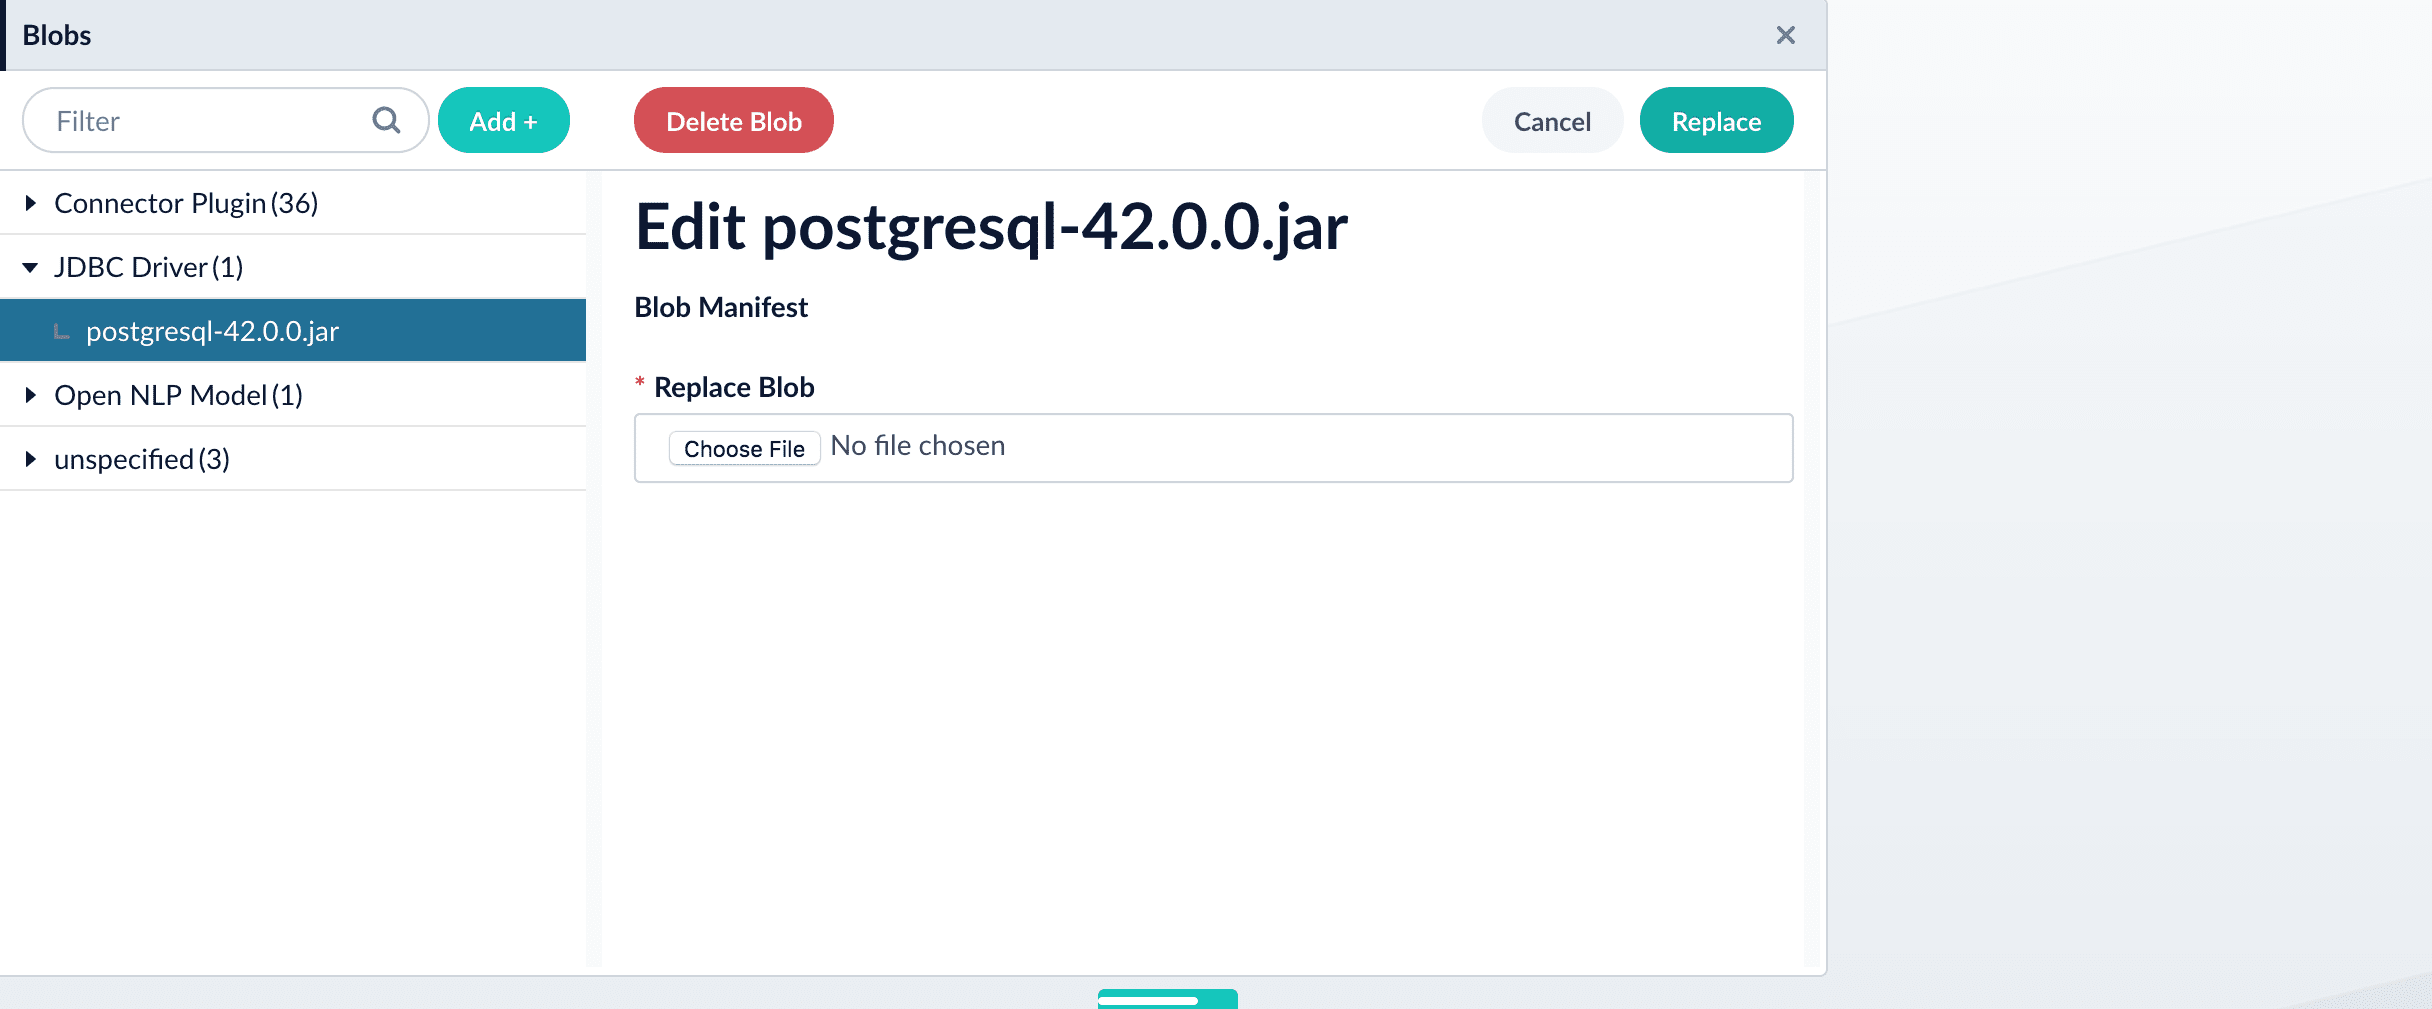
How to install a JDBC driver using the API
-
Upload the JAR file to Fusion’s blob store using the
/blobs/{id}endpoint. Specify an arbitrary blob ID, and aresourceTypevalue ofplugin:connector, as in this example:Success response:Fusion automatically publishes the event to the cluster, and the listeners perform the driver installation process on each node. -
To verify the uploaded driver, run:
Where the
BLOB_IDis the name specified during upload, such as “mydriver” above. A success response looks like this:
How to manually upload a JDBC V1 driver for Fusion 4.x.x releases
For Fusion 4.x.x release levels, it is recommended that you upload the JDBC driver jar files manually. This prevents some issues with dynamically loading the driver causing errors, particularly with Oracle and Microsoft SQL drivers.The following steps specify how to upload a JDBC driver JAR file to Fusion manually. The example uses the Microsoft SQL Server JDBC drivermssql-jdbc-6.6.2-jre8.jar file.- Delete the JDBC V1 driver uploaded using the Blob store upload window.
-
Save the JDBC V1 driver JAR file to the
apps/libfolder. For example:apps\libs\mssql-jdbc-6.2.2.jre8.jar -
Open the
apps/jetty/connectors-classic/webapps/connectors-extra-classpath.txtfile and add the following line:apps/libs/mssql-jdbc-6.2.2.jre8.jar - Restart connectors-classic.
- Specify the JDBC driver class name in the Manually uploaded JDBC Driver Name field.
- Enter com.microsoft.sqlserver.jdbc.SQLServerDriver in the JDBC Driver Name field.
Quickstart
Quickstart
The Quickstart is a wizard that lets you explore some of Fusion’s core capabilities: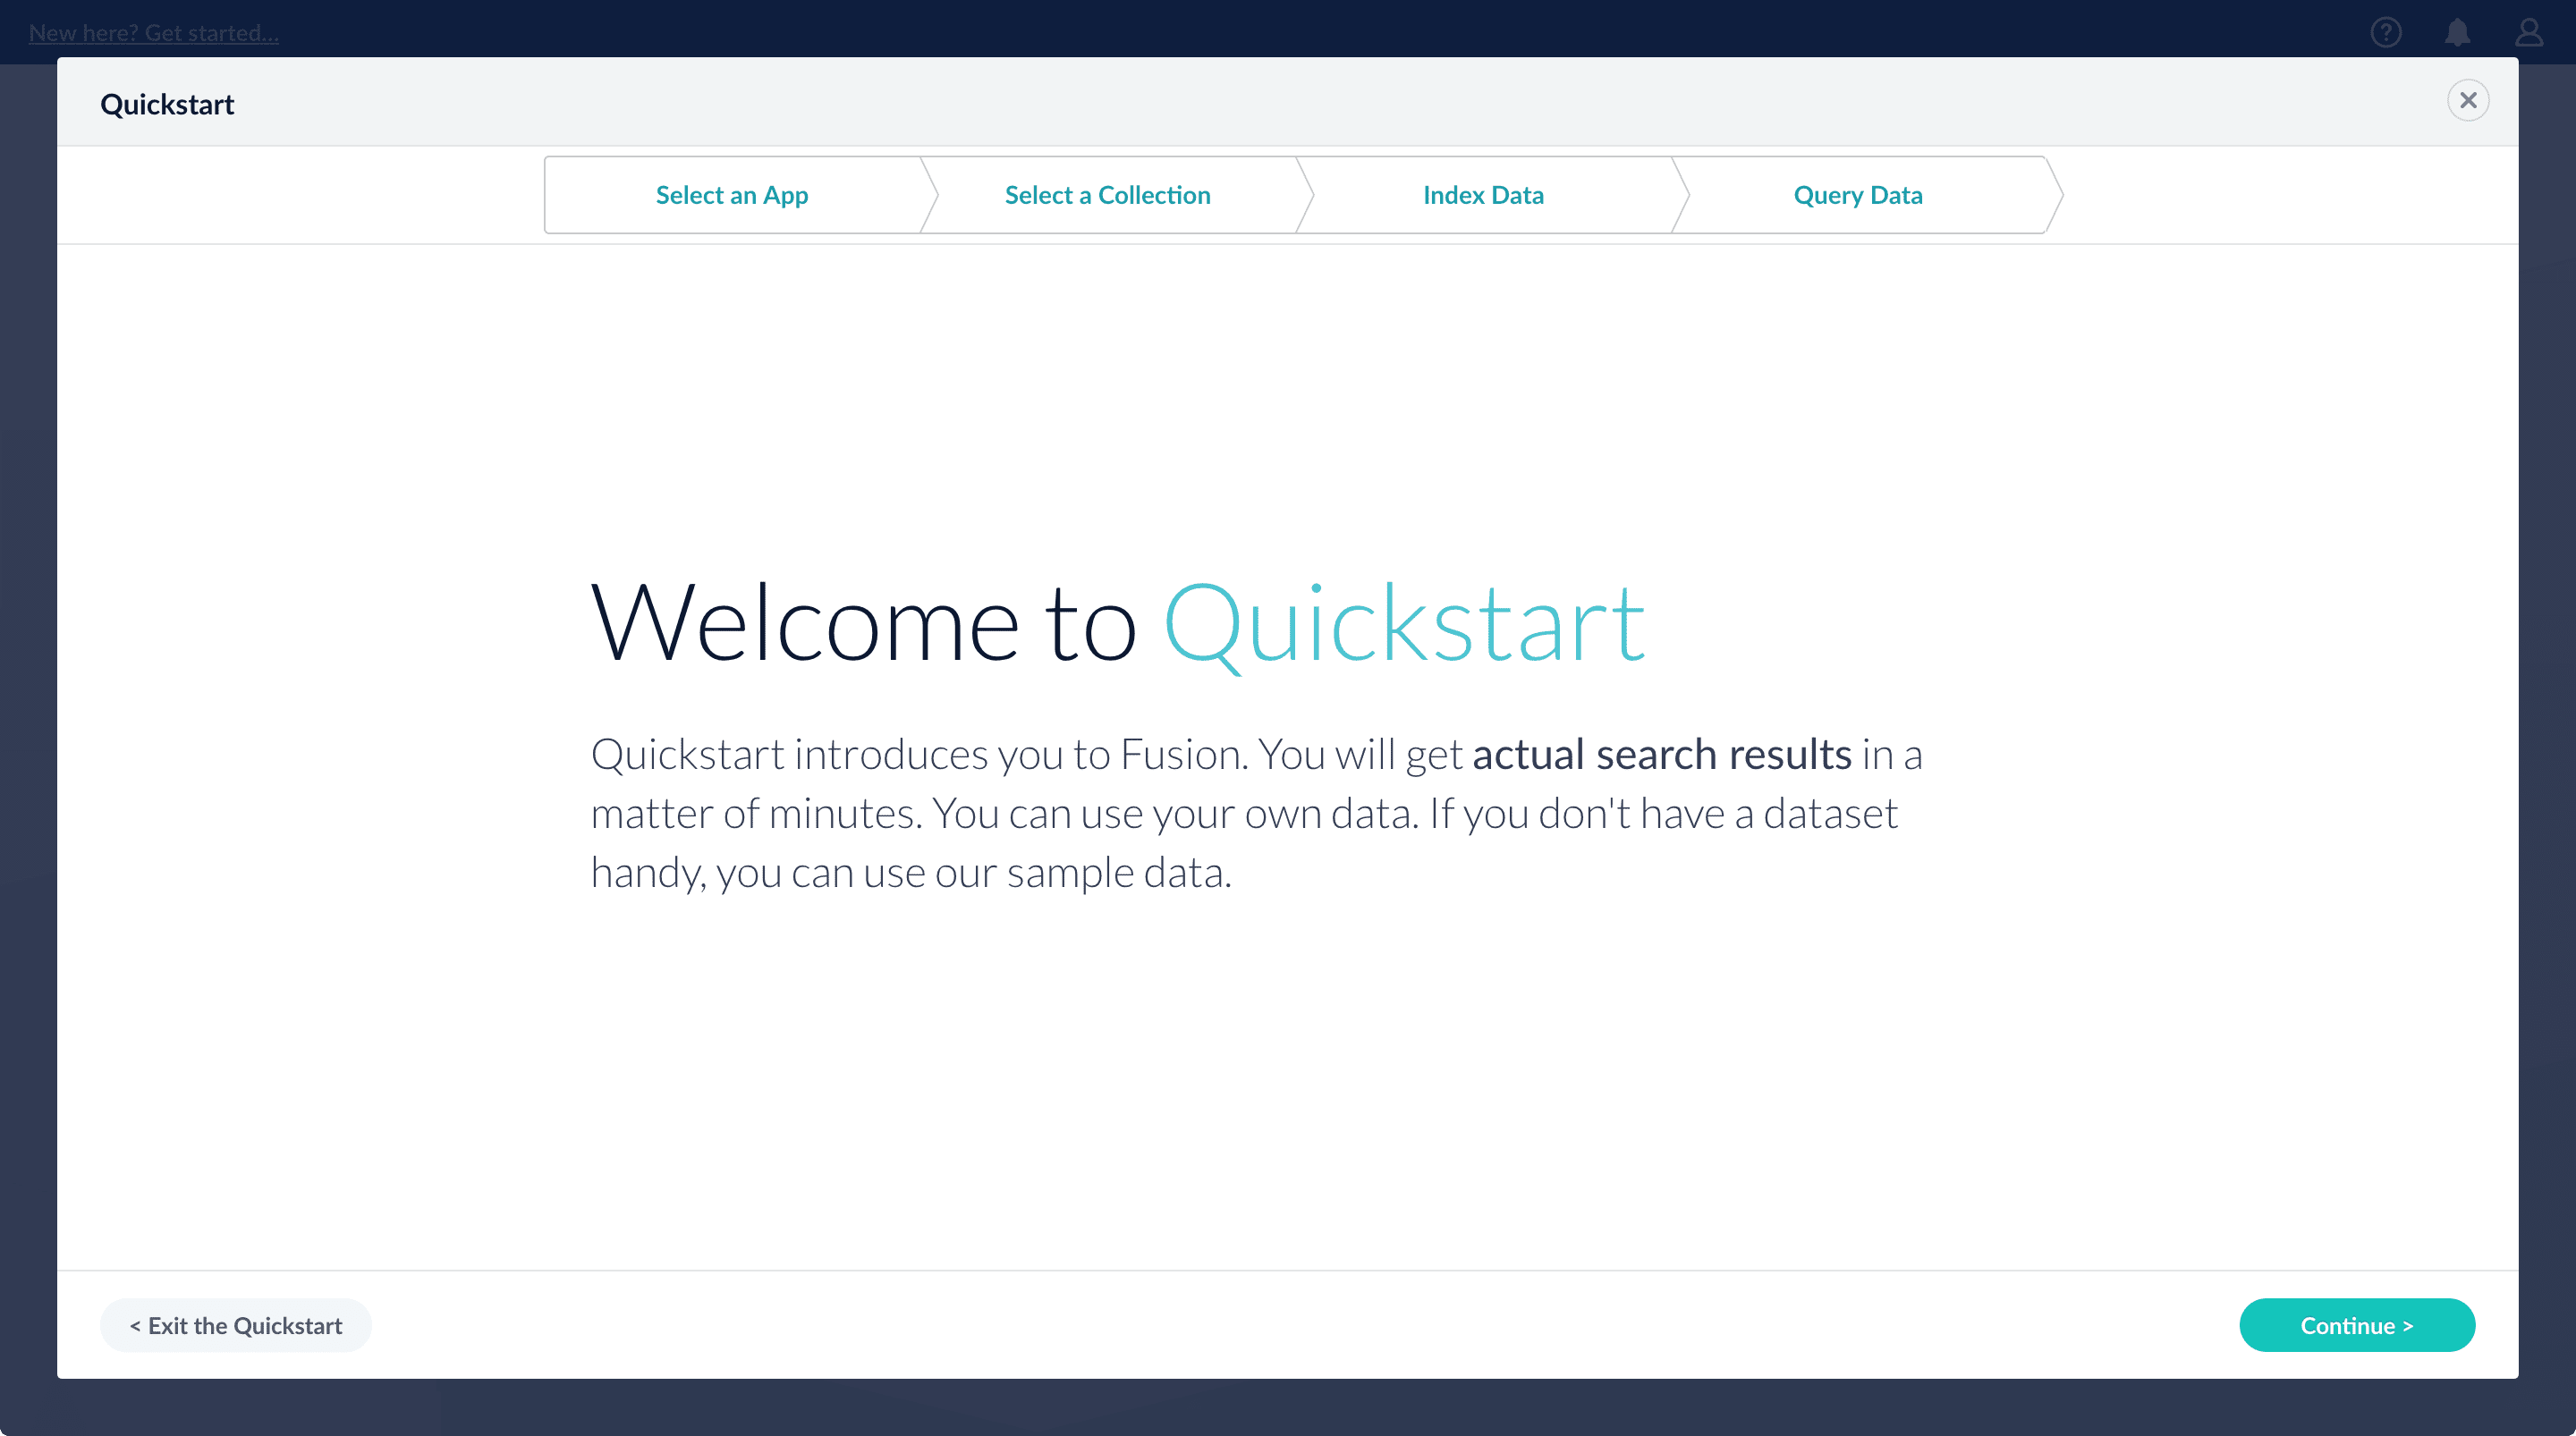
- Creating or selecting an app
- Selecting a collection (where data is stored)
- Indexing data
- Searching
Using The Quickstart Wizard
The course for Using The Quickstart Wizard focuses on using the wizard to practice using the key functions of Fusion.
Step through the Quickstart wizard
If it is not already open, open the Quickstart wizard. In the Fusion launcher, click New here? Get started….-
Click Continue.
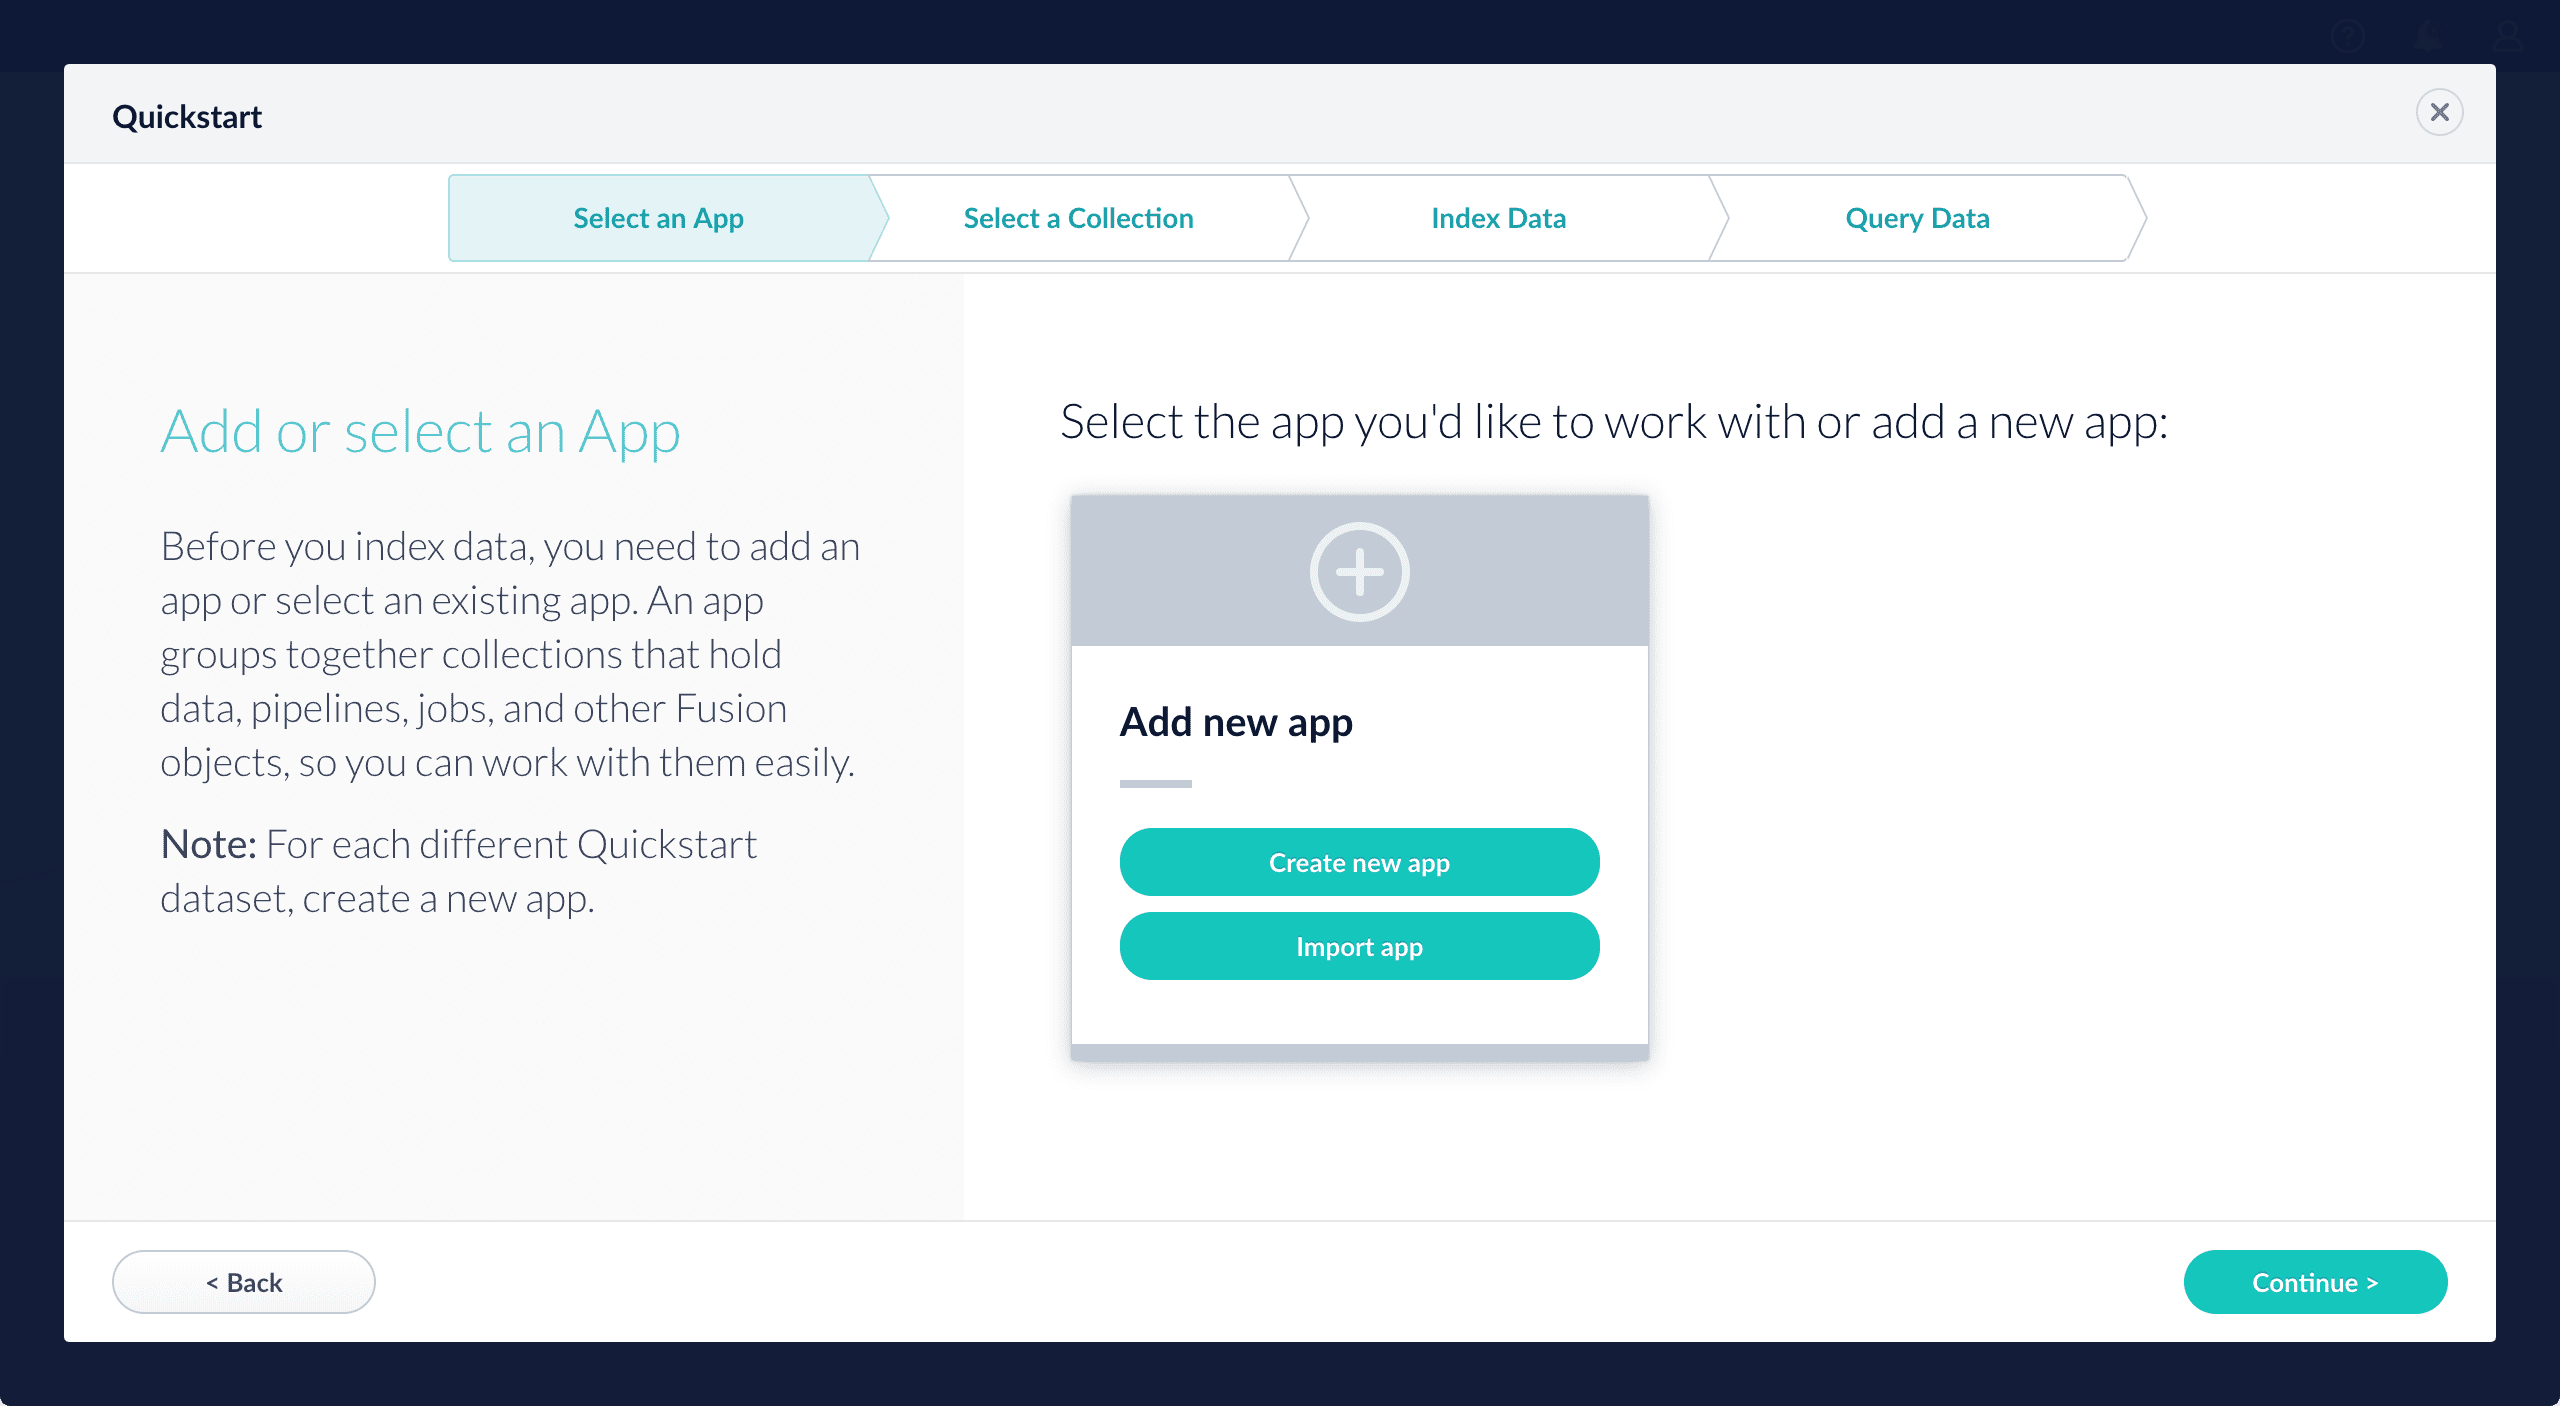
On the Select an App screen, you can select or create an app for your quickstart data.
-
After selecting an app, click Continue.
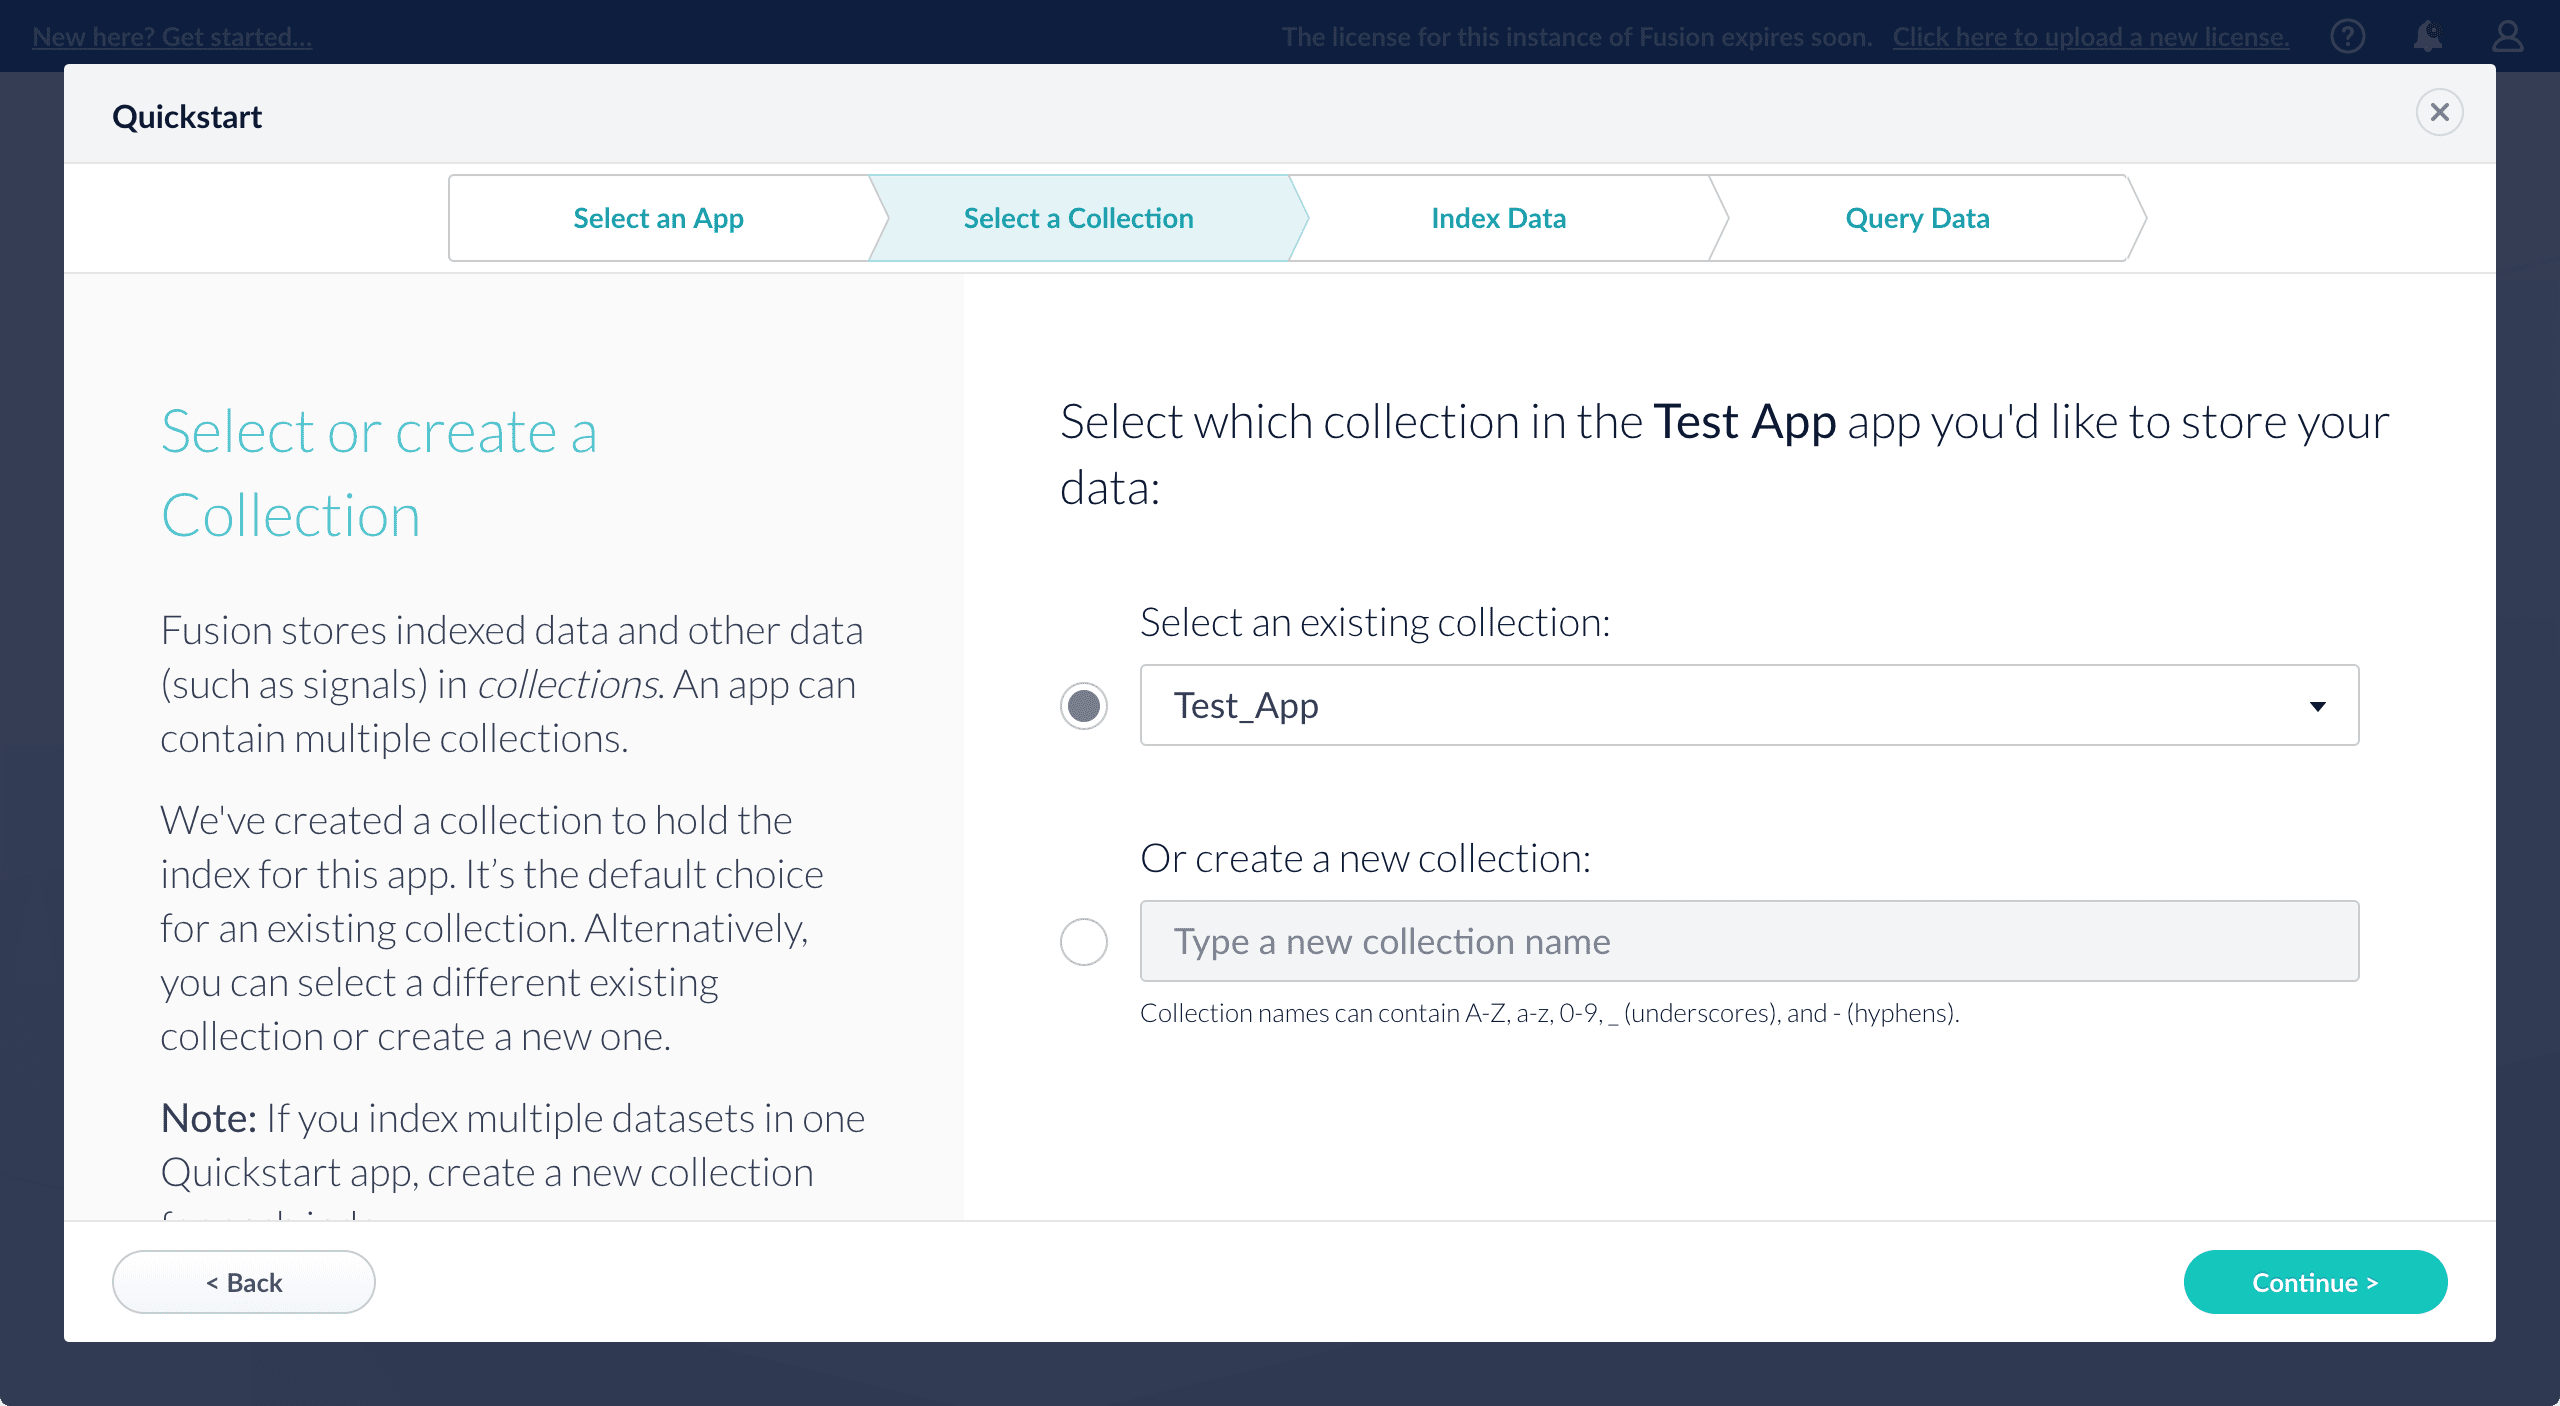
On the Select a Collection screen, you can select or create a collection for your quickstart data. A collection with the same name as your app is created automatically:
-
Click Continue.
On the Index Data screen, you can either select one of the built-in sample datasets or click Use my data to upload your own: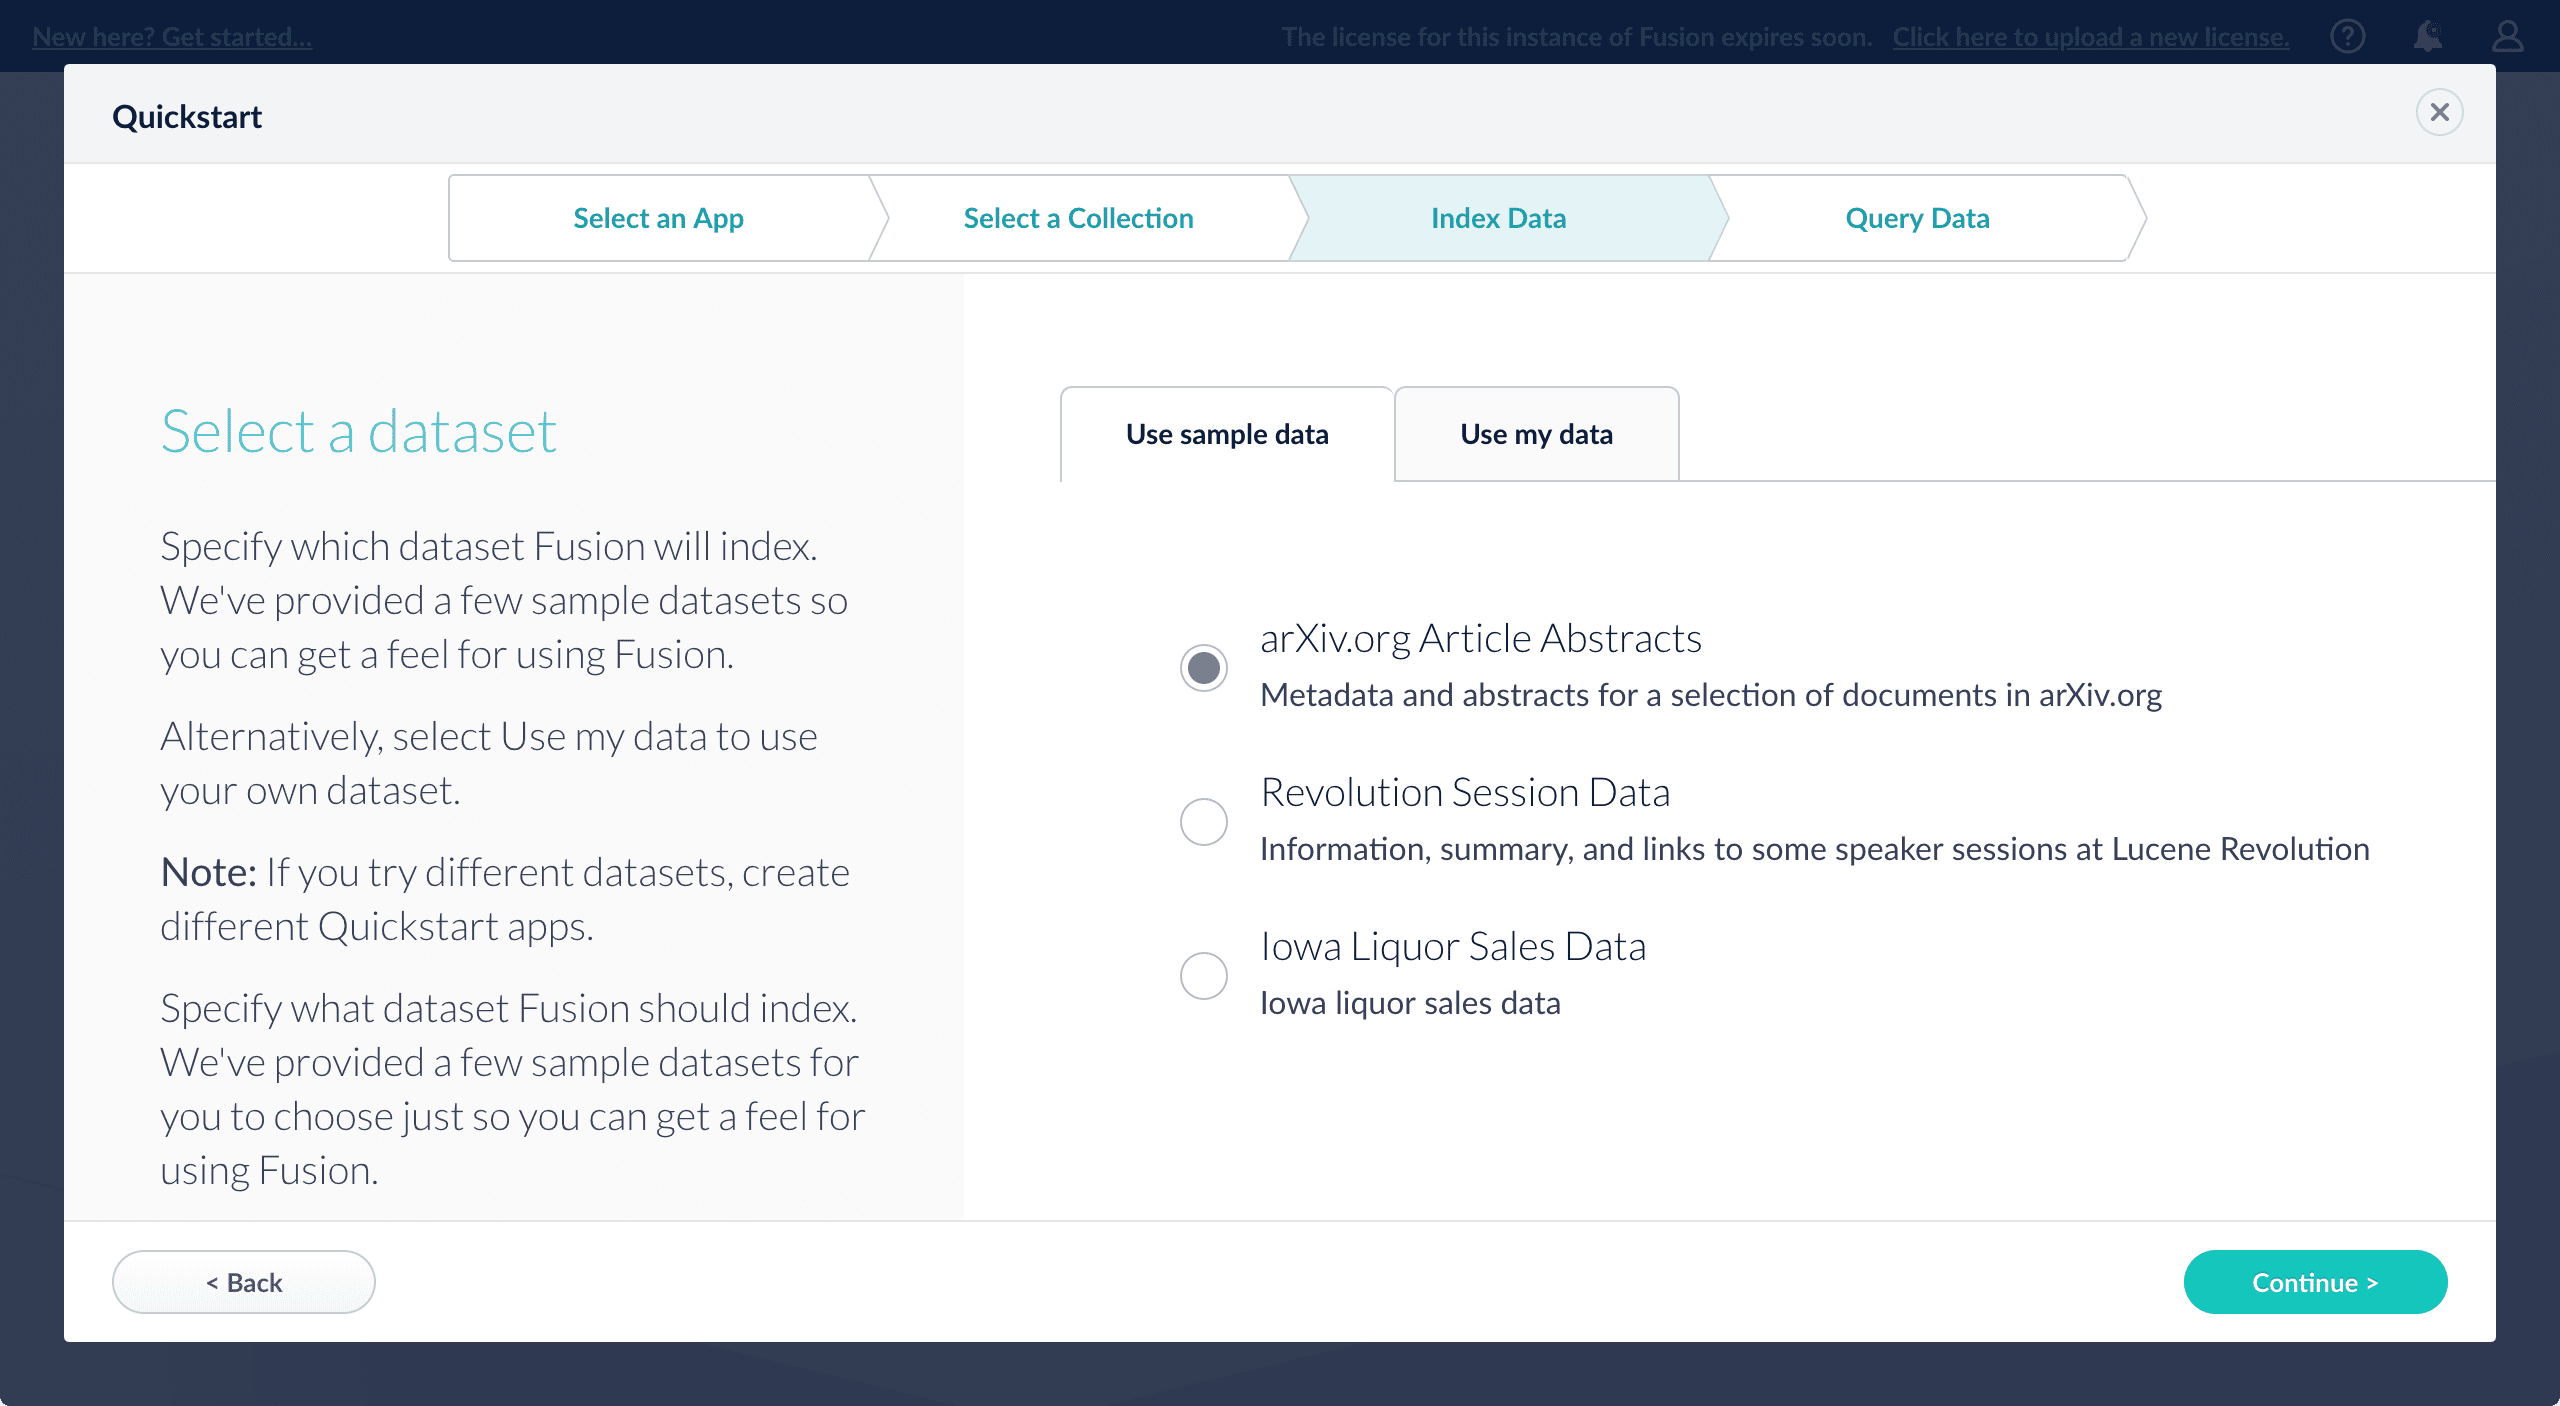
-
Click Continue.
On the Query Data screen, you can see all search results and enter your own search queries to test the indexed dataset. You can also select the display fields or view the parsed documents: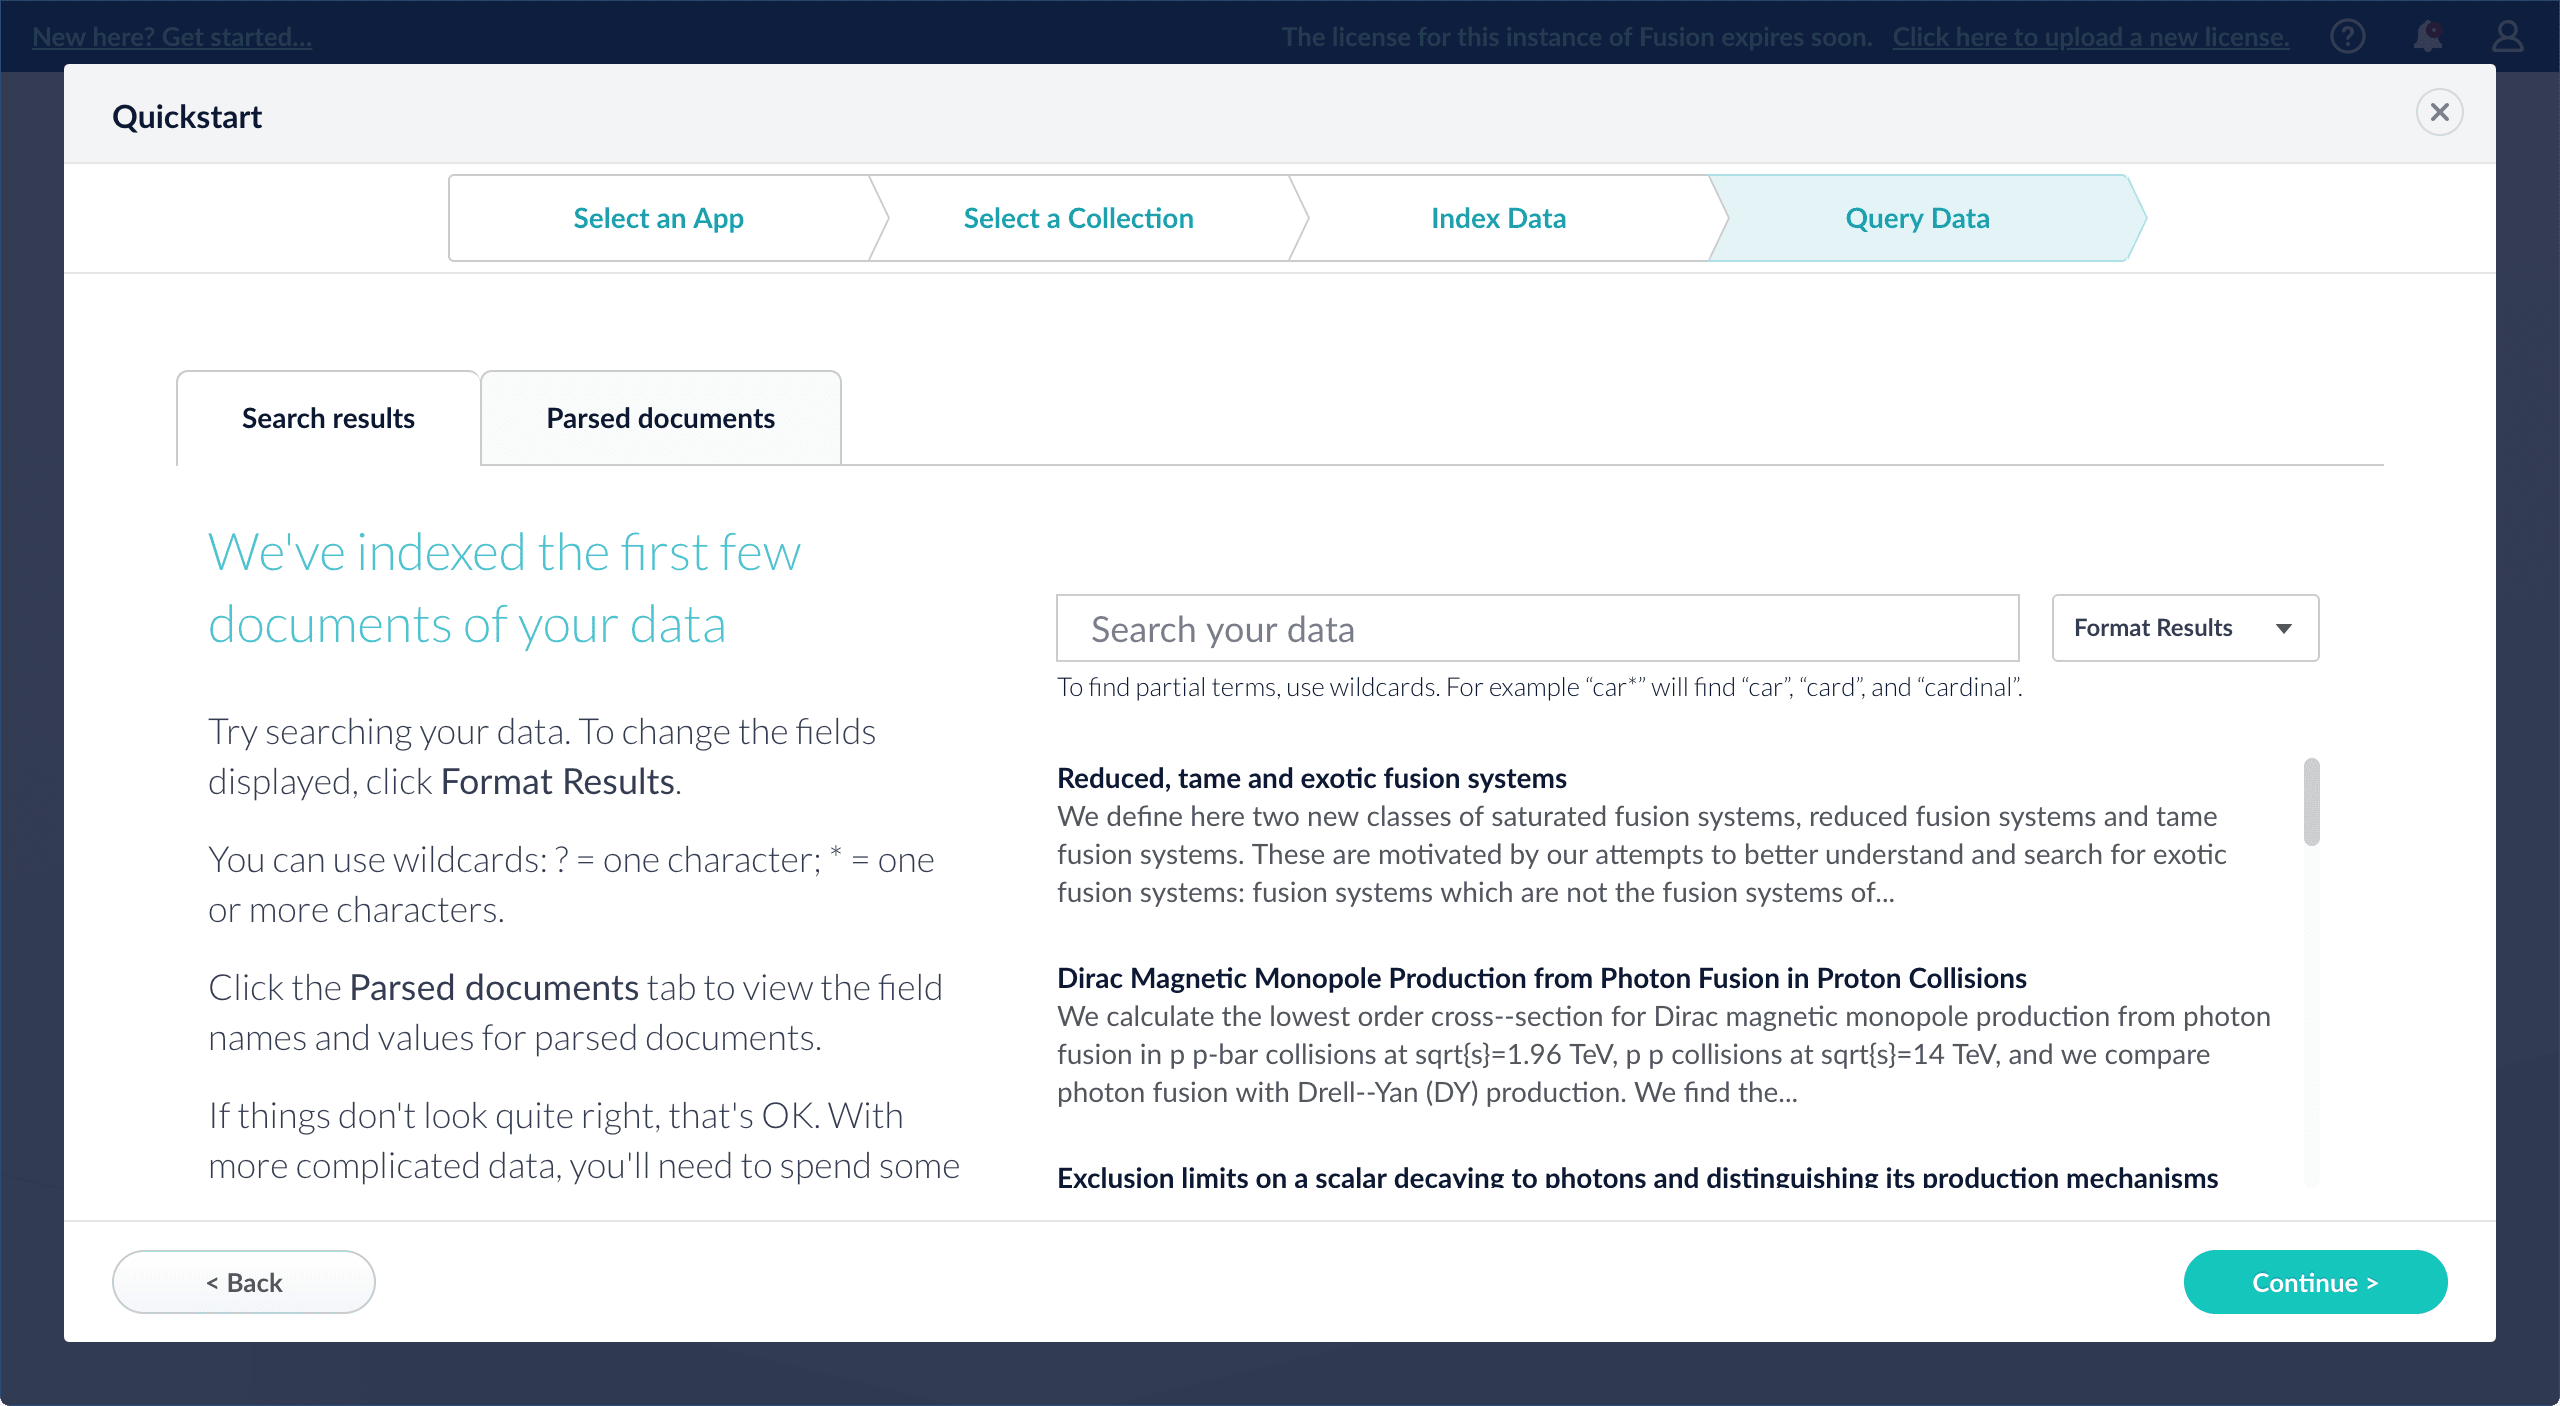
-
Click Continue.

- Open the Index Workbench to change the index pipeline.
- Open the Query Workbench to change the query pipeline. The workbenches are essentials tools in the Fusion workflow.
-
Open App Studio to create a user interface for searching this collection.
App Studio is only available in Fusion 4.1 and 4.2.
Install a Connector - Fusion 4.x
Install a Connector - Fusion 4.x
In Fusion 4.x, connectors are installed by uploading them to the blob store. You can use any of these methods to install a connector:After you install a connector, you can Configure A New Datasource.
- By installing connectors as “bootstrap plugins”, that is, by putting them in the
bootstrap-pluginsdirectory during initial installation or an upgrade - By using the Blob Store UI after installation or an upgrade
- By using the Blob Store API after installation or an upgrade.
During upgrades, the migrator handles some aspects of installing connectors. Depending on the target version and the presence or absence of an Internet connection, there might be manual steps. Installing connectors during upgrades is explained where needed in the upgrade procedures.
Install a connector as a bootstrap plugin
Fusion can install connectors as “bootstrap plugins.” All this means is that you put the connectorzip files in a specific directory named bootstrap-plugins, and Fusion installs the connectors the first time it starts during initial installation or an upgrade.- Download the connector zip file from Fusion 4.x Connector Downloads.
Do not expand the archive; Fusion consumes it as-is. Also, do not start Fusion until instructed to do so by the installation or upgrade instructions. - Under the version-numbered Fusion directory, place the connector in the directory
apps/connectors/bootstrap-plugins/(on Unix) or\apps\connectors\bootstrap-plugins\(on Windows). - Start Fusion when instructed to do so in the installation or upgrade procedure.
Install or update a connector using the Blob Store UI
-
Download the connector zip file from Fusion 4.x Connector Downloads.
Do not expand the archive; Fusion consumes it as-is.
- In the Fusion workspace, navigate to System > Blobs.
- Click Add.
-
Select Connector Plugin.

-
Click Choose File and select the downloaded zip file from your file system.
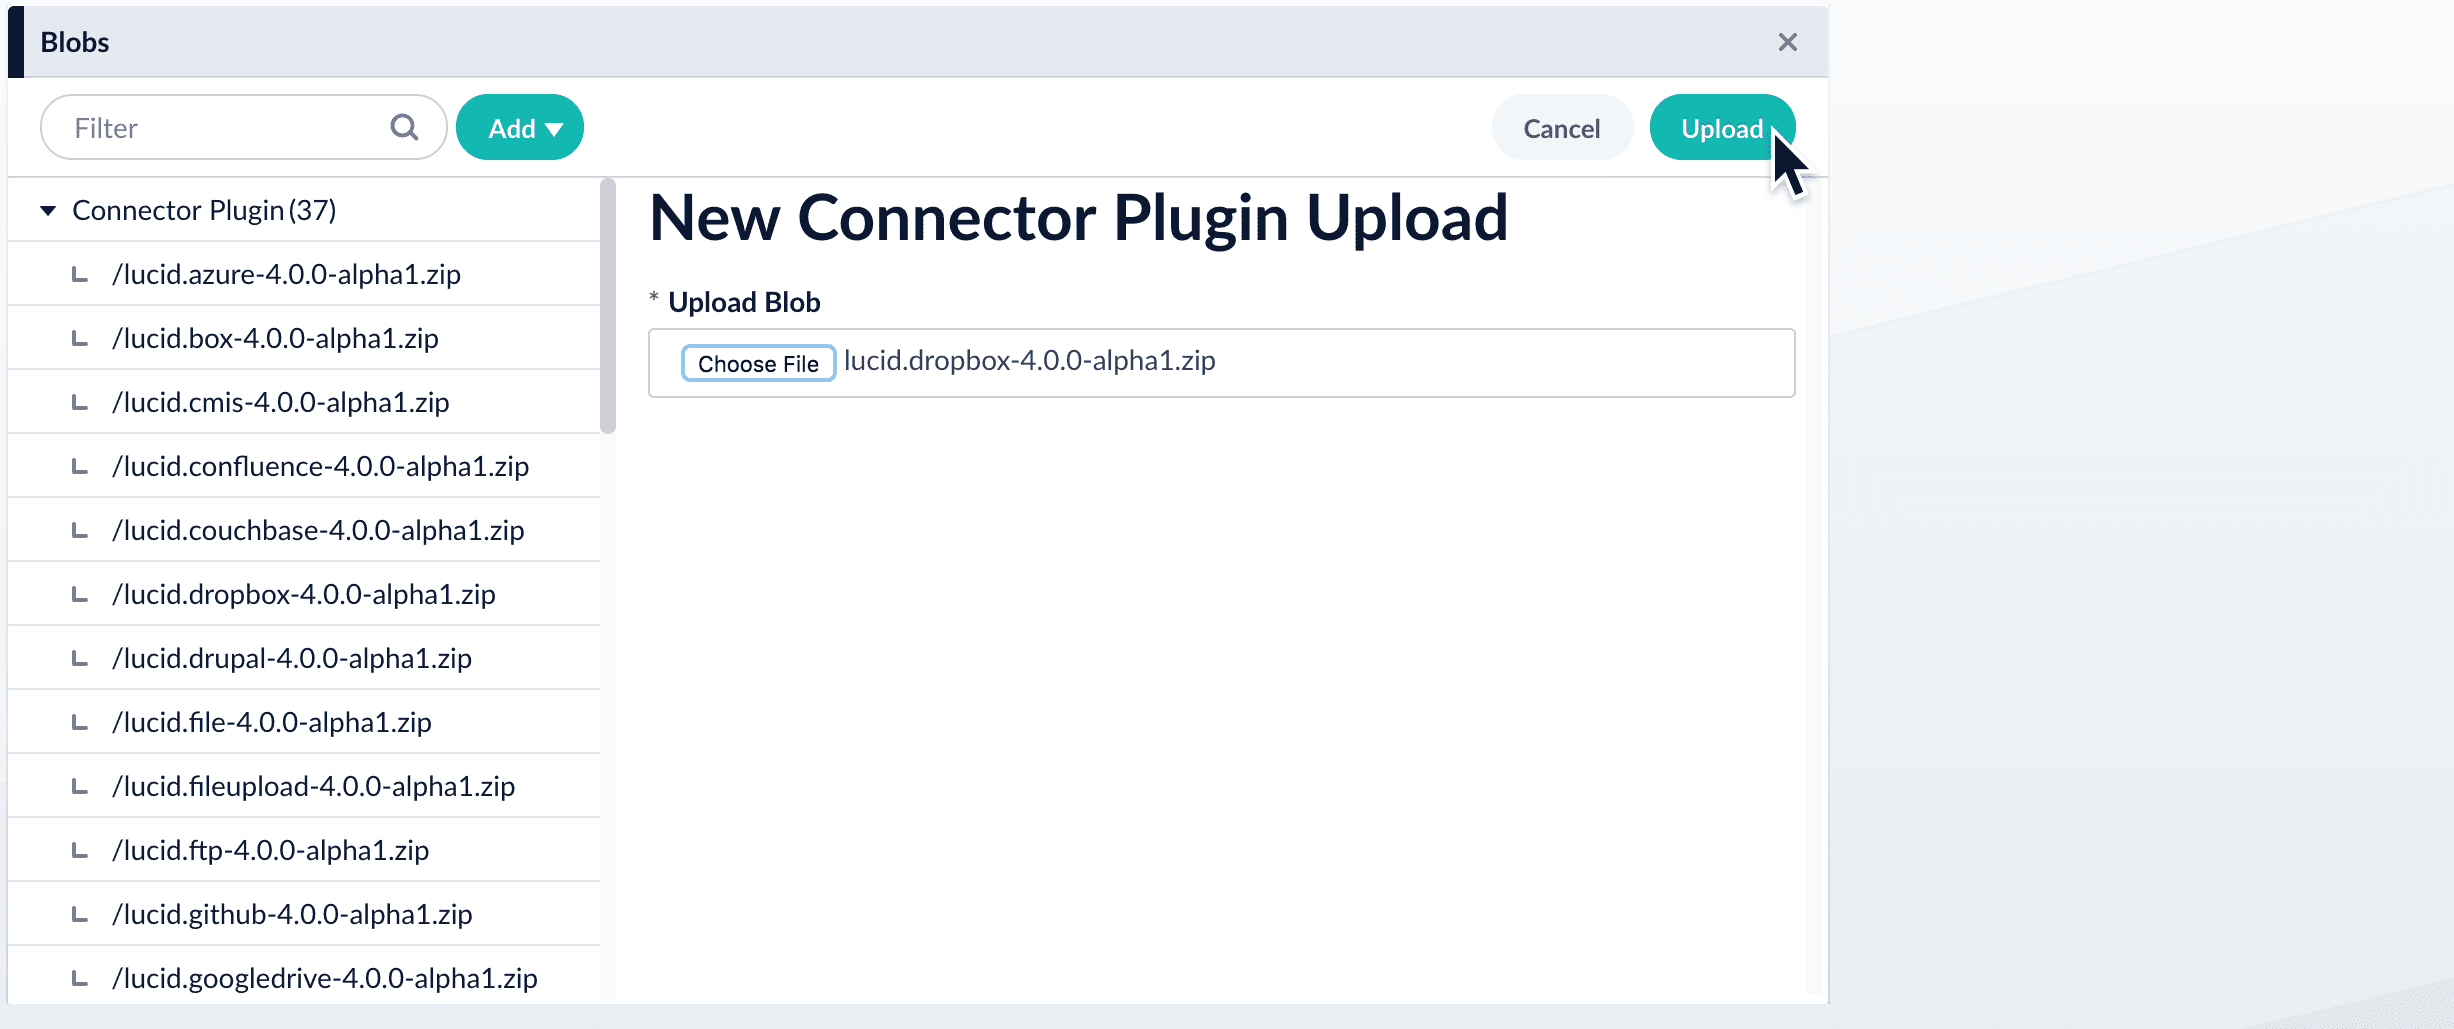
-
Click Upload.
The new connector’s blob manifest appears.
Install or update a connector using the Blob Store API
-
Download the connector zip file from Fusion 4.x Connector Downloads.
Do not expand the archive; Fusion consumes it as-is.
-
Upload the connector zip file to Fusion’s blob store.
Specify an arbitrary blob ID, and aresourceTypevalue ofplugin:connector, as in this example:Fusion automatically publishes the event to the cluster, and the listeners perform the connector installation process on each node. -
Look in
https://FUSION_HOST:FUSION_PORT/apps/connectors/plugins/to verify the new connector is installed.
Reinstall a connector
To reinstall a connector for any reason, first delete the connector then use the preceding steps to install it again. This may take a few minutes to complete depending on how quickly the pods are deleted and recreated.Examples
Upload a JavaScript file to the blob store
REQUESTVerify that the JavaScript blob was uploaded
REQUESTUpload an OpenNLP sentence model binary file to the blob store
REQUESTIn this example, we have changed the name of the blob during upload by giving it a different ID. The file is named ‘en-sent.bin’ but we have defined the ID of this to ‘sentenceModel.bin’. When we use this blob in an index pipeline, we would refer to it by the ID we have given it.