V1 (Classic) connectors
V1 connectors are developed with a general-purpose crawler framework called Anda, created by Lucidworks. Anda helps simplify and streamline crawler development, reducing the task of developing a new crawler to gain access to your data. In Fusion 5, V1 connectors are included in the Fusion image. You can install or update a connector at any time through the UI (under Datasources).Install or update a connector - Fusion 5
Install or update a connector - Fusion 5
When you create a new datasource that requires an uninstalled connector, Fusion releases 5.2 and later automatically download and install the connector using the Datasources dropdown. You can also update the connector using the Blob Store UI or via the Connector API.
Install a connector using the Datasources dropdown
- In your Fusion app, navigate to Indexing > Datasources.
- Click Add.
- In the list of connectors, scroll down to the connectors marked Not Installed and select the one you want to install.
Fusion automatically downloads it and moves it to the list of installed connectors.
Install or update a connector using the Blob Store UI
- Download the connector zip file from Download V2 connectors.
Do not expand the archive; Fusion consumes it as-is.
- In your Fusion app, navigate to System > Blobs.
- Click Add.
- Select Connector Plugin.

- Click Choose File and select the downloaded zip file from your file system.
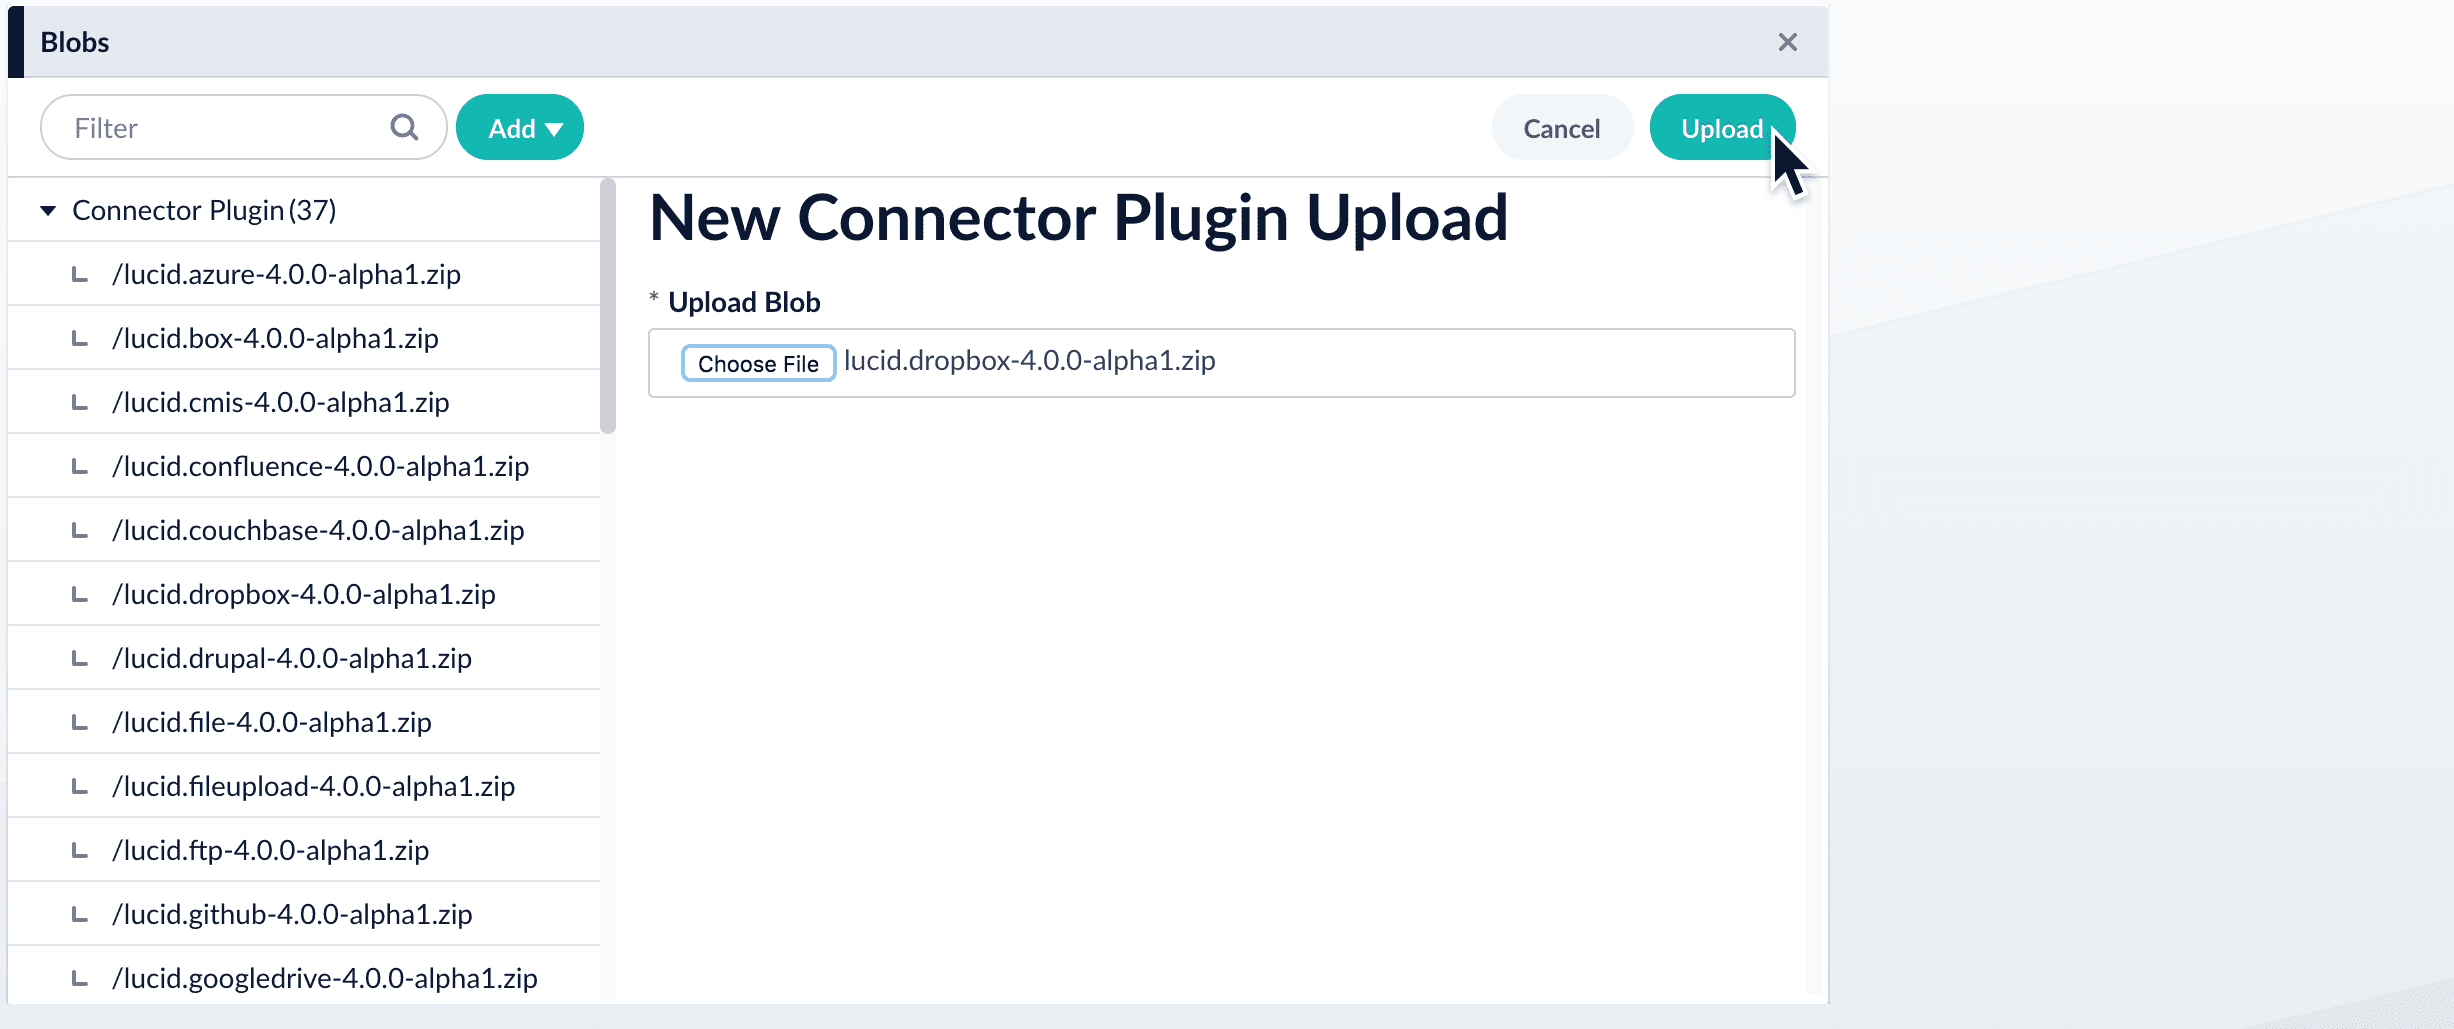
- Click Upload.
The new connector’s blob manifest appears.

Install or update a connector using the Connector API
-
Download the connector zip file from Download V2 connectors.
Do not expand the archive; Fusion consumes it as-is.
-
Upload the connector zip file to Fusion’s plugins.
Specify a
pluginIdas in this example:Fusion automatically publishes the event to the cluster, and the listeners perform the connector installation process on each node. -
Look in
https://FUSION_HOST:FUSION_PORT/apps/connectors/plugins/to verify the new connector is installed.
Reinstall a connector
To reinstall a connector for any reason, first delete the connector then use the preceding steps to install it again. This may take a few minutes to complete depending on how quickly the pods are deleted and recreated.V2 (Plugin) connectors
Fusion 4.2 supports V2 connectors, which utilize a Java SDK framework. Fusion V2 connectors are installed via Datasources in the UI or by using the Connector Plugins Repository API. In addition to the features and benefits provided by V1 connectors, V2 connectors offer:- Updates and improvements delivered separately from Fusion releases. Update a V2 connector by installing the latest plugin version.
- Security Access-control Lists (ACL) which are separate from content.
- Improved scalability. Jobs can be scaled by simply adding instances of the connector. The fetching process supports distributed fetching, allowing many instances to contribute to the same job.
- The ability to develop a custom connector.
Develop a Custom Connector
Develop a Custom Connector
Java SDK configuration
To build a valid connector configuration, you must:- Define an interface.
- Extend
ConnectorConfig. - Apply a few annotations.
- Define connector methods and annotations.
@Property are considered to be configuration properties.
For example, @Property() String name(); results in a String property called name.
This property would then be present in the generated schema.Here is an example of the most basic configuration, along with required annotations:@RootSchema is used by Fusion when showing the list of available connectors.
The ConnectorConfig base interface represents common, top-level settings required by all connectors.
The type parameter of the ConnectorConfig class indicates the interface to use for custom properties.Once a connector configuration has been defined, it can be associated with the ConnectorPlugin class.
From that point, the framework takes care of providing the configuration instances to your connector.
It also generates the schema, and sends it along to Fusion when it connects to Fusion.Schema metadata can be applied to properties using additional annotations. For example, applying limits to the min/max length of a string, or describing the types of items in an array.Nested schema metadata can also be applied to a single field by using “stacked” schema based annotations:Plugin client
The Fusion connector plugin client provides a wrapper for the Fusion Java plugin-sdk so that plugins do not need to directly talk with gRPC code. Instead, they can use high-level interfaces and base classes, like Connector and Fetcher.The plugin client also provides a standalone “runner” that can host a plugin that was built from the Fusion Java Connector SDK. It does this by loading the plugin zip file, then calling on the wrapper to provide the framework interactions.Standalone Connector Plugin Application
The second goal of the plugin-client is to allow Java SDK plugins to run remotely. The instructions for deploying a connector using this method are provided below.Locating the UberJar
The uberjar is located in this location in the Fusion file system:$FUSION_HOME is your Fusion installation directory and <version> is your Fusion version number.Starting the Host
To start the host app, you need a Fusion SDK-based connector, built into the standard packaging format as a.zip file. This zip must contain only one connector plugin.Here is an example of how to start up using the web connector:Java SDK security
Fusion Connector Plugin Client
The Fusion connector plugin client provides a wrapper for the Fusion Java plugin-sdk so that plugins do not need to directly talk with gRPC code. Instead, they can use high-level interfaces and base classes, like Connector and Fetcher.The plugin client also provides a standalone “runner” that can host a plugin that was built from the Fusion Java Connector SDK. It does this by loading the plugin zip file, then calling on the wrapper to provide the framework interactions.Standalone Connector Plugin Application
The second goal of the plugin-client is to allow Java SDK plugins to run remotely. The instructions for deploying a connector using this method are provided below.Locating the UberJar
The uberjar is located in this location in the Fusion file system:$FUSION_HOME is your Fusion installation directory and <version> is your Fusion version number.Starting the Host
To start the host app, you need a Fusion SDK-based connector, built into the standard packaging format as a.zip file. This zip must contain only one connector plugin.Here is an example of how to start up using the web connector:Simple Connector
Fusion Connector Plugin Client
The Fusion connector plugin client provides a wrapper for the Fusion Java plugin-sdk so that plugins do not need to directly talk with gRPC code. Instead, they can use high-level interfaces and base classes, like Connector and Fetcher.The plugin client also provides a standalone “runner” that can host a plugin that was built from the Fusion Java Connector SDK. It does this by loading the plugin zip file, then calling on the wrapper to provide the framework interactions.Standalone Connector Plugin Application
The second goal of the plugin-client is to allow Java SDK plugins to run remotely. The instructions for deploying a connector using this method are provided below.Locating the UberJar
The uberjar is located in this location in the Fusion file system:$FUSION_HOME is your Fusion installation directory and <version> is your Fusion version number.Starting the Host
To start the host app, you need a Fusion SDK-based connector, built into the standard packaging format as a.zip file. This zip must contain only one connector plugin.Here is an example of how to start up using the web connector:Remote V2 connectors
All V2 connectors can be hosted within Fusion or run remotely unless otherwise stated in the specific connector documentation.- Hosted connectors run within the Fusion cluster and are managed by Fusion.
- Remote connectors run on your own infrastructure and communicate securely with Fusion using gRPC over HTTP/2. This enables indexing of data sources behind firewalls or in private networks.
- Remote connectors are ideal for data behind firewalls, security policies restricting cloud access, or compliance requirements mandating on-premises data processing.
gRPC framework
V2 connectors use Google’s gRPC framework as the underlying client/server technology. This offers:- Increased flexibility in the way services and their methods are defined.
- HTTP/2 based transport.
- Efficient serialization format for data handling (protocol buffers).
- Bi-directional/multiplexed streams.
- As of Fusion 5.6.1, V2 connectors using a gRPC backend can be run remotely.
Learn more
Add Tesseract Optical Character Recognition to Fusion Connectors
Add Tesseract Optical Character Recognition to Fusion Connectors
Tesseract Optical Character Recognition (OCR) solution
The Tesseract OCR is an open source solution that can be added to interact with Fusion connectors in releases 5.2 and later. The example in this topic represents a classic REST service that interfaces with V1 connectors including functions such as file upload and web crawl.To set up OCR for V2 connectors, you must repeat this process for each individual Docker image related to the connector.
Prerequisites
The following must be established before adding the Tesseract OCR solution:- A local environment for installing and managing Fusion 5 that includes Google Cloud Tools and other required components.
- The Docker daemon must be running on MacOS and a Docker account for hub.docker.com.
- Fusion 5 installed and deployed.
Add Tesseract OCR solution
- Execute the following to create a Docker file:
The file:
- Directs Kubernetes Helm to use an existing image with the
<repo>/<image>:<tag>format as the basis for the new image. - Switches to the
rootuser to perform the Tesseract install. - Switches back to user
8764because the classic REST service pod in Kubernetes is not permitted to run asroot.
- Directs Kubernetes Helm to use an existing image with the
- Build the new Docker image in the same directory as your
Dockerfile. Enter values that reflect your image and directory. For example:docker build -t jdoe/lucidworks/classic-rest-service-ocr:1.0.1
In Fusion 5, the dependency check in Fusion must be included in any custom operation. You must add the dependency image where the custom connector image is stored (at the same level and in the same repository). The sample commands are:Access the Docker hub to view the image-related information such as name, tag, digest, and operating system. - Open the
fusion_values.yamlfile and replace the existing connector image with the custom version. For example: - Execute the standard process to upgrade (rebuild) the Fusion cluster.
- Access the Tesseract pod using ssh and run
tesseract -vto verify Tesseract is installed and working correctly. The result is similar to the following: - Access each Fusion parser used for a datasource that performs OCR and select the following items:
- Apache Tika
- Include images
- Scan one of the following files to test the OCR function:
- A
.pdffile, that may contain an underlying.tifffile - A
.jpegfile - A
.giffile
- A
- Verify the parser correctly extracts the information, which includes the
body_tfield.