Configure Activity Tracking
Configure Activity Tracking
click will include, amongst other things, information about the URL that was clicked as well as the number of times that URL was clicked.A signal event of type annotation will include, amongst other things, information about the annotation target, the collection, and the creator.For a full list of properties that are stored, refer to the signals collection associated with your application.Authorization
Activity tracking requires authorization. Both service account impersonation and the Sessions API can be used for this purpose.Service account impersonation requires credentials for the service account and these are stored in the Fusion platform configuration. These credentials can be accessed by setting the name of the Fusion platform configuration via theplatform-config parameter in the Fusion activity tracking configuration.If the credentials for a service account are not provided or cannot be found, a check will be made to see if a Fusion session cookie is available. Typically, this will be present when the user is known to the Fusion server and the Session API has been set up accordingly.Advanced Search
Advanced Search
How to Configure Advanced Search in App Studio Enterprise
-
Open
../src/main/webapp/search/app/controllers/search.controller.js -
Add the following code block inside the
SearchControllerfunction: -
Open
../src/main/webapp/views/partials/header.tpl.html -
Replace the
<search:box>element with the code block below. The original<search:box>tag may span multiple lines and include nested elements such as<instant:result-list>and/or<query:suggestions>. You must replace the entire<search:box>tag with the following code block: Note: You must also update the<advanced:date-range>and<advanced:text>tags to point to fields in your data set. When using the<advanced:text>tag for searching within field values you must use an untokenized field. -
Replace the
<layout:include>tags in any HTML files that referenceheader.tpl.htmlfile with an<ng:include>tag. 1.Replace this line:<layout:include file="views/partials/header.tpl.html"></layout:include>2.With this line:<ng:include src="'views/partials/header.tpl.html'"></ng:include> -
Add the following code block to
../src/main/webapp/styles/includes/custom.less: Note: You may need to update thecolor: rgb(255,255,255)attribute in thetoggleclass below in order for theAdvanced Search...text to be visible in the header. -
Hard refresh the search UI in your browser. There will now be an
Advanced Search...link under the search box in the header. Click this link to bring up the Advanced Search dialog box.
Using Java Processors
Using Java Processors
Implementing processors
You need to make some configuration changes to set up processors on your platforms. There are two ways. The simplest is directly on the platform config file, when the processor requires no arguments. For more complex processors that take input arguments there are additional steps.Query Processor
Example: Add the user name to the query filtering on the ‘username’ field. Get the username either from the query payload itself or from the security provider.src/main/conf/platforms/fusion/data.confResponse processor with configuration
Example: If the response has no results send the query again to a different platform.src/main/conf/platforms/fusion/fusion.confSolr Highlighting
Solr Highlighting
<search:query> tag, or in a Fusion query pipeline.App Studio also allows for custom styling of any highlighted hits, which is covered at the end of this page.How to Configure Solr Highlighting in App Studio
- Open any HTML page that uses a
<search:query>tag where highlighting should take place. - Modify the
<search:query>tag to include the requiredhl.flparameter (a complete list of optional parameters can be found here):
If not using App Studio Enterprise, an additionalhlparameter must be included and set totruefor highlighting to work. App Studio Enterprise sets this parameter to true by default in../src/main/resources/conf/platforms/fusion/fusion.conf(viahighlighting: true).Parameter Name Parameter Value Description hl.fl description_t comma separated list of fields where highlighting should occur hl (only required if not using App Studio Enterprise) true Boolean flag for whether or not highlighting should occur - Refresh the search UI in your browser and any hits will appear highlighted.
NOTE: you must have the field(s) specified in the
hl.flparameter above displayed using a<search:field>on the HTML page. - See the Styling Highlighted Hits section below for steps to add custom styling to search hits.
How to Configure Solr Highlighting in a Fusion Query Pipeline
- In the Query Workbench, add or modify an existing Additional Query Parameters stage.
- Add the following required parameters (a full list of optional parameters can be found here):
If not using App Studio Enterprise, an additionalhlparameter must be included and set totruefor highlighting to work. App Studio Enterprise sets this parameter to true by default in../src/main/resources/conf/platforms/fusion/fusion.conf(viahighlighting: true).Parameter Name Parameter Value Description hl.fl description_t comma separated list of fields where highlighting should occur hl (only required if not using App Studio Enterprise) true Boolean flag for whether or not highlighting should occur - Save the query pipeline, and return to your search application.
- Run a new search that utilizes the query pipeline modified in step 2 and any hits will appear highlighted.
NOTE: you must have the field(s) specified in the
hl.flparameter above displayed using a<search:field>on the HTML page. - See the Styling Highlighted Hits section below for steps to add custom styling to search hits.
Styling Highlighted Hits
- Add the following CSS in order to add custom styling to Solr highlighting:
- If using App Studio Enterprise, this should go in
../src/main/webapp/styles/includes/custom.less - Any custom CSS can be used in place of the example attributes below.
- If using App Studio Enterprise, this should go in
Configure the Fields in Results
Configure the Fields in Results
search:result and search:field tags configure which fields are displayed with each individual search result. A field can be styled as the title or description, and any additional fields can have a variety of styles.
Persist Social Data
Persist Social Data
Configure Result Persistence
Configure Result Persistence
Requirements
- Any relational JDBC-compliant database (such as Oracle or MySQL).
- Network access from the Appkit application to the relational database.
twigkit identifier, but for simplicity we would prefer having our own schema since you probably won’t need to join these tables with other schemas.Database specific setup instructions
Which database is used for storing the metadata collected using the Social module is controlled via POM dependencies. By default a lightweight, in-memory Derby database is used, as per the followingpom.xml dependency:derby.system.home does not exist at startup, Derby creates the directory automatically.You will need to configure a persistence.xml file with the appropriate connection strings etc.Other pre-configured versions are also available, including:src/main/resources/META-INF/persistence.xmlID generator mappings in the persistence.xml
Regardless of which persistence.xml you use, please ensure the following property is added to the persistence.xml file:Troubleshooting database configuration
Connection issues
Many databases require the application to manage the connections, refreshing them and maintaining enough open connections to service the load on the database. In some cases the default connection management provided is inadequate for production setups.If you notice bad performance, connections going stale, and associated errors (usually intermittently) the default connection pooling is probably inadequate for your environment.To remedy this situation you can use a third-party connection pooling technology. We recommend ‘C3P0’, which can be configured with the following simple steps:-
Add the dependency for Hibernate c3p0 to the pom.xml:
The version of Hibernate c3p0 you should use depends on the version of Appkit you are using. To begin with try version 4.1.7.Final (legacy) or 5.2.2.Final.
-
Add the configuration for C3P0 to the persistence.xml:
Configure SSL for App Studio
Configure SSL for App Studio
SSL keystore
We include a keystore file with a default self-signed key for development and testing.For proper security in a production environment, import your own keystore into thekeystore.jks file, or copy it to a new file. If you copy it to a new file, use the -Dtwigkit.keystore.file (described below) to specify its location.SSL parameters
To enable SSL, you specify the following parameters on the command line when invoking the startup script:| Parameter | Description | Default |
-Dtwigkit.ssl=true | Enable SSL. | false |
-Dtwigkit.https.port | Set the port. | 8765 |
-Dtwigkit.keystore.file | The keystore path/filename, relative to the app-studio directory. | keystore.jks |
-Dtwigkit.keystore.password | The keystore password. | p4ssw0rd |
-Dtwigkit.keystore.alias | The name of the key in the keystore to be used. | default-key |
Connect to Fusion from App Studio
Connect to Fusion from App Studio
- Define which provider to use (the “search:platform” tag).
- Create a query from the URL, or any parameters you explicitly declare (the “search:query” tag).
- Send the query to the platform and obtain a response (the “search:response” tag).
app/views/search.html for version 4.0):The search:platform tag
The search:platform tag specifies the endpoint where App Studio obtains its data, pointing to a specific platform configuration endpoint.In this case we declare a data provider (platform) for a particular Fusion collection and set of parameters to search through an index.The search:query tag
The search:query tag constructs an App Studio query object. You can choose to build a query from scratch by passing in the parameters you want or you can have it automatically created from the page URL.Here is how you build a query using all query string parameters, and default to 12 results per page:The search:response tag
The search:response tag brings the platform and the query together.In the example below we refer to the previously-defined platform and query by variable name:Set Up Appkit Cookie Cracker Authentication
Set Up Appkit Cookie Cracker Authentication
Create a New Web App (4.2)
Create a New Web App (4.2)
Prerequisites
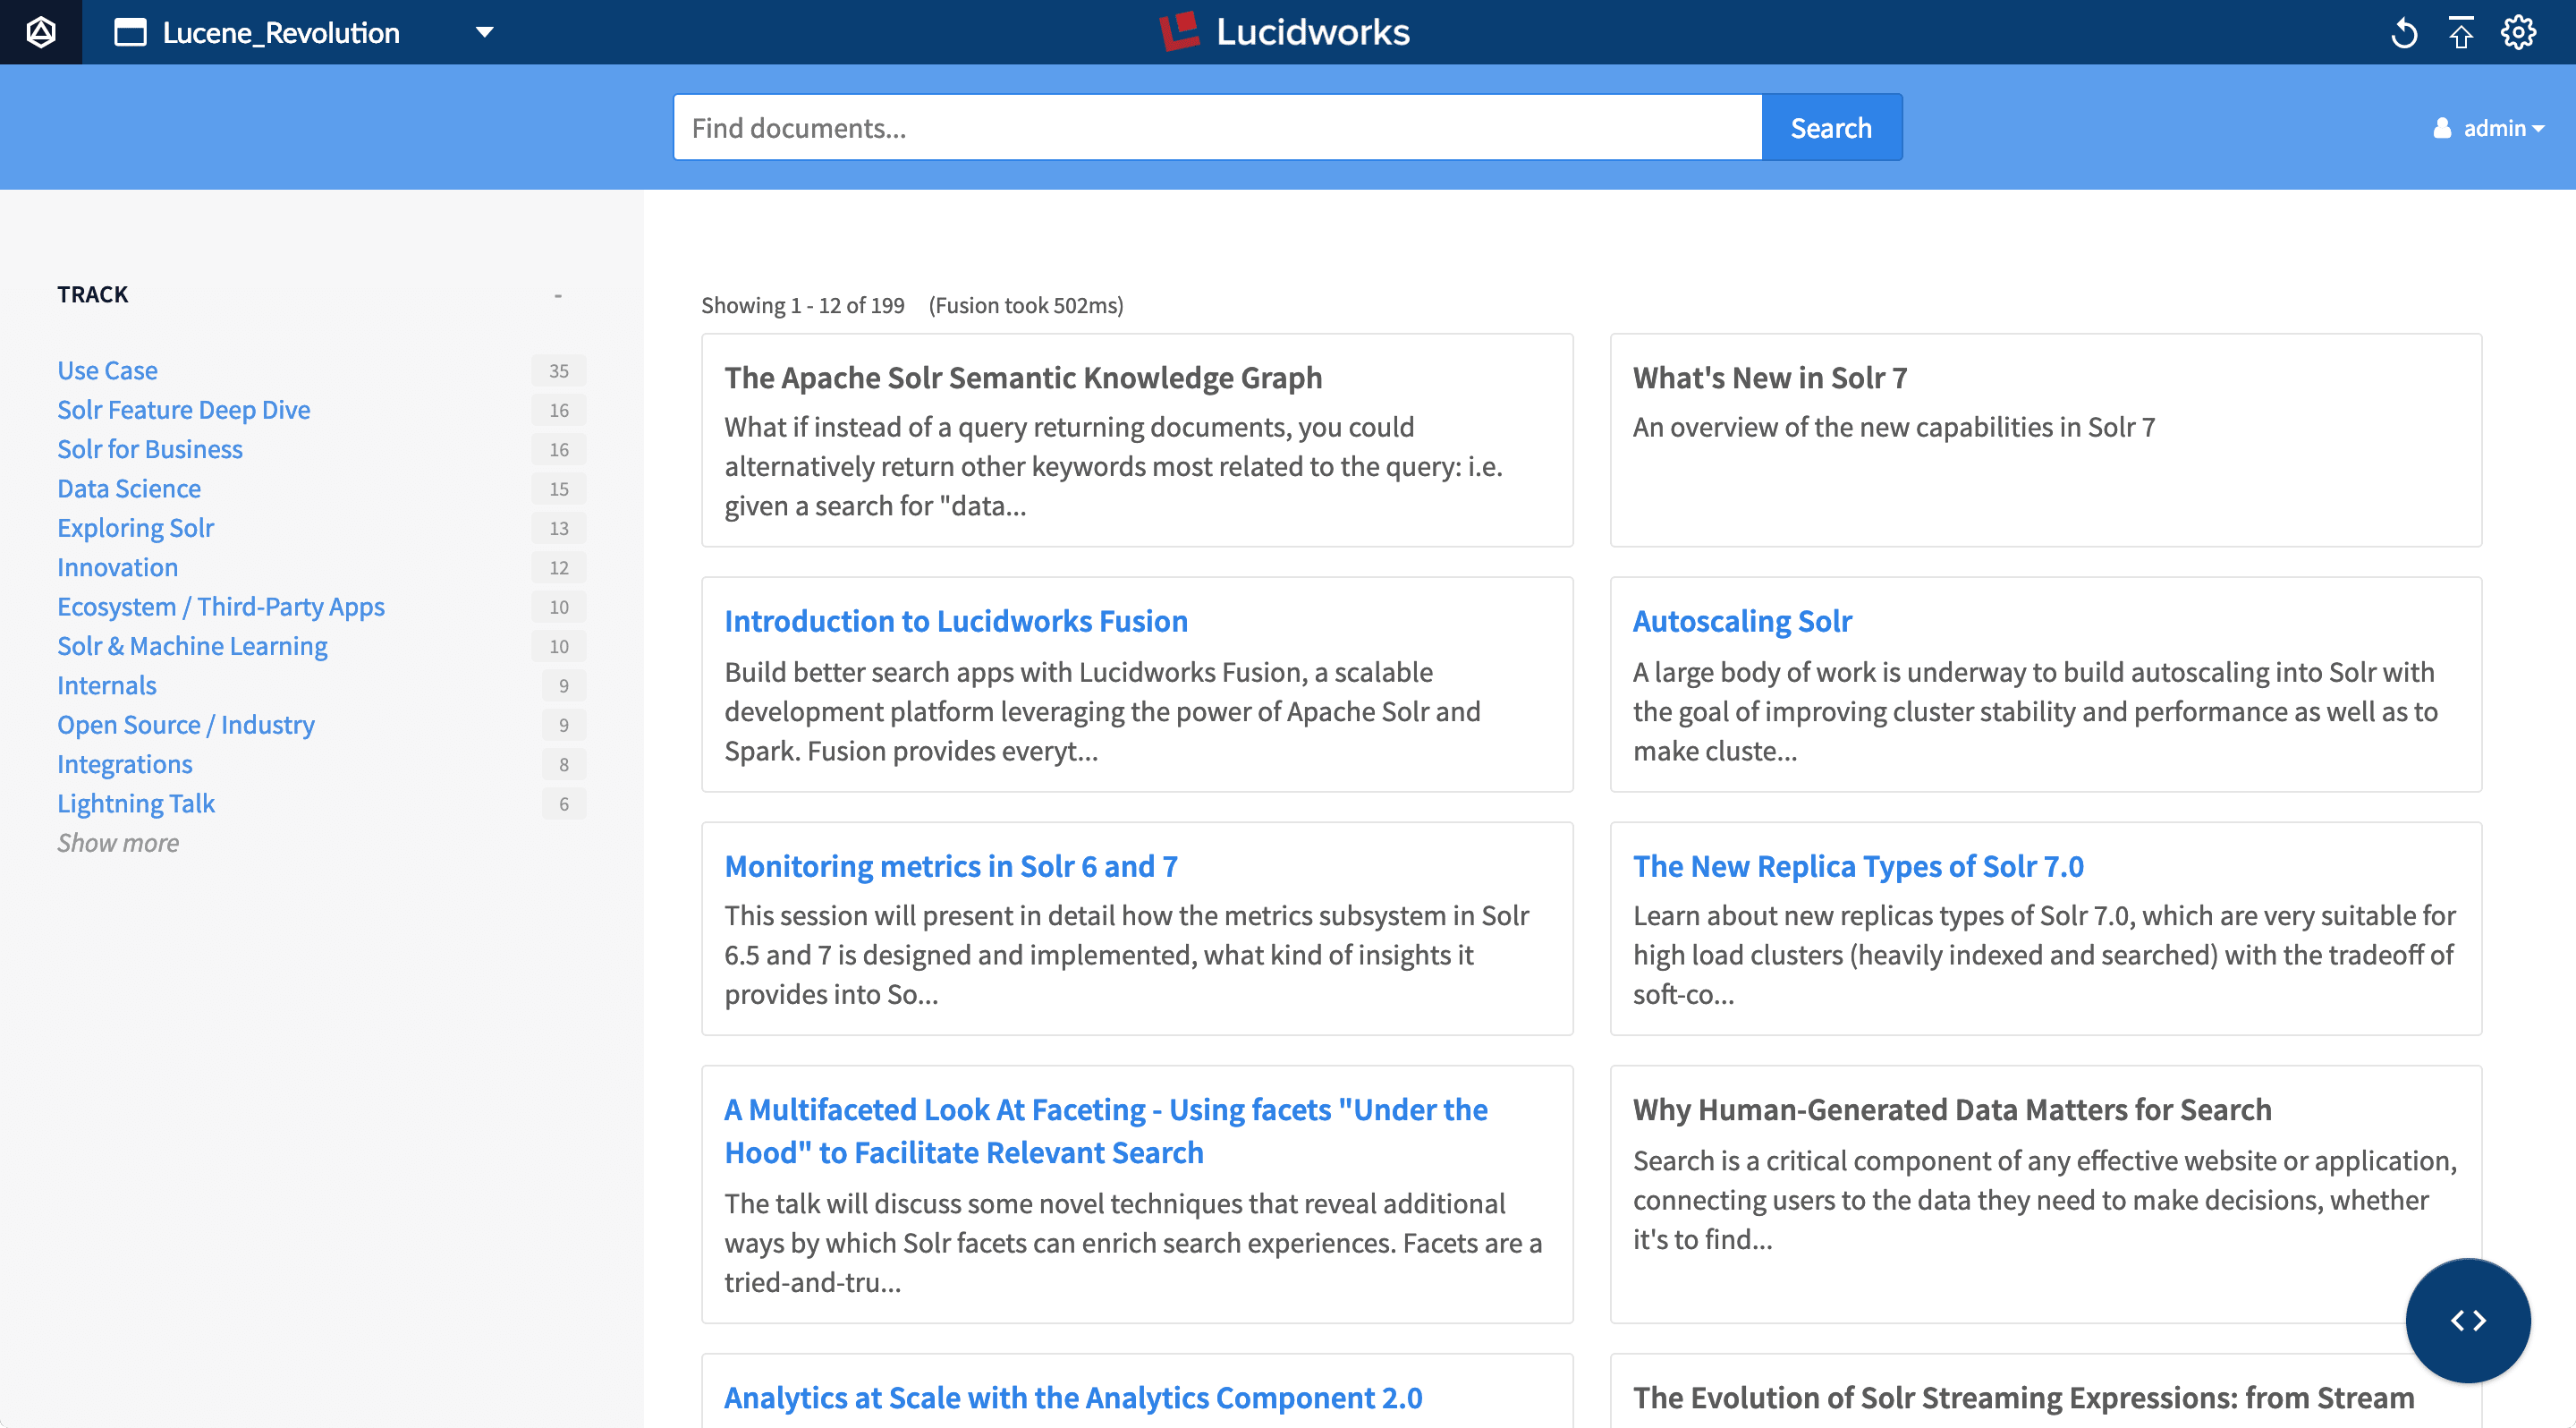
The instructions in this topic assume that you have a running instance of Fusion Server, with one or more collections of indexed data and at least one query profile.How to create a new Web app
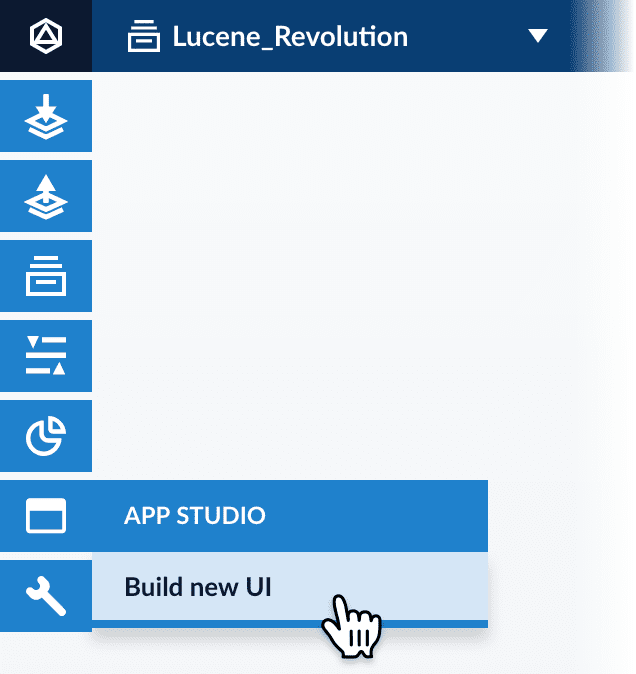
-
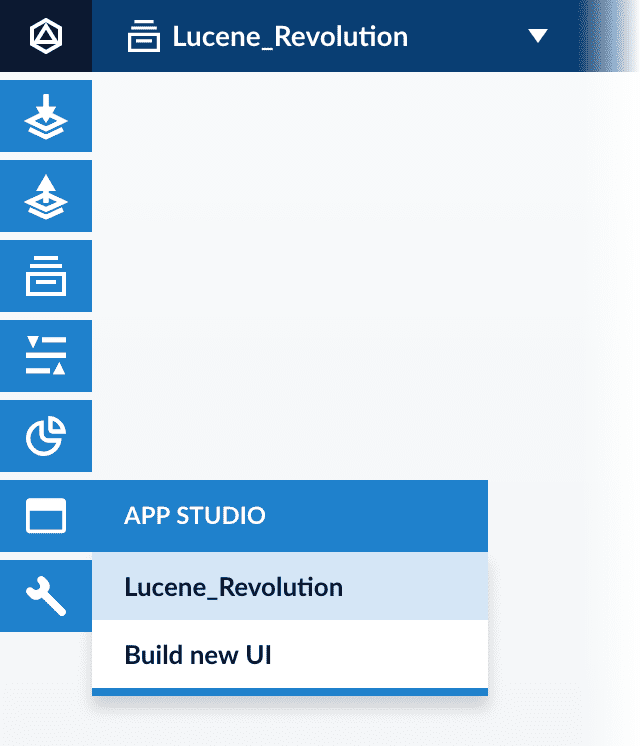
In the Fusion workspace, navigate to App Studio > Build New UI.
-
On the Set Query Source page, select the query profile to use for your search UI:
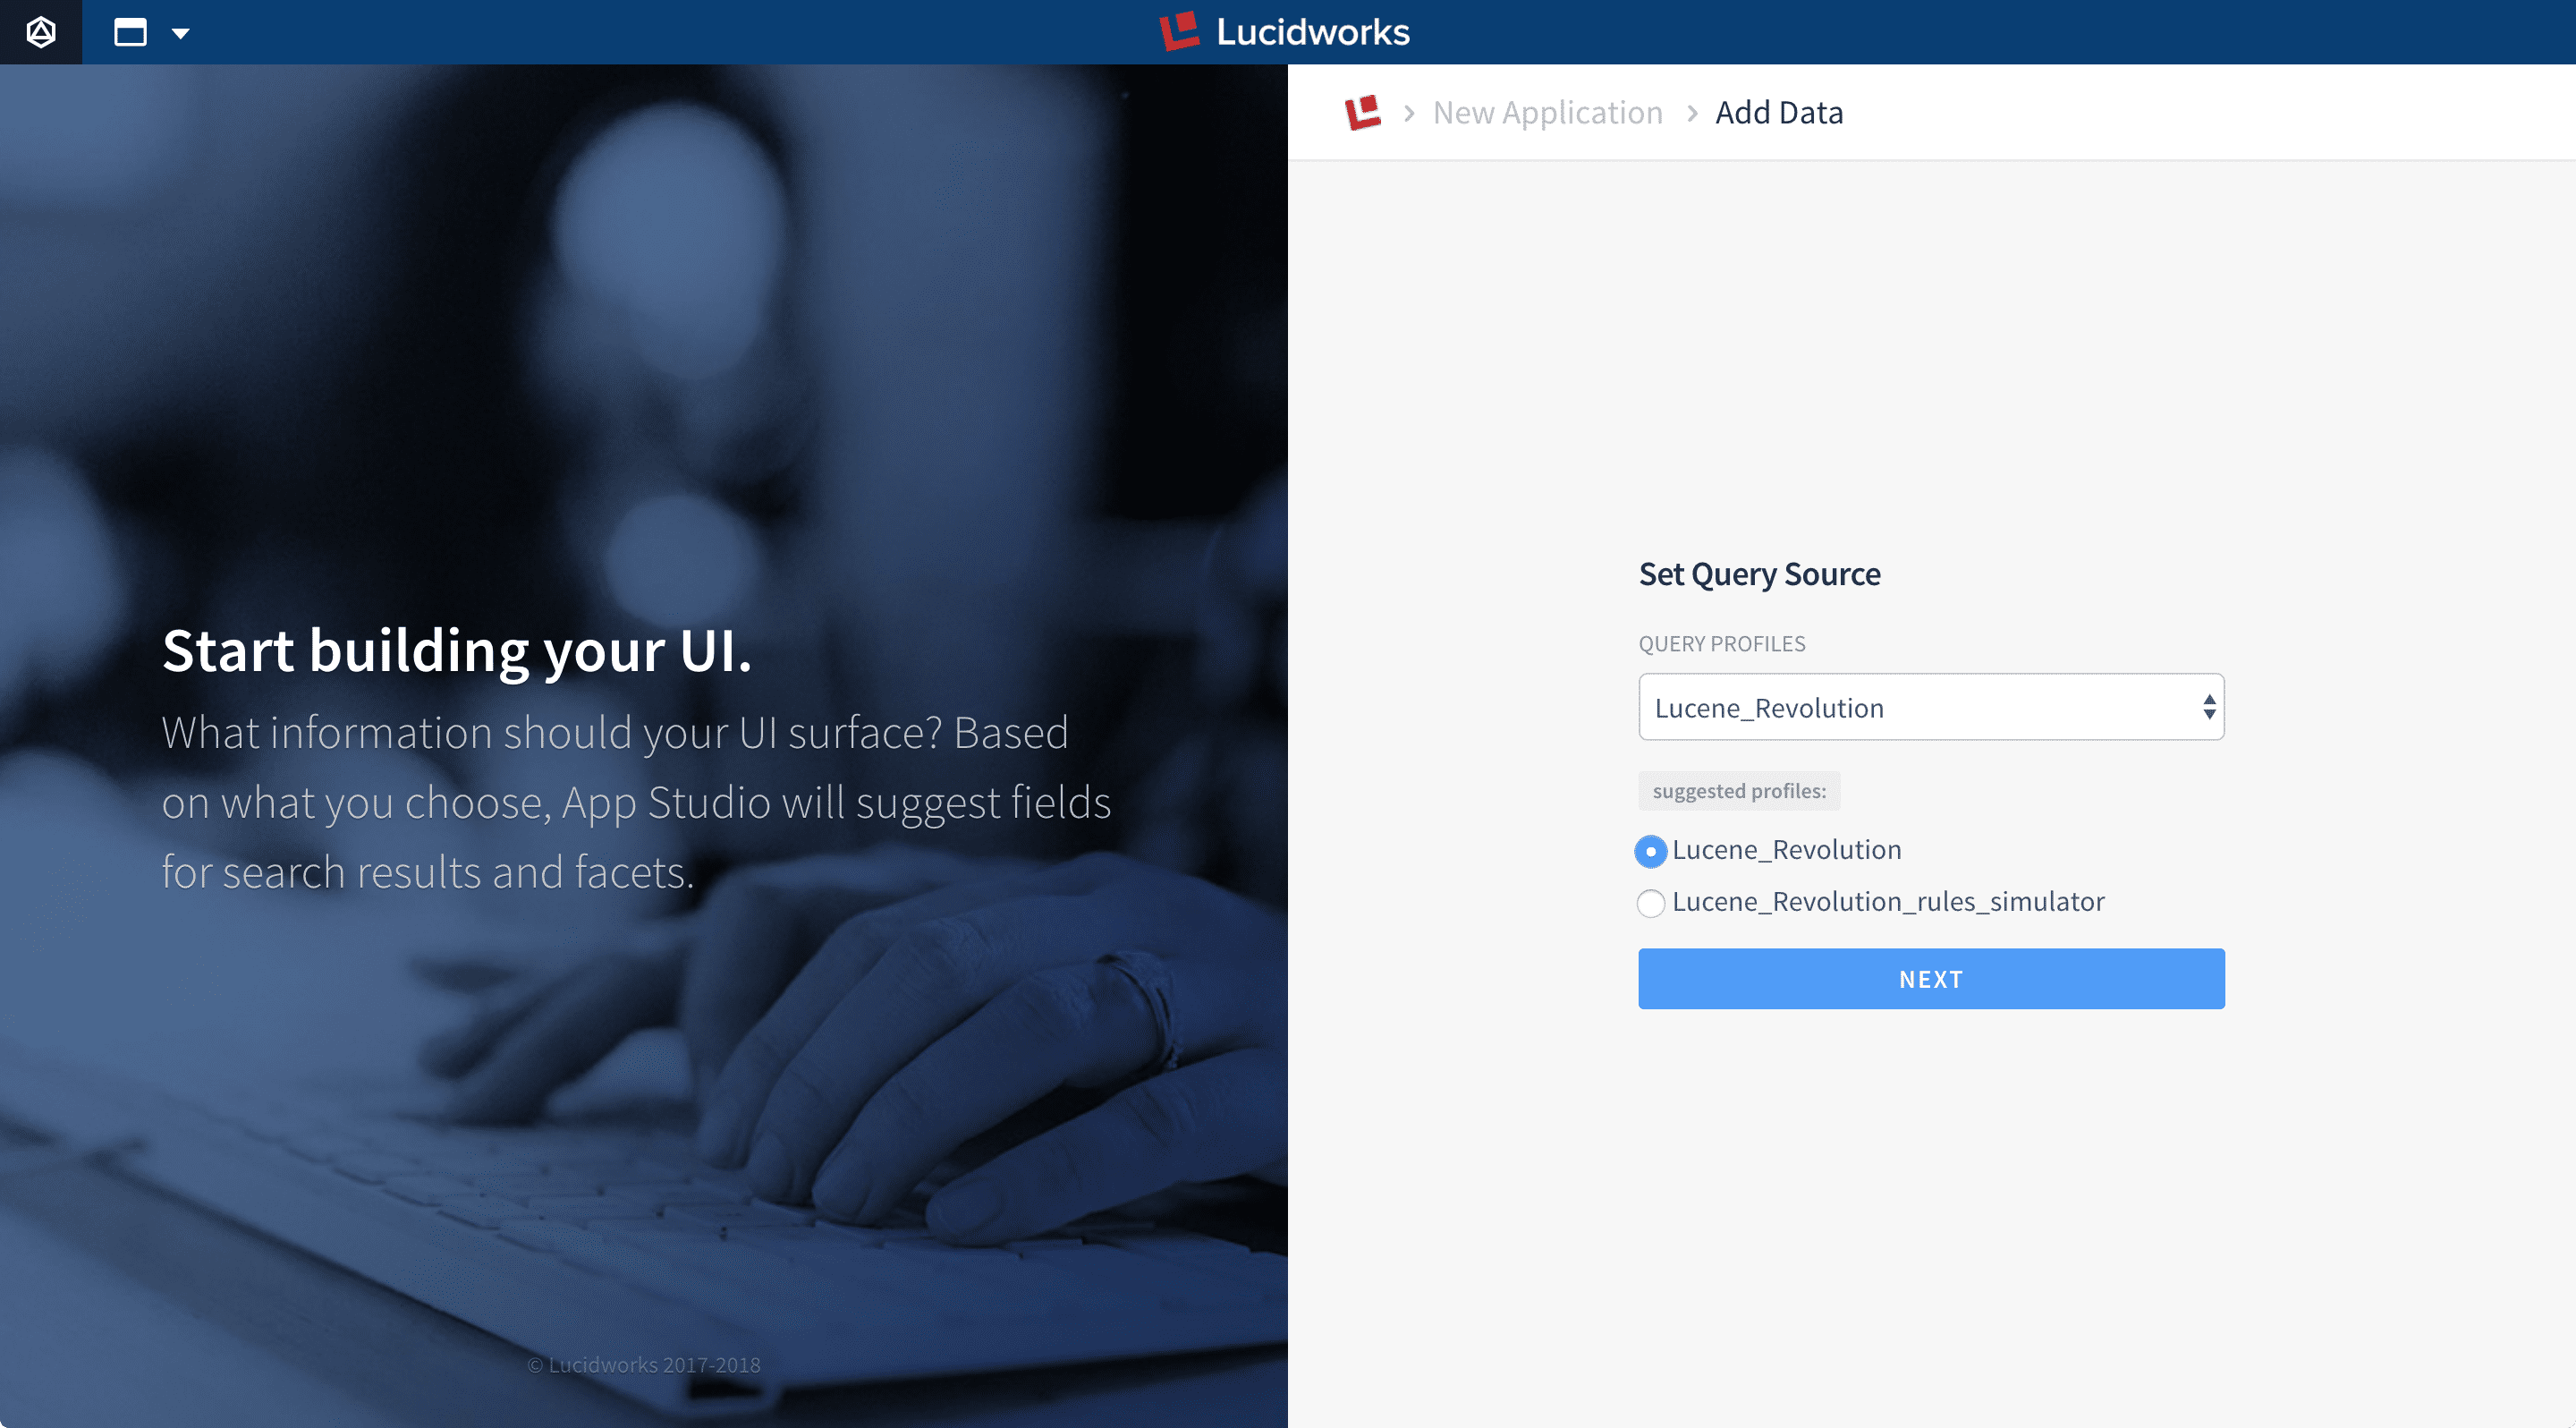
-
Click Next.
App Studio connects to the specified collection and query profile to analyze your searchable data:
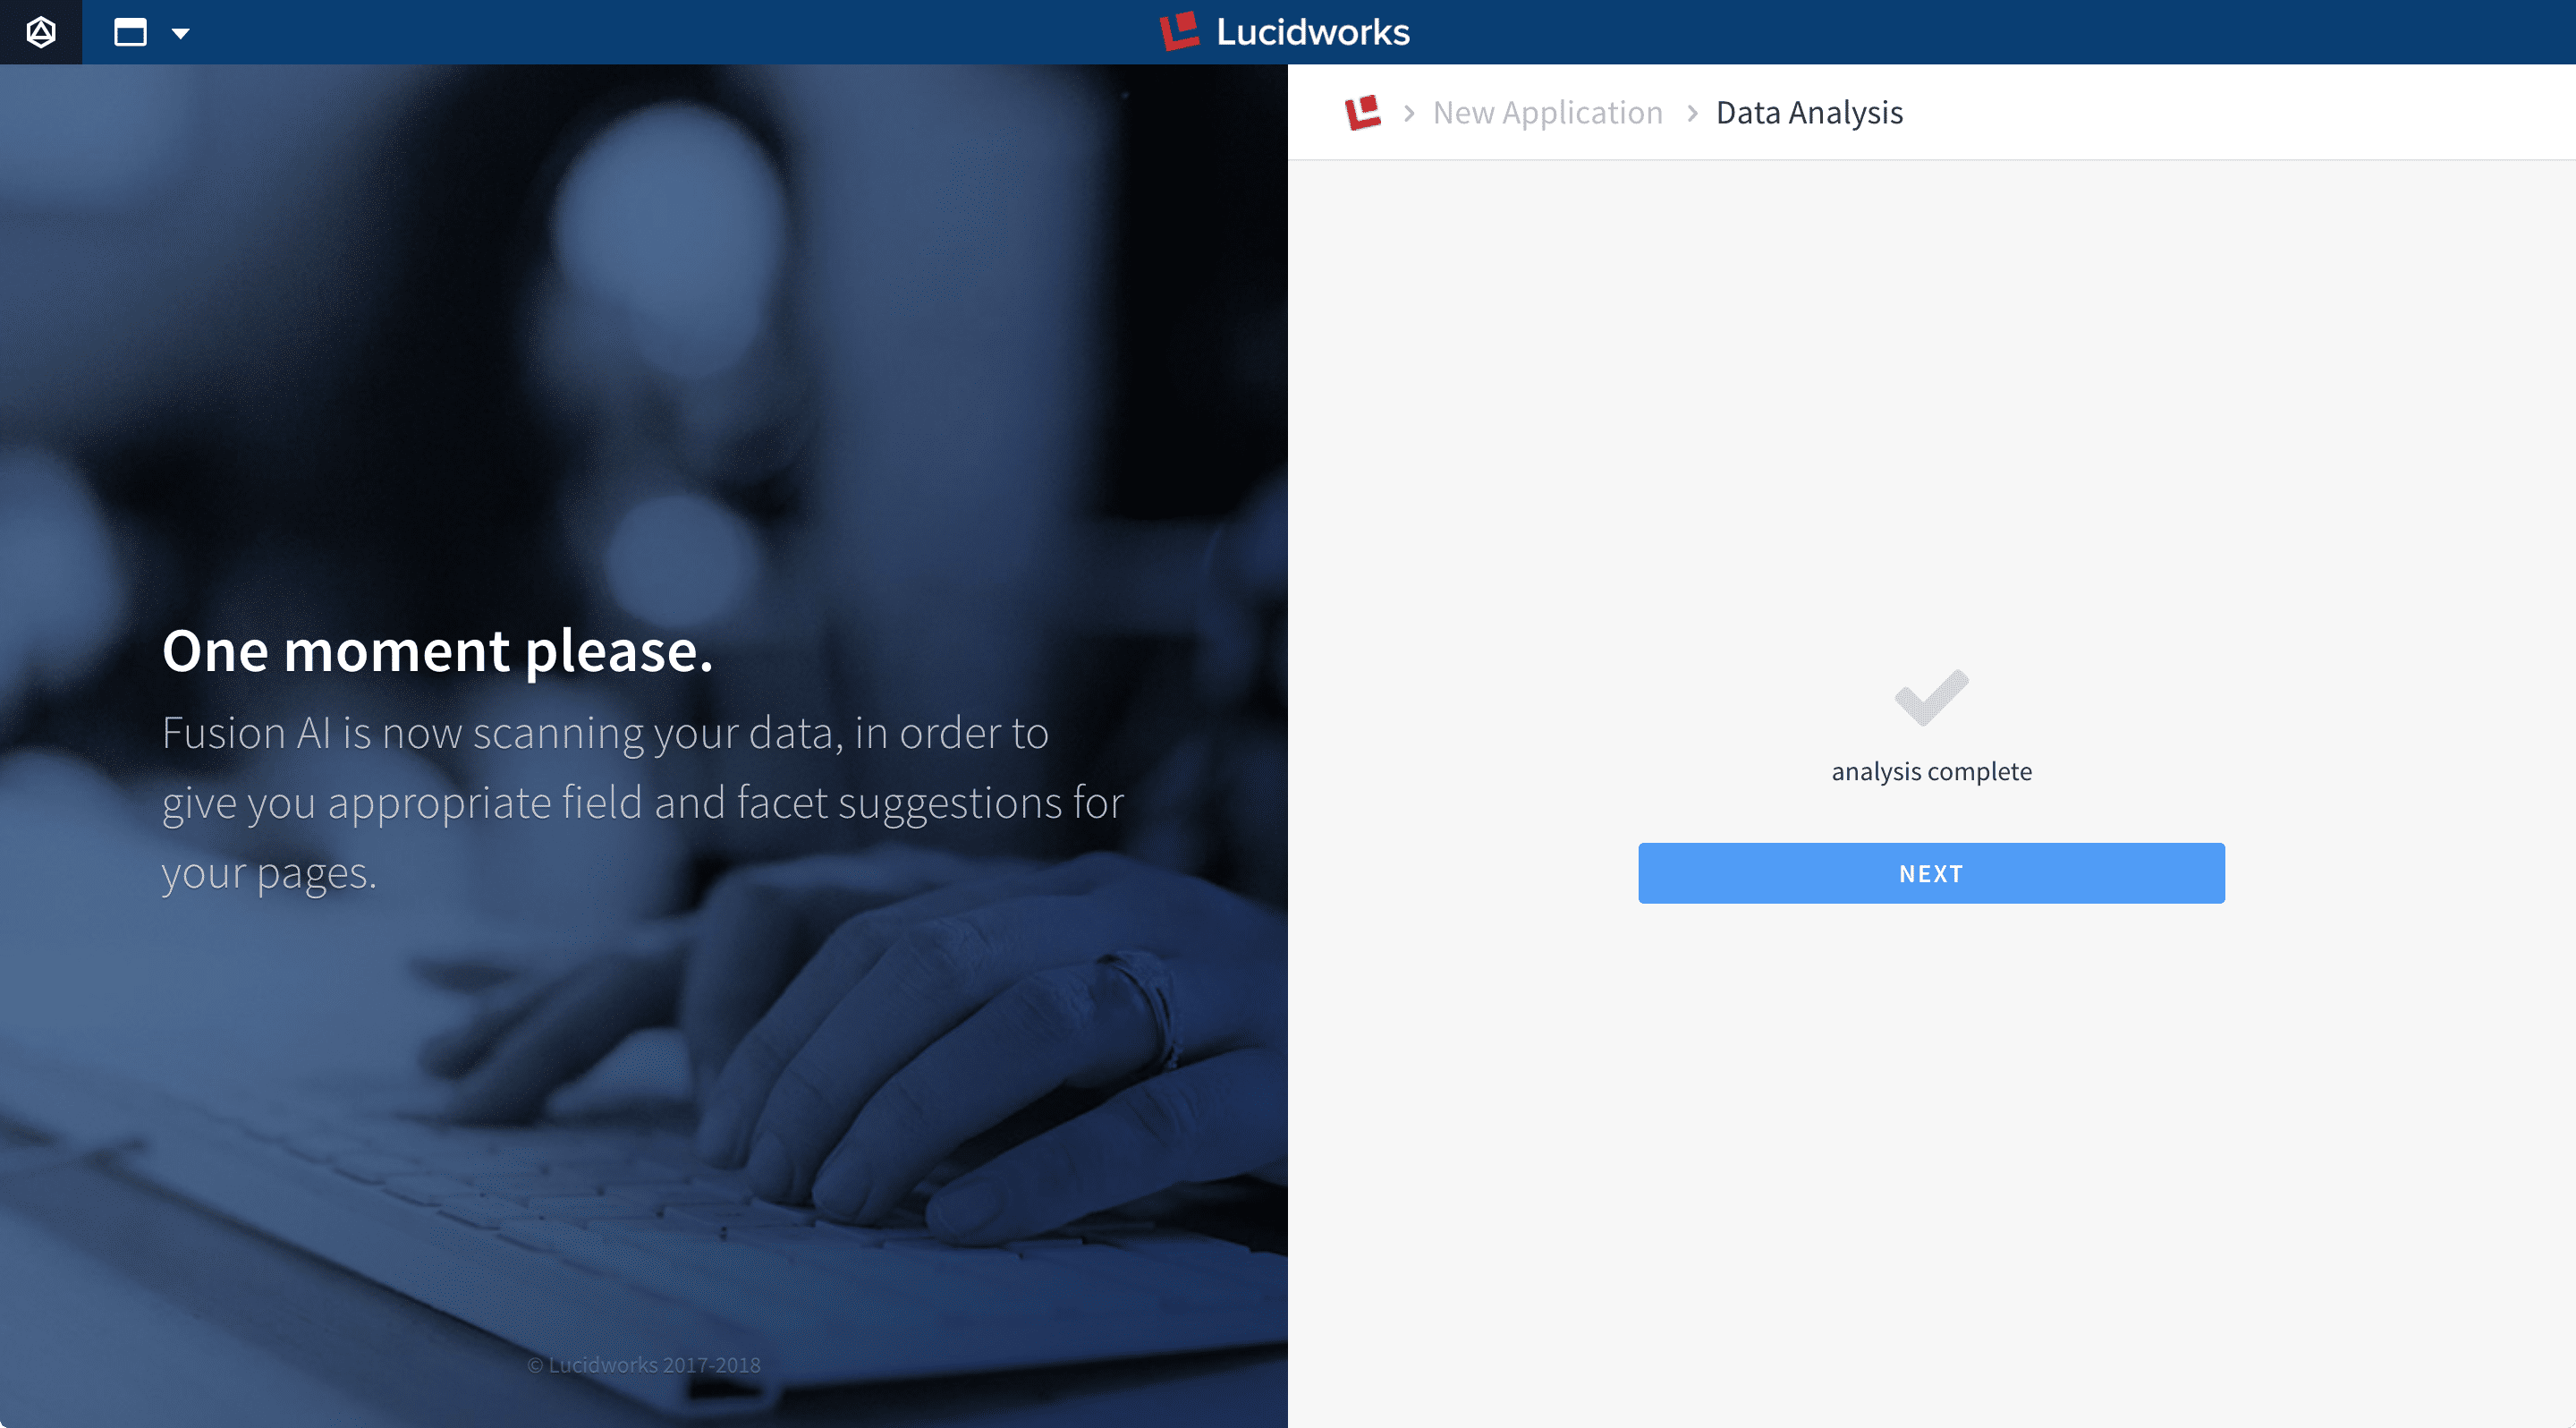
- Click Next.
-
On the Set Result Title page, select the field to use as the title of each search result:
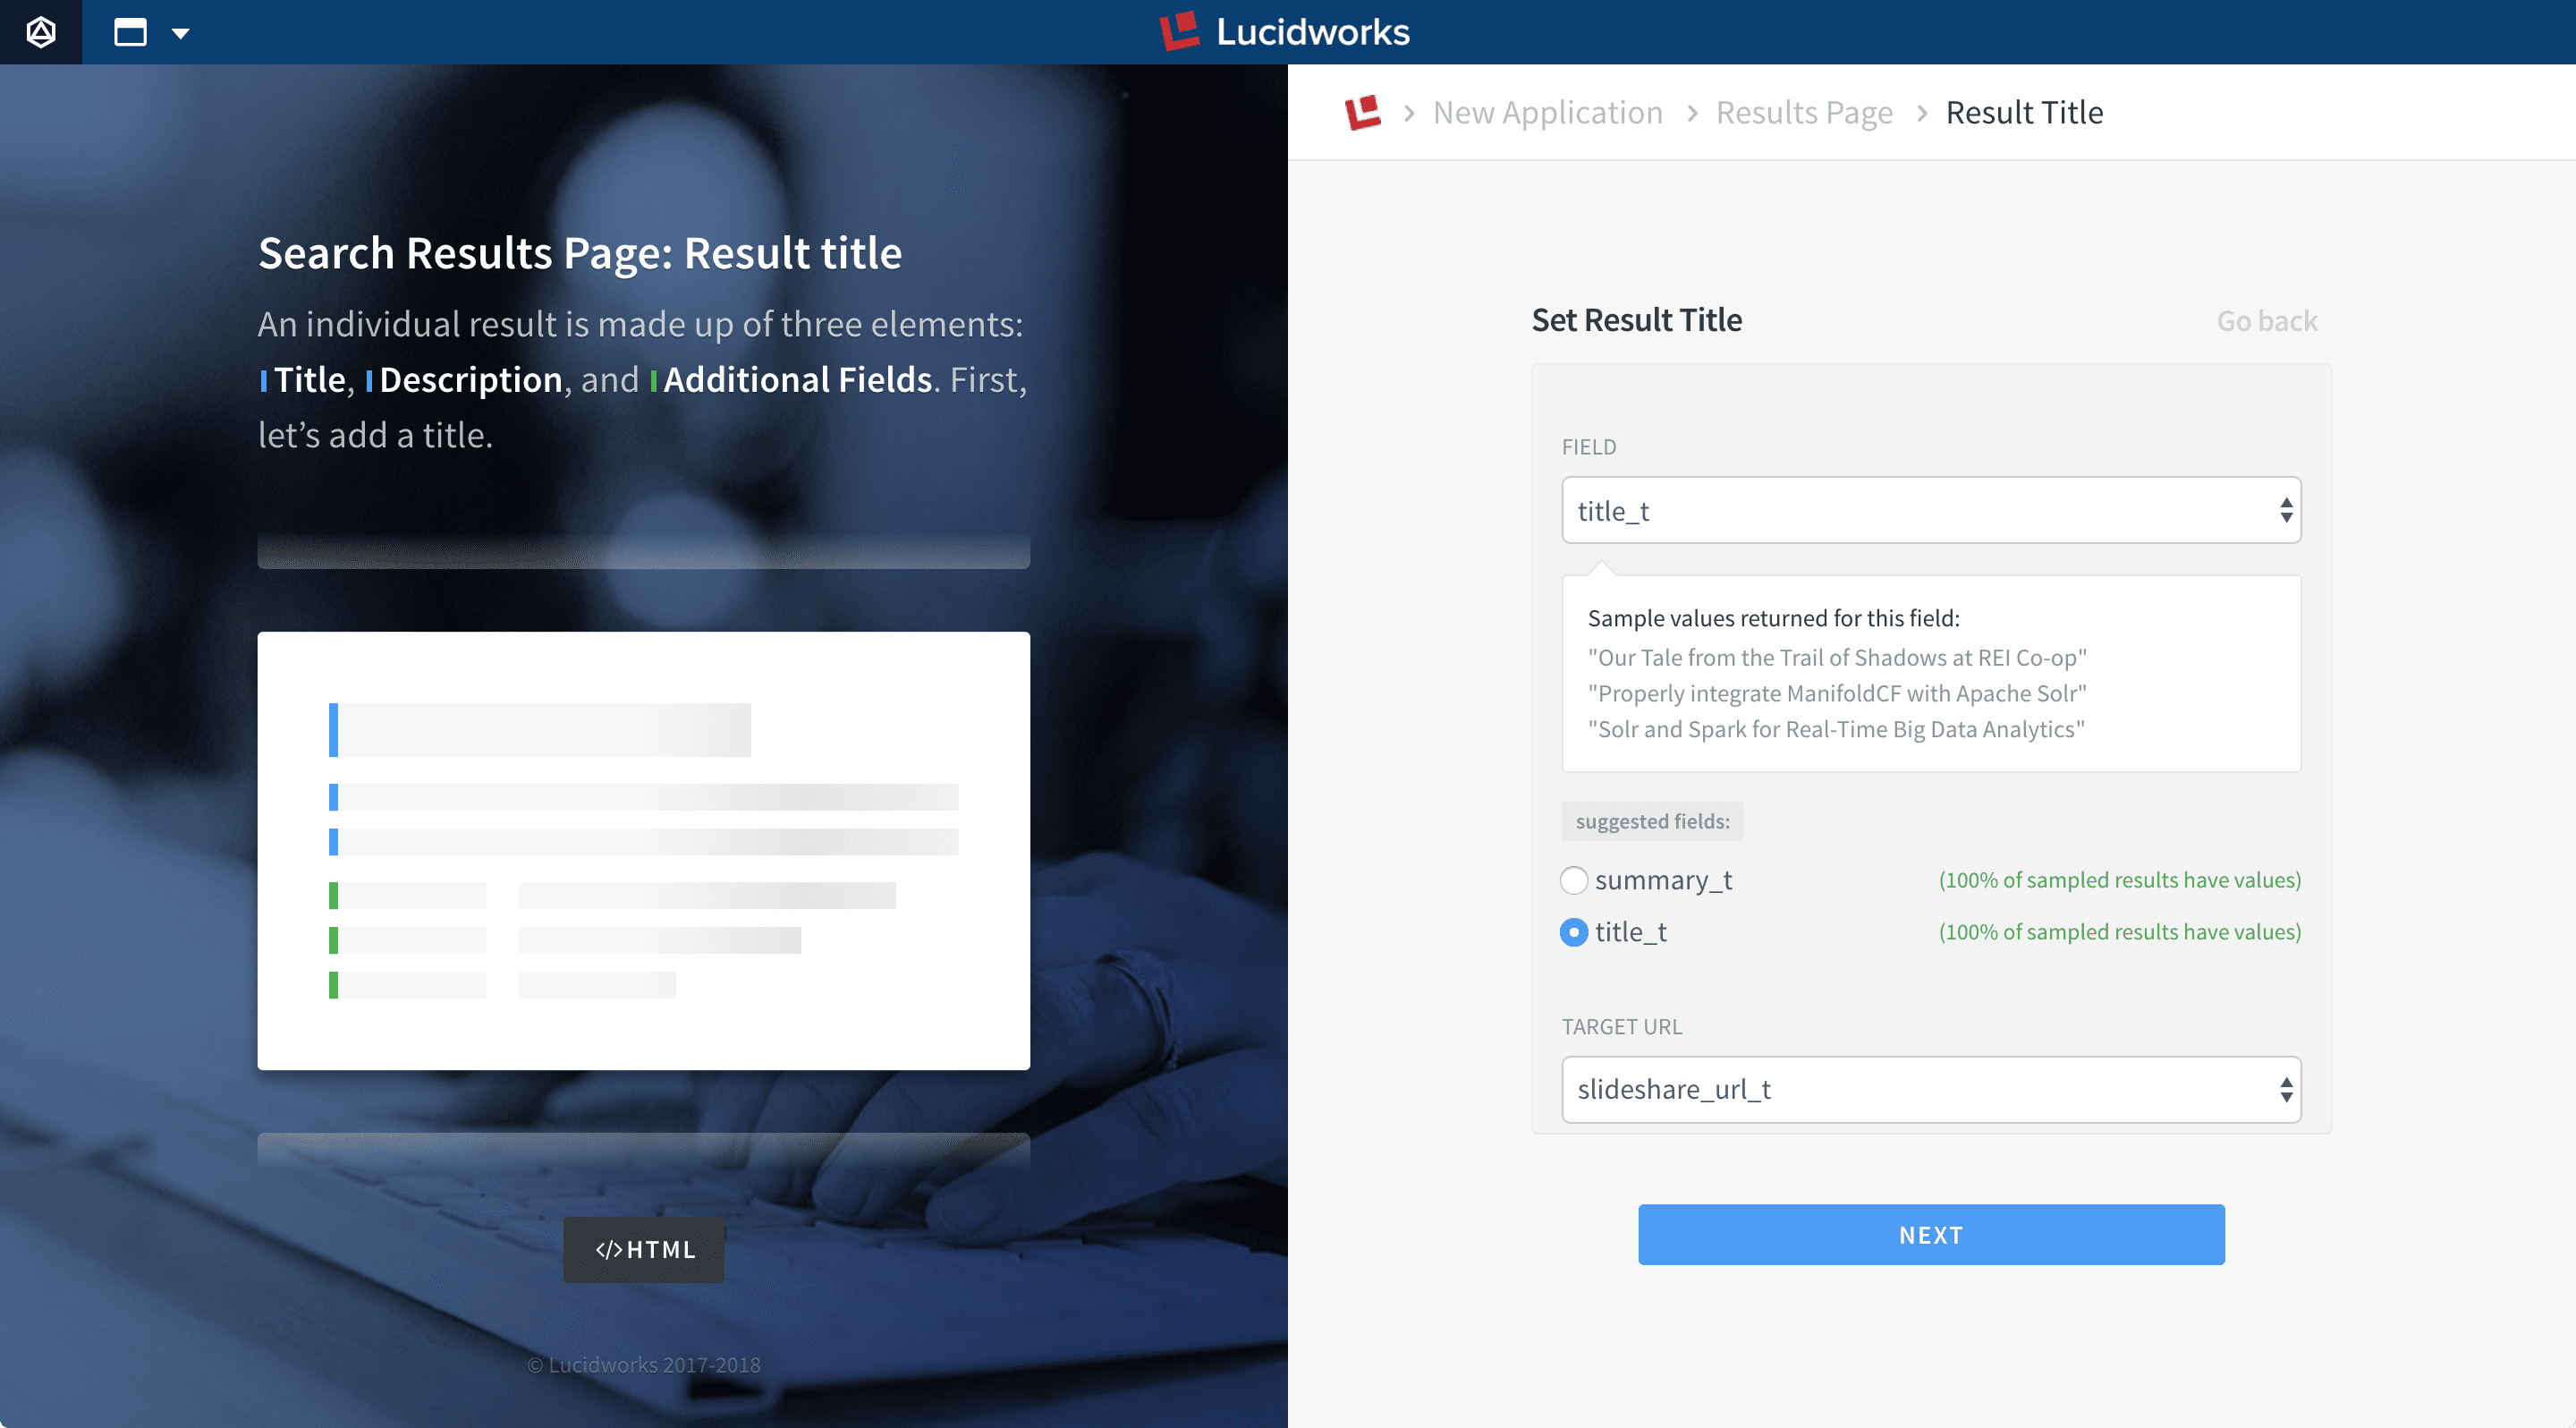
- Click Next.
-
On the Set Result Description page, select the field to use as the description of each search result:
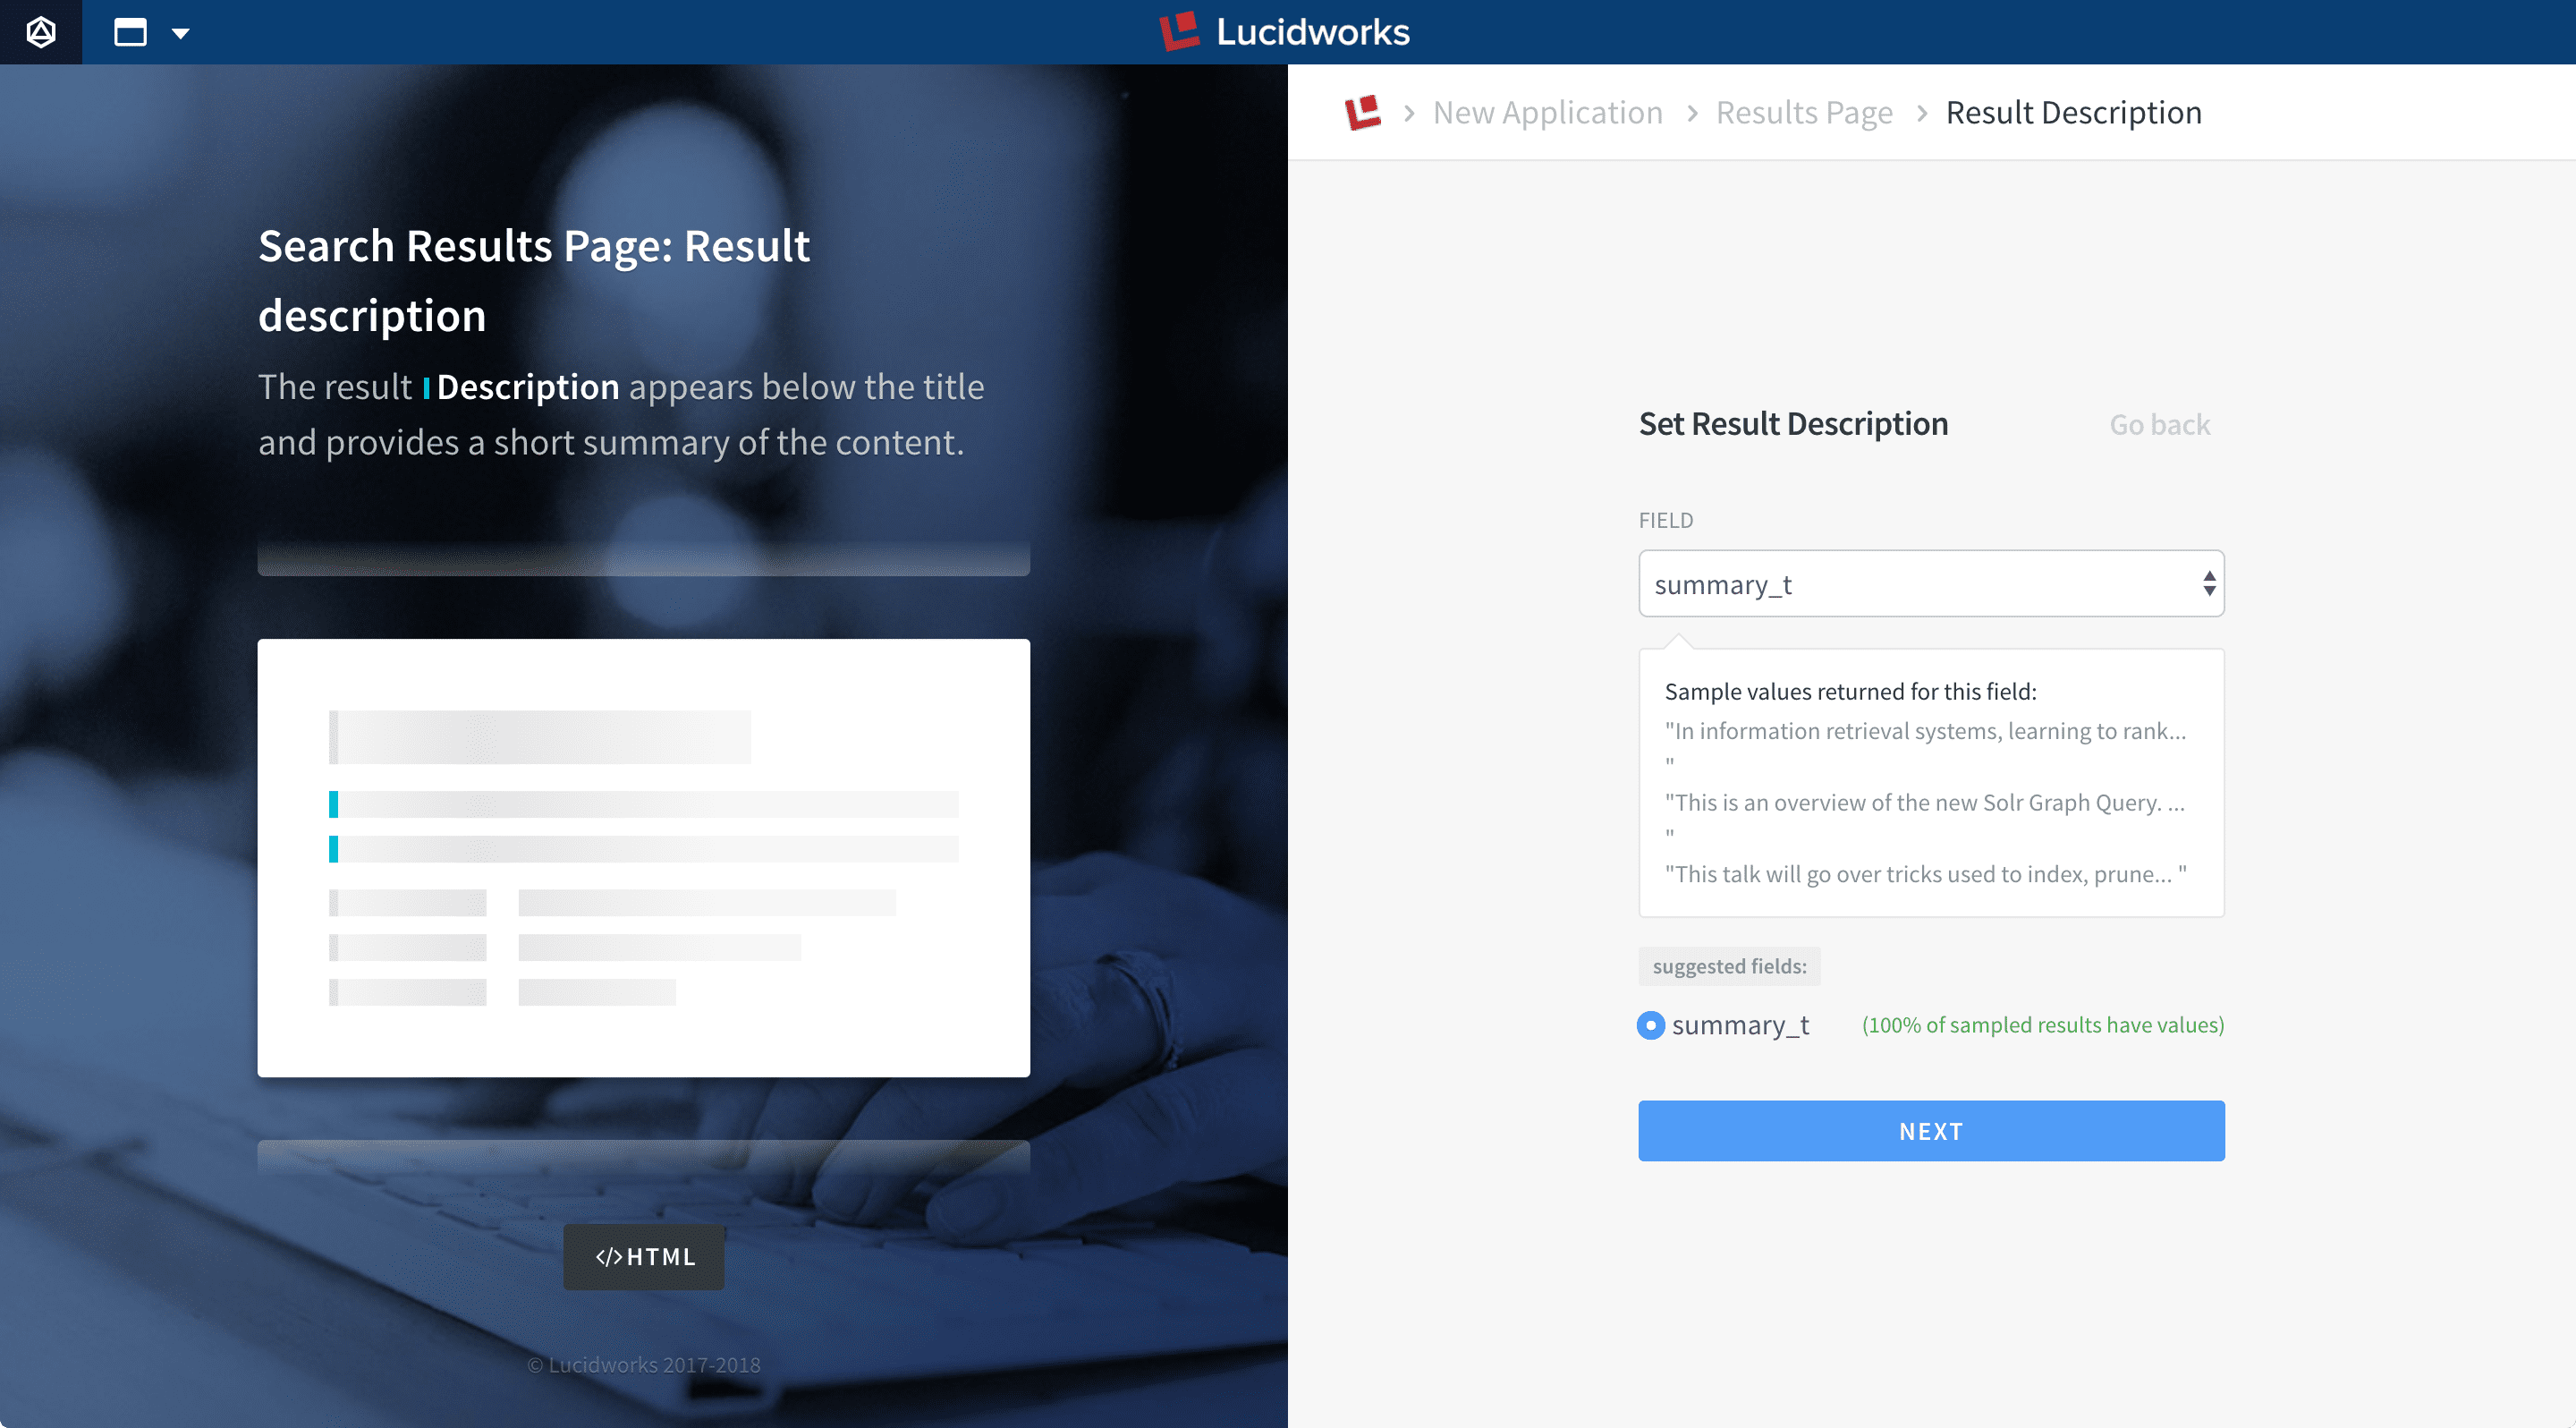
- Click Next.
-
On the Set Facets and Additional Fields page, select one or more multi-valued fields to use as facets:
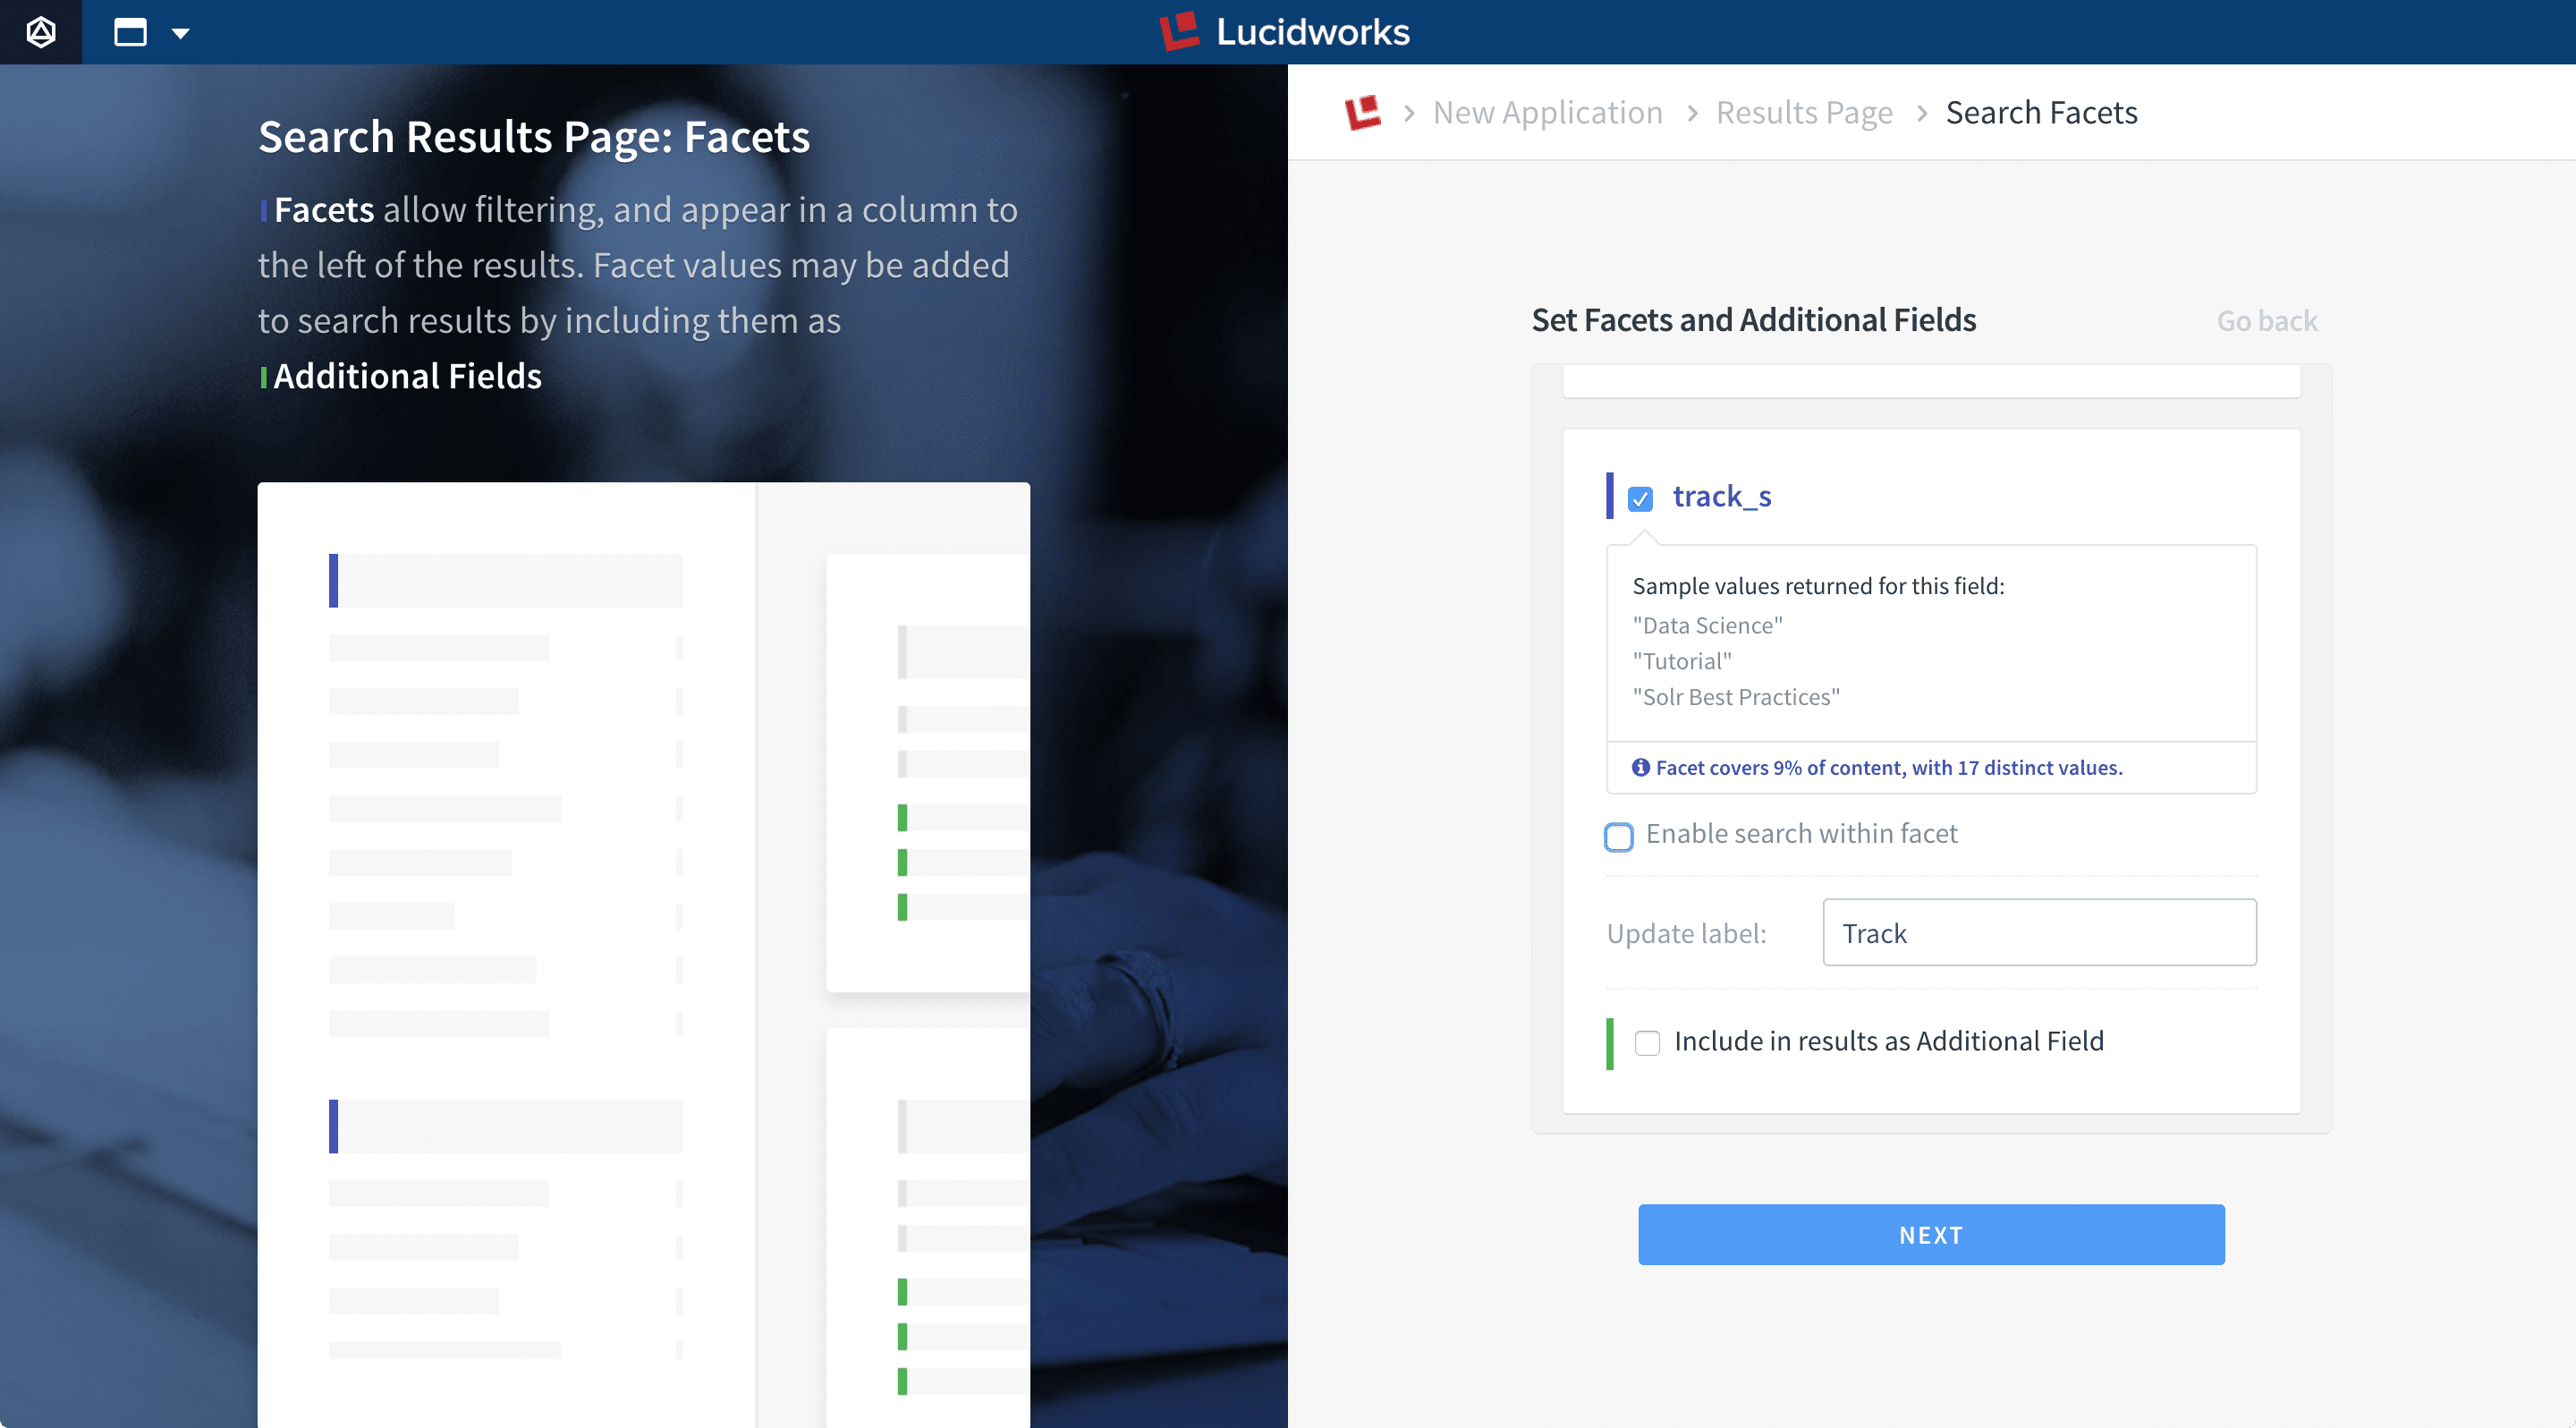 Optionally:In some cases, facet fields are not selectable in the wizard. In this case, you can define facets later using markup.
- Select Enable search within facet to add a search box for searching the facet field names to the Facets pane.
- Enter a user-friendly label for each facet field, such as “Genre” instead of “genres_ss”.
- Select Include in results as Additional Field to display the values of the facet fields within each search result.
- Click Next.
-
On the Customize UI page, enter a title and select a color theme:
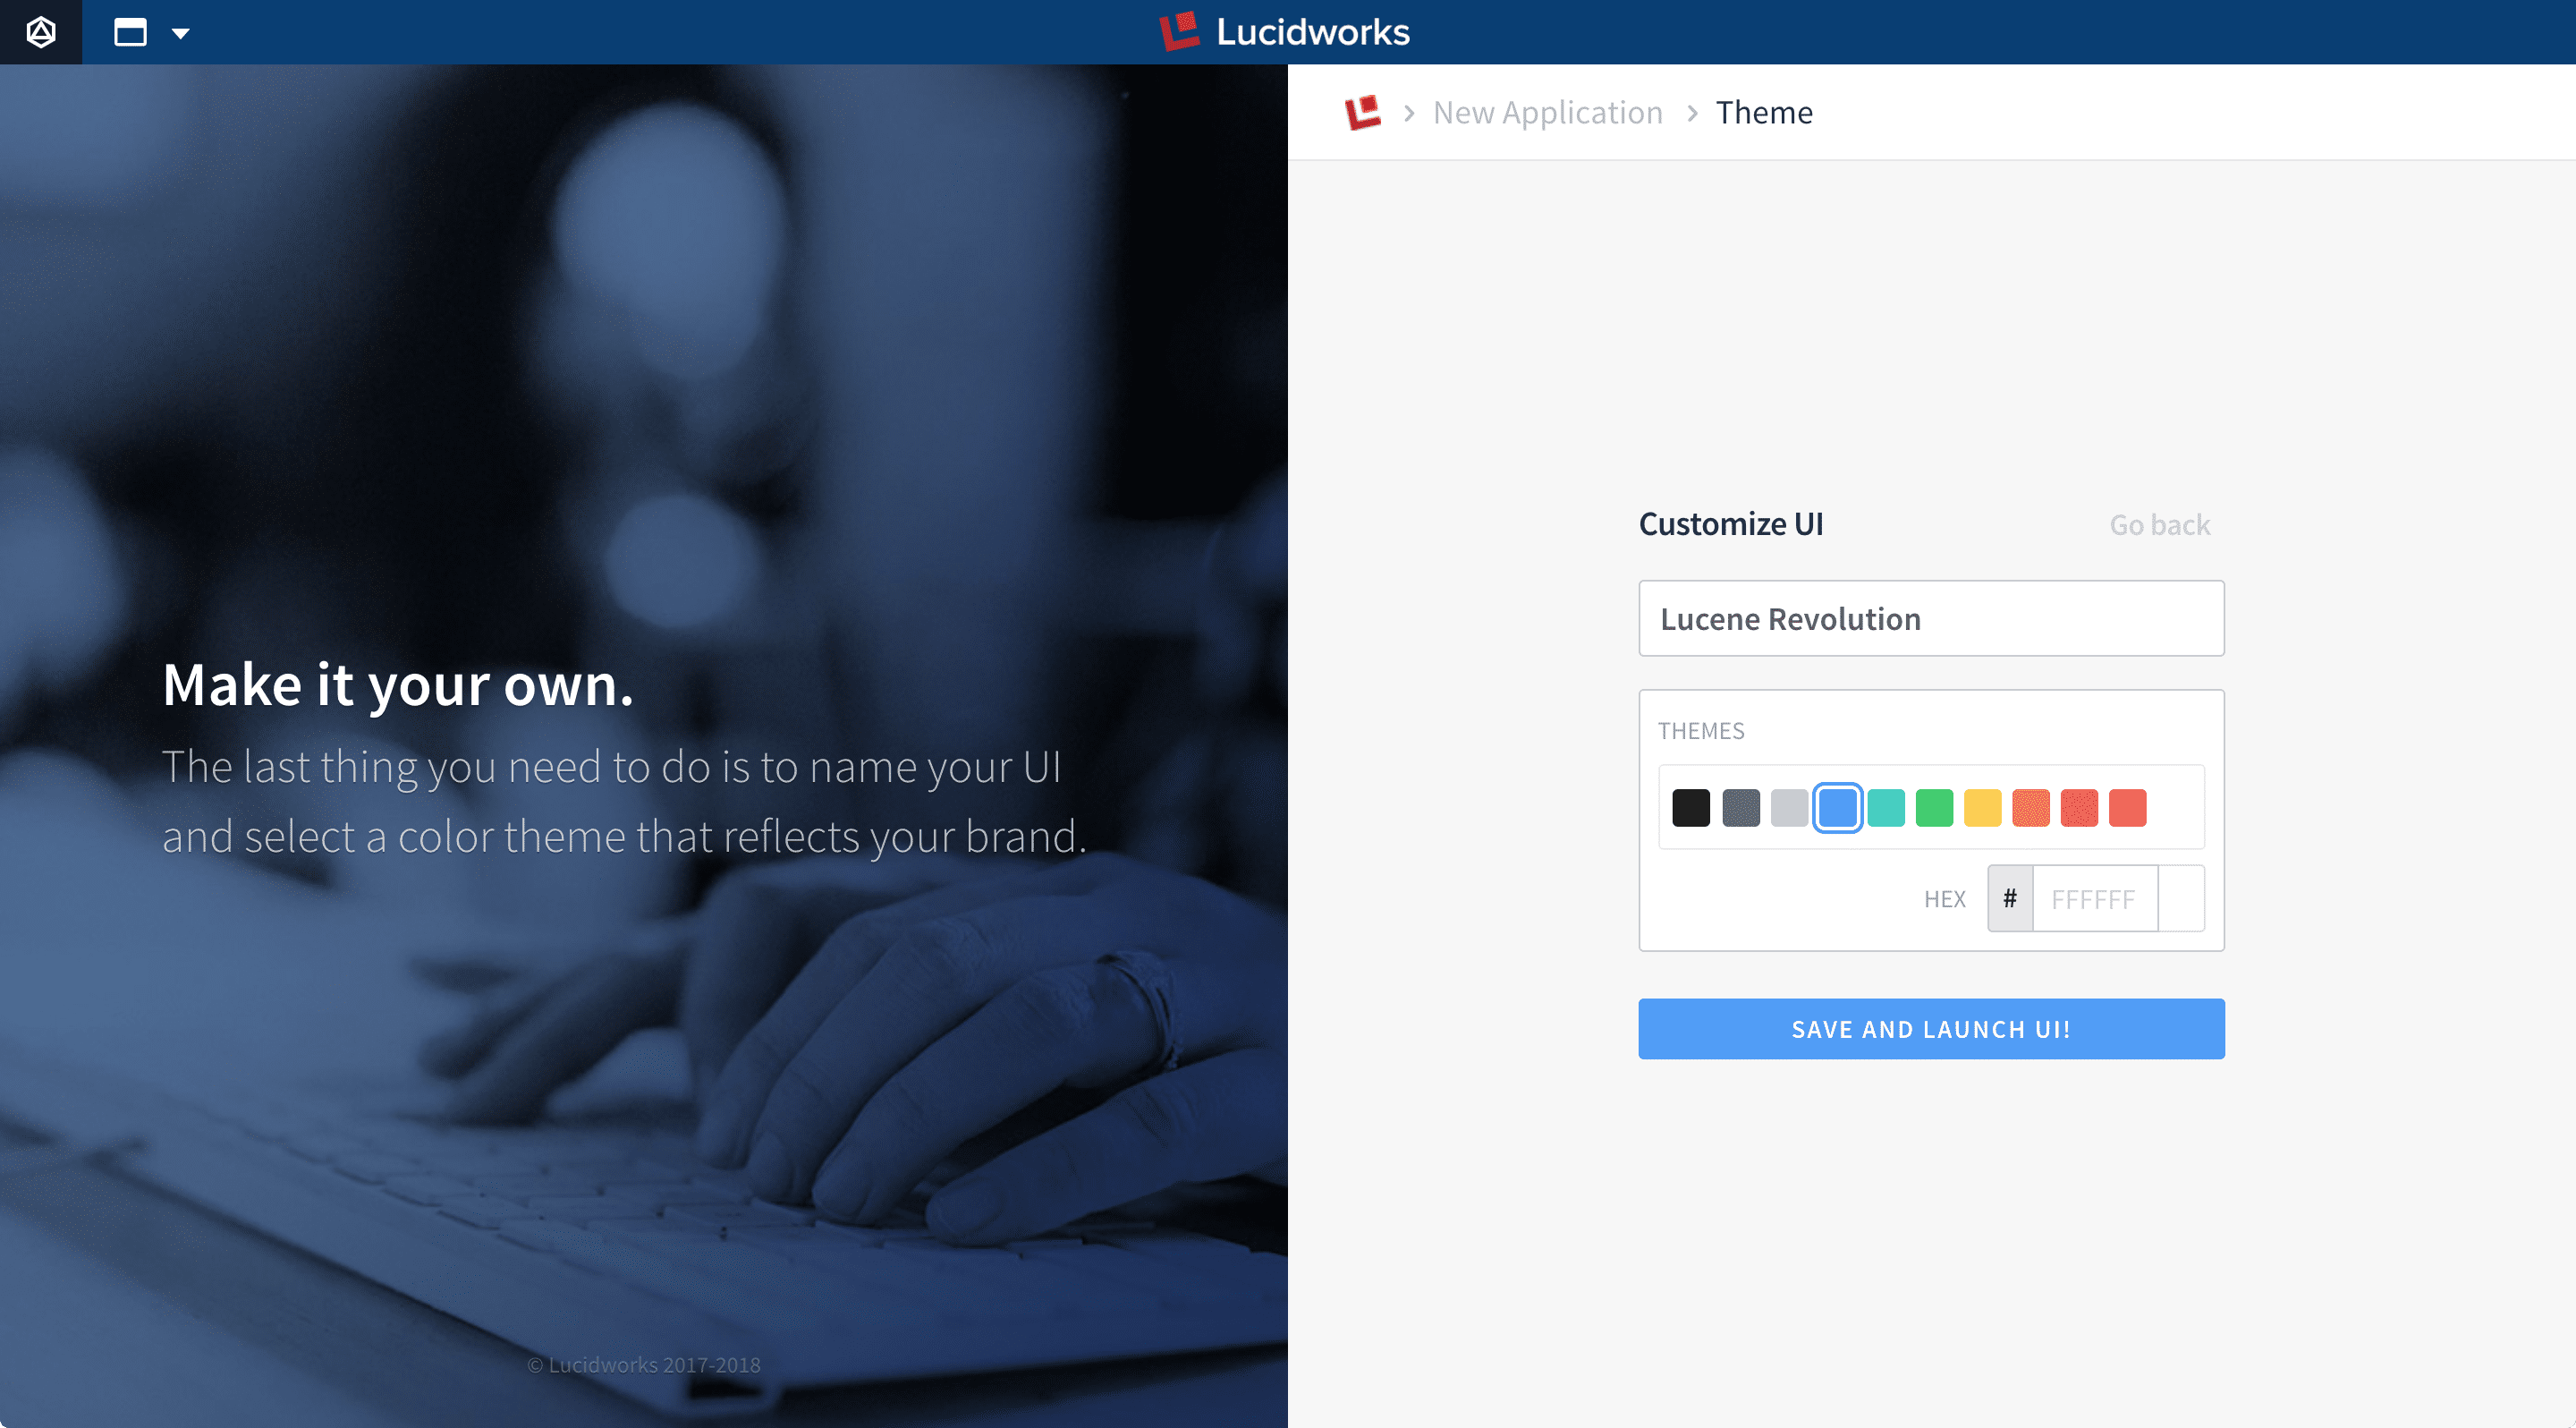
-
Click Save and Launch UI.
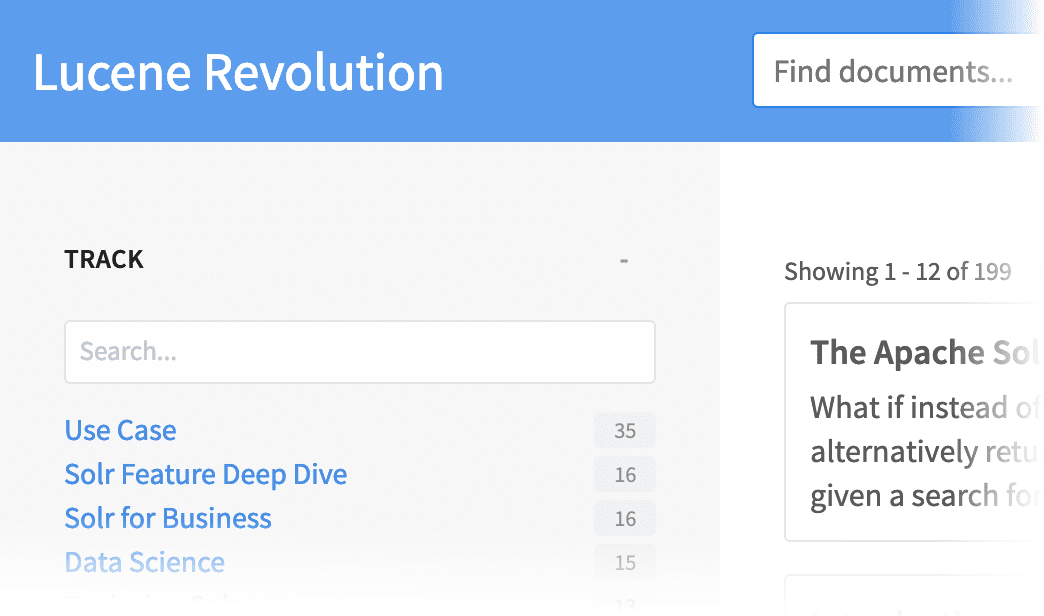
A preview of your search interface and data appear:
 It can take about a minute for the preview to appear. If the preview does not appear, refresh the browser tab.

Protect Against CSRF Attacks
Protect Against CSRF Attacks
- If it does not already exist, create a new file named
csrf.confand place it insrc/main/resources/conf/security. - In that file, set the property
enabledtotrue. This tokenizes the requests. - By default, the time-to-live of the Appkit request token is 60 minutes. You can change this by setting the property
durationto some other value; for example,duration: 30. Responses received without a request token or with a request token has expired are rejected.
Deploy a Search App in Fusion’s Webapps Service (4.2)
Deploy a Search App in Fusion’s Webapps Service (4.2)
UI deployment overview

- Develop your search interface.
- Publish your UI to Fusion Server using the instructions below.
http://localhost:8764/webapps/<project-name>.Publishing a search interface to Fusion Server
These steps publish your search interface to a Fusion instance (and its cluster) where the App Studio project already exists.-
In the Fusion workspace, navigate to App Studio and select your search interface.
-
Next to Publish Status, click the toggle:
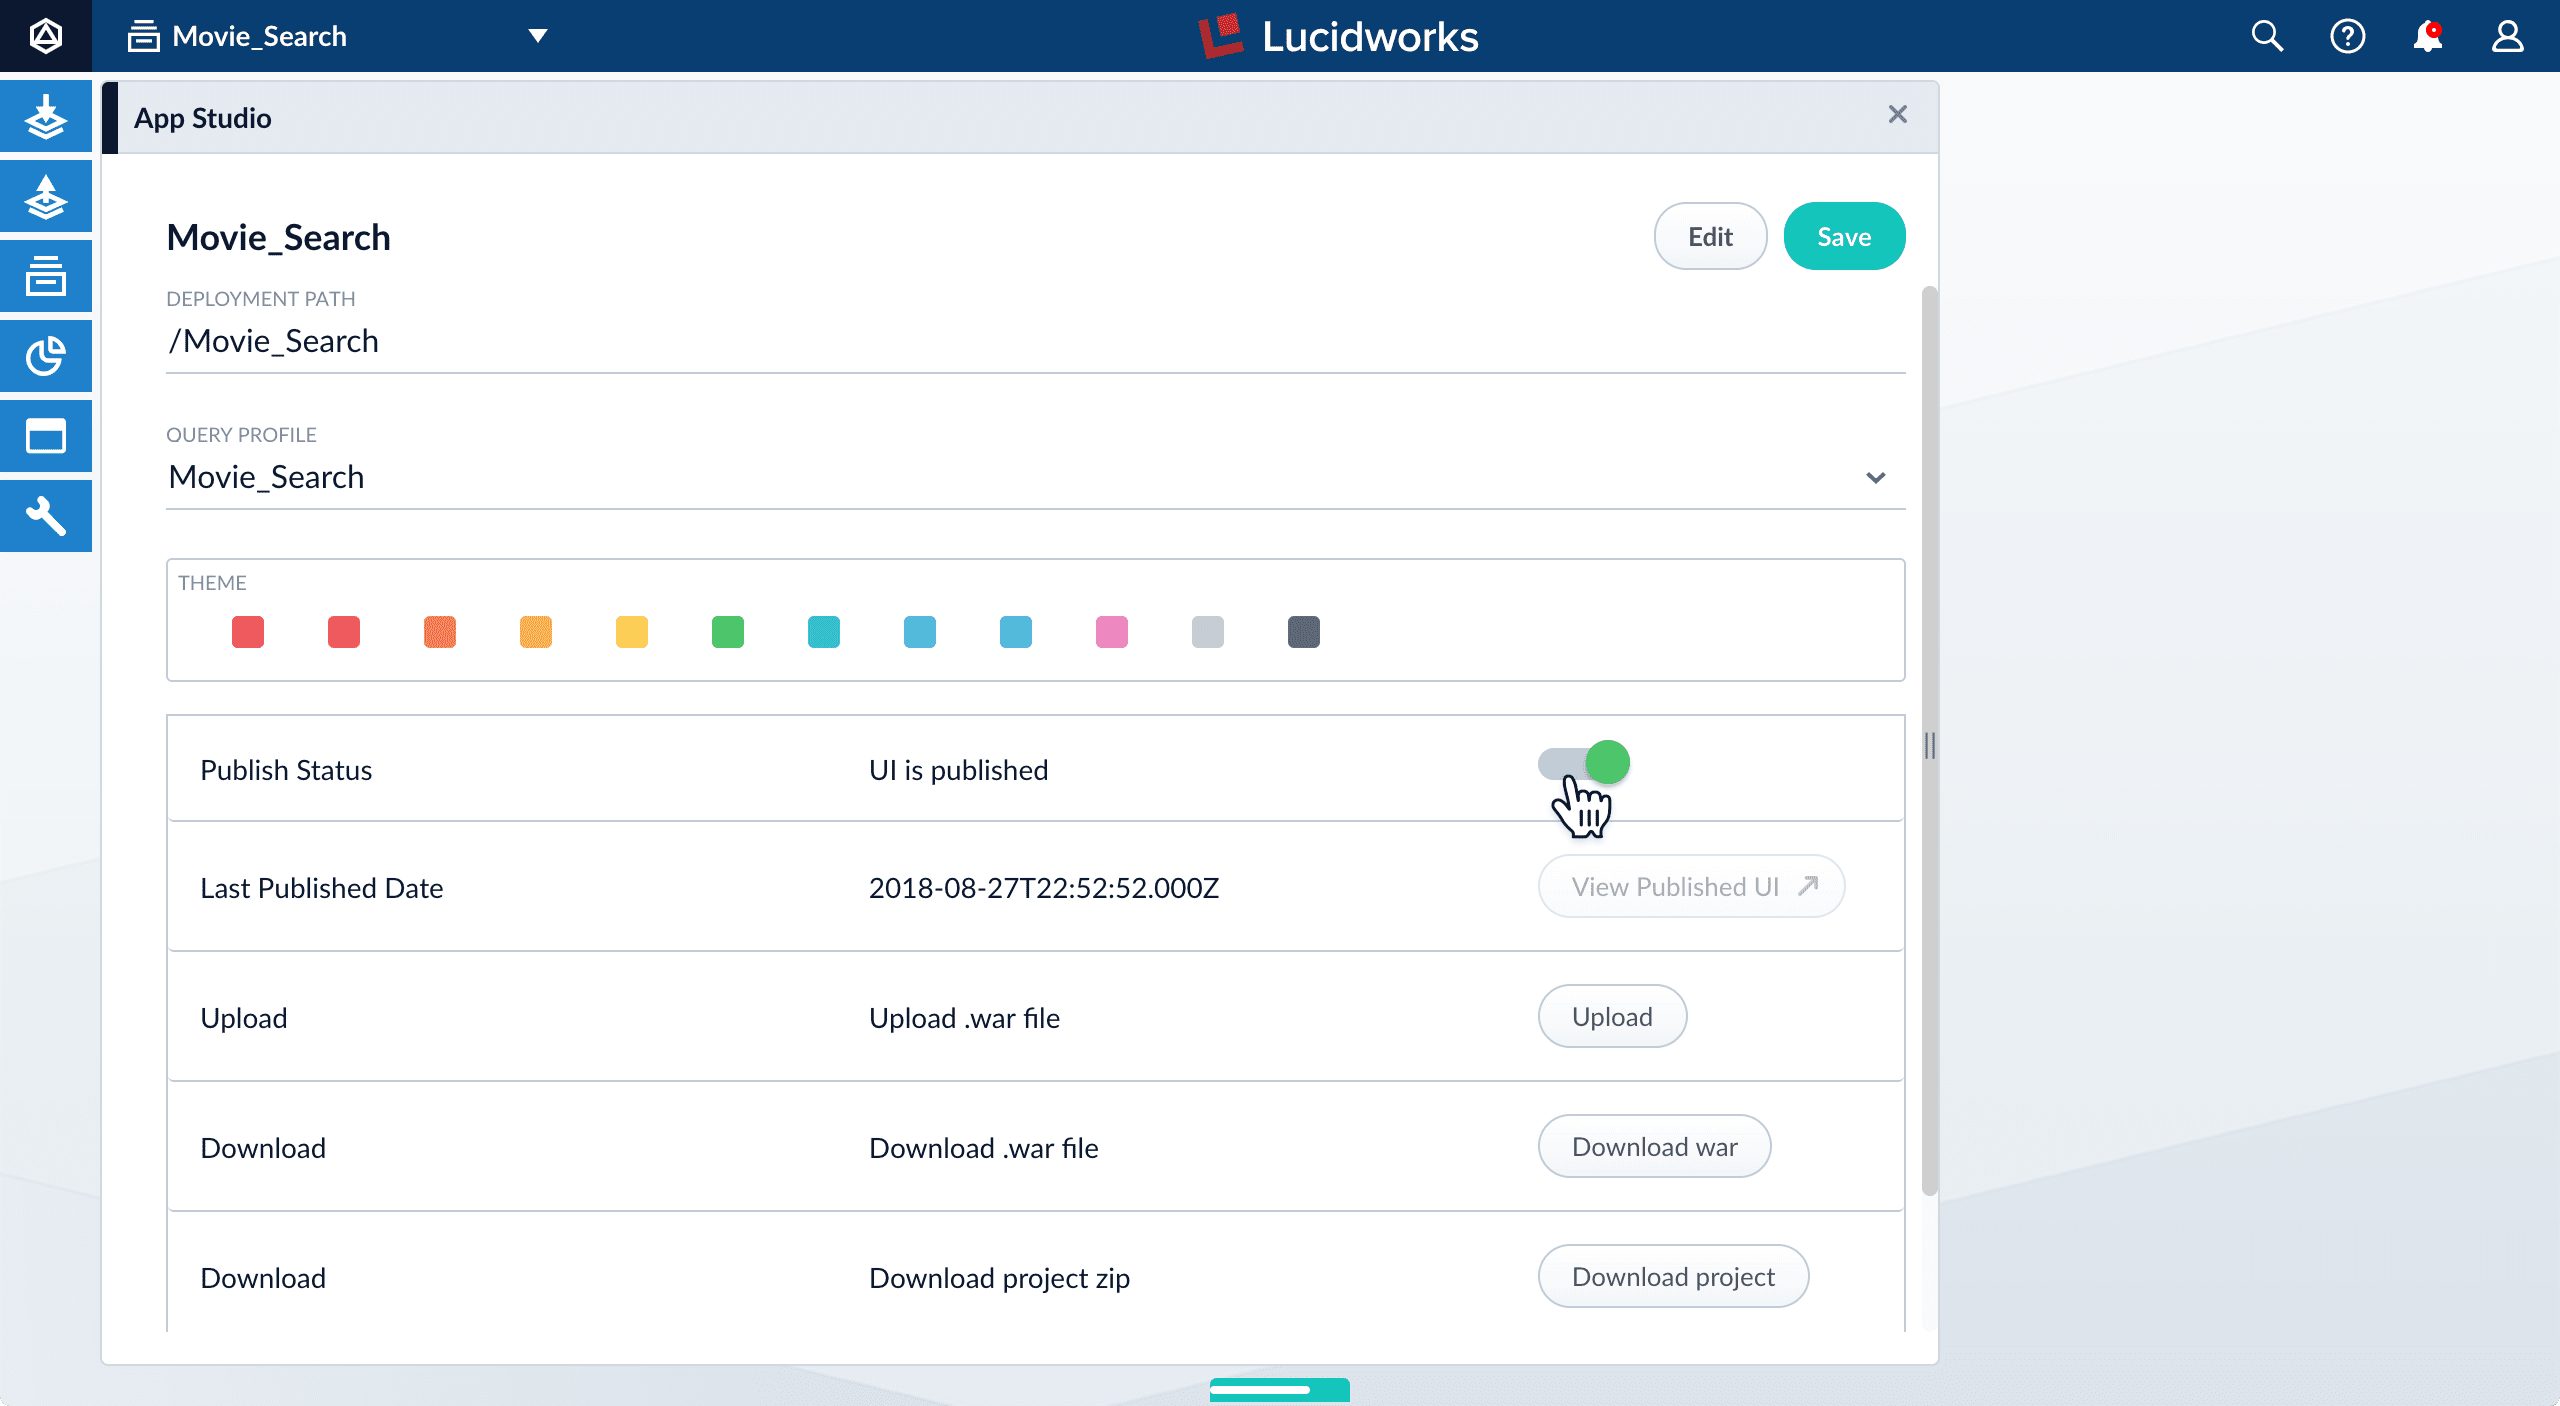
- Click Save. The interface is only published after you click Save, which also enables the View Published UI button.
-
Click View Published UI to launch a new window where you can view the interface as an end user.
Your published interface is available at
http://localhost:8764/webapps/<project-name>#/search.
Migrating a search interface to other Fusion hosts
If you have published your search interface on one Fusion Host in a cluster, then it is published throughout the cluster.There are two ways to migrate a search interface to a different Fusion cluster:| Export and import the Fusion app | Download and upload the WAR (.war) file |
|---|---|
| This migrates all objects in the Fusion app, such as datasources, query profiles, schedules, and so on, in addition to the search interface. The search interface will be editable on the target hosts. | This migrates only the search interface. The search interface will not be editable on the target hosts. If you are uploading the file into a Fusion app other than the one in which it was created, the new Fusion app must include a query profile and data fields whose names are identical to the ones already configured in the search interface. For instructions on downloading or building a WAR file and uploading it to Fusion, see below. |
Download or build a WAR file
You can distribute a search interface as a WAR (.war) file.You can download a WAR file from the Fusion UI or create one from a downloaded project.Downloading a WAR file
-
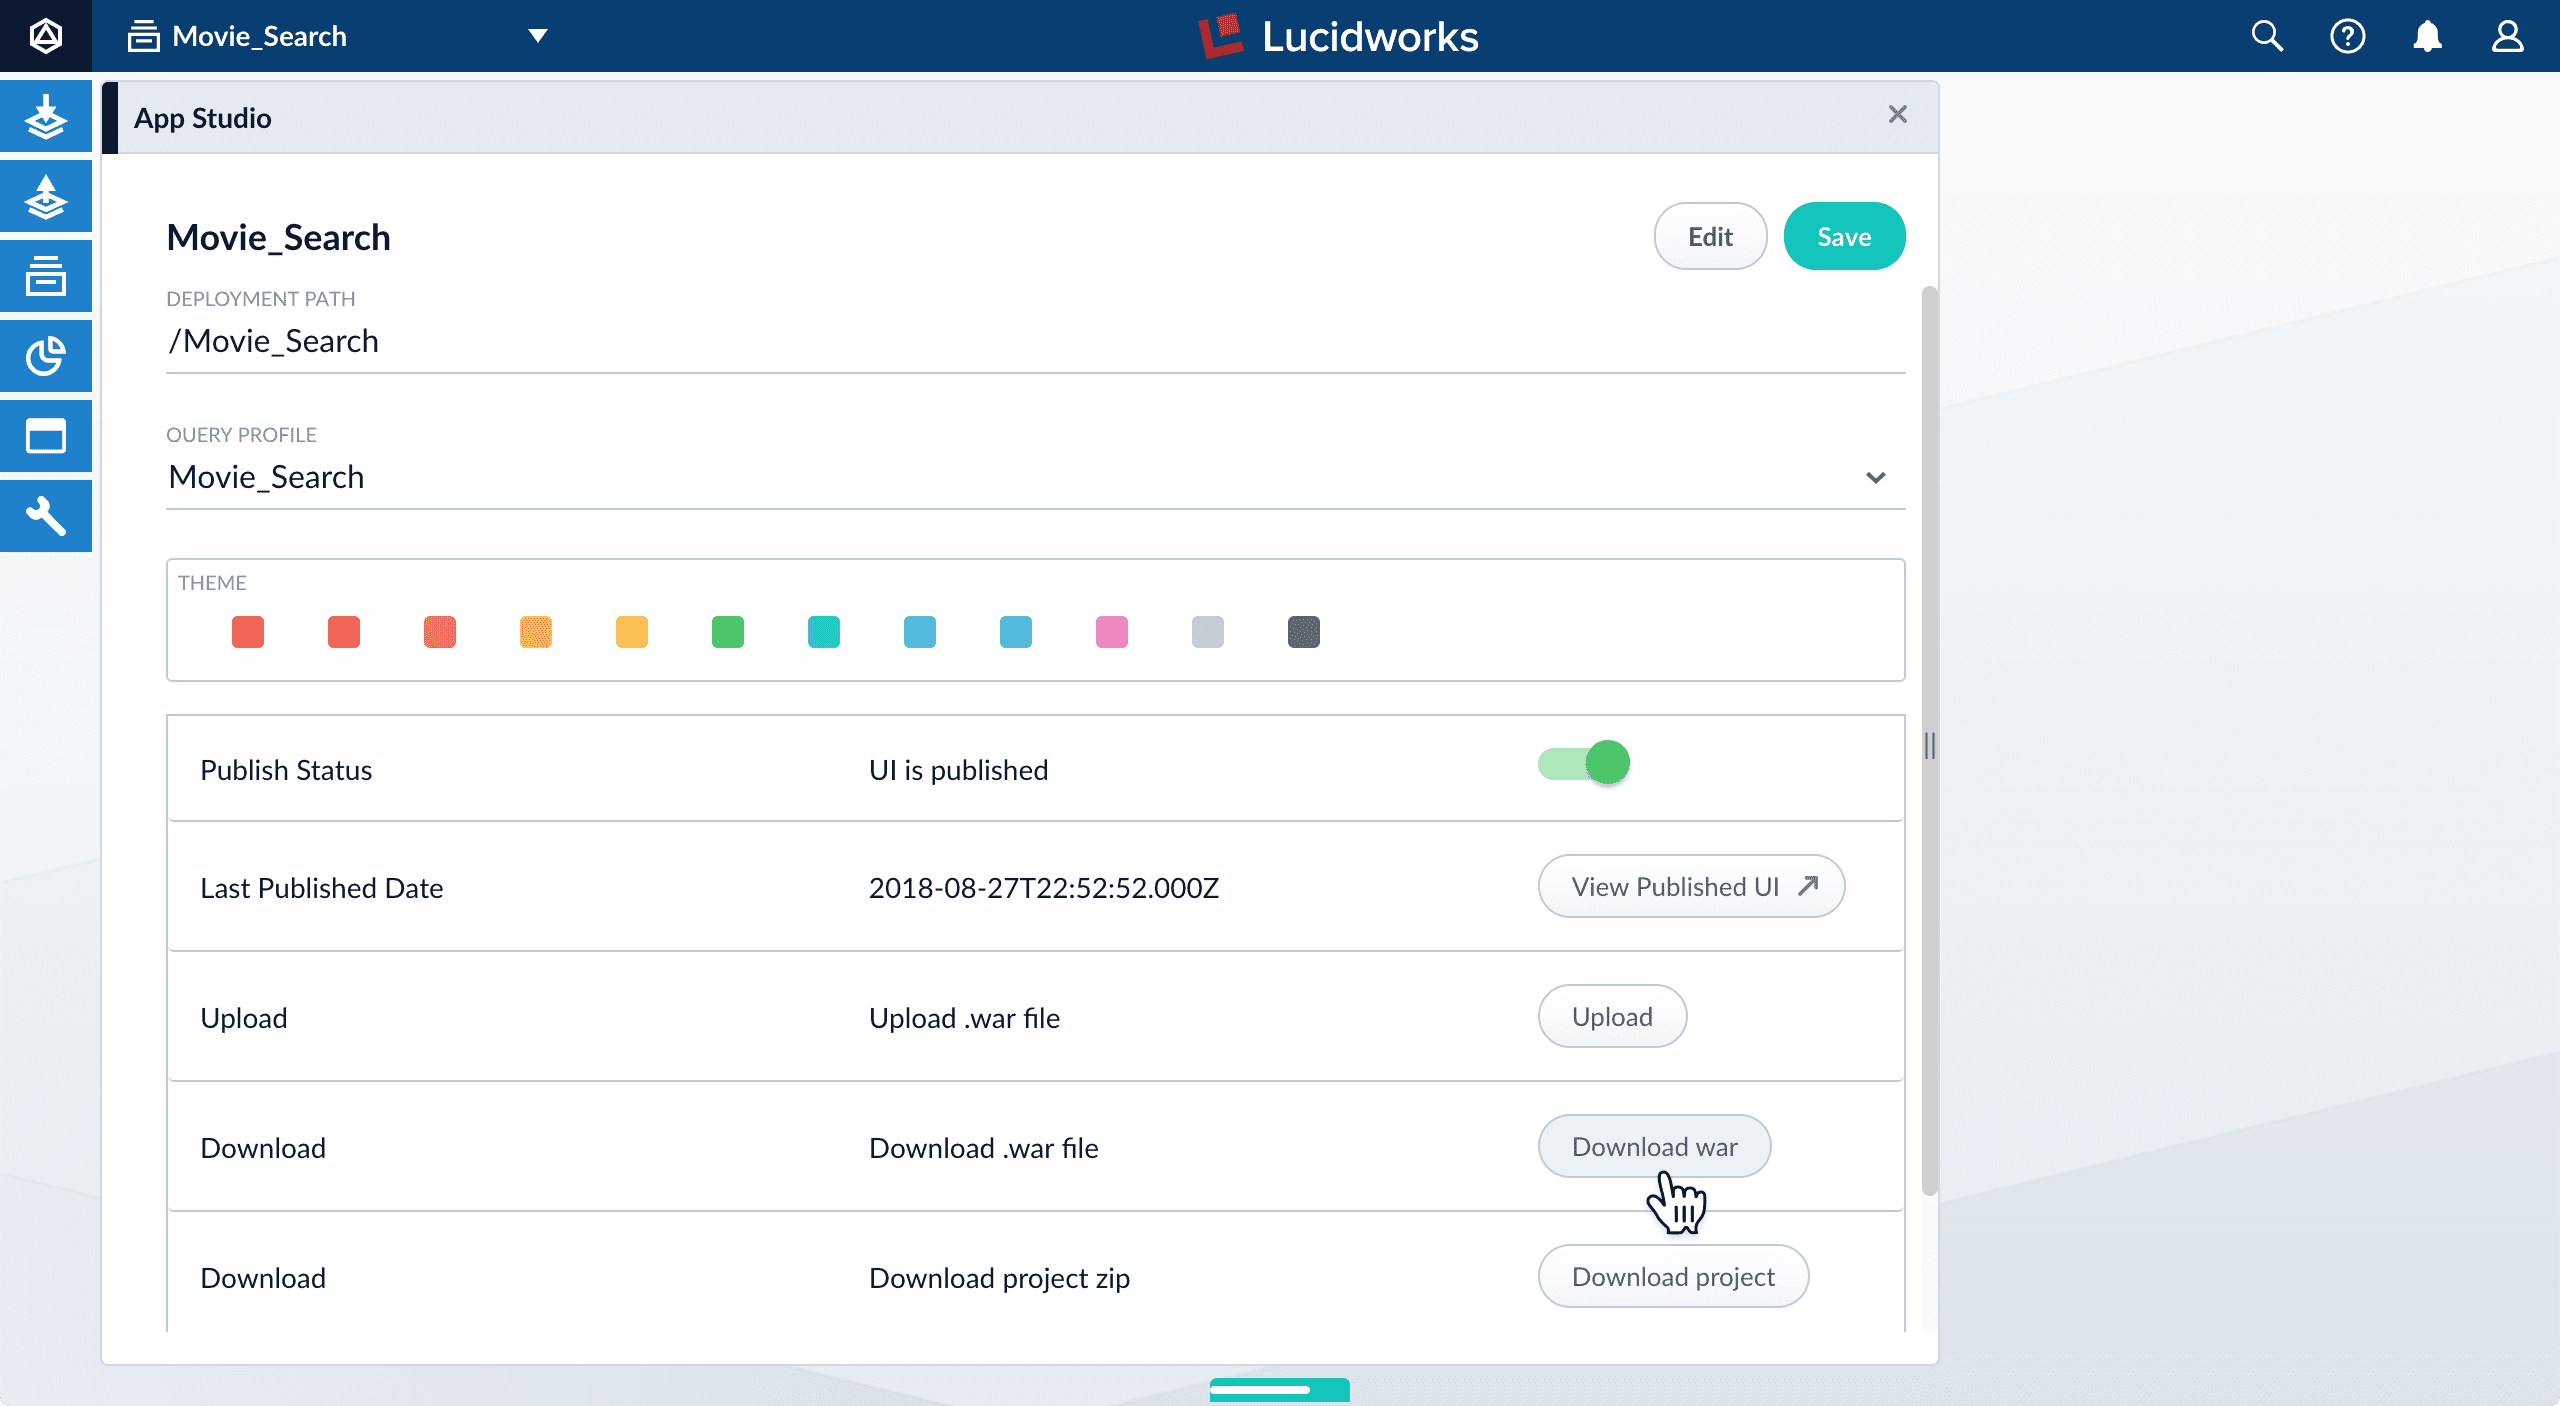
In the Fusion workspace, navigate to App Studio and select your search interface.
-
Click Download war:
Building a WAR file
A downloaded project comes with the scriptsapp-studio (for Unix) and app-studio.bat (for Windows) that create WAR files.Unix and MacOS:-
In a shell window, switch to your project directory:
-
Create application files:
-
In a terminal window, switch to your project directory:
-
Create application files:
dist directory of your project:-
search-app-latest.x.jarThis is an executable Java JAR file file. -
search-app-project.zipUse this file to share your project with other search interface developers. -
search-app.warYou can upload this file to Fusion to deploy it.
Upload the WAR file
You can upload the WAR file through the Fusion UI or the REST API.Uploading with the Fusion UI
You can upload your project (as a WAR file) in the App Studio configuration panel.-
From the App Studio menu, select your project:
-
Click Upload.

- Click Yes, continue.
- Navigate to your WAR file and select it. After the upload is complete, you can edit or publish the uploaded project.
Uploading with the REST API
Use thewebapps/{id}/war endpoint of the Webapps API to upload a WAR file, as in this example:Running a dedicated node for a search interface
When deploying Fusion nodes dedicated to serving one or more search interfaces, only the following Fusion services need to run:agentapilog-shipperwebapps
App Studio Development & Deployment Guide
App Studio Development & Deployment Guide
Development
In building out a search application, App Studio developers use an IDE (Intellij, eclipse, VS Code), maven for server-side dependency management and its integrated jetty plugin, NPM 9.0.2 for client-side dependency management and Java 1.8 JDK.We first will clone the repository of our project on our local system. From there we make additions and edits to the code which we then commit to the repo.In order to test our changes in real time, we use the integrated maven jetty plugin to serve up our local application at http://localhost:8080 where we can see most changes made to the code in real time.Environment / Profile management
For each environment, we build out a profile to overlay specific parameters to this environment. See the section entitled ‘Package the web application for different runtime environments - build profiles’ here for more details: https://dev.twigkit.net/docs/Getting_started/Installation/Building_from_source/?q=profileExample command:mvn clean jetty:run -Dtwigkit.profile=profileNameIn App Studio apps, we can have different profiles for each environment (Dev, QA and Prod) as well as local development. These profiles contain configuration files that should overwrite the files with the corresponding names and directory locations in the main resources directory.Setting up a profile
Following are the files you may want to specify for a given environment in each profile:message.service.fusion.conf – This config file is responsible for the configuration of the way we send signals to the Fusion endpoint. The important property here is query-profile, which we should ensure points to the query profile that manages the main collection to which we want to send signals. I.e. – if we specify a query profile that points to the myCollection collection, App Studio will send signals to the myCollection_signals collection (if it does exist).platforms.fusion.fusion.conf – This is our base Fusion platform configuration file. It manages all the configuration settings that are common amongst each Fusion platform. These settings are inherited by any config file in the platforms.fusion directory, as this file has the same name as the directory it resides in.platforms.fusion.data.conf – This is our configuration file for the main platform, by default. The only required parameter is the query-profile to send these queries to. This is included in the profiles as during the course of development, there were some differences across environments in the name of this collection, so we set them individually for each environment.The important property to note here is query-profile which tells App Studio which query profile to fire search requests against.security.kerberos.conf – This is an example of a security configuration file. In this case, the file in which Kerberos security is configured. The parameters set here are referenced in our configuration of resources/spring-security.xml when the app is loaded. The main parameters to understand are service-principal and keytab-location. The service principal should be the one used when creating the keytab file. The keytab location is the location in which the keytab resides on the server that App Studio is running.security.security.conf – The function of this file is to set general parameters related to security. The type parameter should be the type of security your app should use (kerberos, spring_security, saml etc..). The password parameter is the key that is used when hashing passwords using twigcrypt utility. It is to be used in combination with a ‘secret seed’ in order to generate the hash.services.api.fusion.conf – This is the main file in which the connection to the Fusion API is configured. The host, port and protocol values are all given independently. The credentials given are that of a service account that has POST rights to enable the sending of signals to Fusion.logback.xml – In this file, we can add additional <logger> tags to print out additional logging on specific classes in the webapps or local logs. The main logging comes from the root package twigkit.Packaging and Deployment
Packaging
To deploy our code to the server, we build and package the source code and dependencies into a WAR file using maven.Command:mvn clean packageIn order to package the app with the proper connection details and other configuration settings for the particular environment (dev, prod, etc..) see the section above re the profile parameter.Command: mvn clean package -Dtwigkit.profile=profileNameYou can watch the logs for any compilation errors. If it’s not already, rename the resulting WAR file to ROOT.war.Deployment
Create a new App Studio context in Fusion
Prerequisites:- Fusion is installed
- A Fusion App is created
Upload the WAR to the Fusion webapps service
App Studio Development Troubleshooting
App Studio Development Troubleshooting
Troubleshooting
Data is not appearing on the page as expected
Check response data
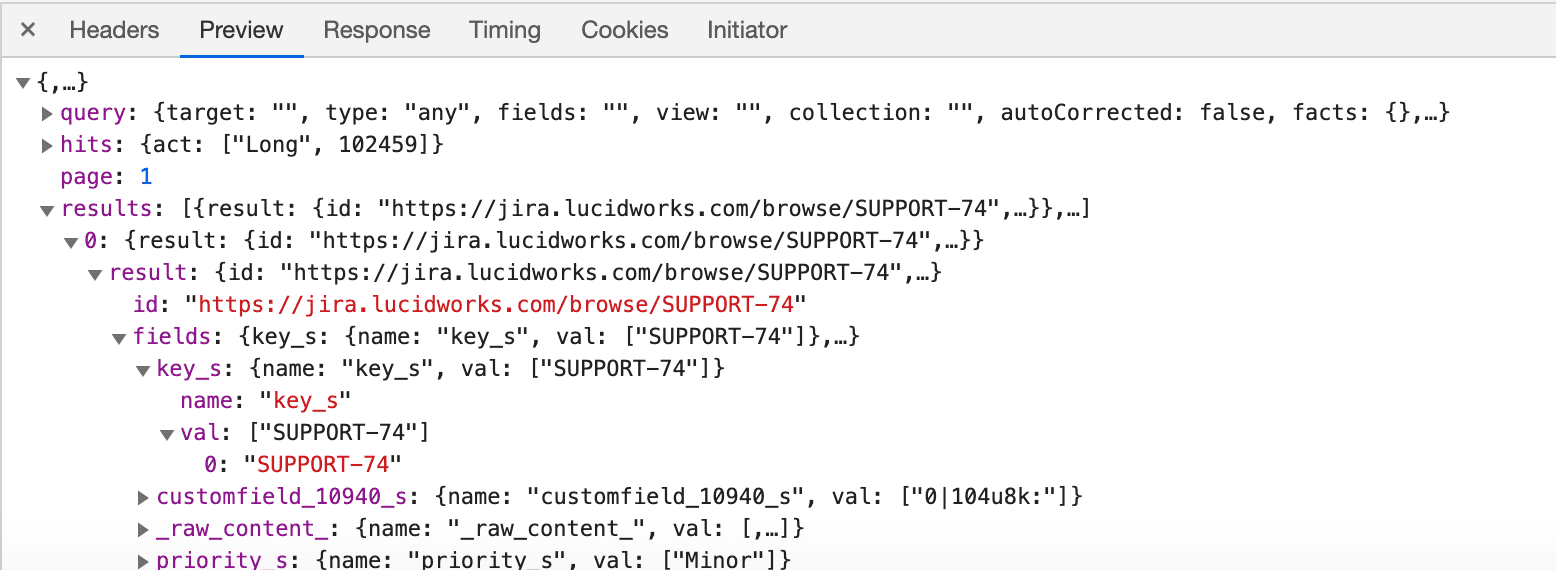
If you open your browser’s dev tools, choose the ‘Network’ tab, and look for an XHR request similar to the one shown below (starting with platforms.fusion…) you can navigate through the values being returned from Fusion.To determine which response is which (as you may have multiple) you will need to look at the platform that populates the response, that populates the element on your page.You can then track down the value you are looking for in here. So if looking at results, a result list iterates through the results, so we should look inside a result. In each result, there’s a set of fields and associated values.Note that other processing may happen in between receiving the response and displaying it on the page (response processors, modifications in the HTML, security trimming, etc..)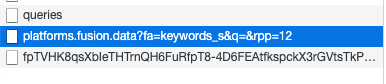
Get query from webapps/servlet logs and fire it against Fusion
If the data in your response object is not as you expect, you can get the query from the App Studio logs to fire directly against the Fusion endpoint, without App Studio as a middle-man. Note that you’ll need your logger configured to print out debug logging for the twigkit class in logback.xml in your environment profile. Or if not using a profile, in the main resources directory.<logger name="twigkit" level="DEBUG"/>Look in the webapps logs are under fusion/version/var/log/webapps/. You can sort them by date (ls -l) and view the latest one with the suffix of stderrout. In here you will see some entries that should follow the format of the following:Page is totally blank/elements look broken or strange
Check browser console
If you open your browser’s dev tools, choose the ‘Console’ tab, you can check for any issues related to client side components. If you see the following error, you should wipe your node modules directory and reinstall them before building. Otherwise typically an error here suggests there is a problem in your Javascript code.rm -rf node_modules package-lock.json\pm cache clear -f\npm install
Encrypt Sensitive Values
Encrypt Sensitive Values
bin/twigcrypt/twigcrypt.sh utility is available to encrypt sensitive string values, such a passwords, at the command line. It uses a two-way encryption mechanism, so anywhere in the code this is used the value can be decrypted.To encrypt a value, run the following (note the single quotes around yourSensitiveValue):src/main/resources/conf/platforms/fusion/fusion.conf file, add:src/main/resources/conf/security/security.conf:Adding sensitive configuration parameters to Spring Security XML files
Two options for handling sensitive configuration parameters with Appkit and App Studio Spring Security XML files are:- Environment variables
- Configuration parameters
Passing environment variables
Assuming there is already a configuration file wired up for property lookup, you can use the following property using the environment variableUSER_TEST:Passing in configuration parameters
Use a system property passed at startup with-Duser_test=myvalue:Get Started with App Studio
Get Started with App Studio
App Studio
You can get started with App Studio in just minutes when you have a Fusion app that includes some indexed data.App Studio creates a single-page search application that you can further customize through the built-in markup editor.If you have created apps in prior versions of App Studio or with prior versions of Appkit, you can upgrade those apps to use the latest version of Appkit.App Studio 4.0
You can get started with App Studio in just minutes by expanding the zip file, editing a few basic configuration parameters, and running the startup script. The application runs in an embedded Jetty servlet, by default on port 8080.App Studio creates a single-page search application that you can further customize through the built-in markup editor.Get the Status of App Studio
Get the Status of App Studio
app-studio):app-studio.sh. A Bash script for Linux and macOSapp-studio.bat. A batch file for Windows
Handle the No-Results Case
Handle the No-Results Case
search:no-results tag displays a default message: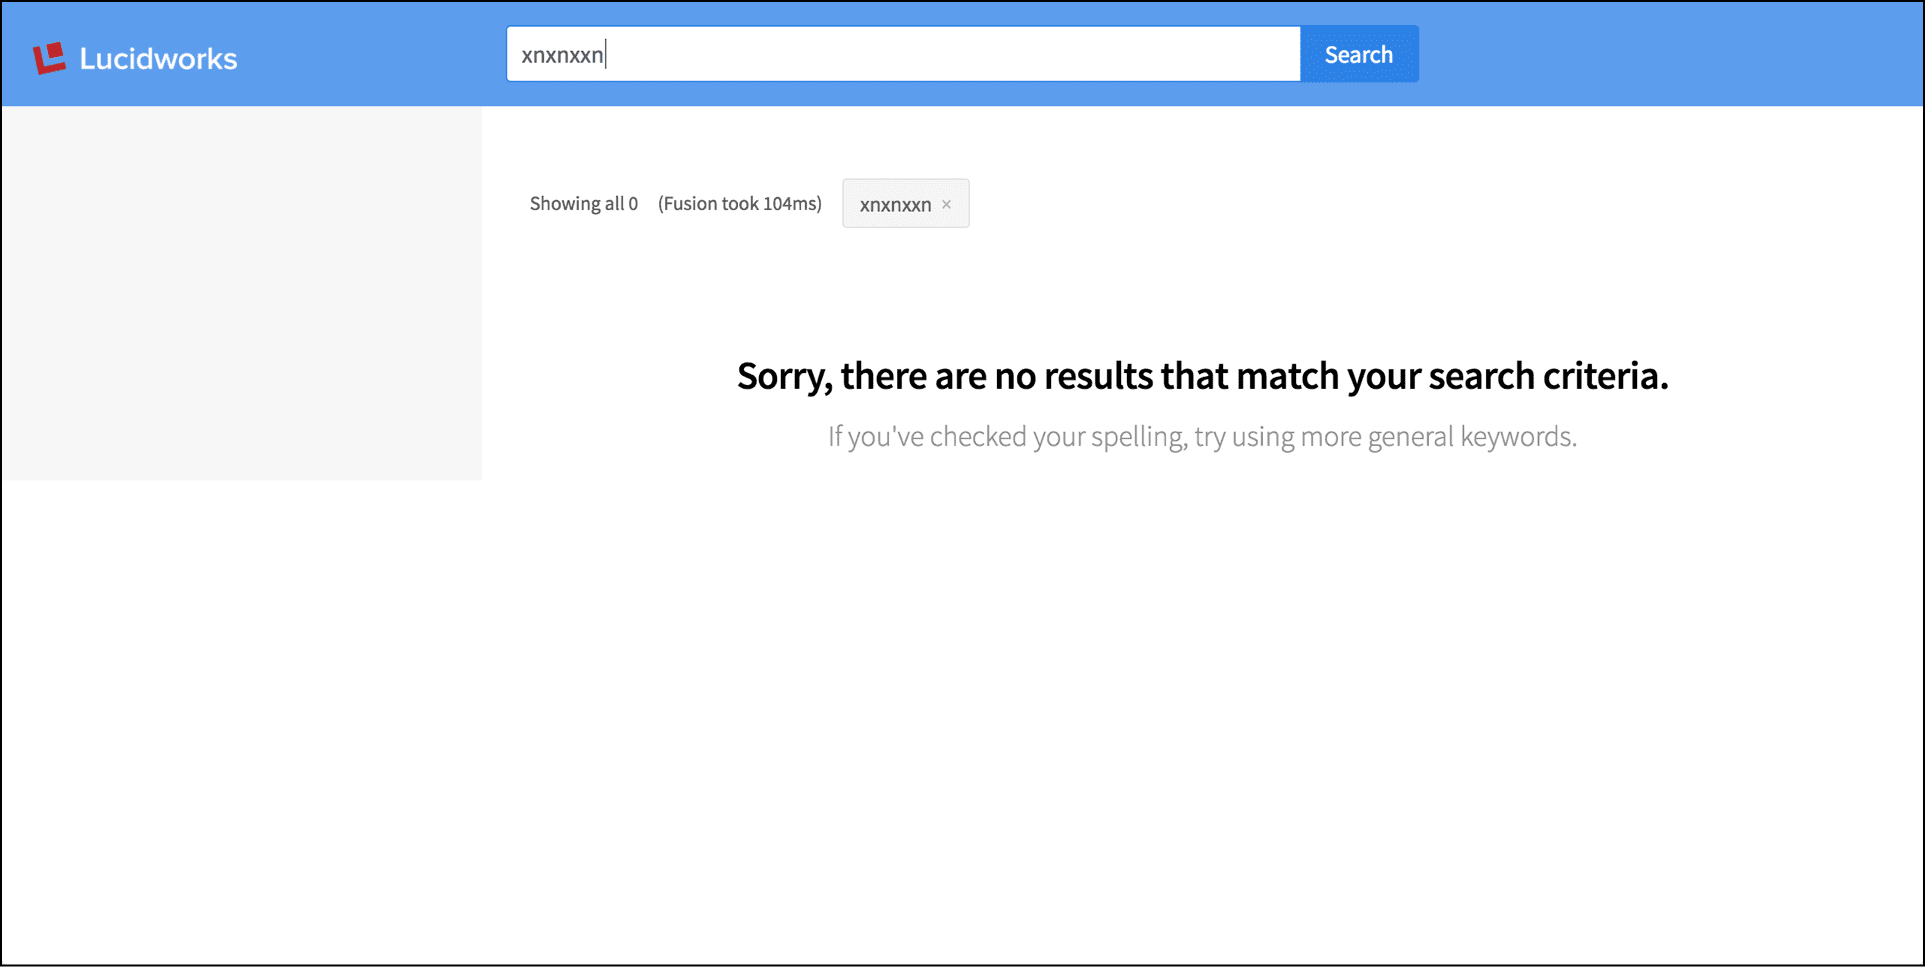
Include a Partial Page
Include a Partial Page
layout:include tag: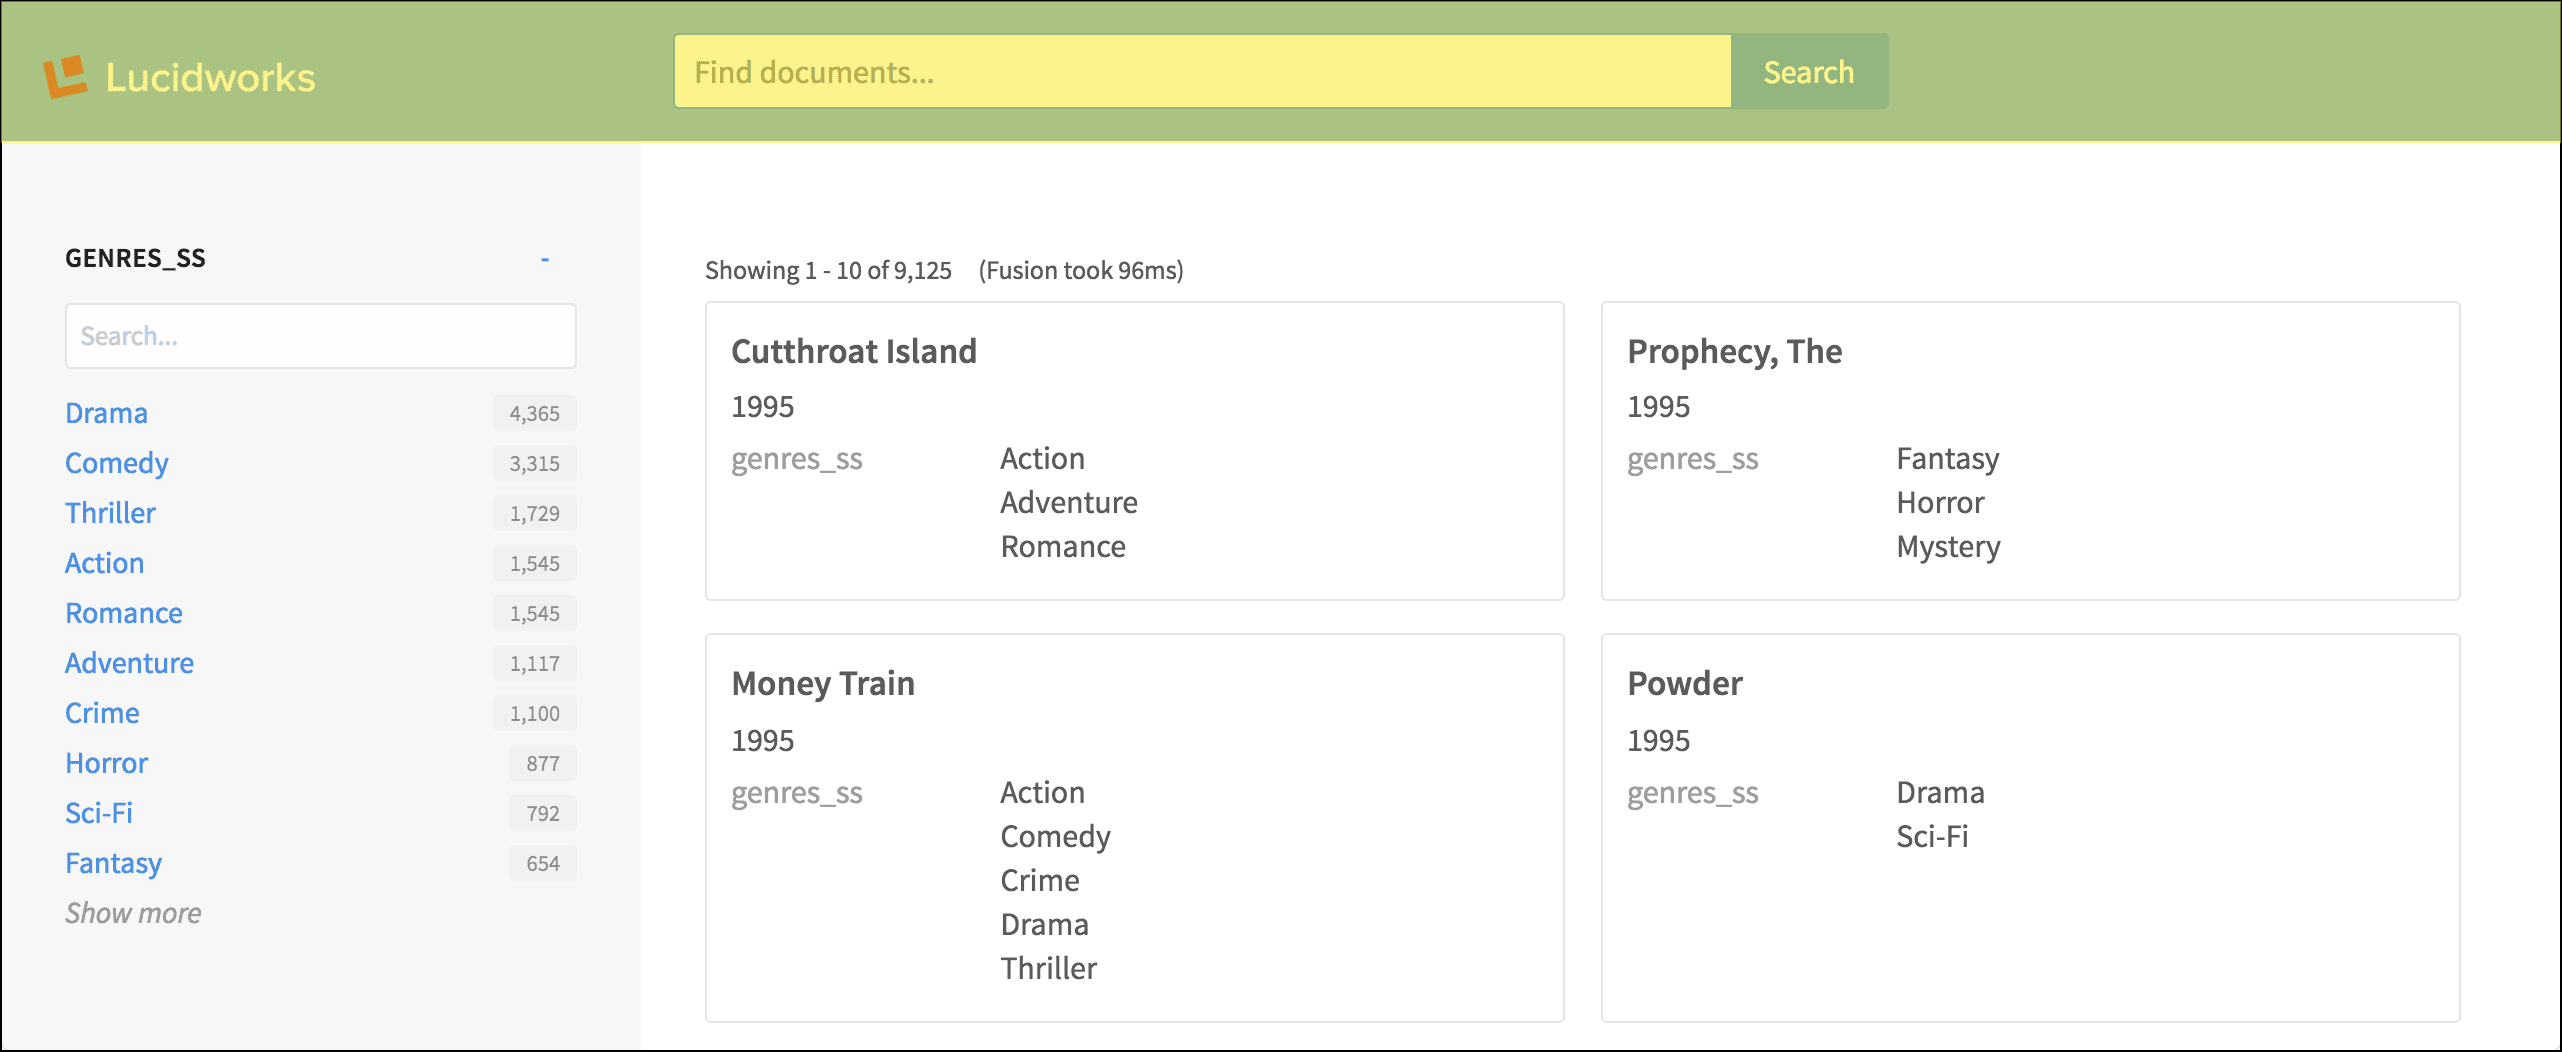
header.tpl.html file, in turn, contains a number of layout tags, plus the important search:box tag.Sidebar with facet list
The sidebar is rendered using the simplelayout:sidebar tag. Within the sidebar, the search:facet-list, and search:facet tags contain the parameters that configure the facet fields and their display.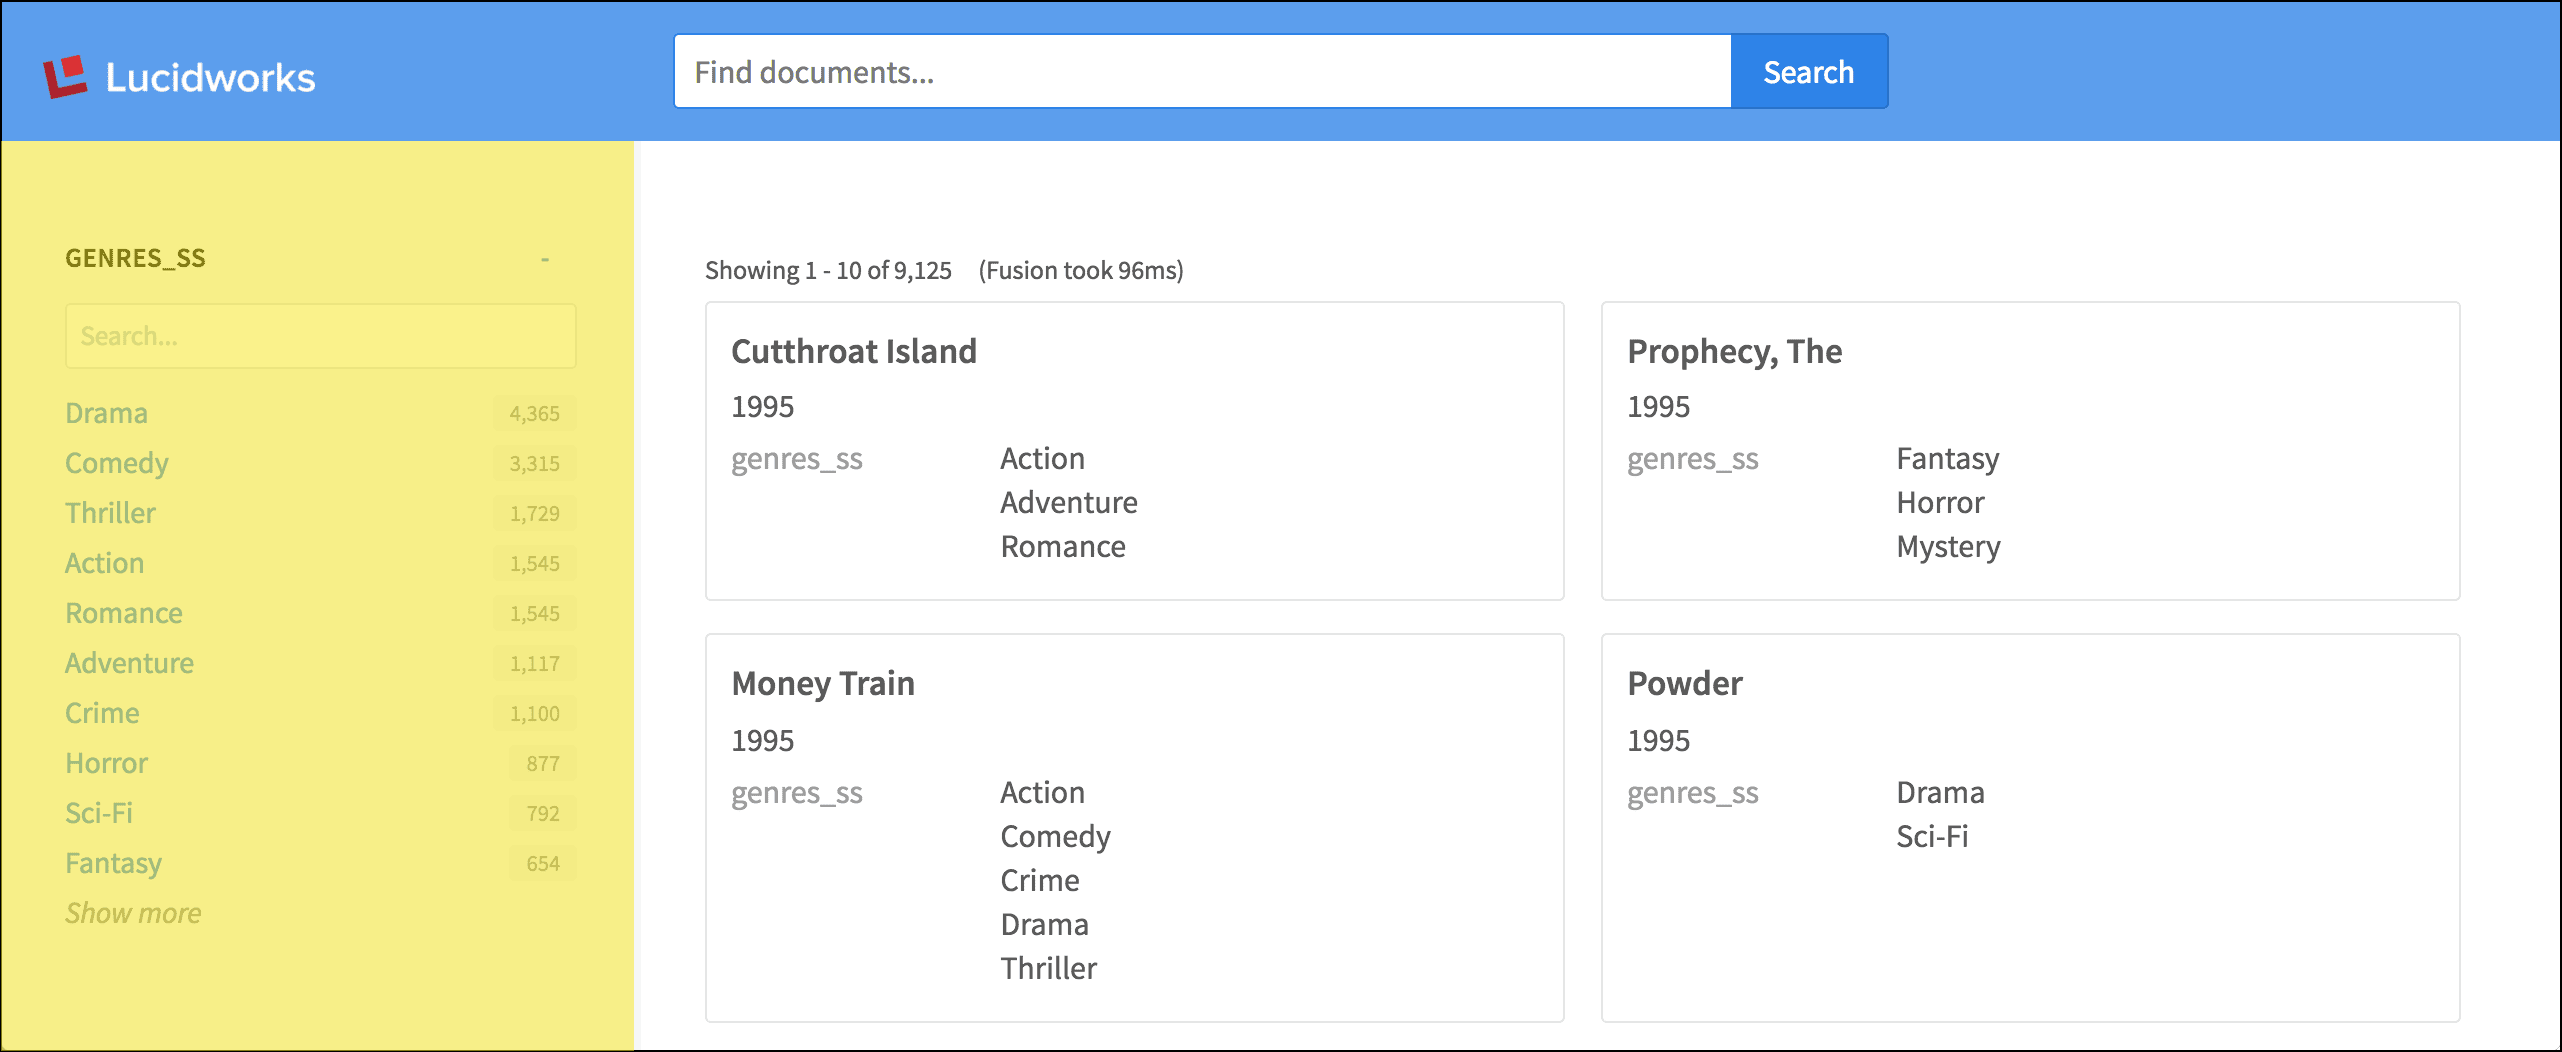
Incorporate Fusion Signals into Appkit Applications
Incorporate Fusion Signals into Appkit Applications
1 Add the Fusion Signals dependency
Signals tracking in Fusion requires the Fusion Signals module. To enable this module, insert this within thedependencies tag of your pom.xml:2 Add fusion.conf to activity tracking resources
To access this module when Appkit starts up, create afusion.conf file in resources/conf/activity/tracking/. In that file, configure the signals-endpoint. This is the REST-API endpoint that will ingest signal data into a signals collection. For example:image_catalog is the name of a primary collection that will be used to generate an auxiliary collection consisting of activity tracking data.When accessing Fusion using a service account, the parameter platform-config is required. This is the name of the Fusion platform configuration that includes the necessary parameters required for basic authentication. For example, if the configuration file for the Fusion platform, fusion.conf is stored in resources/conf/platforms/fusion/ then the platform-config parameter would be set as shown above. If, however, the configuration file for the Fusion platform was named myFusion.conf and again stored in resources/conf/platforms/fusion/, then the platform-config parameter would be platforms.fusion.myFusion. For quick reference, the platform configuration should contain these parameters to enable basic authentication:signals-index-pipeline, can be used to define an index pipeline that will to be used to convert the raw JSON signal data into a set of Solr documents. If no pipeline is defined, then the preconfigured _signals_ingest pipeline will be used. Both the remaining two parameters, commit and async, are booleans. If commit is set to true, a Solr commit will occur at the end of indexing allowing a persistent record of the activity to be kept. If async is set to true, signals will be indexed in asynchronous mode. In this mode, an autoCommit is issued with each signal and failures are not reported. The default is false.Install App Studio
Install App Studio
Version 4.1
App Studio is licensed and installed with Fusion Server.Version 4.0
You can get started with App Studio in just minutes by expanding the zip file, running the startup script and following the steps of the setup wizard. The application runs in an embedded application server, by default on port 8080.Licensing
App Studio comes with a trial license file, located atapp-studio/twigkit.lic. This trial license is valid for 30 days. Contact Lucidworks to obtain a commercial license.To install a commercial license, copy the new license file to app-studio/twigkit.lic, overwriting the trial license. Commercial licenses support multiple instances of App Studio. Lucidworks issues a separate license for each App Studio instance.Requirements
App Studio is a standalone application with the following requirements:- Oracle Java JDK 1.8 or later
- A running instance of Fusion Server, with one or more collections of indexed data
Installation
- Download App Studio.
- Copy the App Studio zip file to any convenient path.
- Expand the archive:
unzip app-studio-latest.x-zip-package.zipThis creates anapp-studiodirectory.
What is next
- See Startup and Shutdown for information about using the App Studio scripts.
- See Create a New Web App to learn how to create your first search app.
Lay Out a Page
Lay Out a Page
layout tags determine the layout and structure of the page. Using these ensures that the application will work equally well on desktops, mobiles and other devices (like high-resolution screens).App Studio uses a grid layout to control how large sections appear on the screen, and how they behave when the visible area or resolution changes.A simple grid:Lay Out Search Results in a Grid
Lay Out Search Results in a Grid
layout tags are used again to construct the grid layout. For brevity, we will omit those from the code samples below.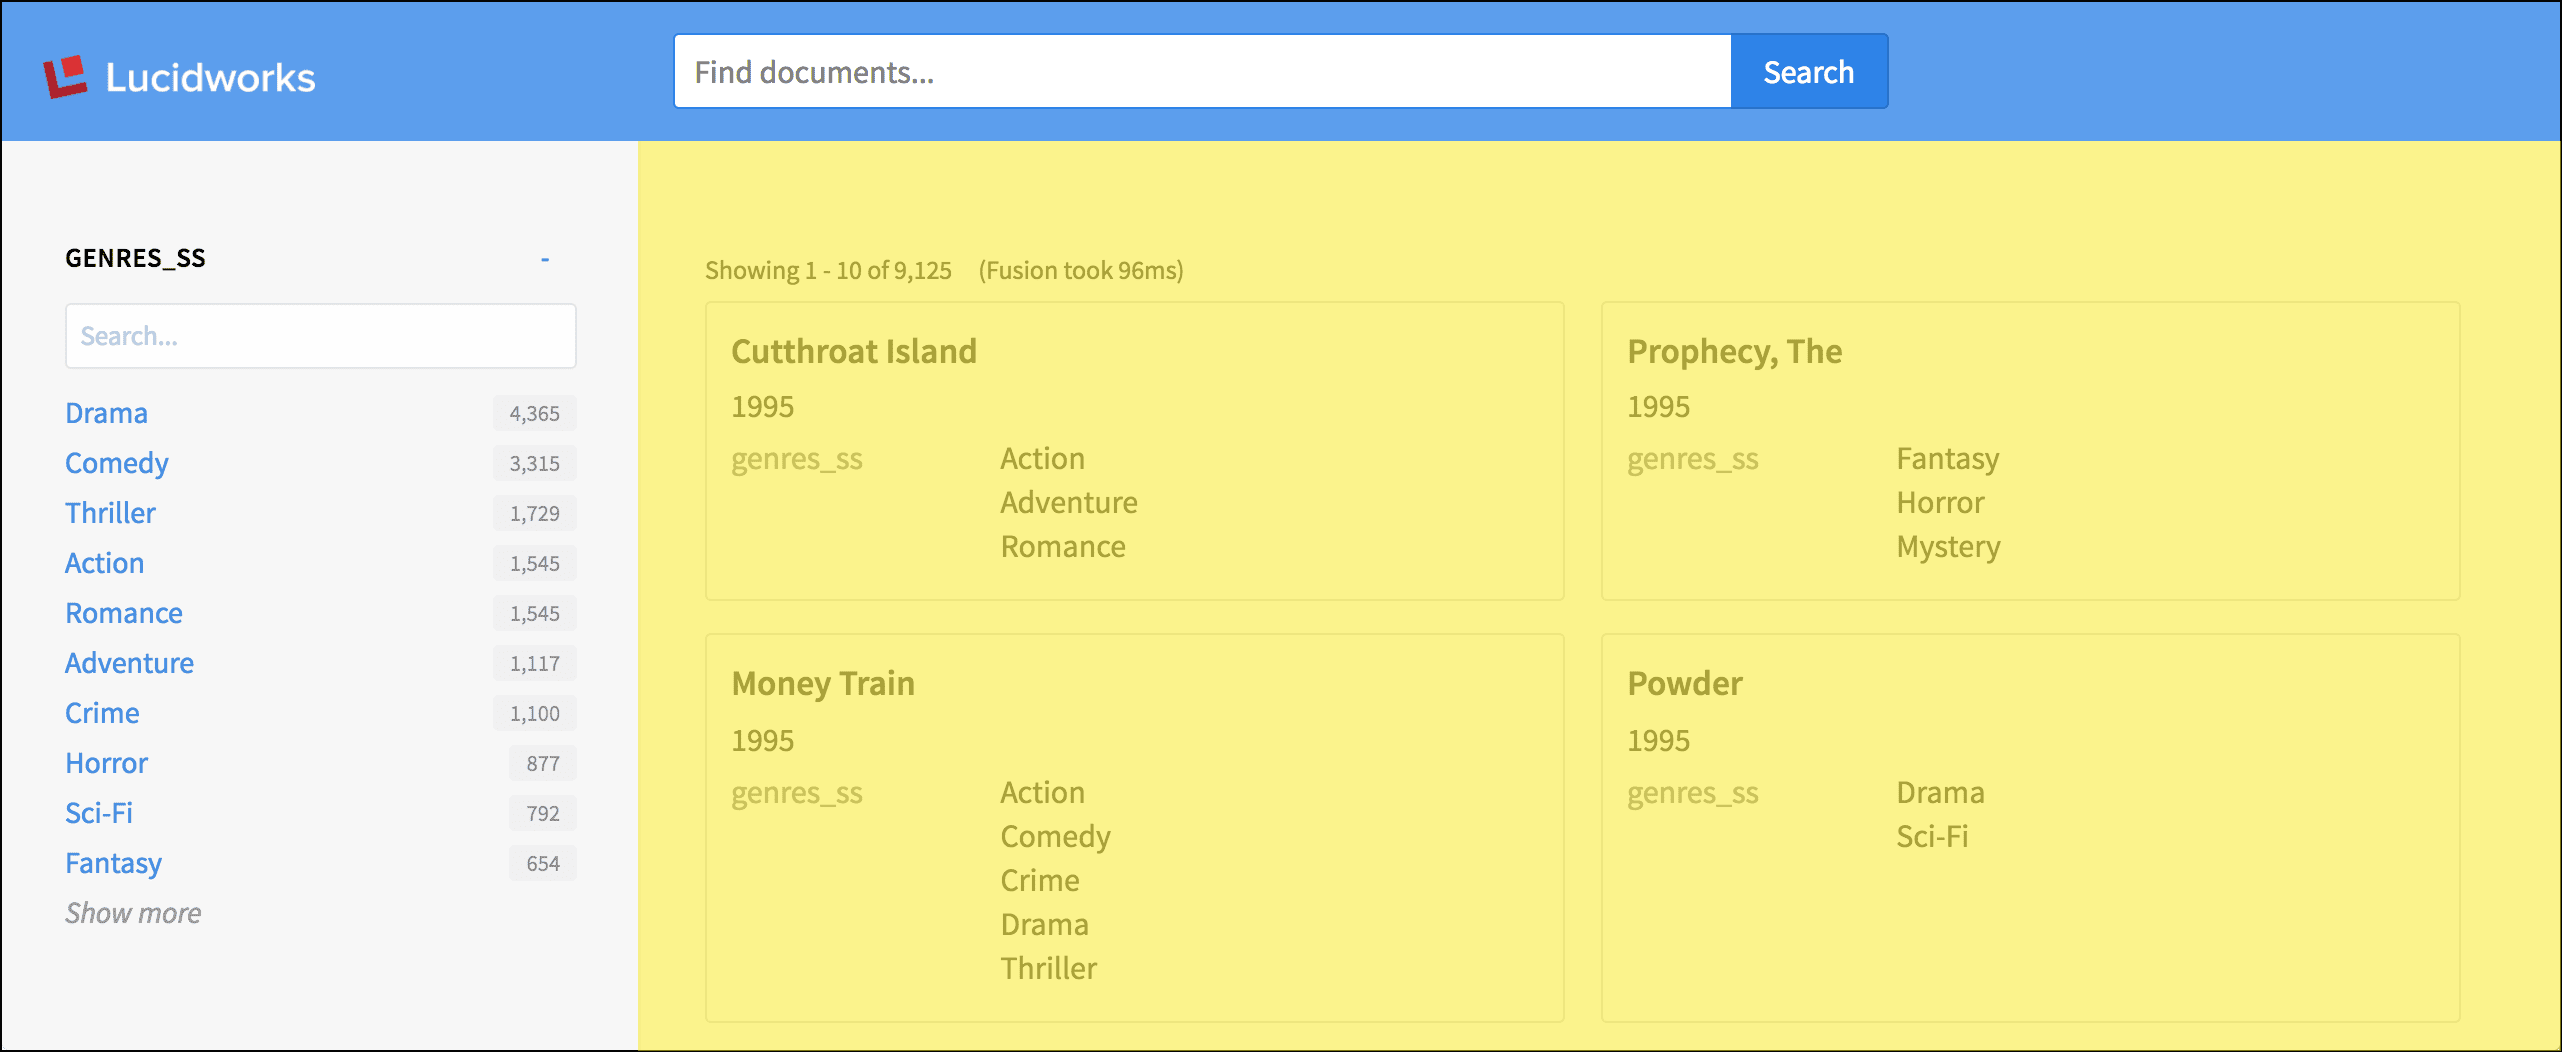
search:result-list tag lays out the grid of search results:Package a Standalone App
Package a Standalone App
Standalone app directory
Unix or MacOS:The standalone app for deployment is in the_app-name_/search-app-standalone directory._app-name_\search-app-standalone directory.Persist Social Data in a Database
Persist Social Data in a Database
Set Up Persisting Alerts
Set Up Persisting Alerts
1: Configure your alerting module database
- Add this dependency to your
pom.xml: - Remove any existing reference to
twigkit.socialmodules. Currently the in-memory database and MySQL are supported (twigkit.alert.db.mysql).
2: Add alerting module ORM mapping to your persistence configuration
Assuming you have configured your social datastore in apersistence.xml file, add this entry right after the existing mapping-file XML element:3: Tell the Quartz scheduler how to connect to the database
Add aquartz.properties file to the root of your class path (typically, in src/main/resources when building a Maven project form source) that contains the database configuration for the Quartz scheduler.This is a sample quartz.properties file with placeholder values for the database-specific parameters you must fill in. For example:persistence.xml file.Self-Contained Deployment
Self-Contained Deployment
Compiling a self-contained application
To compile the application, run theapp-studio script with the dist target, like this:Unix:dist directory:search-app-project.zip is a snapshot of your project at the time you compiled the application. The search-app-standalone/ directory is the self-contained application.Self-Executing Deployment
Self-Executing Deployment
Compiling a .jar file
A downloaded project comes with anapp-studio script that creates a .jar file.- In a shell window, switch to your project directory:
- Run the following command:
dist directory of your project:search-app-VERSION.x-y.y.y.jarThis is your self-executing application file.Launching a self-executing deployment
Set Up Email Alerts
Set Up Email Alerts
conf files to be sent at regular intervals throughout the lifecycle of an application. Use these steps to get up and running with the Alerting module:- Add this dependency to your
pom.xmlfile: - Set up
conf/alert/email/smtp.conf; see below for an example configuration: - Set up
conf/alert/email/alerts/alerts.conf; see below for an example configuration: - Add the alert
.conffiles toconf/alert/email/alerts/my-alert-name-here.conf; see below for an example:Here, thecron-expressiondefines how often to send the alert as described in this Quartz tutorial. - Create a JSP, in this case configured as above, on a standard Appkit application would be in
src/main/webapp/WEB-INF/pages/email.jspand the content would include:
Set Up User-specified Email Alerts
Set Up User-specified Email Alerts
- Add this dependency to your
pom.xml. Remove any previous reference totwigkit.socialmodules. - Add a configuration file in
conf/alert/email/smtp.conf; see below for an example configuration: - Add another configuration file for the email template in
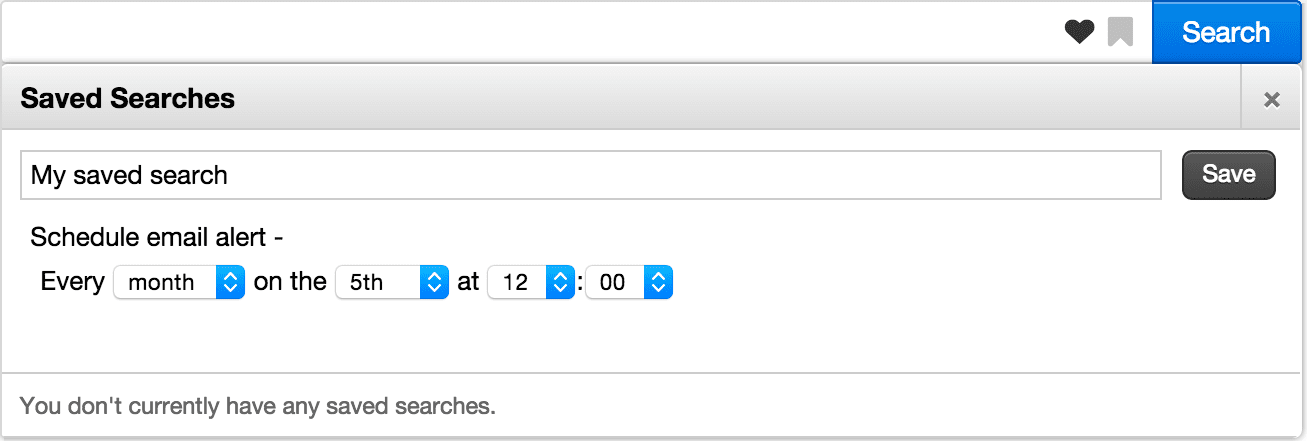
conf/alert/email/alerts/alerts.conf; see below for an example configuration: - Add the saved query alert scheduling form to the search header (header.tag):
- Create the email template JSP, in
src/main/webapp/WEB-INF/pages/email.jsp. For example:
- The ‘alert seen’ functionality is reliant on a field in the data specifying the date the document was last updated, in this case named
updated - The ‘to address’ of the email alert will either be chosen by the user via the form (default) or can be set by using the
toAddressattribute on the saved query alert form tag. - Appkit includes full user impersonation, so any security trimming is applied automatically.
Shut Down App Studio
Shut Down App Studio
Scripts
App Studio has two scripts for startup and shutdown in the root directory of an App Studio project (app-studio):app-studio.sh. A Bash script for Linux and macOSapp-studio.bat. A batch file for Windows
Obtain usage information about the scripts
For usage information, enter:- Linux and macOS:
./app-studio.sh -help - Windows:
app-studio.bat -help
- Linux and macOS:
./app-studio **_command_** -help - Windows:
app-studio.bat **_command_** -help
Shutdown commands
- Linux and macOS:
./app-studio stop [-p port] [-V] - Windows:
app-studio.bat stop [-p port] [-V]
Parameters
Bold italic text is a placeholder for a value. For example, for-m **_memory_** you might use -m 4g.| Parameter | Description |
|---|---|
-p **_port_** | Specify the port on which the App Studio web server will listen. The default port is 8080. |
-V | Output verbose messages from the script. |
Stopping multiple App Studio instances
You can run multiple instances of App Studio on a single host by specifying different ports for all instances on startup, at the command line, using the-p parameter.When running multiple instances, also use the -p flag to indicate which instance of App Studio to shut down, for example:Version 4.0
| Stop the server |
./app-studio.sh stop Optionally: * -s or --stop-portThe port to use when issuing the stop command. |
| app-studio-standalone-stop.bat |
What is next
- See Create a New Web App to learn how to create your first search app.
Start App Studio
Start App Studio
Scripts
App Studio has two scripts for startup and shutdown in the root directory of an App Studio project (app-studio):app-studio.sh. A Bash script for Linux and macOSapp-studio.bat. A batch file for Windows
Obtain usage information about the scripts
For usage information, enter:- Linux and macOS:
./app-studio.sh -help - Windows:
app-studio.bat -help
- Linux and macOS:
./app-studio **_command_** -help - Windows:
app-studio.bat **_command_** -help
Startup commands
- Linux and macOS:
./app-studio start [--production] [-f] [-p port] [-m memory] [-t timeout] [-V] - Windows:
app-studio.bat start [-f] [-p port] [-m memory] [-t timeout] [-V]
Parameters
Bold italic text is a placeholder for a value. For example, for-m **_memory_** you might use -m 4g.| Parameter | Description |
|---|---|
--production | Start the app in production mode, which disables the configuration wizard and the code editor. |
-f | Start App Studio in the foreground. By default, App Studio starts in the background. |
-p **_port_** | Specify the port on which the App Studio web server will listen. The default port is 8080. |
-m **_memory_** | Set the minimum (-Xms) and maximum (-Xmx) heap size for the JVM. For example, -m 4g results in: -Xms4g -Xmx4g. The default heap size is 512m. |
-t **_timeout_** | Set the startup timeout in seconds. |
-V | Output verbose messages from the script. |
Starting multiple App Studio instances
You can run multiple instances of App Studio on a single host by specifying different ports for all instances. Do this on startup, at the command line, using the-p parameter, for example:Version 4.0
Before starting App Studio, verify that Fusion Server is running and that it has one or more collections of indexed data.Run App Studio at the command line from theapp-studio directory, like this:| Unix | Windows | |
| Start the server | ./app-studio.sh start Options: * --productionRun the server in production mode. * --extraJvmArgumentsSpace character-delimited additional JVM arguments; multiple arguments must be quoted. Example: "-Xms2G -Xmx5G" * -p or --portThe port on which to run the server. * -s or --stop-portThe port to use when issuing the stop command; it must be re-specified when running stop. | app-studio-start.bat |
| Stop the server | ./app-studio.sh stop Optionally: * -s or --stop-portThe port to use when issuing the stop command. | app-studio-standalone-stop.bat |
| Restart the server | ./app-studio.sh restart | app-studio-stop.bat app-studio-start.bat |
Starting in production mode
App Studio’s standalone mode can be used for small production deployments, by starting in production mode.Production mode disables the configuration wizard and the code editor.To use standalone mode in a production environment, start App Studio with the--production flag:What is next
- See Create a New Web App to learn how to create your first search app.
Set Up Static Alerts
Set Up Static Alerts
conf files to be sent at regular intervals throughout the lifecycle of an application. Use these steps to get up and running with the Alerting module:- Add this dependency to your
pom.xmlfile: - Set up
conf/alert/email/smtp.conf; see below for an example configuration: - Set up
conf/alert/email/alerts/alerts.conf; see below for an example configuration: - Add the alert
.conffiles toconf/alert/email/alerts/my-alert-name-here.conf; see below for an example:Here, thecron-expressiondefines how often to send the alert as described in this Quartz tutorial. - Create a JSP, in this case configured as above, on a standard Appkit application would be in
src/main/webapp/WEB-INF/pages/email.jspand the content would include:
Subscribing to Events
Subscribing to Events
Sending event notifications
To post an event notification onto the event bus, you must obtain a copy of the global event bus and submit an instance of the class that describes the event. In this example, we assume that a Java class namedMyEvent captures the event details.Subscribing to events
To subscribe for an event of a particular type, you create a new subscriber class (or use an anonymous class) that has a single-argument method annotated with the@Subscribe annotation.Standard event types
This types of event are built into the AppKit core framework. You can register your own subscriber to receive notifications of each. See details in our JavaDocs on which attributes are available in each case.twigkit.security.event.LoginEvent: User logs into the system.twigkit.event.ResponseEvent: A search response was retrieved from a data provider.
twigkit.event.QueryEvent: A search query was formulated and submitted to a data provider.twigkit.event.ClickEvent: User clicked a link on a page, possibly linked to a search query.
Troubleshoot App Studio Development
Troubleshoot App Studio Development
Data is not appearing on the page as expected
Check the response data
- Open your browser’s developer tools.
- Click the Network tab.
- Look for an XHR request similar to the one shown below (starting with
platforms.fusion…) and select it.
Here you can navigate through the values being returned from Fusion. - To determine which response is which (as you may have multiple) look at the platform that populates the response, which also populates the element on your page.
You can then track down the value you are looking for. So if looking at results, a result list iterates through the results, so we should look inside a result. In each result, there’s a set of fields and associated values:
Note that other processing may happen in between receiving the response and displaying it on the page (response processors, modifications in the HTML, security trimming, and so on).
Get query from webapps/servlet logs and fire it against Fusion
If the data in your response object is not as you expect, you can get the query from the App Studio logs to fire directly against the Fusion endpoint, without App Studio in the middle.- Make sure your logger is configured to print out debug logging for the
twigkitclass inlogback.xmlin your environment profile (or if not using a profile, in the main resources directory): - In
fusion/version/var/log/webapps/, sort by date(ls -l)and view the latest one with the suffix ofstderrout.
Here you will see some entries that should follow the format of the following: - To determine which entry is the correct one, check the query that populates the response you’re interested in, and match the parameters you’re setting in the tag as well as any Solr parameters being applied to the query via interaction on the page (keyword =
q, facet filters =fq, and so on). - Go to the Query Workbench in Fusion and select the Published URI in the URI tab:\
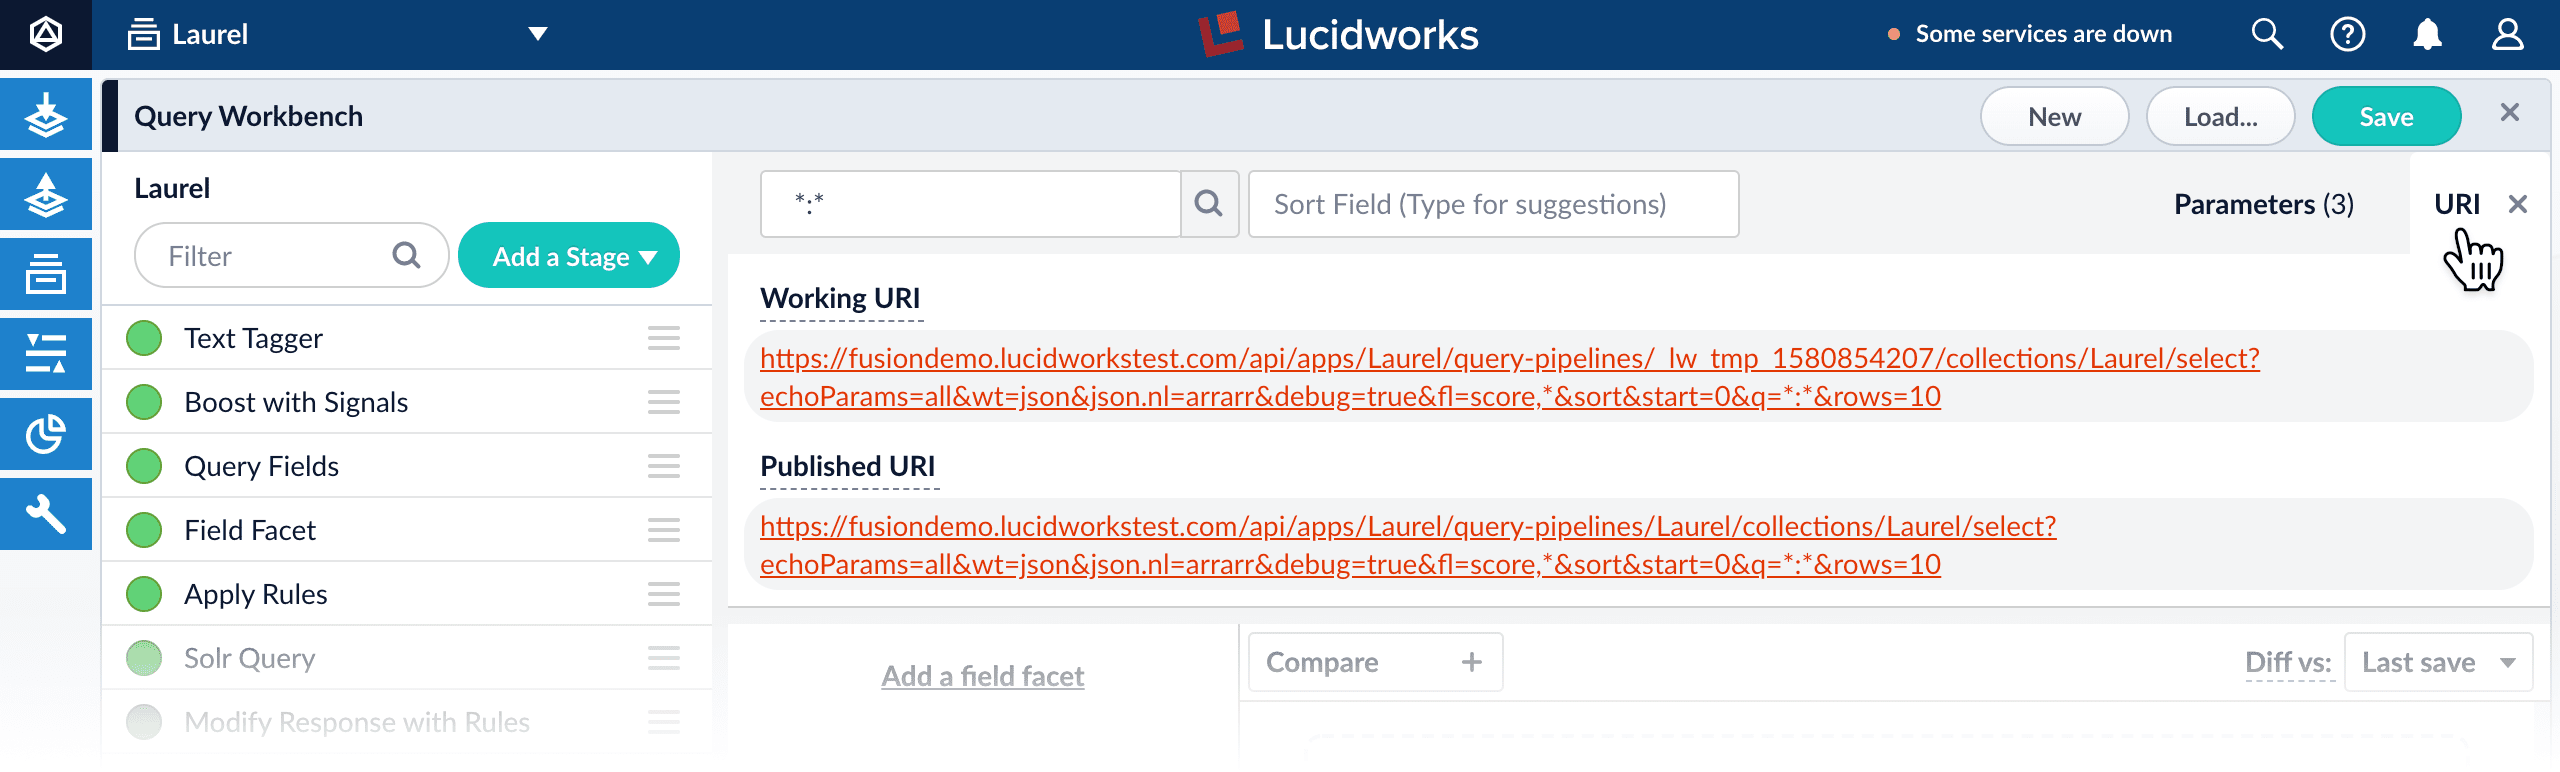
- Remove every parameter given in this URL after
select?. - Append the parameters from the webapps logs.
- Put the resulting URL into your browser.
The result will be the response of the query fired by App Studio, but unaltered by App Studio.
Page is totally blank/elements look broken or strange
Check the browser console
- Open your browser’s developer tools.
- Click the Console tab.
Here you can check for any issues related to client-side components. - Look for the following error:
- If you see the error above, you should wipe your
node_modulesdirectory and reinstall the modules before building:
rm -rf node_modules package-lock.jsonnpm cache clear -fnpm install
- If you do not see this error, then typically there is a problem in your Javascript code.
- If you see the error above, you should wipe your
Upgrade App Studio
Upgrade App Studio
Upgrade the Appkit Social Module
Upgrade the Appkit Social Module
Set Up User-specified Alerts
Set Up User-specified Alerts
Setup
To set up user-specified alerts:- Add this dependency to your
pom.xml. Remove any previous reference totwigkit.socialmodules. - Add a configuration file in
conf/alert/email/smtp.conf; see below for an example configuration: - Add another configuration file for the email template in
conf/alert/email/alerts/alerts.conf; see below for an example configuration: - Add the saved query alert scheduling form to the search header (header.tag):
- Create the email template JSP, in
src/main/webapp/WEB-INF/pages/email.jsp. For example:
- The ‘alert seen’ functionality is reliant on a field in the data specifying the date the document was last updated, in this case named
updated - The ‘to address’ of the email alert will either be chosen by the user via the form (default) or can be set by using the
toAddressattribute on the saved query alert form tag. - Appkit includes full user impersonation, so any security trimming is applied automatically.
Saved Query Alert Form tag attributes
**query (twigkit.model.Query)**The Query object to be registered for alerting.
**defaultTitle (java.lang.String)**Default title of a saved query (if no query supplied).
**scheduleAlertText (java.lang.String)**Text to display above schedule component.
**toAddress (java.lang.String)**The email address to which the alert should be sent. If not supplied (left empty), the user will be presented with a field to specify this (default behavior).
**toAddressPlaceholderText (java.lang.String)**Placeholder text for ‘to’ email address field which is displayed if toAddress attribute is blank
**toAddressLabelText (java.lang.String)**Label text for ‘to’ email address field which is displayed if toAddress attribute is blank
**deliveryFrequencyLabelText (java.lang.String)**Text for label above scheduling component
Use a Configured Platform
Use a Configured Platform
src/main/resources/conf/platforms/gsa/gsa.conf, in your code you would have:PlatformOperationNotSupportedException will be thrown if the method is not supported by the underlying platform. See the Javadoc for the twigkit.model.Platform interface for more information.Deploying your service
Appkit uses Guice to inject dependencies into Java classes. The easiest way to let Guice know about your new Java class (service) so that it can inject the ConfiguredPlatformProvider is to define your class as a managed Appkit service. This is done by adding a configuration file with the fully qualified name of the Java class under:Use Git with Appkit
Use Git with Appkit
Getting access to the project
To gain access to a project, you must sign up for a free GitHub account. After you are signed up, contact Lucidworks Support and tell us who you are, your GitHub username, and which project you work on, and we can add you to the right project.Using the Fork-and-Branch Git workflow
When working with multiple developers on a single codebase, we use a Fork-and-Branch model. This lets you create a copy of a repository, make your changes and then submit them back to the original repository for review by the owner before they are merged in.GitHub Desktop App (Windows and Mac)
If you use the GitHub desktop application (details and install guide) there is a good Github guide on how forking with the GitHub desktop app works.Command Line (Windows and Mac)
If you use the command-line git tools then the “fork and branch” workflow process is documented well in this blog post:The article above covers it really well, but at a high level the process is as follows:- Fork a GitHub repository.
- Clone the forked repository to your local system.
- Add a Git remote for the original repository.
- Create a feature branch in which to place your changes.
- Make your changes to the new branch.
- Commit the changes to the branch.
- Push the branch to GitHub.
- Open a pull request from the new branch to the original repo.
- Keeping Your Fork in Sync.
Forking a GitHub Repository
Forking a repository is really straightforward:Make sure you’re logged into GitHub with your account. Find the GitHub repository with which you’d like to work.Click the Fork button on the upper right-hand side of the repository’s page. That’s it — you now have a copy of the original repository in your GitHub account.Making a local clone
Even though you have a copy of the original repository in your GitHub account, you must copy it (clone it) locally so you can work on it. Navigate to the forked repository on github.com (this is the copy of the original repository residing in your GitHub account) and look on the right-hand side of the web page. You should see an area that is labeled “HTTPS clone URL”. Simple copy the URL there and use as follows:origin that points back to the forked repository in your GitHub account.Adding a Git Remote
Git already added a Git remote namedorigin to the clone of the Git repository on your system, and this will let you push changes back up to the forked repository in your GitHub account using git commit (to add commits locally) and git push.To use the “fork and branch” workflow, you’ll must add a Git remote pointing back to the original repository (the one you forked on GitHub).You’d want to add a Git remote that points back to the original repository, like this:git remote add upstream with the appropriate clone URL for the original project repository.Keeping Your Fork in Sync
Your forked repository does not stay in sync automatically - you must take care of this yourself - it is good practice to do this before you start work to pull in changes from other developers. To ensure your code has the latest upstream code changes, first make sure you are on your local master branch:Working with feature branches
The master branch is the master copy of the code. When working on individual features, it is better to work in branches. Using branches, you can switch between different development tasks easily mid-flow.Create a new branch
Commit changes
- See what files you have changed and what is queued up to commit:
- Add some changes you have made to commit:
- Make your changes and then commit the changes to the branch:
Push changes back to your repository
When you’re ready to commit your changes, push those changes up to the corresponding feature branch on your remote fork. This does not push the changes back to Appkit - just to your forked copy:git branch (lists what branches you have created) and git remote -v (lists what remote repositories you are linked to).Sending changes back to the master repository - opening a Pull Request
When your feature branch is ready to have its changes brought into the master branch, you must go to your GitHub fork and issue a new pull request from that feature branch. If the branch does not already exist in GitHub, a pull request will automatically be created when you push the new branch up to your repository - GitHub will prompt you to create a pull request when you view the repo online (I’m assuming you’re using your browser and not the GitHub native apps). The maintainers of the original project can use this pull request to pull your changes across to their repository and, if they approve of the changes, merge them into the main repository. See this guide on how to create a pull request in GitHub for more details.It is good practice to ensure the pull request has a clear description of what it entails, and it should refer back to the issue that is being resolved in either the title or the description.Code review
After you have created the pull request, you should assign it to a colleague for peer review. If any issues are identified during the review, the reviewer can add code comments, and assign the pull request back to you to fix. After the pull request has passed its code review, the reviewer can assign the pull request to a dedicated merge master who can do the final merge.Milestones and releases
GitHub lets you tag your work and keep track of which tasks should be completed by specific milestones or releases. You might also want to consider following this practice to ensure development work on your codebase is sufficiently prioritized.Learn more - great Git resources
The best reference on the web is the git SCM book - https://git-scm.com/book/en/v2 - covers everything you must know about Git - a great reference if you are stuck or if you are getting started, a simplified Git Guide.Protect Against CSRF Attacks
Protect Against CSRF Attacks
- If it does not already exist, create a new file named
csrf.confand place it undersrc/main/resources/conf/security. - In that file, set the property
enabledtotrue. This tokenizes the requests. - By default, the time-to-live of the Appkit request token is 60 minutes. You can change this by setting the property
durationto some other value; for example,duration: 30. Responses received without a request token or with a request token has expired are rejected.
Writing a Custom Authorization
Writing a Custom Authorization