When you first create a UI using the setup wizard, it configures the default search view. App Studio supports customization using an array of markup elements, or tags, that handle all the complexities of connecting to Fusion and visualizing the response to your queries. These topics explain the details of how to customize your search interface:Documentation Index
Fetch the complete documentation index at: https://doc.lucidworks.com/llms.txt
Use this file to discover all available pages before exploring further.
- Introduction to App Studio Markup
- Anatomy of A View
- Display Search Results
- Style an App
- Add Navigation Tools
- Search Queries
- Search Filters
- Security
- Connecting to other search providers
Configure Autocomplete
Configure Autocomplete
App Studio supports the ability to generate suggestions on the fly, also called autocomplete or type-ahead, using the Terms component or Suggest component embedded in Fusion’s Solr core.The Solr Terms component provides access to the indexed terms in a field and the number of documents that match each term. This can be used, for example, to find all terms in the Solr index that match an expansion of the given query term. For example, “car” might return CARRY, CARRIED, CARE, CARL, and so on.How to configure suggestions with the Terms component
Since the Terms component only allows suggestions one term at a time, in cases when multiple terms are being typed, suggestions are given for the last term typed.
- Configure Fusion:
- In Fusion, navigate to Querying > Query Pipelines.
- Select the query pipeline you are using.
- Select the Solr Query pipeline stage.
-
Under configure Request Handlers Allowed for Queries, click Add
 .
.
-
Enter “Terms”.
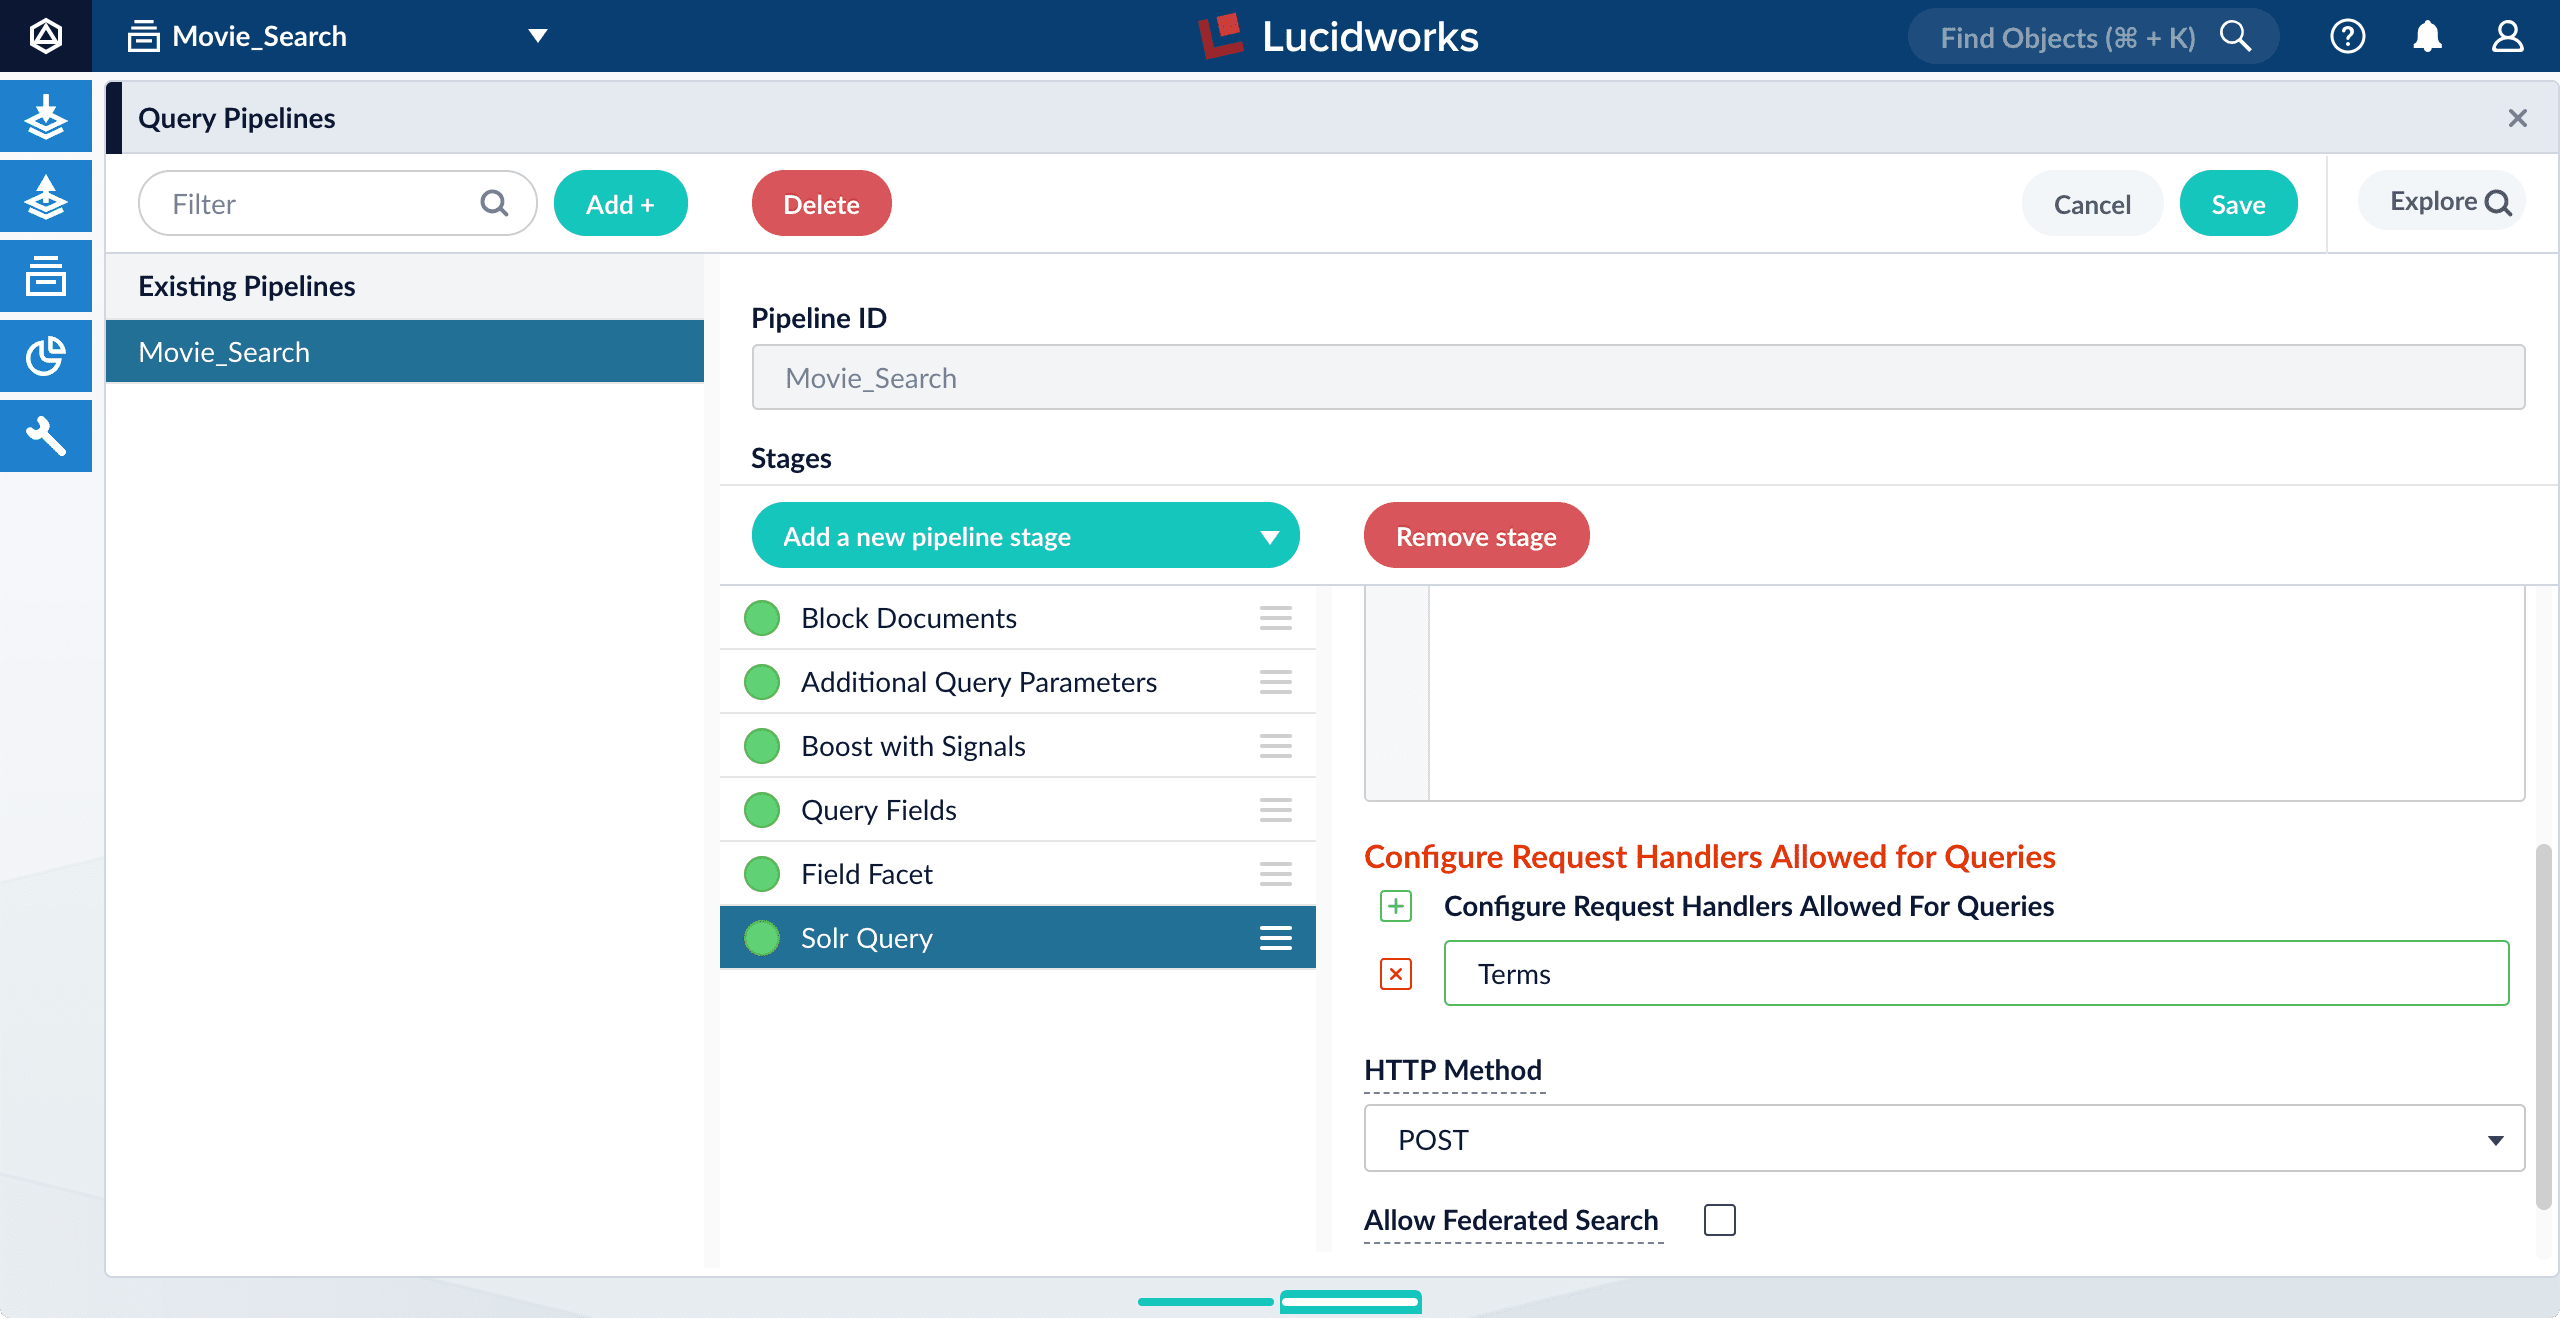
-
Click Save.
Unlike the Suggest component, you do not need to modify
solrconfig.xmlto use the Terms component; it is preconfigured.
- Configure App Studio:
-
Open
config/services/suggestions/terms.conf. Its default content is as follows:
-
Open
List out all fields to base your terms suggestions on
term-fields: title title:- Save the file.
- Refresh the search UI in your browser.
-
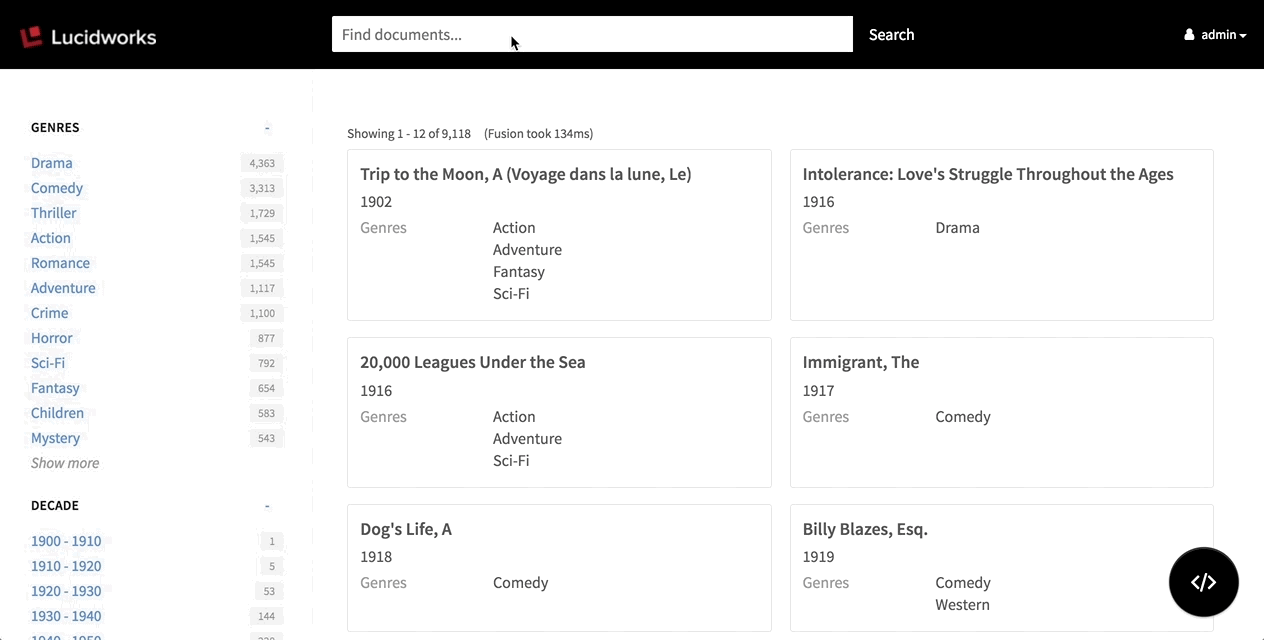
Test the feature by typing a search phrase.
App Studio now displays suggested terms on the fly:
Localize an App
Localize an App
You can localize the UI labels in an app in multiple languages of your choice.Appkit obtains the correct labels for a language by making calls to an Appkit translation service. The service provides a label in the chosen language, with a fallback to English if no translation exists for the label in the chosen language.
Loading translations
You can use the new<translations:localize> JSP tag to load a set of UI label translations into an app. The tag syntax is:-
dictionary. Name of the resource bundle from which to load translations. This is also the first part of the name of each property file that contains translations. Default:translations -
locale. Locale Default:en(English)
dictionary and locale are used to find the file as follows:- In
src/main/resources, the Appkit translation service looks for a resource bundle nameddictionary, for example,translations. - Within the resource bundle, the translation service looks for property files named
{resource}, for example, for the filestranslations_en.propertiesandtranslations_fr.properties.
Enabling translations
- Find label strings that need to be translated in the UI and identify the key names for the labels.
- Create translation property files and add them under the
src/main/resourcesdirectory. For example, for a dictionary calledtranslationsaddtranslations_en.propertiesandtranslations_fr.properties.
Edit the property files and include the label keys and translations. For example: Intranslations_en.properties:Intranslations_fr.properties:Some translations include variables. For example,components.response-statistics.showingisShowing {first} - {last} of {total}in English. Translations should retain the variables, though their order might differ. Labels can use<em>tags for emphasis, for example,More results like <em>{result}</em>. - Add the following dependency to your app’s
pom.xml: - Add this
taglibdirective at the top of your app’sindex.jsp: - Add the Appkit
<translations:localize>JSP tag inside the<head>element of your app’sindex.jsp: - Add this rule to the
url-rules.xmlfile:You can modify other URL rules to suit your application logic. The<translations:localize>JSP tag works the same. - Restart your app.
- Verify that the translations are present by visiting pages in the app that should be in different languages.
Run App Studio in Demo Mode
Run App Studio in Demo Mode
This deployment type is useful for:After startup, your demo deployment is available at
The optional
- Evaluating App Studio
- Previewing the UI during development
- Demoing your UI
app-studio start or app-studio.bat start and go to http://localhost:8080/ to view your demo deployment. The code editor is available in the demo interface; you can hide this by using the --production flag.Start up in demo mode
Run theapp-studio or app-studio.bat script like this:http://localhost:8080/.| —production | Run App Studio in “production mode”, with the code editor and wizard disabled. This gives you a preview of what your UI will look like in a production deployment. |
| -f | Start App Studio in the foreground. By default, App Studio starts in the background and sends stdout/stderr to app-studio-PORT-console.log. |
| -p <port> | Specify the port on which to start the App Studio Web server; the default is 8080. |
| -m <memory> | Set the minimum (-Xms) and maximum (-Xmx) heap size for the JVM, such as -m 4g which results in -Xms4g -Xmx4g. By default, this script sets the heap size to 512MB. |
| -t <timeout> | Set the startup timeout in seconds; the default is 120. |
Shut down in demo mode
To shut down your demo application, runapp-studio stop or app-studio.bat stop:-p flag specifies the port to which the App Studio HTTP listener is bound.Use the Code Editor
Use the Code Editor
App Studio’s interface includes a built-in code editor that opens in your browser.The code editor modifies the file that configures your search interface (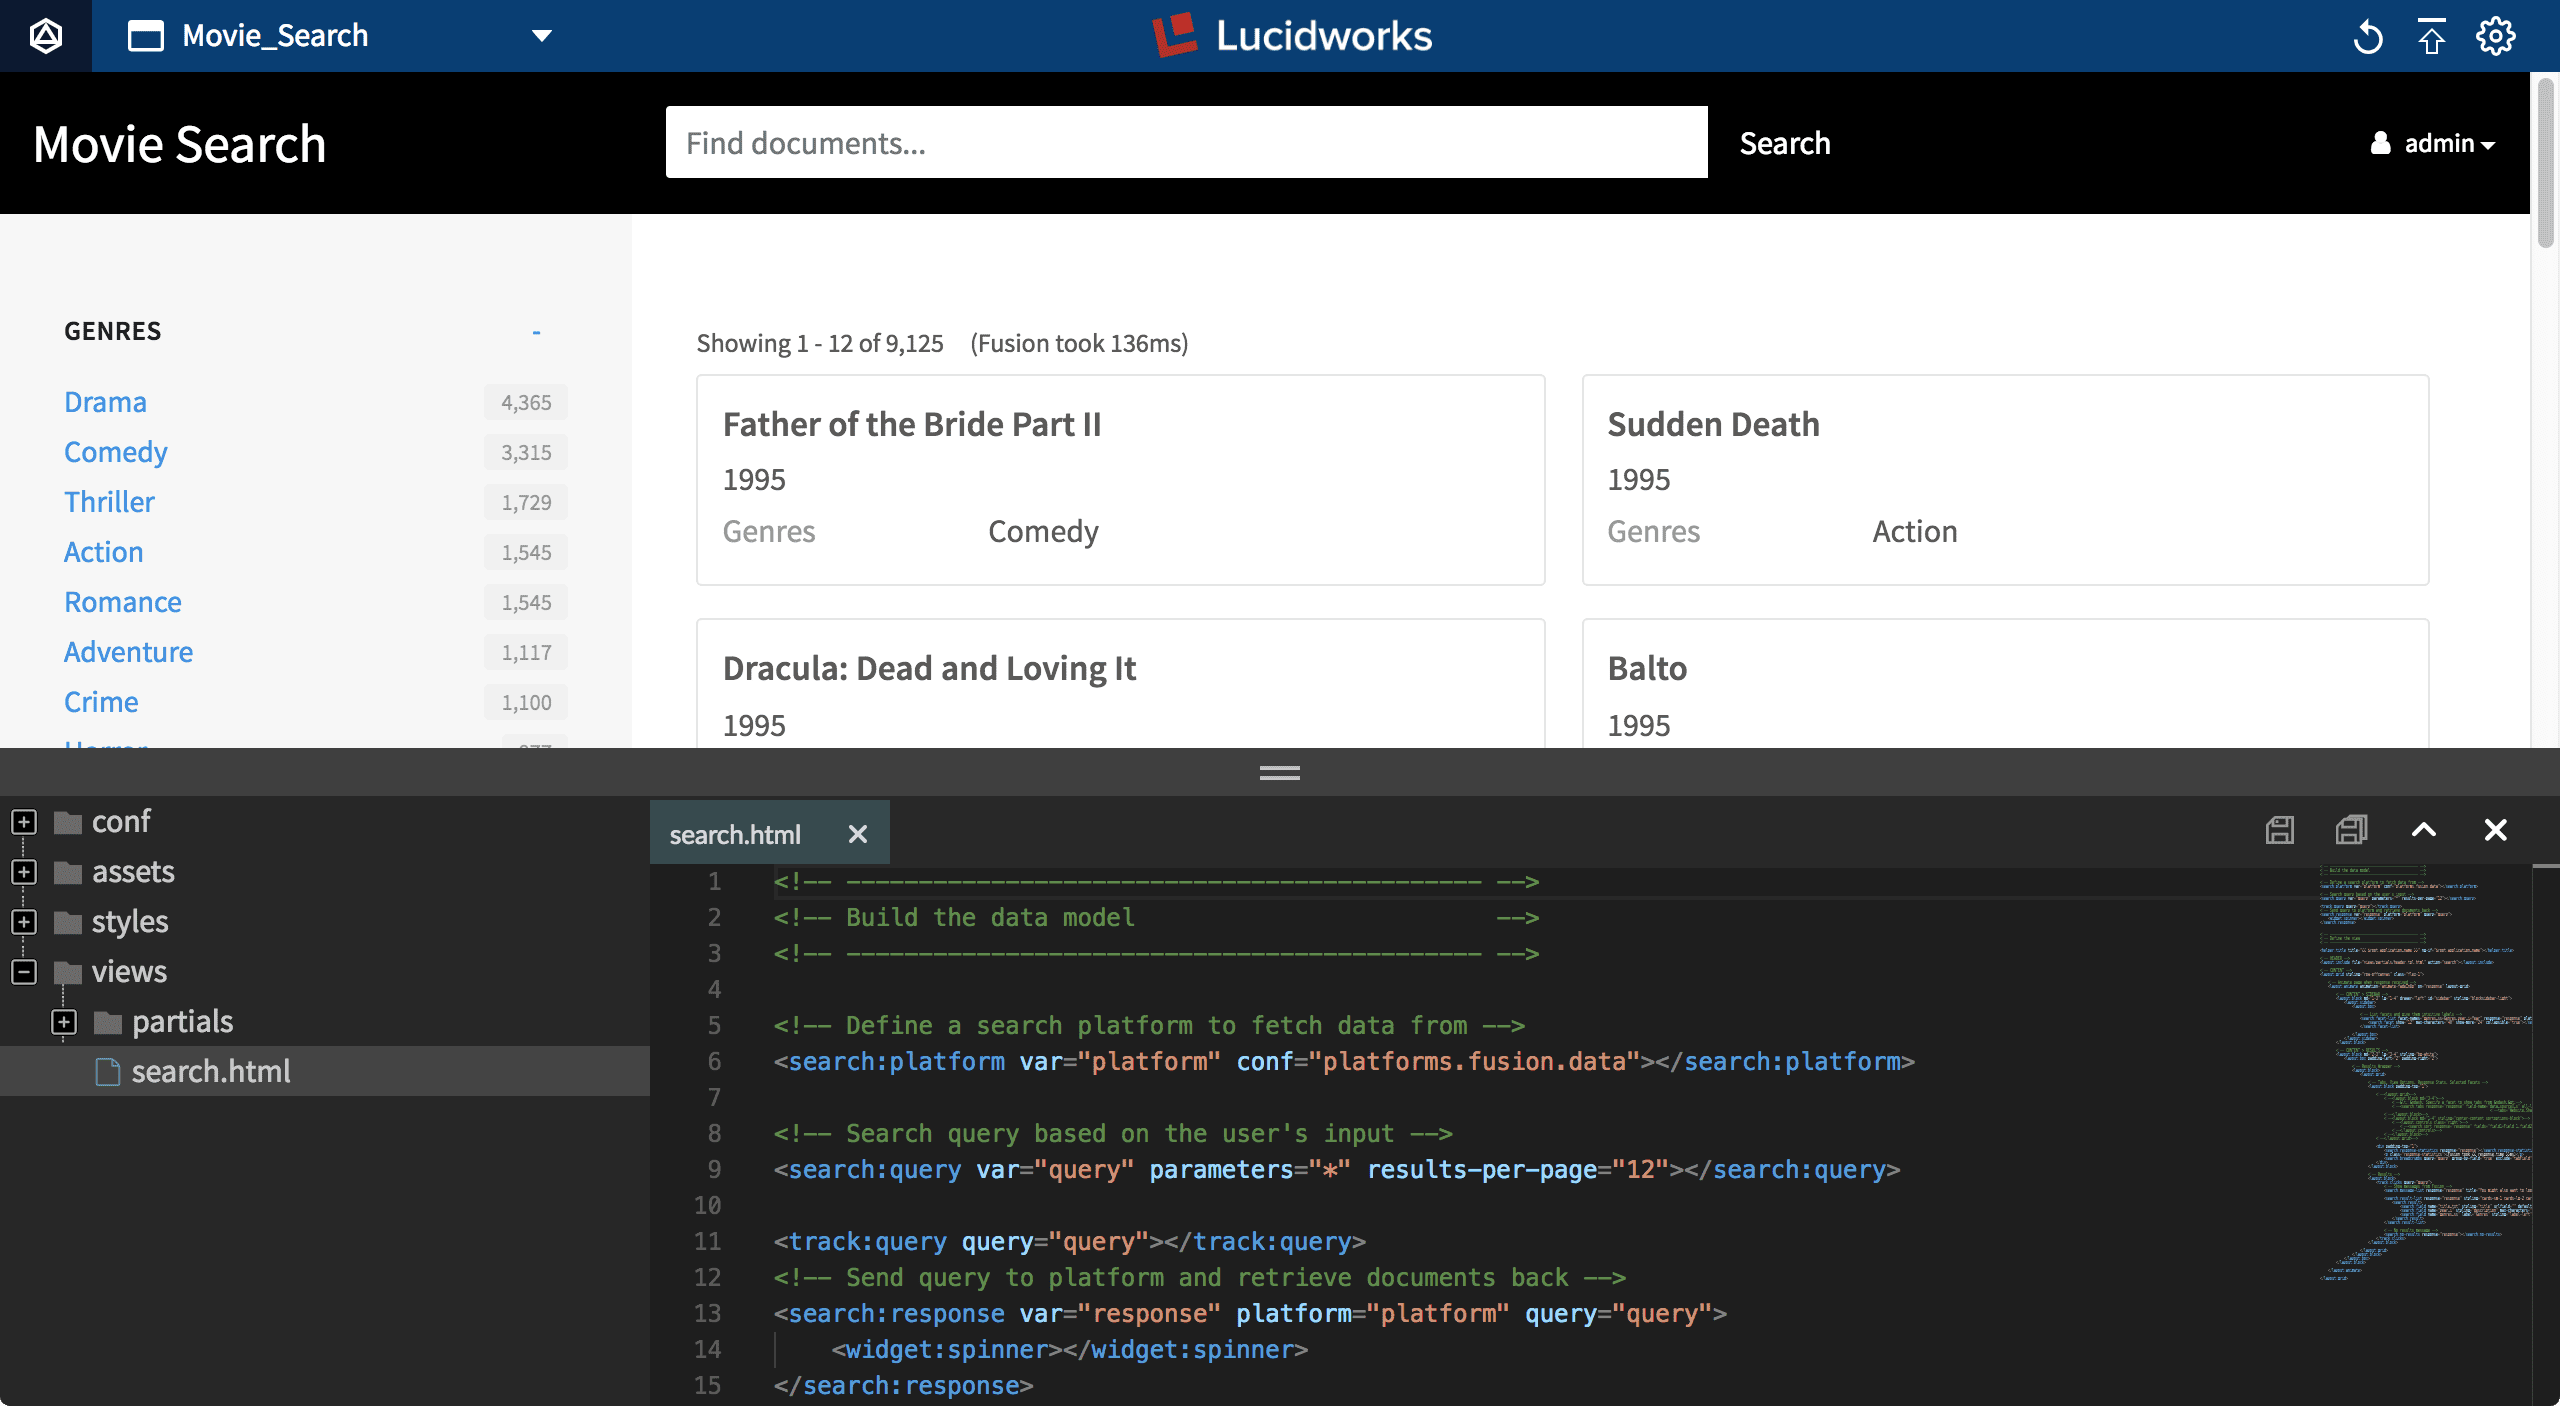
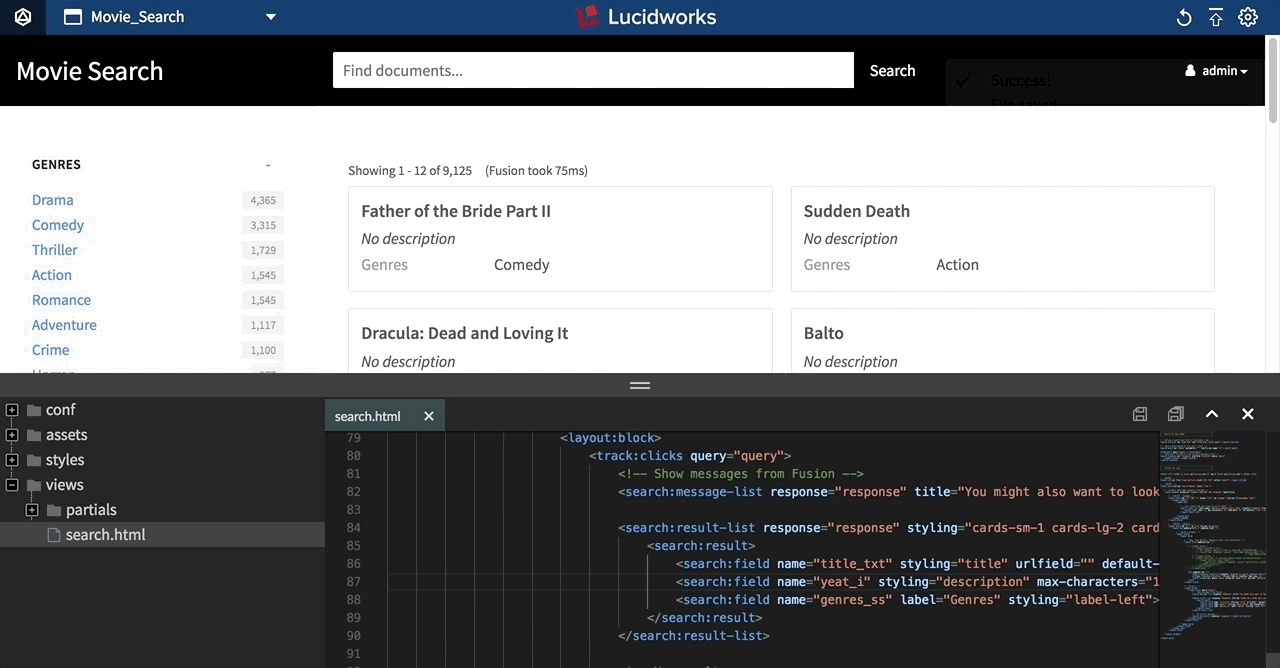
app-studio/app/views/search.html in version 4.0), using App Studio’s markup tags. Your search interface reloads automatically when you save your changes in the code editor.The code editor is also where you can publish your search interface to Fusion Server.Opening the code editor
How to open the code editor- Press the ESC key or
-
Click the code editor button:

The toolbar
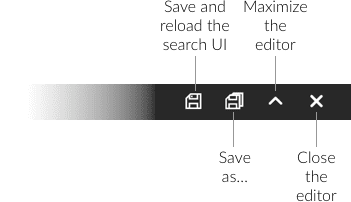
Saving your changes
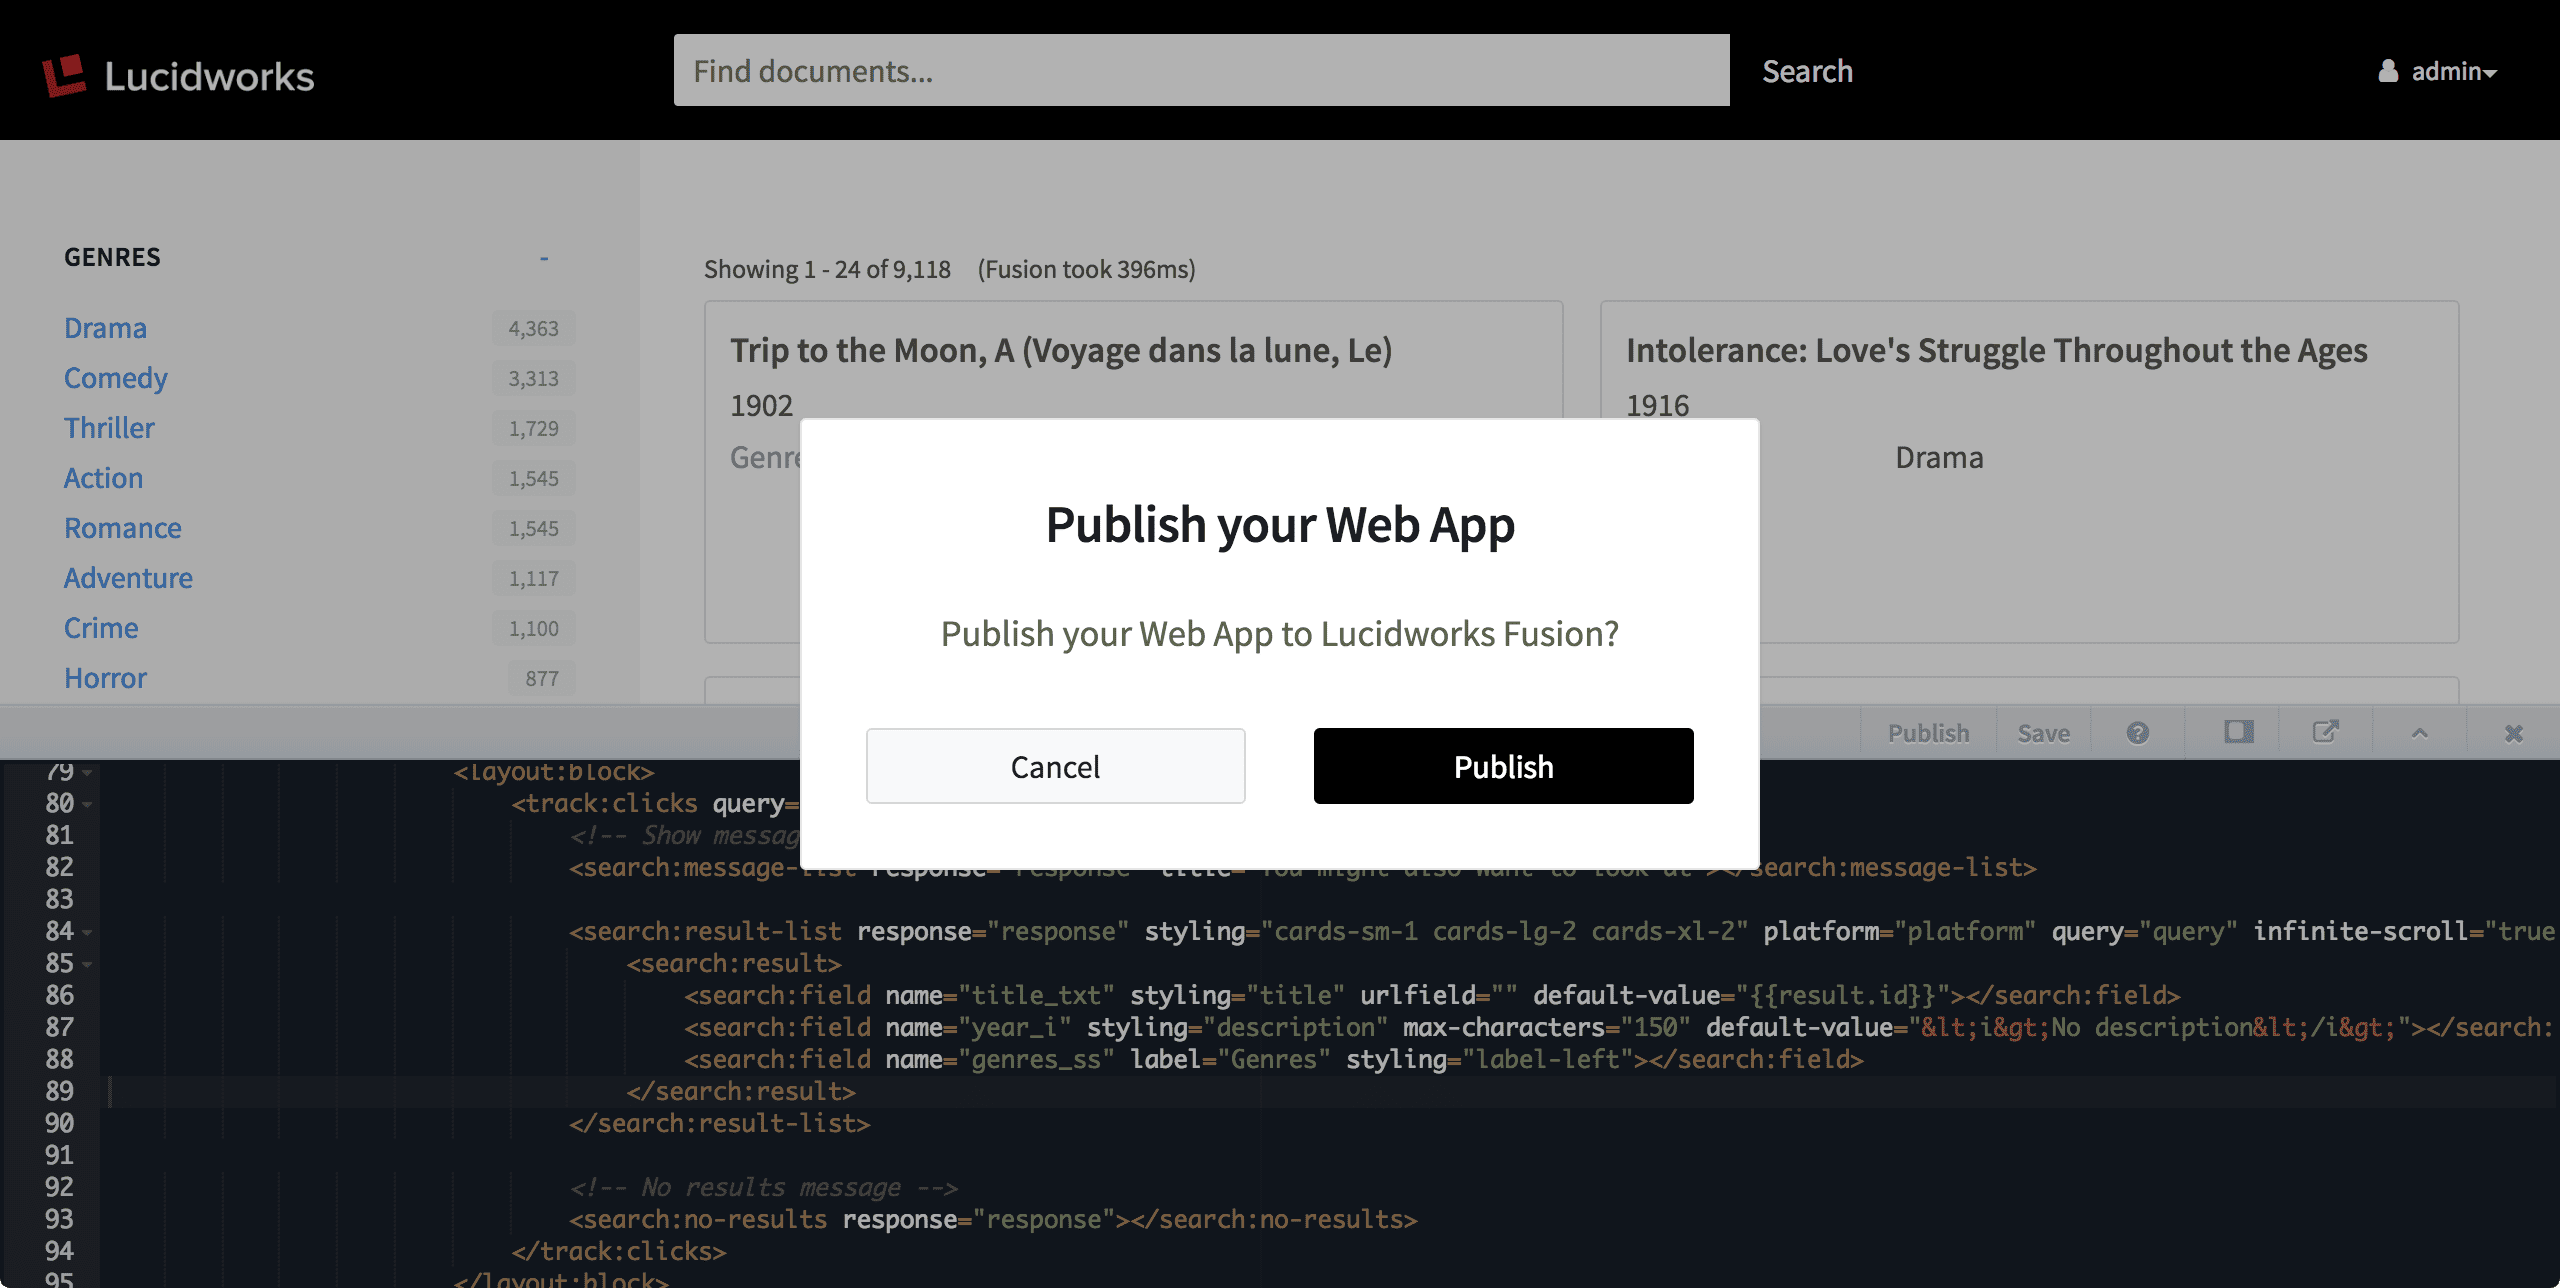
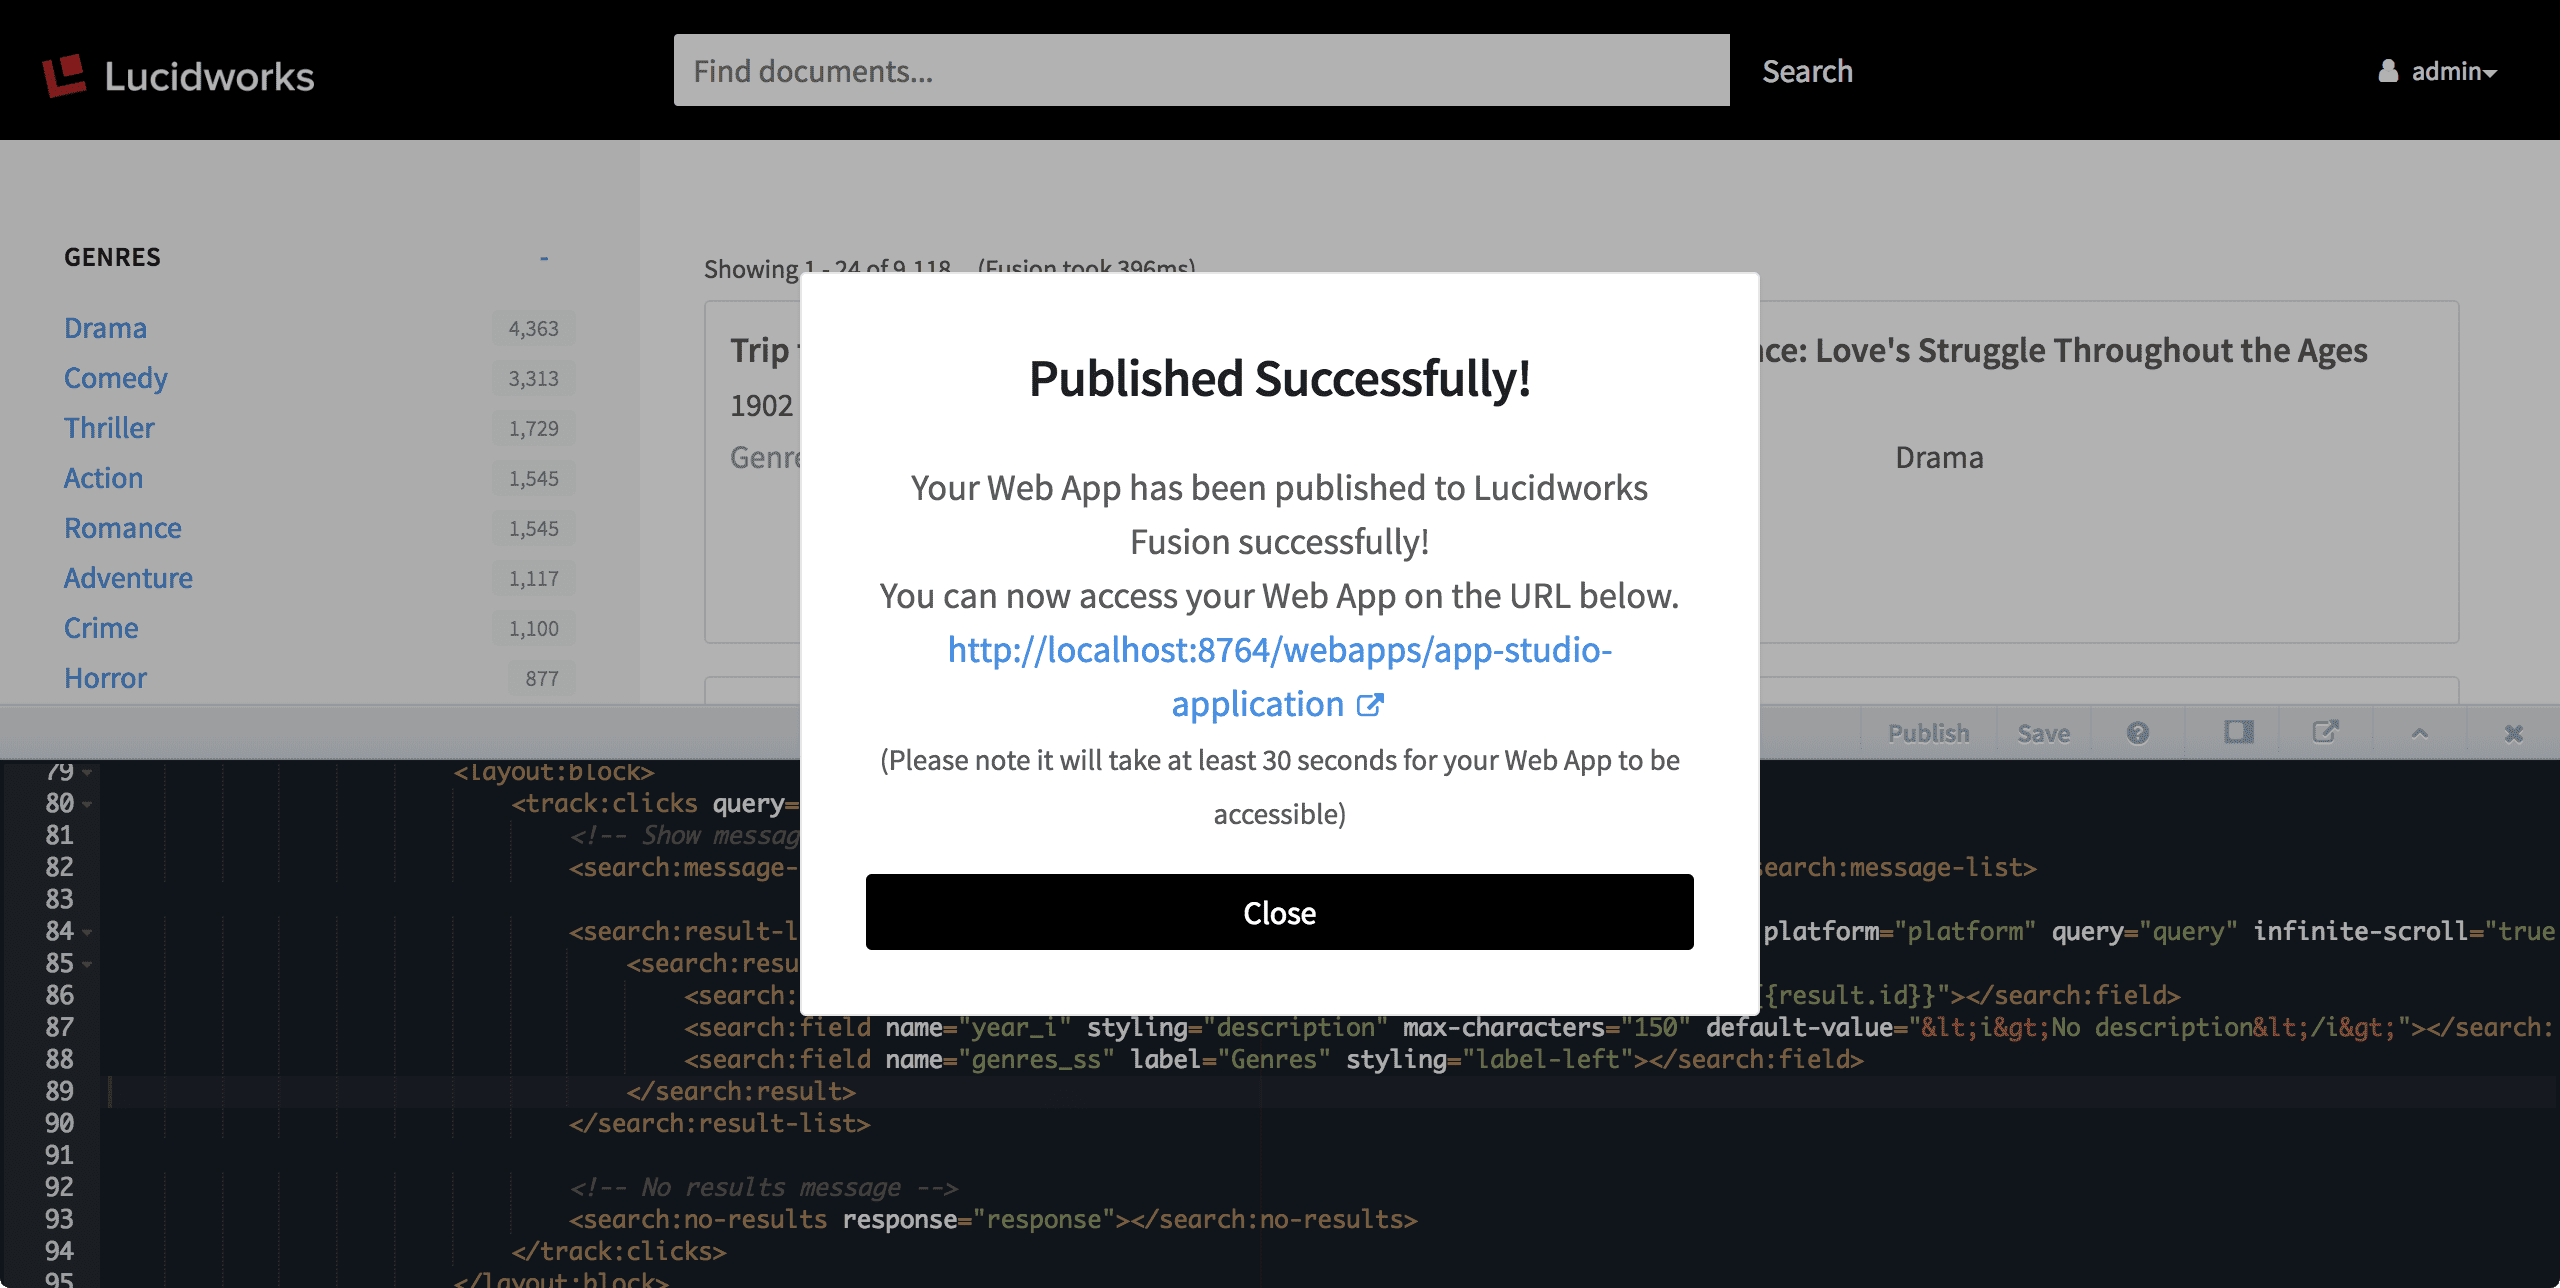
The Save button (or⌘-S/CTRL-S) saves the file and reloads the page to display your updated interface:Publishing your search interface from the code editor (version 4.0)
The Publish button deploys your search interface to Fusion. App Studio prompts you to confirm that you want to publish your Web app to Fusion:Download an App Studio Project
Download an App Studio Project
If you prefer to develop your search interface using your own tools, you can download it as a
.zip file.The project directory includes tools for running a demo deployment or compiling an application for a production deployment.Downloading a project from Fusion
You can download your App Studio project as a.zip file from its configuration panel in App Studio.This option is unavailable after you have uploaded a WAR file for the project.
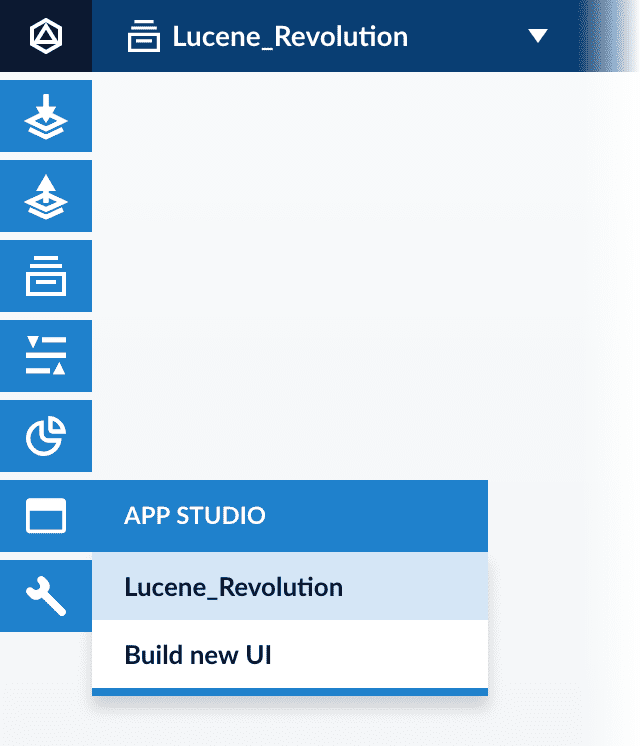
-
From the App Studio menu, select your project:
-
Click Download project:
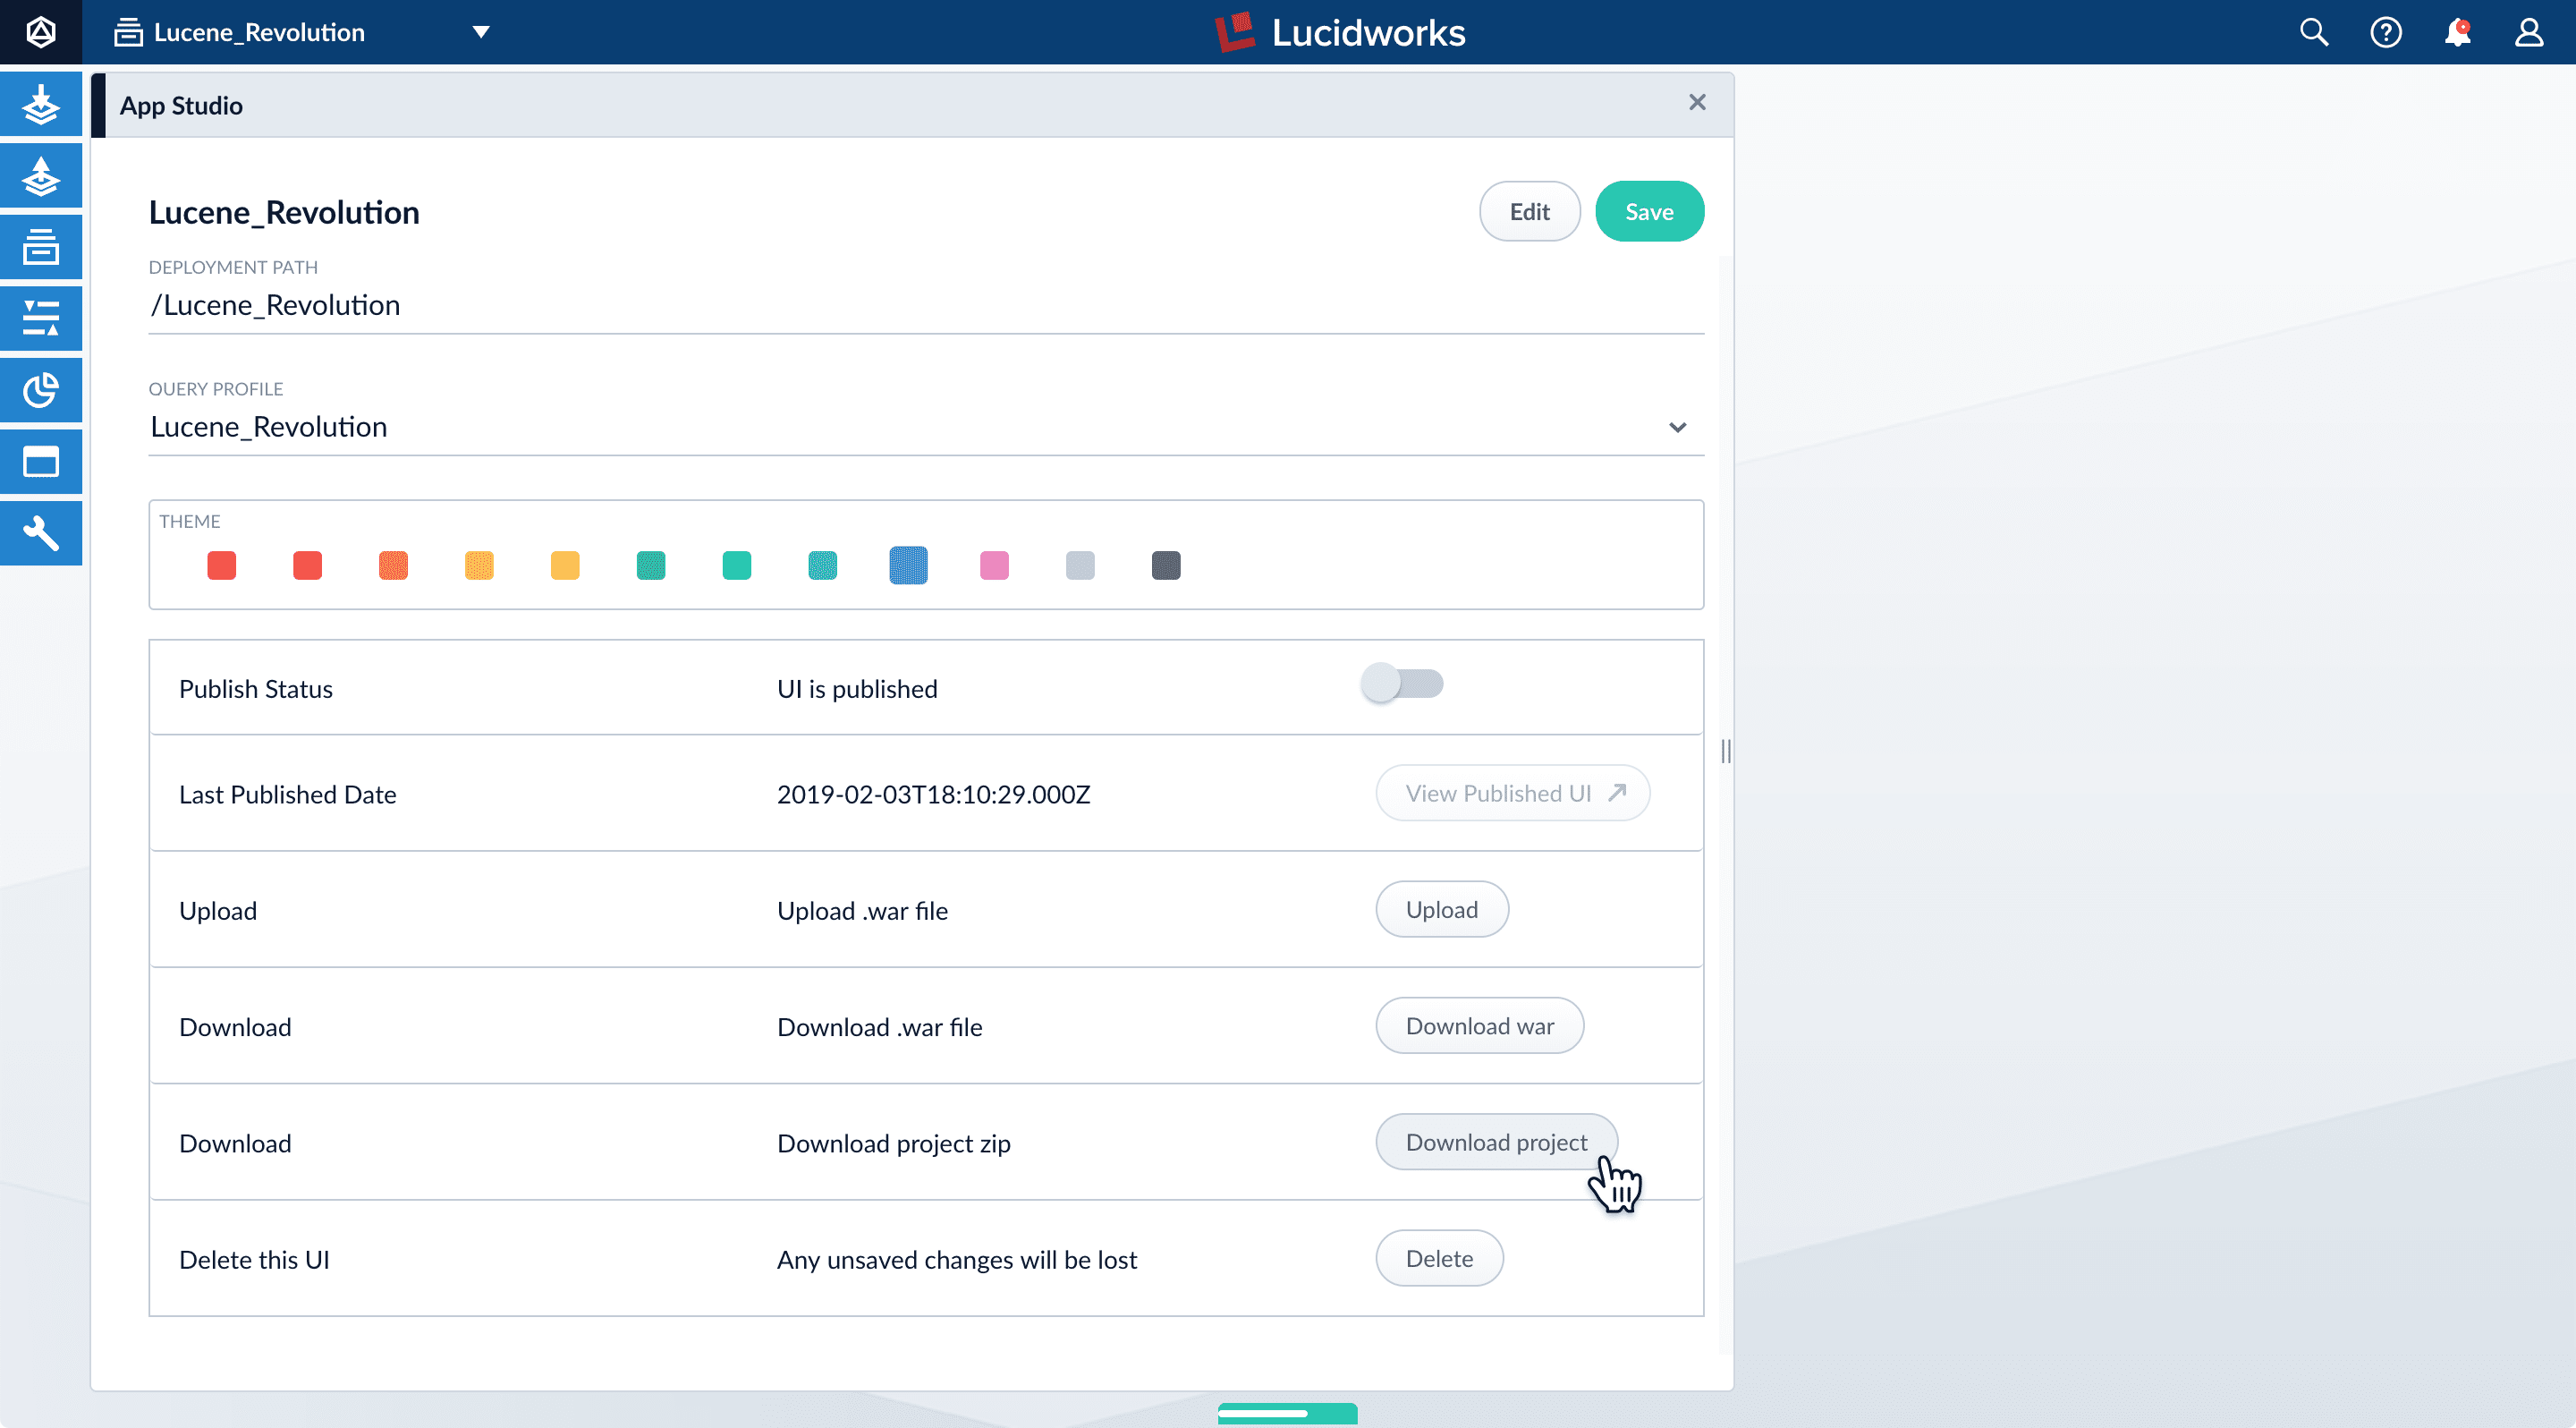
.zipfile.
Deploying a project
There are several ways to deploy a project. For information, see Deployment Overview.- You can get detailed information about every App Studio markup tag in the Reference Guides.
- For ideas and reusable code, see the App Studio Gallery.