Set up an Experiment using a Query Pipeline stageAlternative method
Here we describe how to set up an experiment that uses an Experiment query pipeline stage. Using an Experiment query pipeline stage is a bit more complicated.
| This approach is an alternative to setting up an experiment and a query profile that references it. If you have used the query profile method, you can skip this article. |
How an Experiment stage works
An Experiment stage applies the experiment actions in-line in the query pipeline (wherever it is located in the pipeline), instead of performing the actions before passing queries to a query pipeline or pipelines.
An Experiment stage that apportions traffic among query pipelines is similar to a Call Pipeline stage, but the processing is conditional. Queries that lack a user ID parameter are not sent processed by the stage and are not sent to other pipelines (if that is what the stage does).
For the primary pipeline to process queries that do not include a user identifier, it must contain a Solr Query stage as the last stage. If the Experiment query stage references other pipelines, then there are two options:
-
Solr Query stage as the last stage in the variant pipelines. The variant pipelines send queries to Solr. Control does not return to the primary pipeline. In the primary pipeline, the Experiment stage must be the second-to-last stage. The last stage must be the Solr Query stage.
-
No Solr Query stage in the variant pipelines. The variant pipelines do not send queries to Solr. Control returns from the variant pipelines to the primary pipeline. In the primary pipeline, the Experiment stage can be in any position except the last.
Before you begin
Before you set up an experiment, you must already have:
-
A search app. The key aspect of the search app for experiments is that the search app identifies users in some way. A user ID might be associated with users persistently (this is best) or only for the current session. Searches and subsequent actions by anonymous users are not sent through an experiment.
-
A Fusion app. The Fusion app provides the search functionality you want to provide. Below, you will modify the app to include an experiment.
-
Data for users to search. The app should have data that users can search and search results that users can interact with. Typically, users will search a single dataset in the sense that different users are not given search results from different datasets. But in an experiment, different experiment variants can use data in different collections.
-
Results for users to interact with. Experiment metrics depend on users interacting with search results, for example, clicking on them. A search app uses signals to report the interactions to Fusion.
-
A plan for the experiment. This plan includes which control and variants to compare, the projected traffic, sample sizes, experiment duration, metrics, and decision criteria.
Basically, you need a working system in some environment on which you want to perform experiments, and a plan for experiment variants and for deciding which results are best.
1. Create an experiment
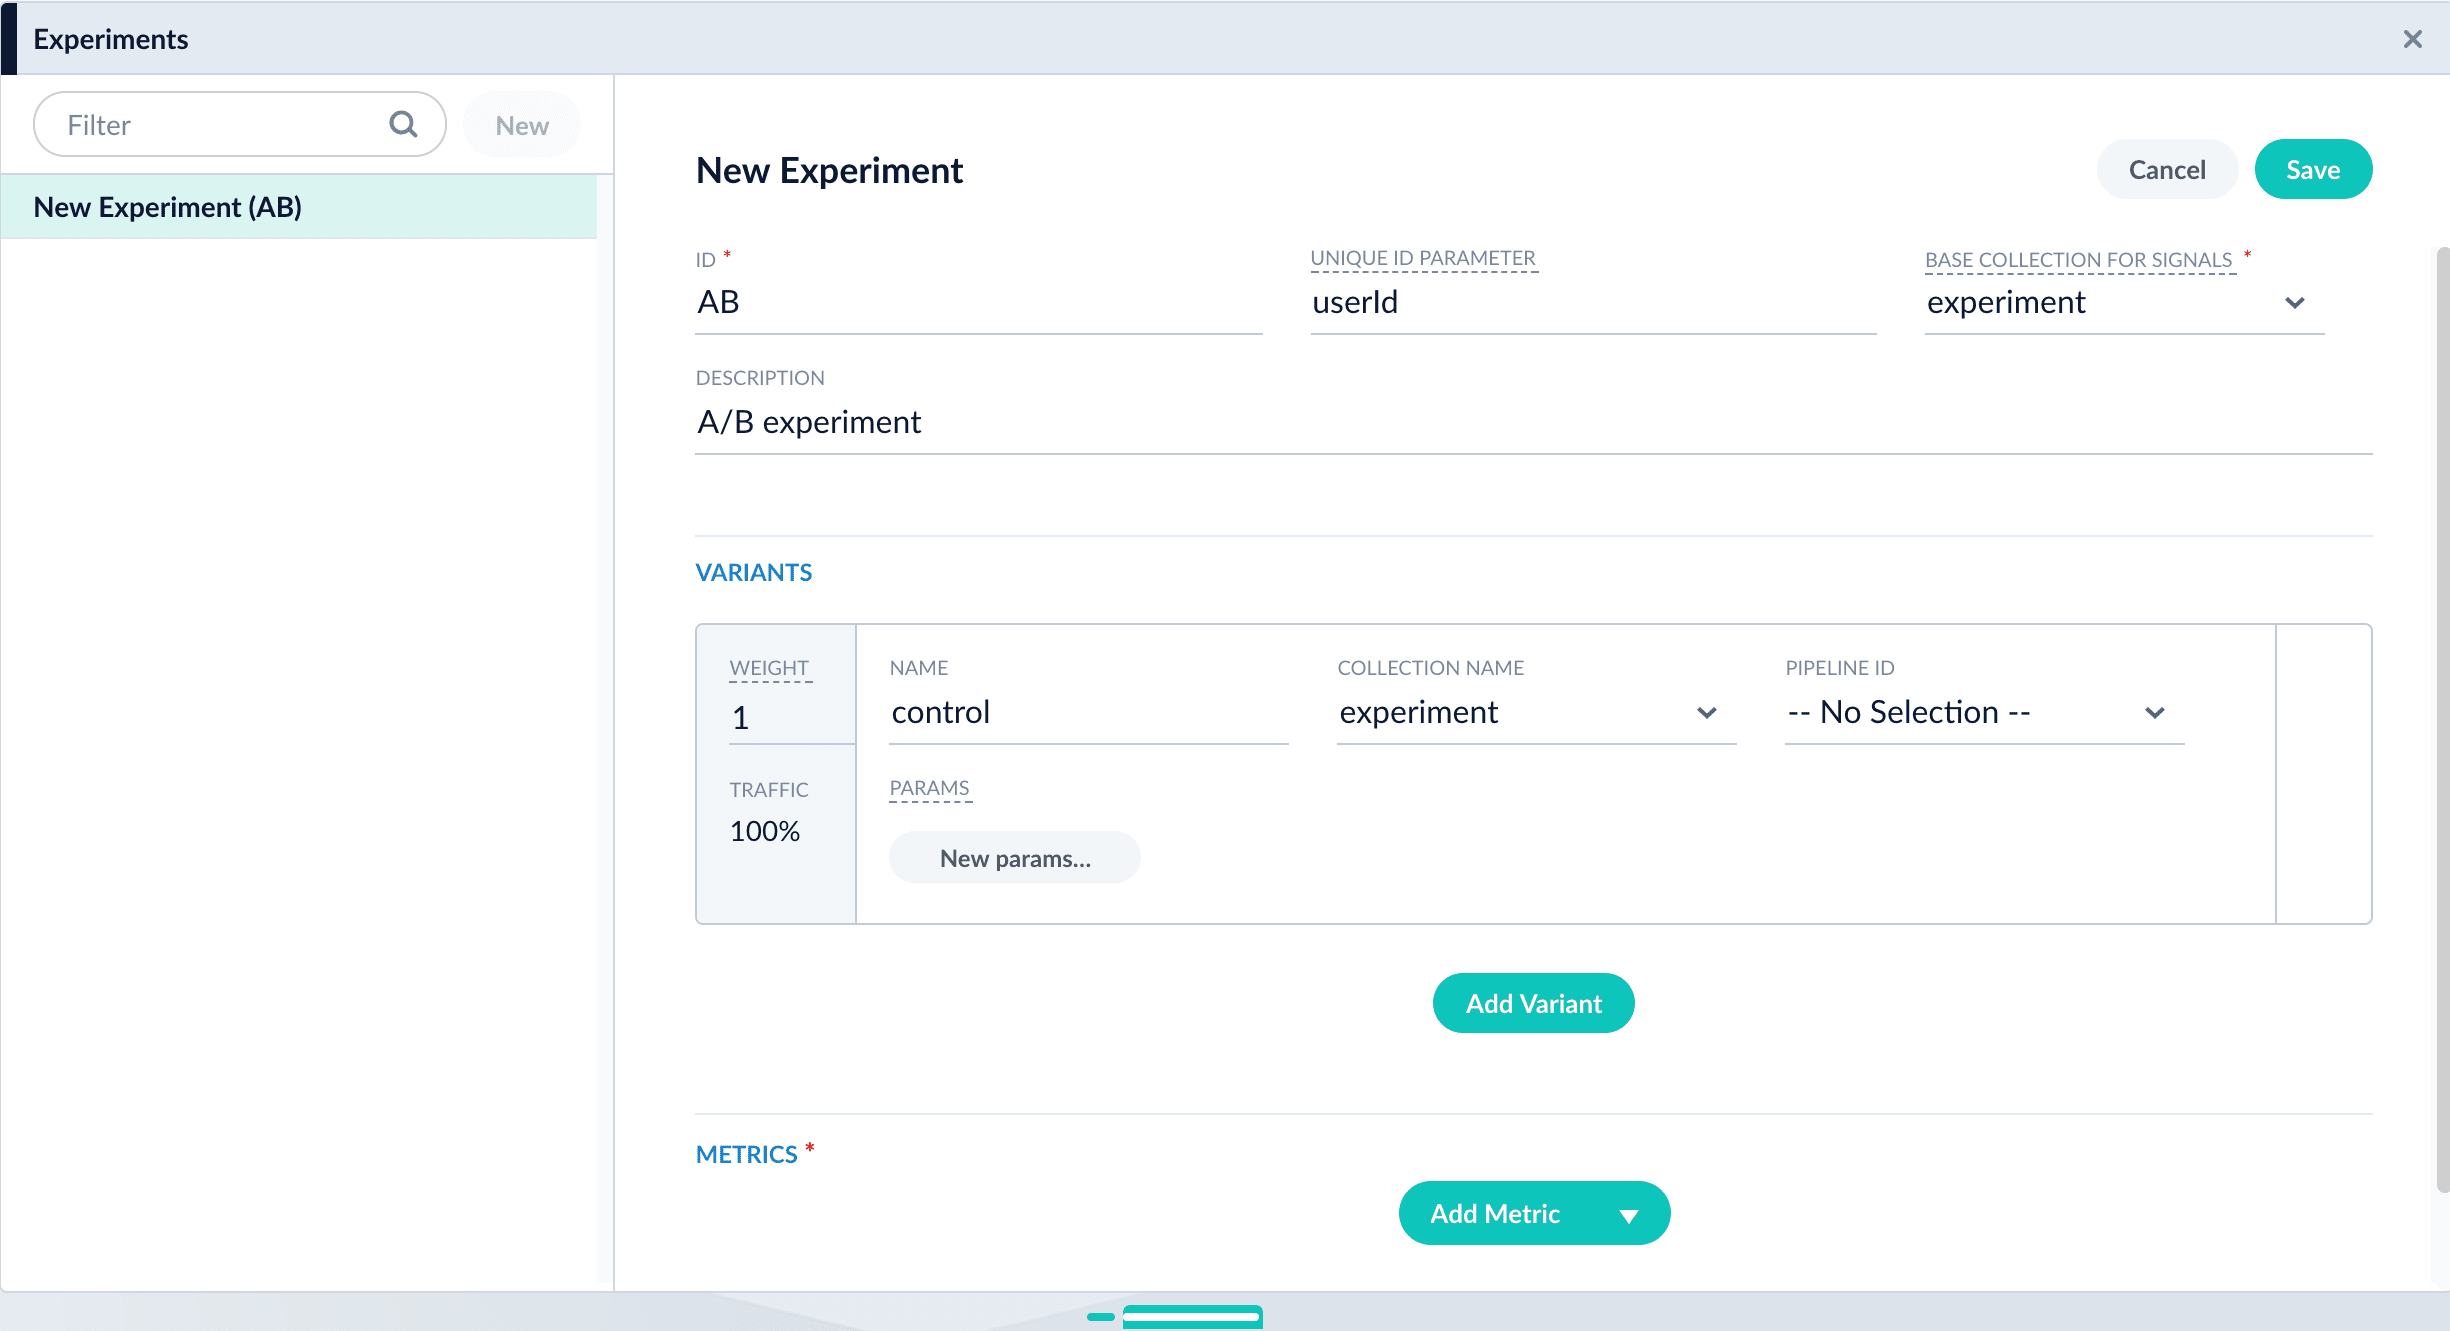
Create an experiment. The experiment defines variants and metrics, as well as the user ID parameter and the base collection for signals:
-
Navigate to Analytics
 > Experiments.
 -
Click New.
-
Enter an arbitrary ID (name) for the experiment.
-
Verify that the unique ID parameter is correct. It is the parameter that uniquely identifies each user. The default is
userId. Correct the parameter if necessary, for example by specifying the session ID field instead. -
Choose the base collection for signals. Signals resulting from requests that flow through the experiment are stored in the
_signalscollection associated with this collection. -
(Optional) Enter a description for the experiment.
-
(Optional) To use a multi-armed bandit, select Automatically Adjust Weights Between Variants.
-
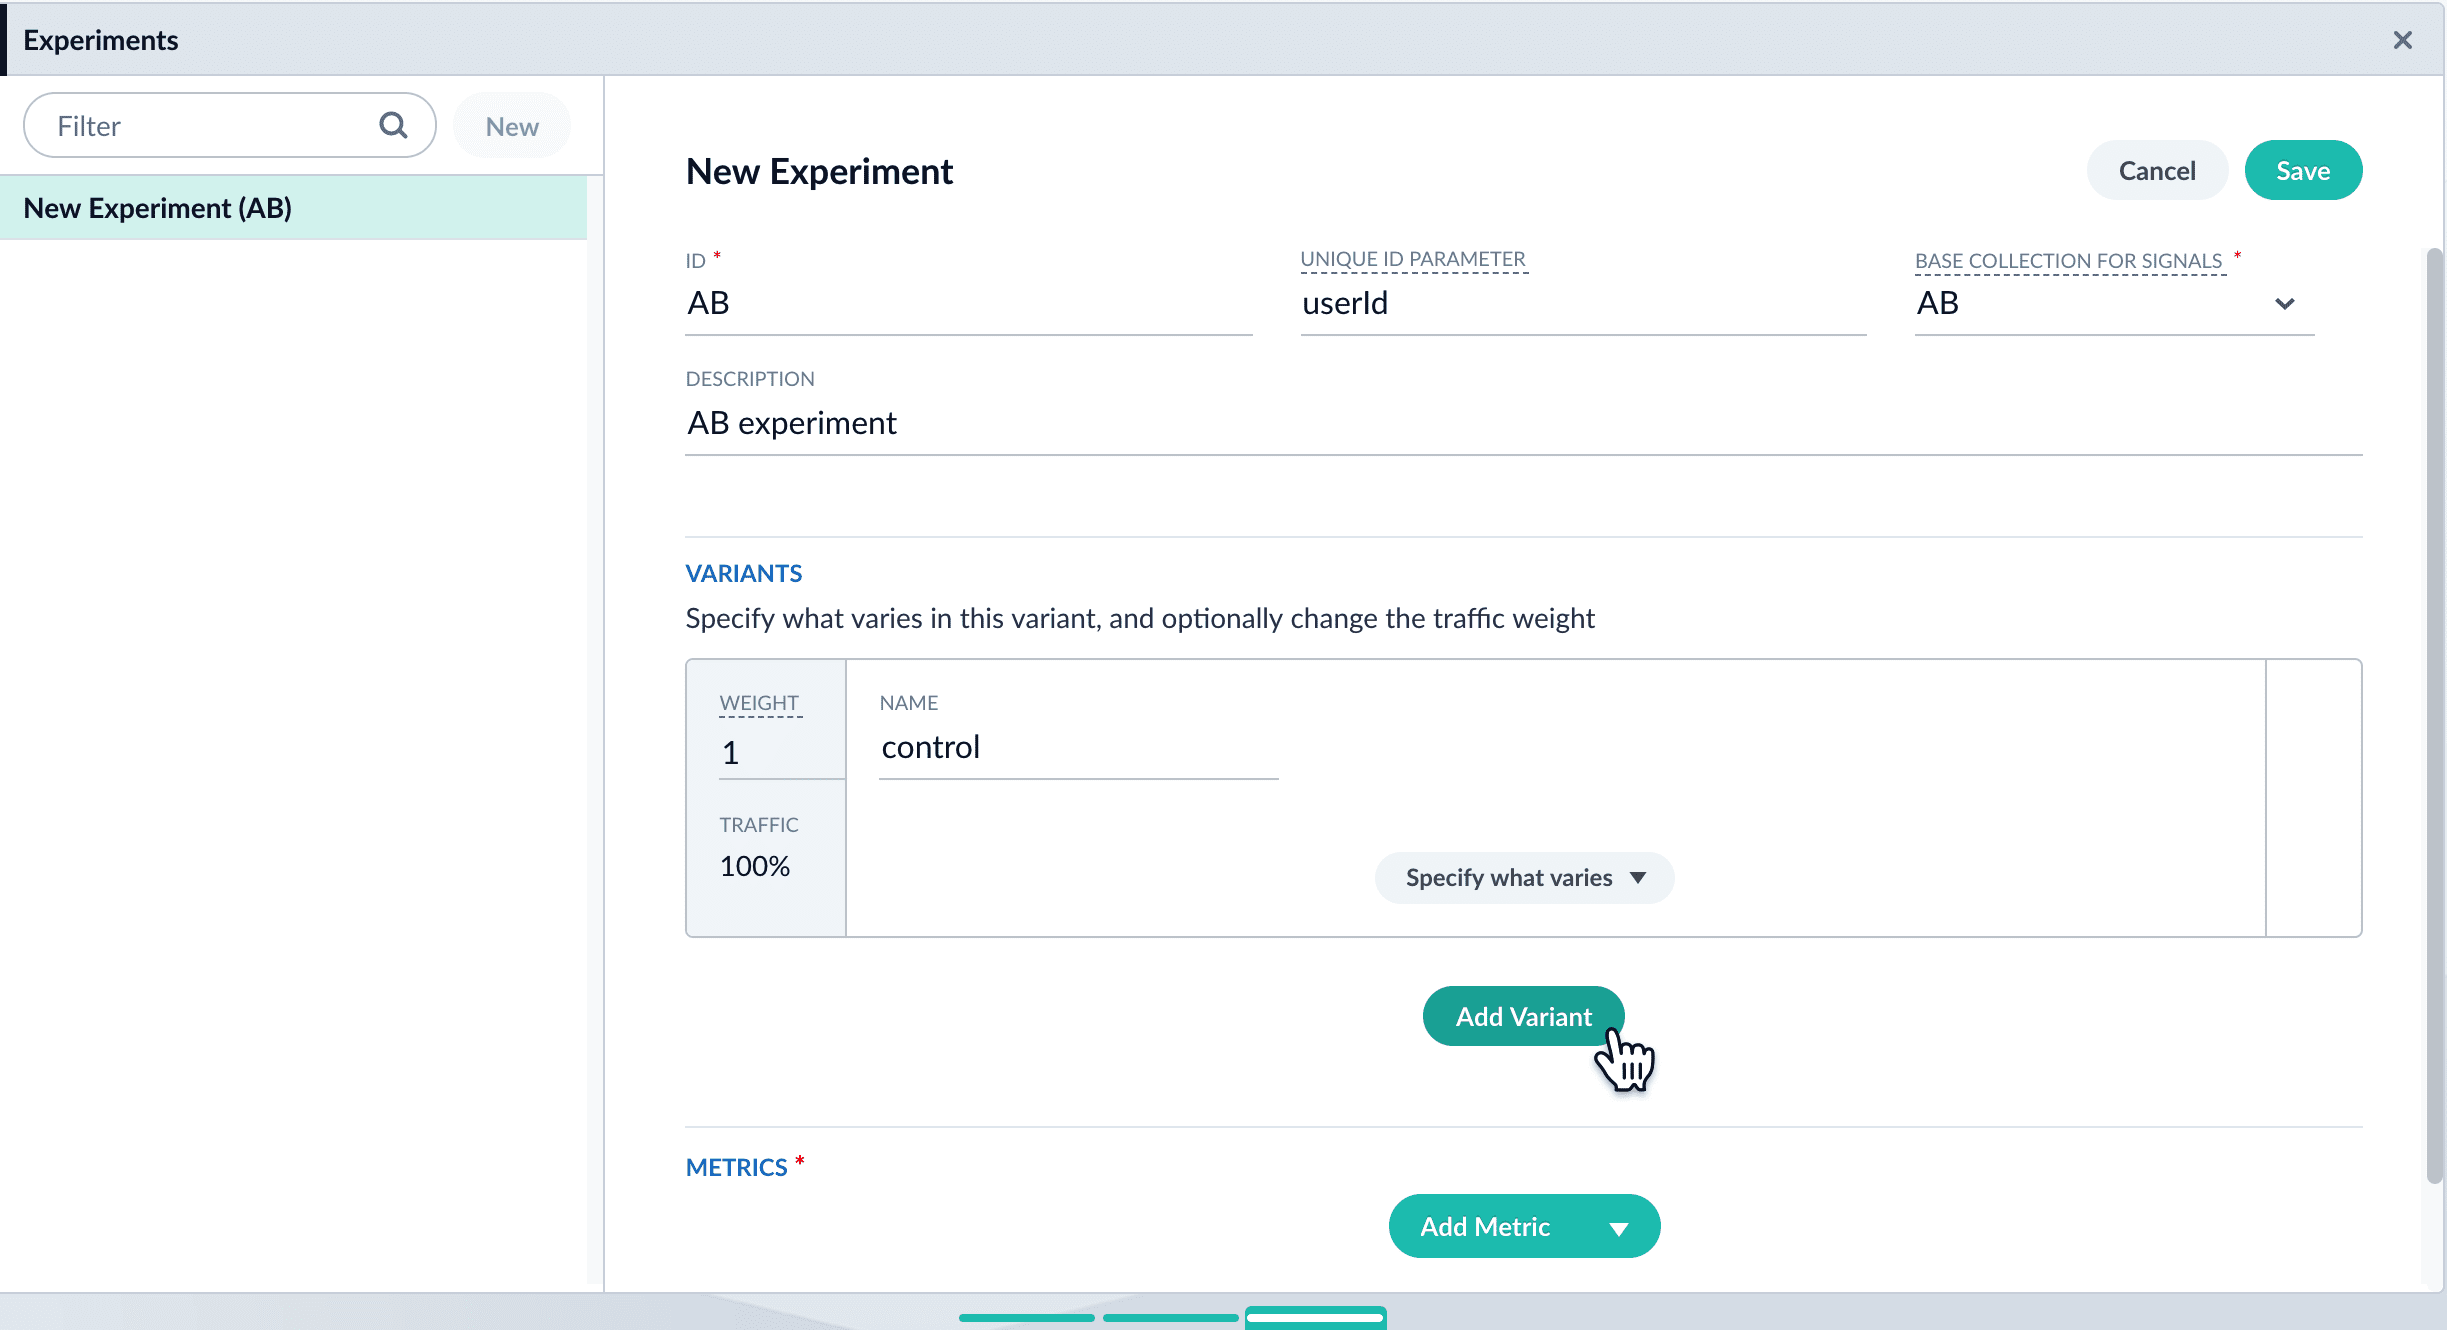
Add variants. Click Add Variant to add each non-control variant in your experiment.
-
For each variant:
-
Enter an arbitrary name. For the first variant, which is the control, Managed Fusion uses the name
control. You can change that name if you wish. -
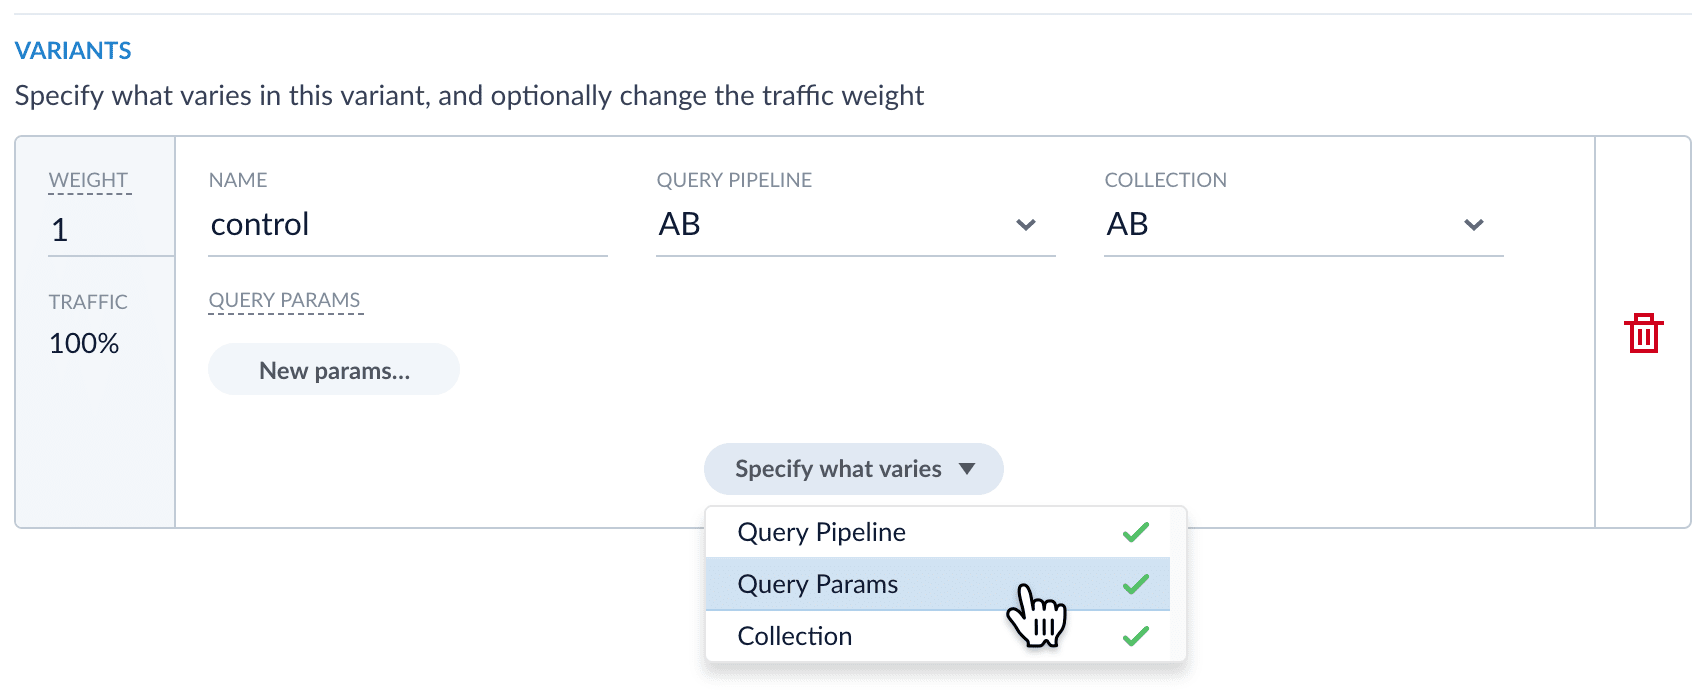
Click Specify what varies and specify what varies. Items you select are visible in the variant UI and have a green check mark in the dropdown menu. You can vary the query pipeline, query parameters (URL parameters to add to the query), and/or the collection.
-
(For query parameters) Click New params. In the dialog box, specify the Parameter Name, Parameter Value, and Update Policy for each parameter (append, default, remove, or replace).
-
-
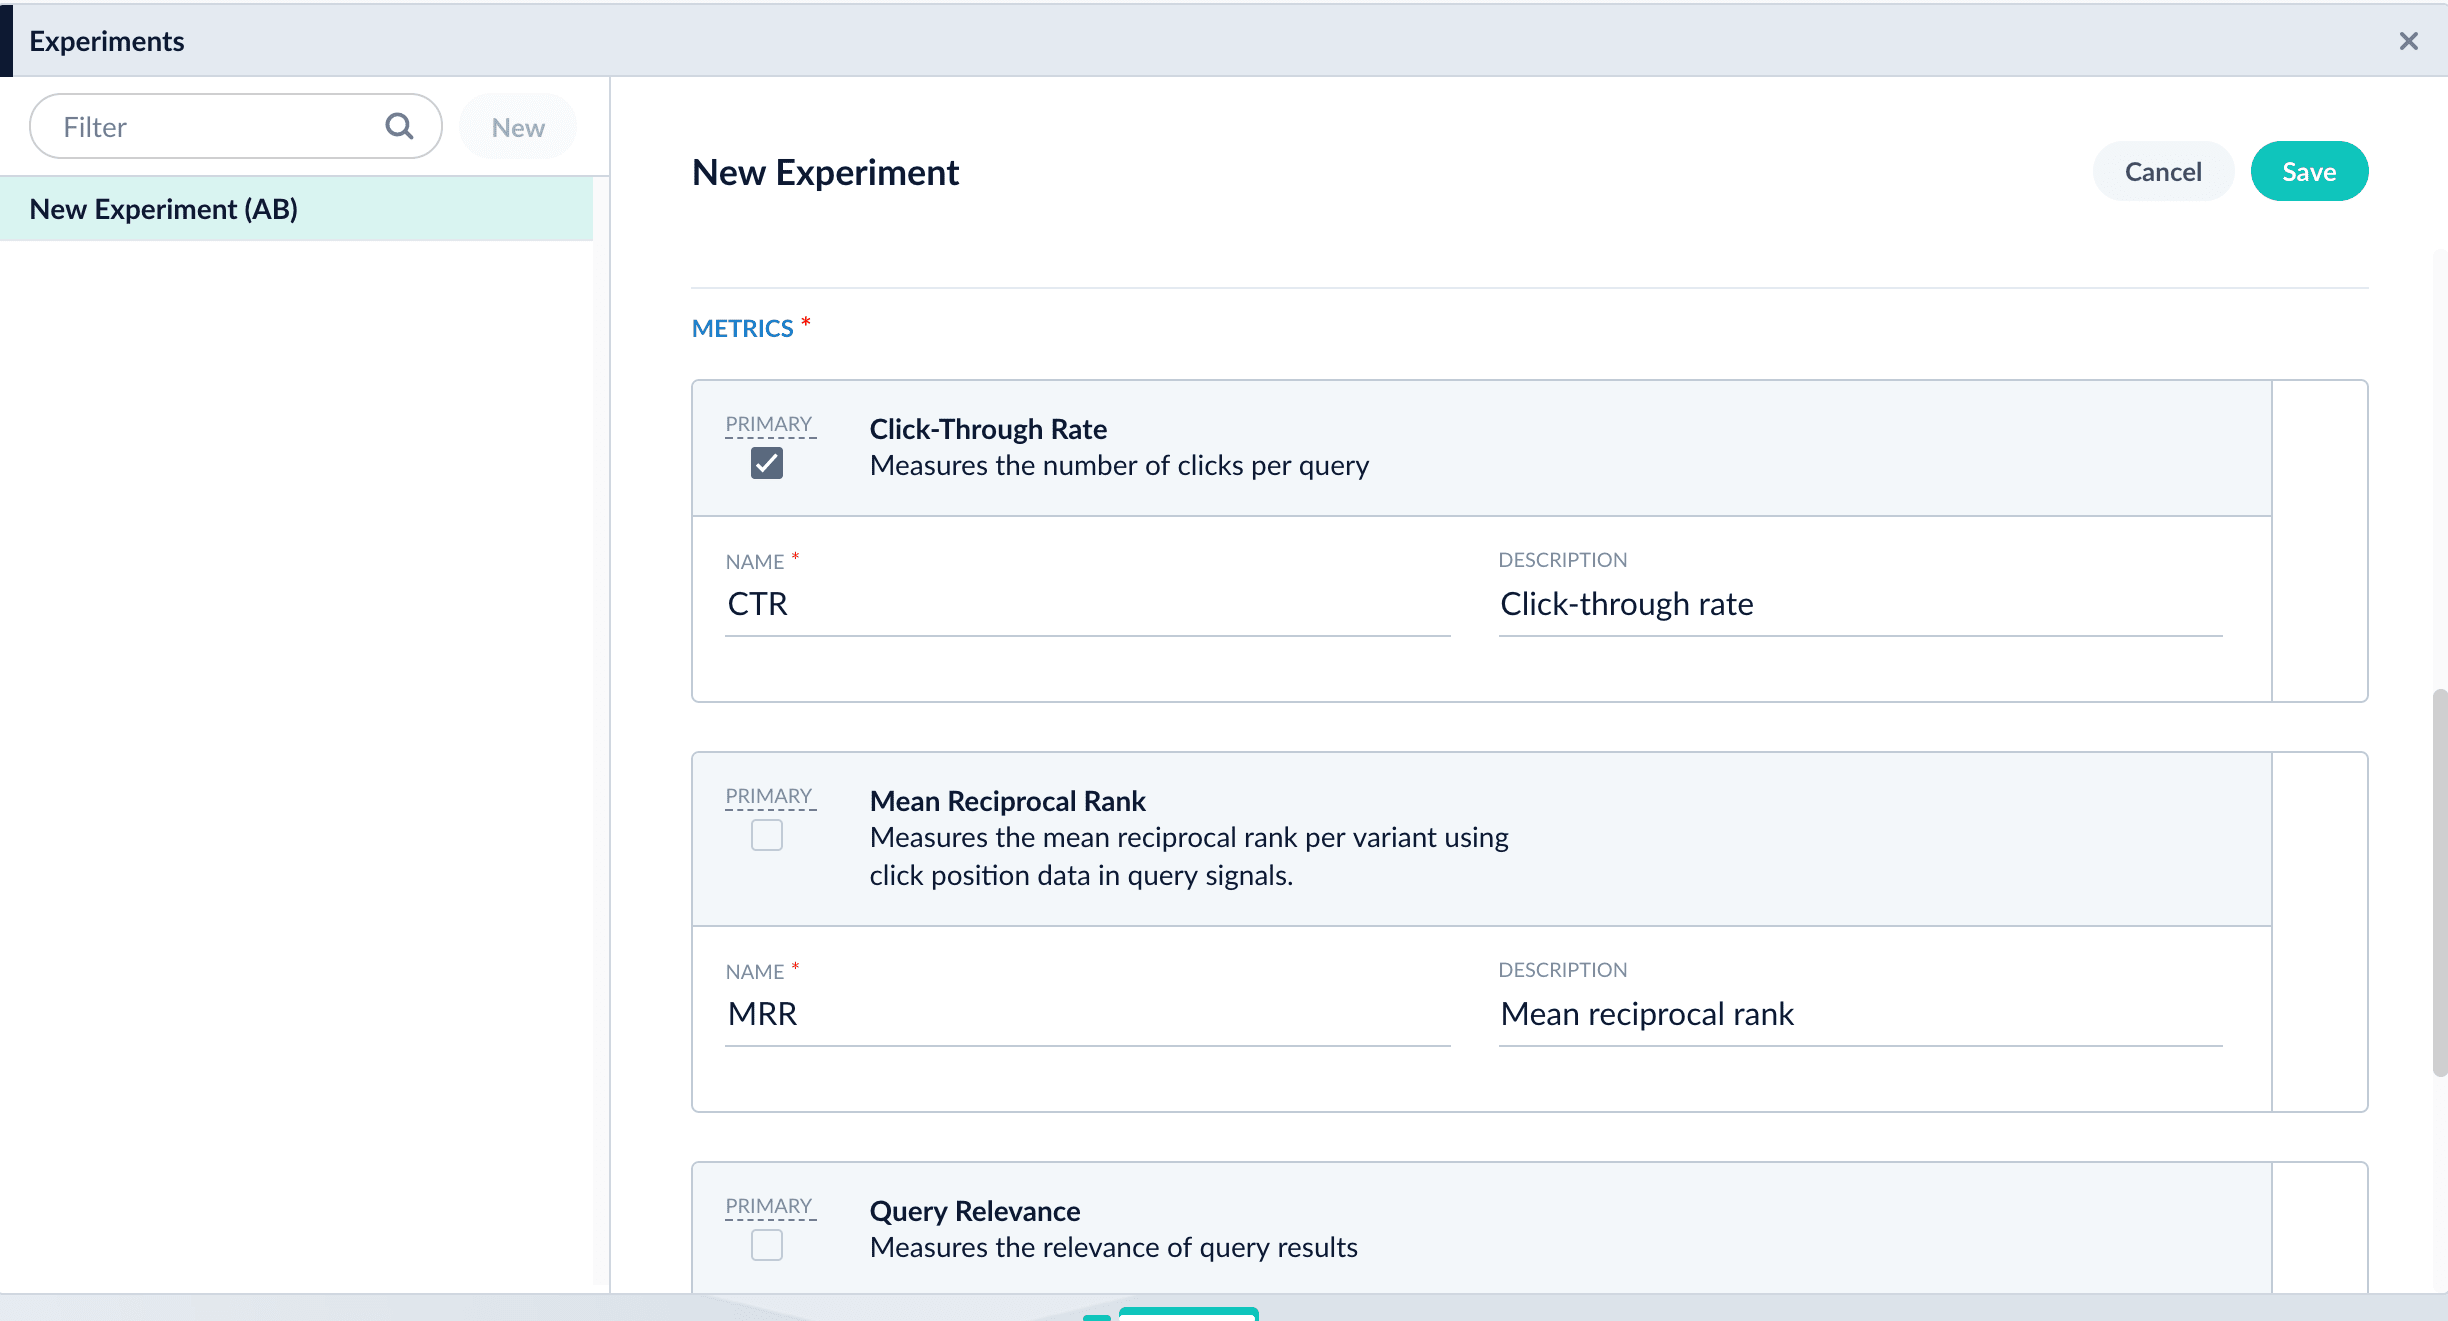
Add metrics. For each metric:
-
Click Add Metric and select the type of metric.
-
Fill in information for the metric.
-
-
Click Save to save the experiment.
2. Set up an Experiment stage
If part or all of what you will vary in the experiment is encompassed by differences in query pipelines, create additional pipelines for experiment variants. You cannot use the default query pipeline (the pipeline to which you are adding the Experiment stage) as one of the variants. That pipeline will be a part of all variants. Managed Fusion directs traffic that does not identify users through the default pipeline but not through the experiment.
-
Navigate to Querying
 > Query Pipelines.
 -
Click the name of the pipeline to which you want to add the Experiment stage.
-
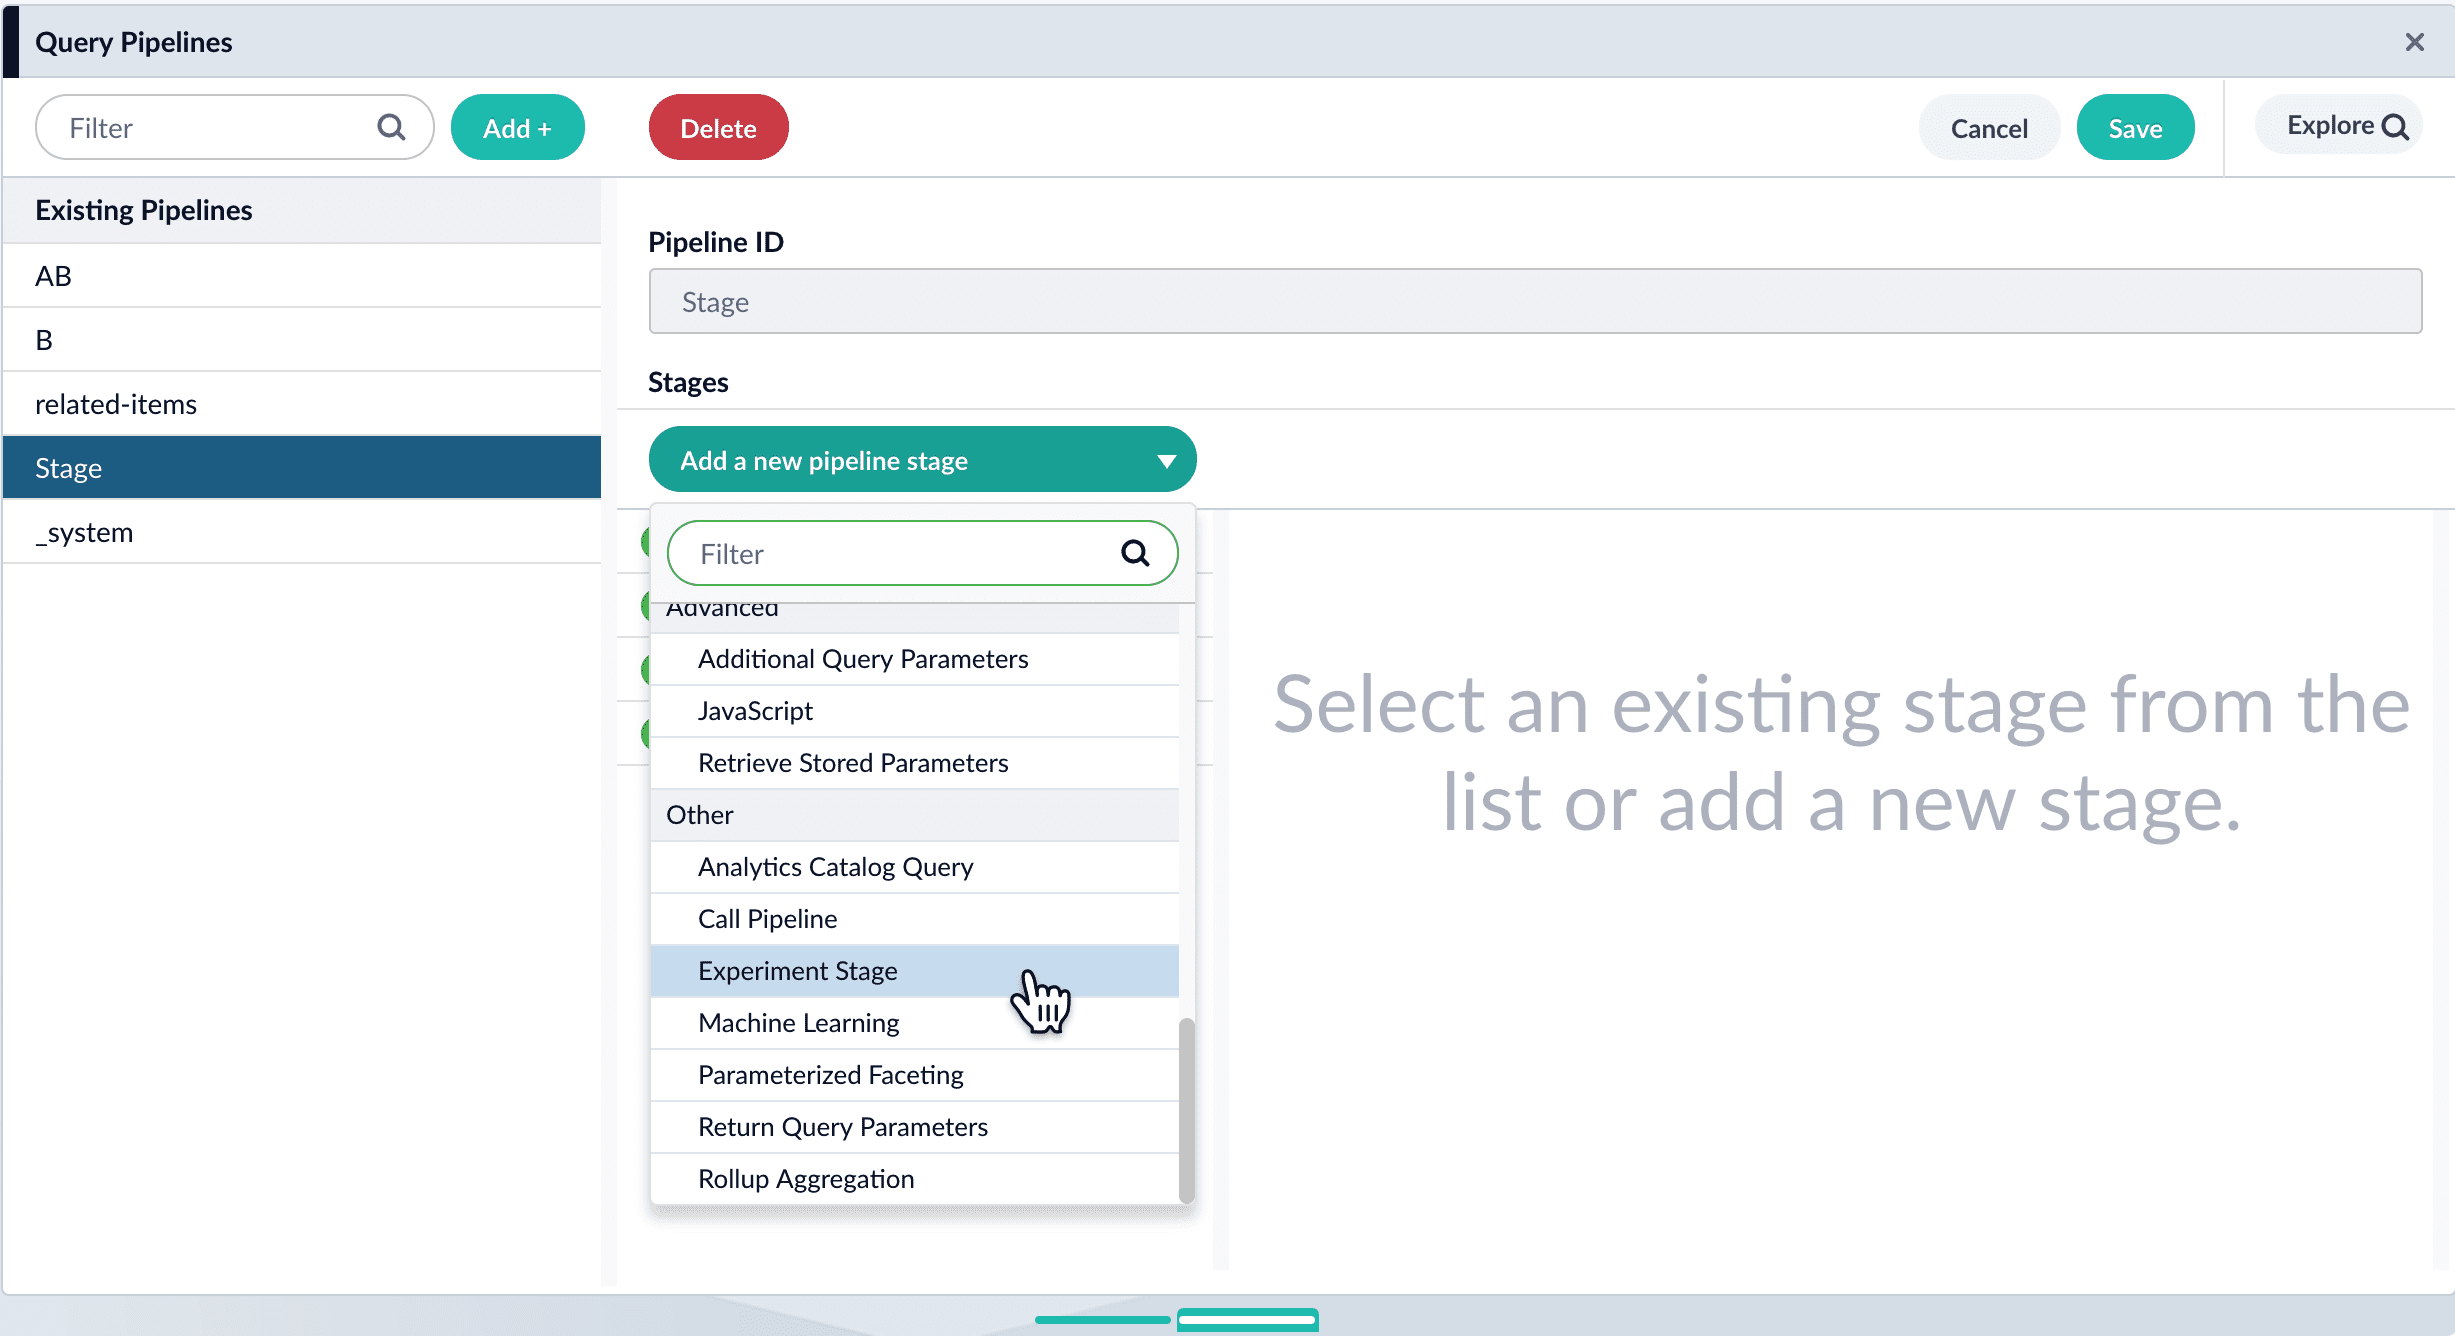
Click Add a new pipeline stage and select Experiment stage.
-
(Optional) Specify a label for the stage.
-
(Optional) Specify a condition that must be satisfied for queries to pass through the experiment.
-
Under Experiment ID, choose the experiment.
-
(Optional) Specify the percent of traffic to include in the experiment.
-
Click Save.
-
Drag the stage to where you want it in the pipeline.
-
Click Save.
You control the experiment in Analytics ![]() > Experiments.
> Experiments.