Install or update a connector - 5.2 and later
When you create a new datasource that requires an uninstalled connector, Fusion releases 5.2 and later automatically download and install the connector using the Datasources dropdown. You can also update the connector using the Blob Store UI or via the Connector API.
Install a connector using the Datasources dropdown
-
In your Fusion app, navigate to Indexing > Datasources.
-
Click Add.
-
In the list of connectors, scroll down to the connectors marked Not Installed and select the one you want to install.
Fusion automatically downloads it and moves it to the list of installed connectors.
After you install a connector, you can Configure a New Datasource.
| You can view and download all current and previous V2 connector releases at Download Connectors. |
Install or update a connector using the Blob Store UI
-
Download the connector zip file from Download V2 connectors.
Do not expand the archive; Fusion consumes it as-is. -
In your Fusion app, navigate to System > Blobs.
-
Click Add.
-
Select Connector Plugin.
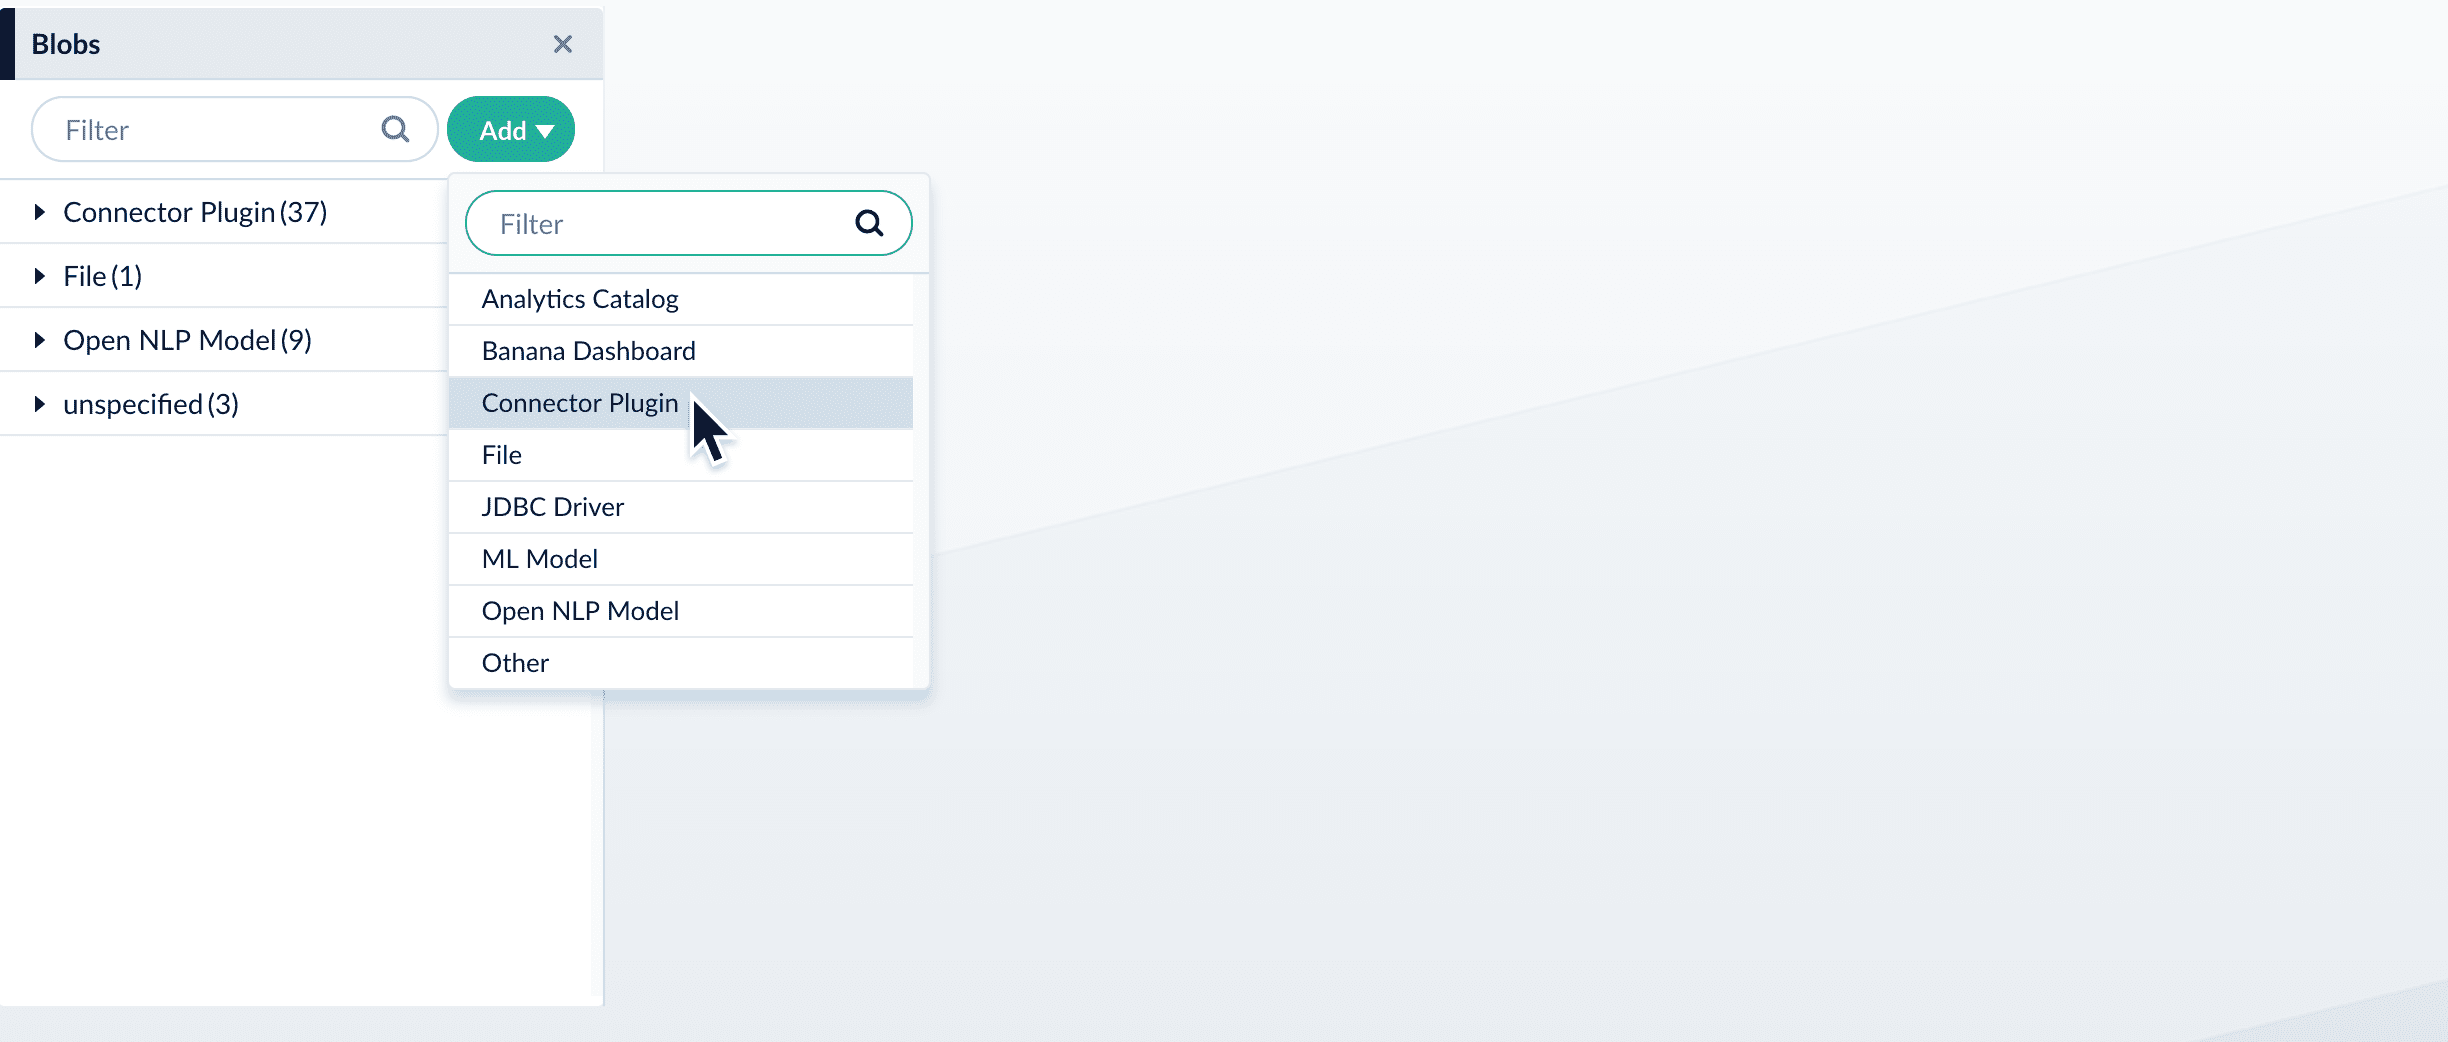
The "New Connector Plugin Upload" panel appears.
-
Click Choose File and select the downloaded zip file from your file system.
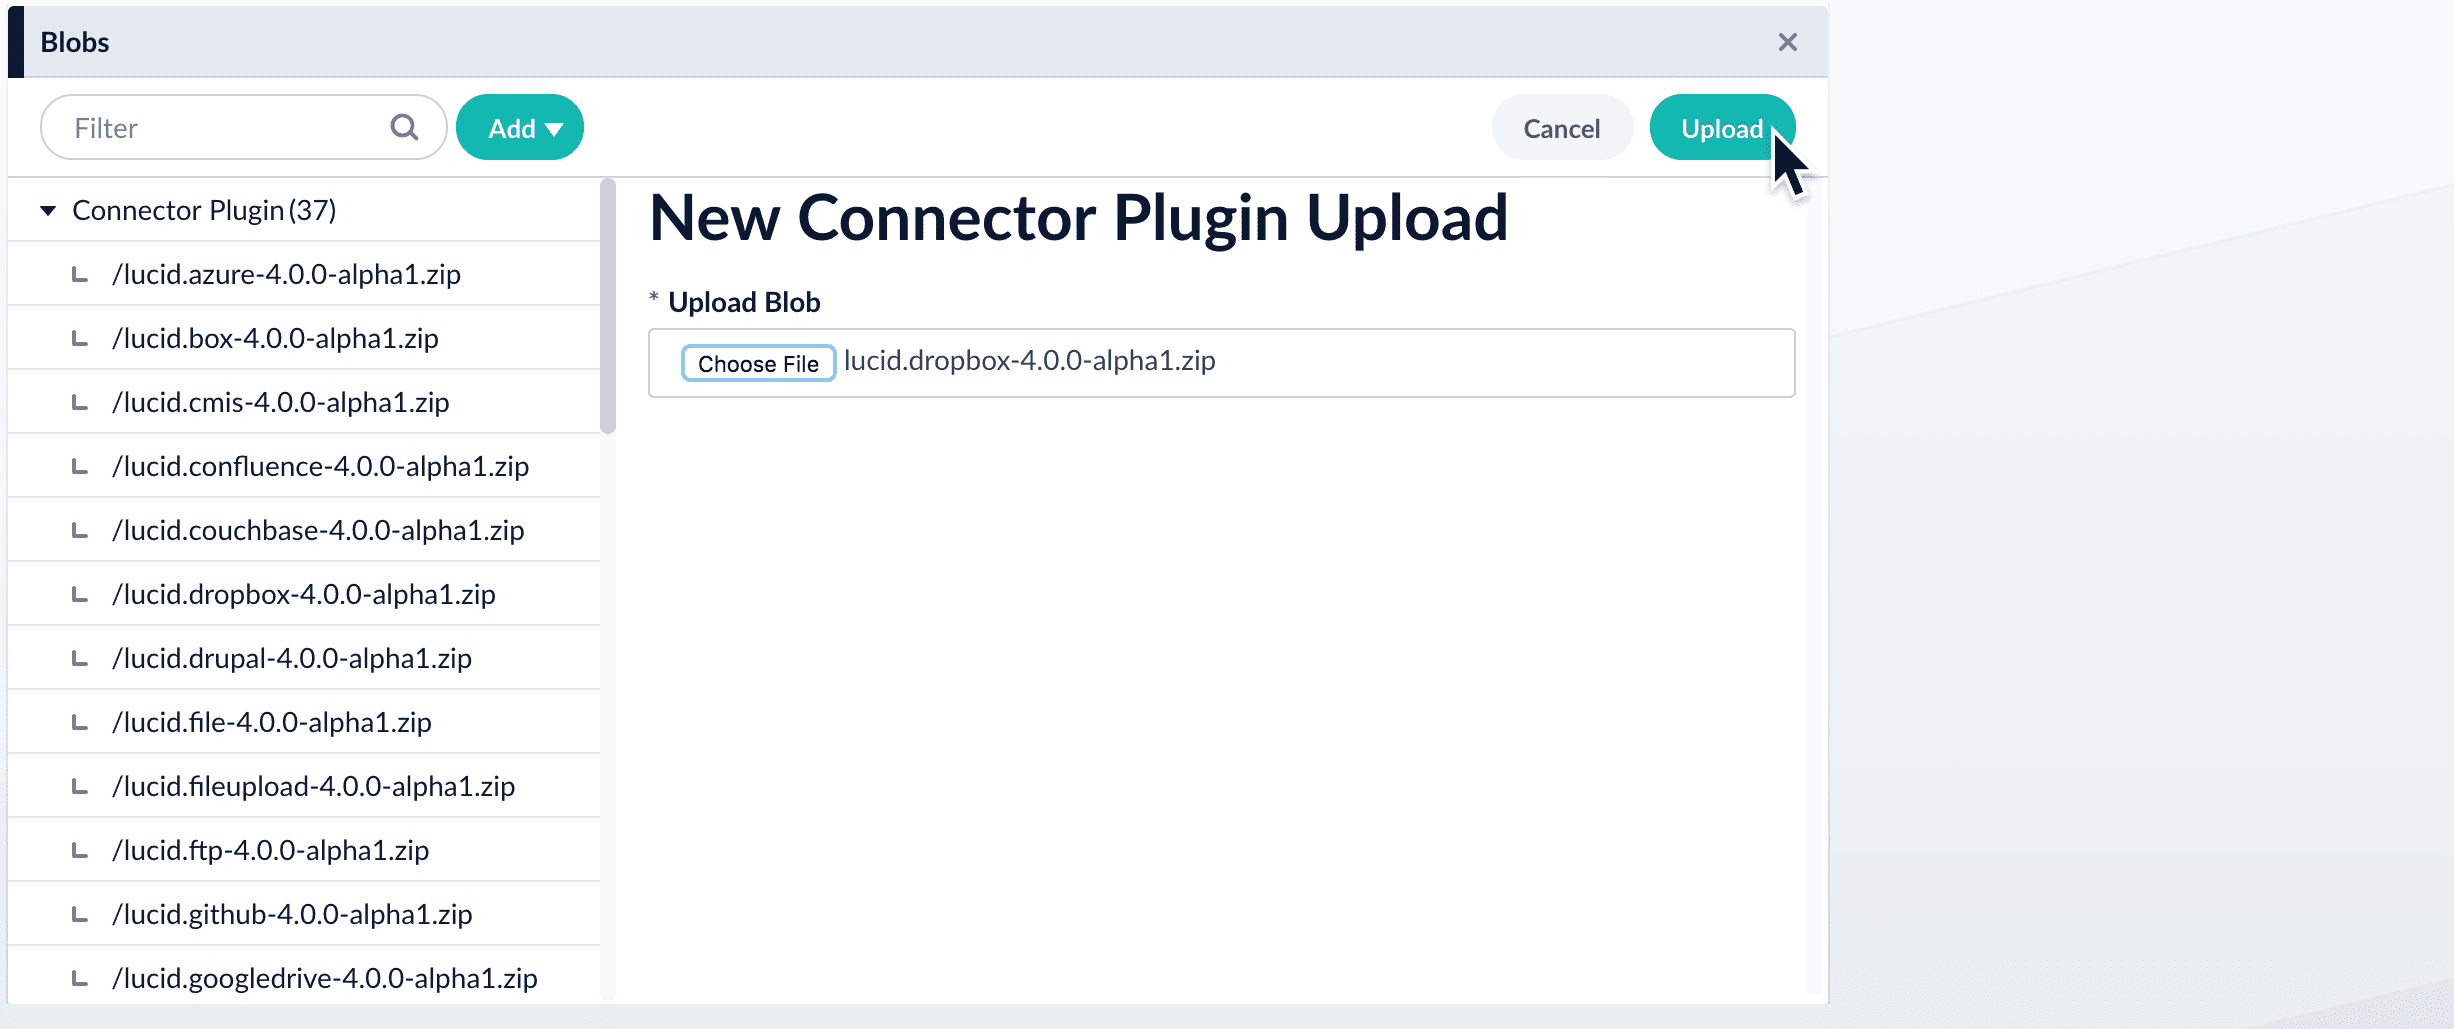
-
Click Upload.
The new connector’s blob manifest appears.
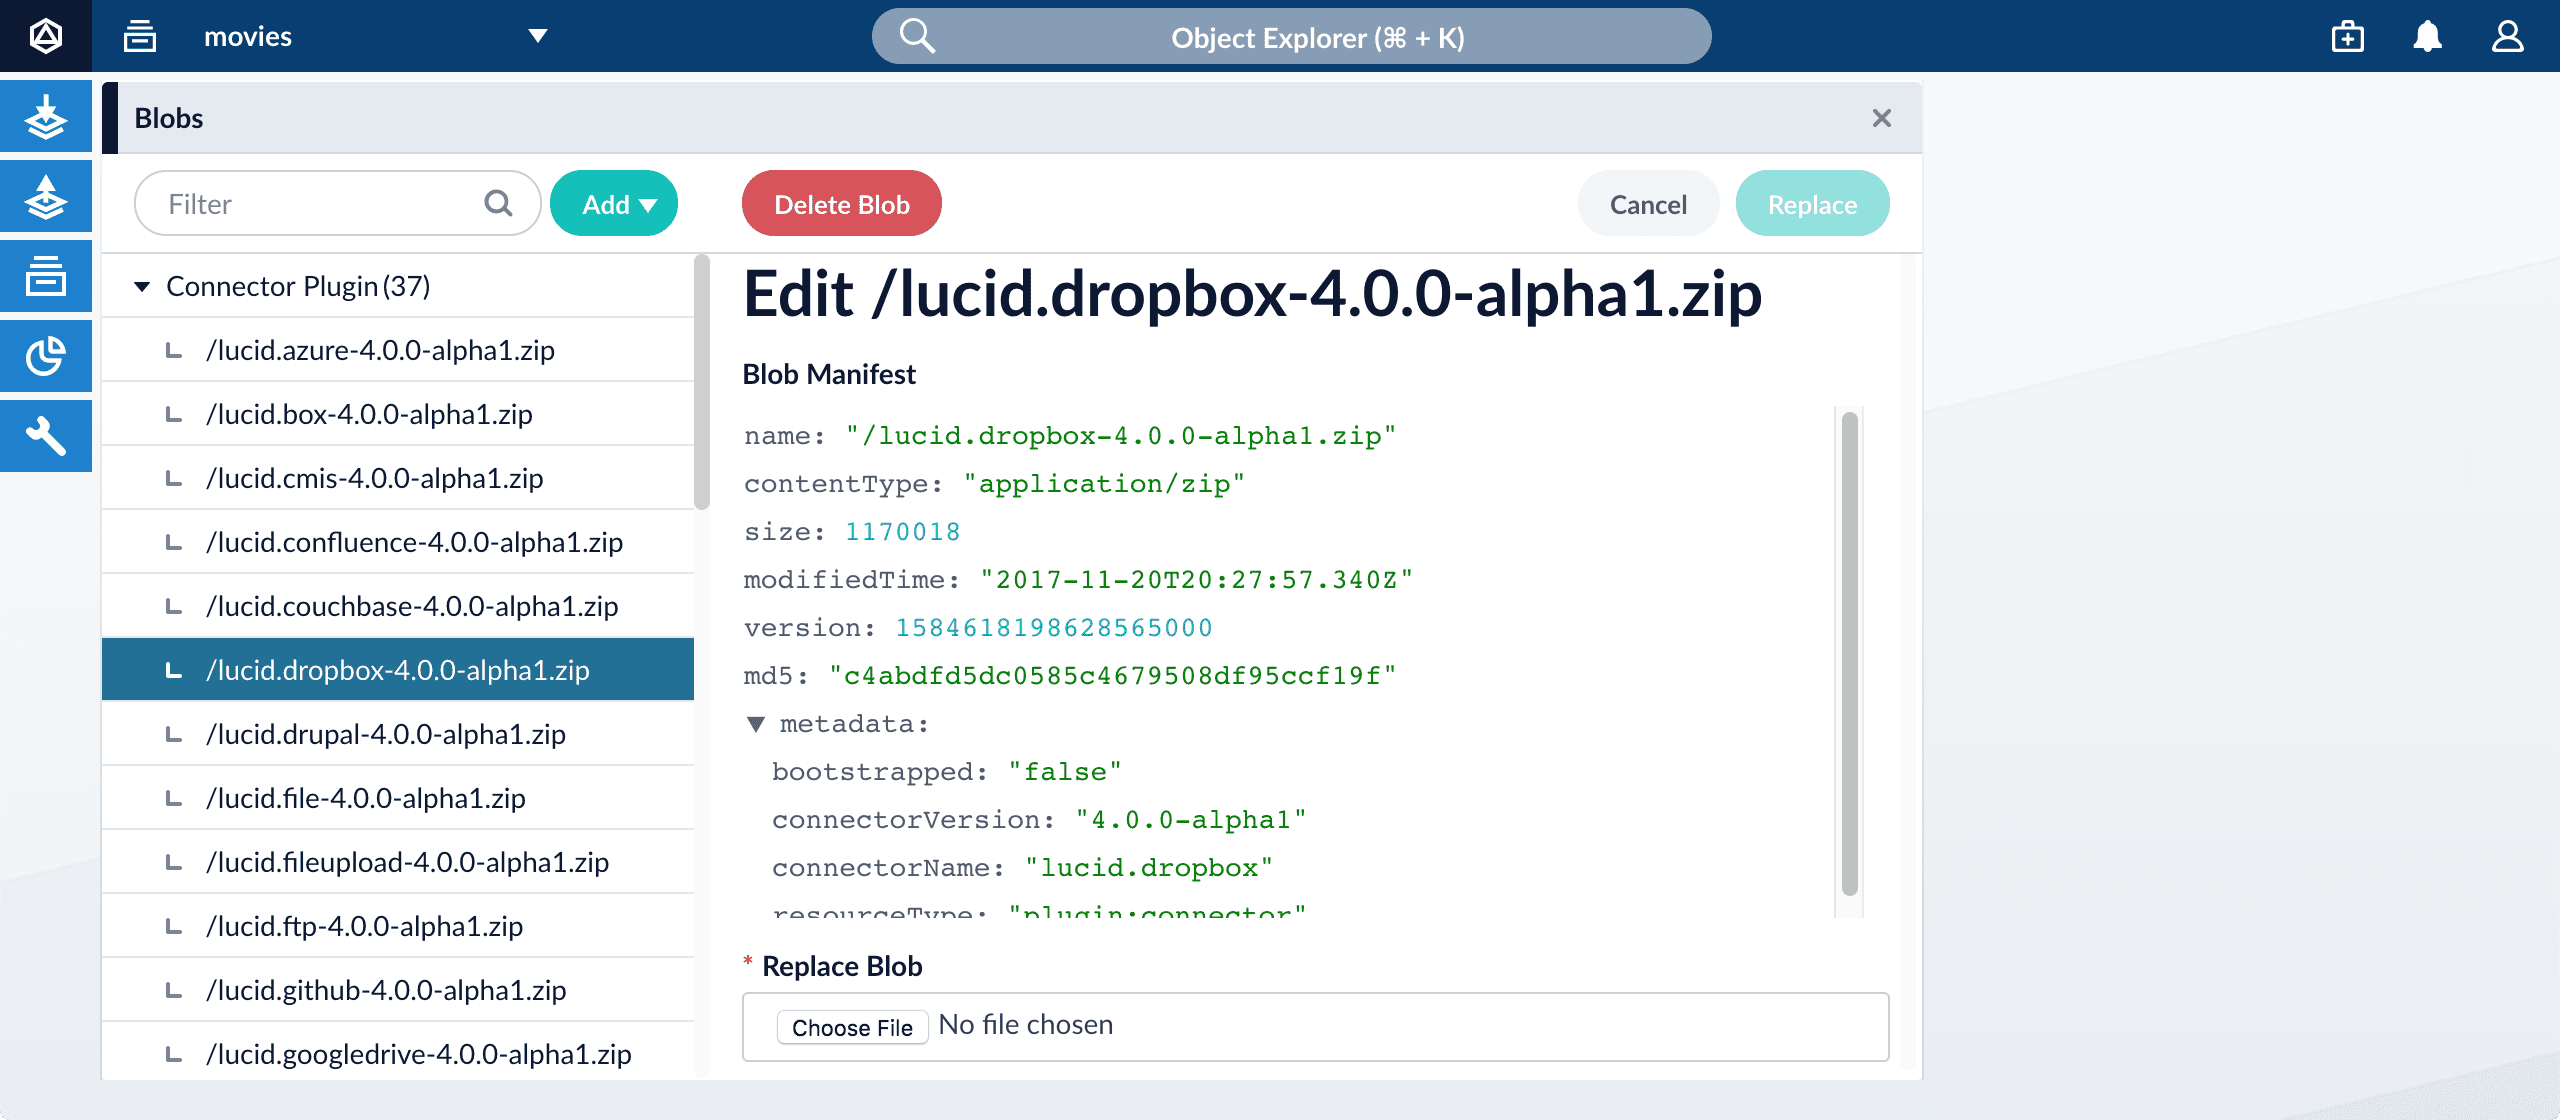
From this screen you can also delete or replace the connector.
| Wait several minutes for the connector to finish uploading to the blob store before installing the connector using the Datasources dropdown. |
Install or update a connector using the Connector API
-
Download the connector zip file from Download V2 connectors.
Do not expand the archive; Fusion consumes it as-is. -
Upload the connector zip file to Fusion’s plugins. Specify a
pluginIdas in this example:curl -H 'content-type:application/zip' -u USERNAME:PASSWORD -X PUT 'https://FUSION_HOST:FUSION_PORT/api/connectors/plugins?id=lucidworks.{pluginId}' --data-binary @{plugin_path}.zipFusion automatically publishes the event to the cluster, and the listeners perform the connector installation process on each node.
If the pluginIdis identical to an existing one, the old connector will be uninstalled and the new connector will be installed in its place. To get the list of existing plugin IDs, run:curl -u USERNAME:PASSWORD https://FUSION_HOST:FUSION_PORT/api/connectors/plugins -
Look in
https://FUSION_HOST:FUSION_PORT/apps/connectors/plugins/to verify the new connector is installed.
Reinstall a connector
To reinstall a connector for any reason, first delete the connector then use the preceding steps to install it again. This may take a few minutes to complete depending on how quickly the pods are deleted and recreated.