Parsers provide fine-grained configuration for inbound data. You configure parsers with stages, much like index pipelines and query pipelines. Parsers can include conditional parsing and nested parsing. You can configure them through the Lucidworks Search UI or the Parsers API. Connectors receive the inbound data, convert it into a byte stream, and send the byte stream to a parser’s configured parsing stages. The parser selects a parsing stage to handle the stream, which parses the data and produces documents that are sent to the index pipeline. Each parsing stage evaluates whether the inbound stream matches the stage’s default media types or filename extensions. The first stage that finds a match processes the data and can output one or both of the following:Documentation Index
Fetch the complete documentation index at: https://doc.lucidworks.com/llms.txt
Use this file to discover all available pages before exploring further.
- Zero or more pipeline documents for consumption by the index pipeline
- Zero or more new input streams for re-parsing
This recursive approach is useful for containers (for example,zipandtarfiles). The output of the container parsing can be another container or a stream of uncompressed content that requires its own parsing.
| Field | Description |
|---|---|
| Document ID Source Field | Field in the source file that contains the document ID. If no value is entered, the default value is id. When a field name matches this parameter, that field is consumed to populate the document’s unique identifier (Solr’s uniqueKey) and is not available as a stored field in the indexed document. If your source data contains a field of id that you want to preserve, either rename the field in your source data or change this parameter to a different field name. |
| Maximum Parser Recursion Depth | Maximum number of times the parser may recurse over the file, before proceeding to the next parser. This is useful for files with hierarchical structures (for example, zip and tar files). |
| Enable automatic media type detection | Whether to automatically detect the media type of the source files. If disabled, the parser uses the media type application/octet-stream. |
Built-in parser stages
The parser stages found in the sidenav are available for configuration. Datasources that use connectors that retrieve fixed-structure content, such as those for Twitter and Jira, have hard-coded parsers and do not expose any configurable parser options.Configure parsers
When you configure a datasource, you can use the Index Workbench or the Parsers API to create a parser. A parser consists of an ordered list of parser stages, some global parser parameters, and the stage-specific parameters. You can re-order the stages list by dragging them up or down in the Index Workbench. Any parser stage can be added to the same parser multiple times if different configuration options are needed for different stages. Datasources with fixed-structure data will also be parsed by Lucidworks Search, but with default settings that do not need to be customized. There is no limit to the number of stages that can be included in a parser. The priority-order of the stages is completely flexible. In a default parser configuration, a fallback parser is provided at the end of the parsing stage list to handle streams no other stage matches. If present, this stage is selected and attempts to parse anything that has not yet been matched.Configure a parser in the Lucidworks Search UI in Index Workbench
To configure parsers under Indexing > Index Workbench:- In the Lucidworks Search workspace, navigate to the Index Workbench.
- At the upper right of the Index Workbench panel, click Load.
- Under Load, click the name of the index pipeline.
-
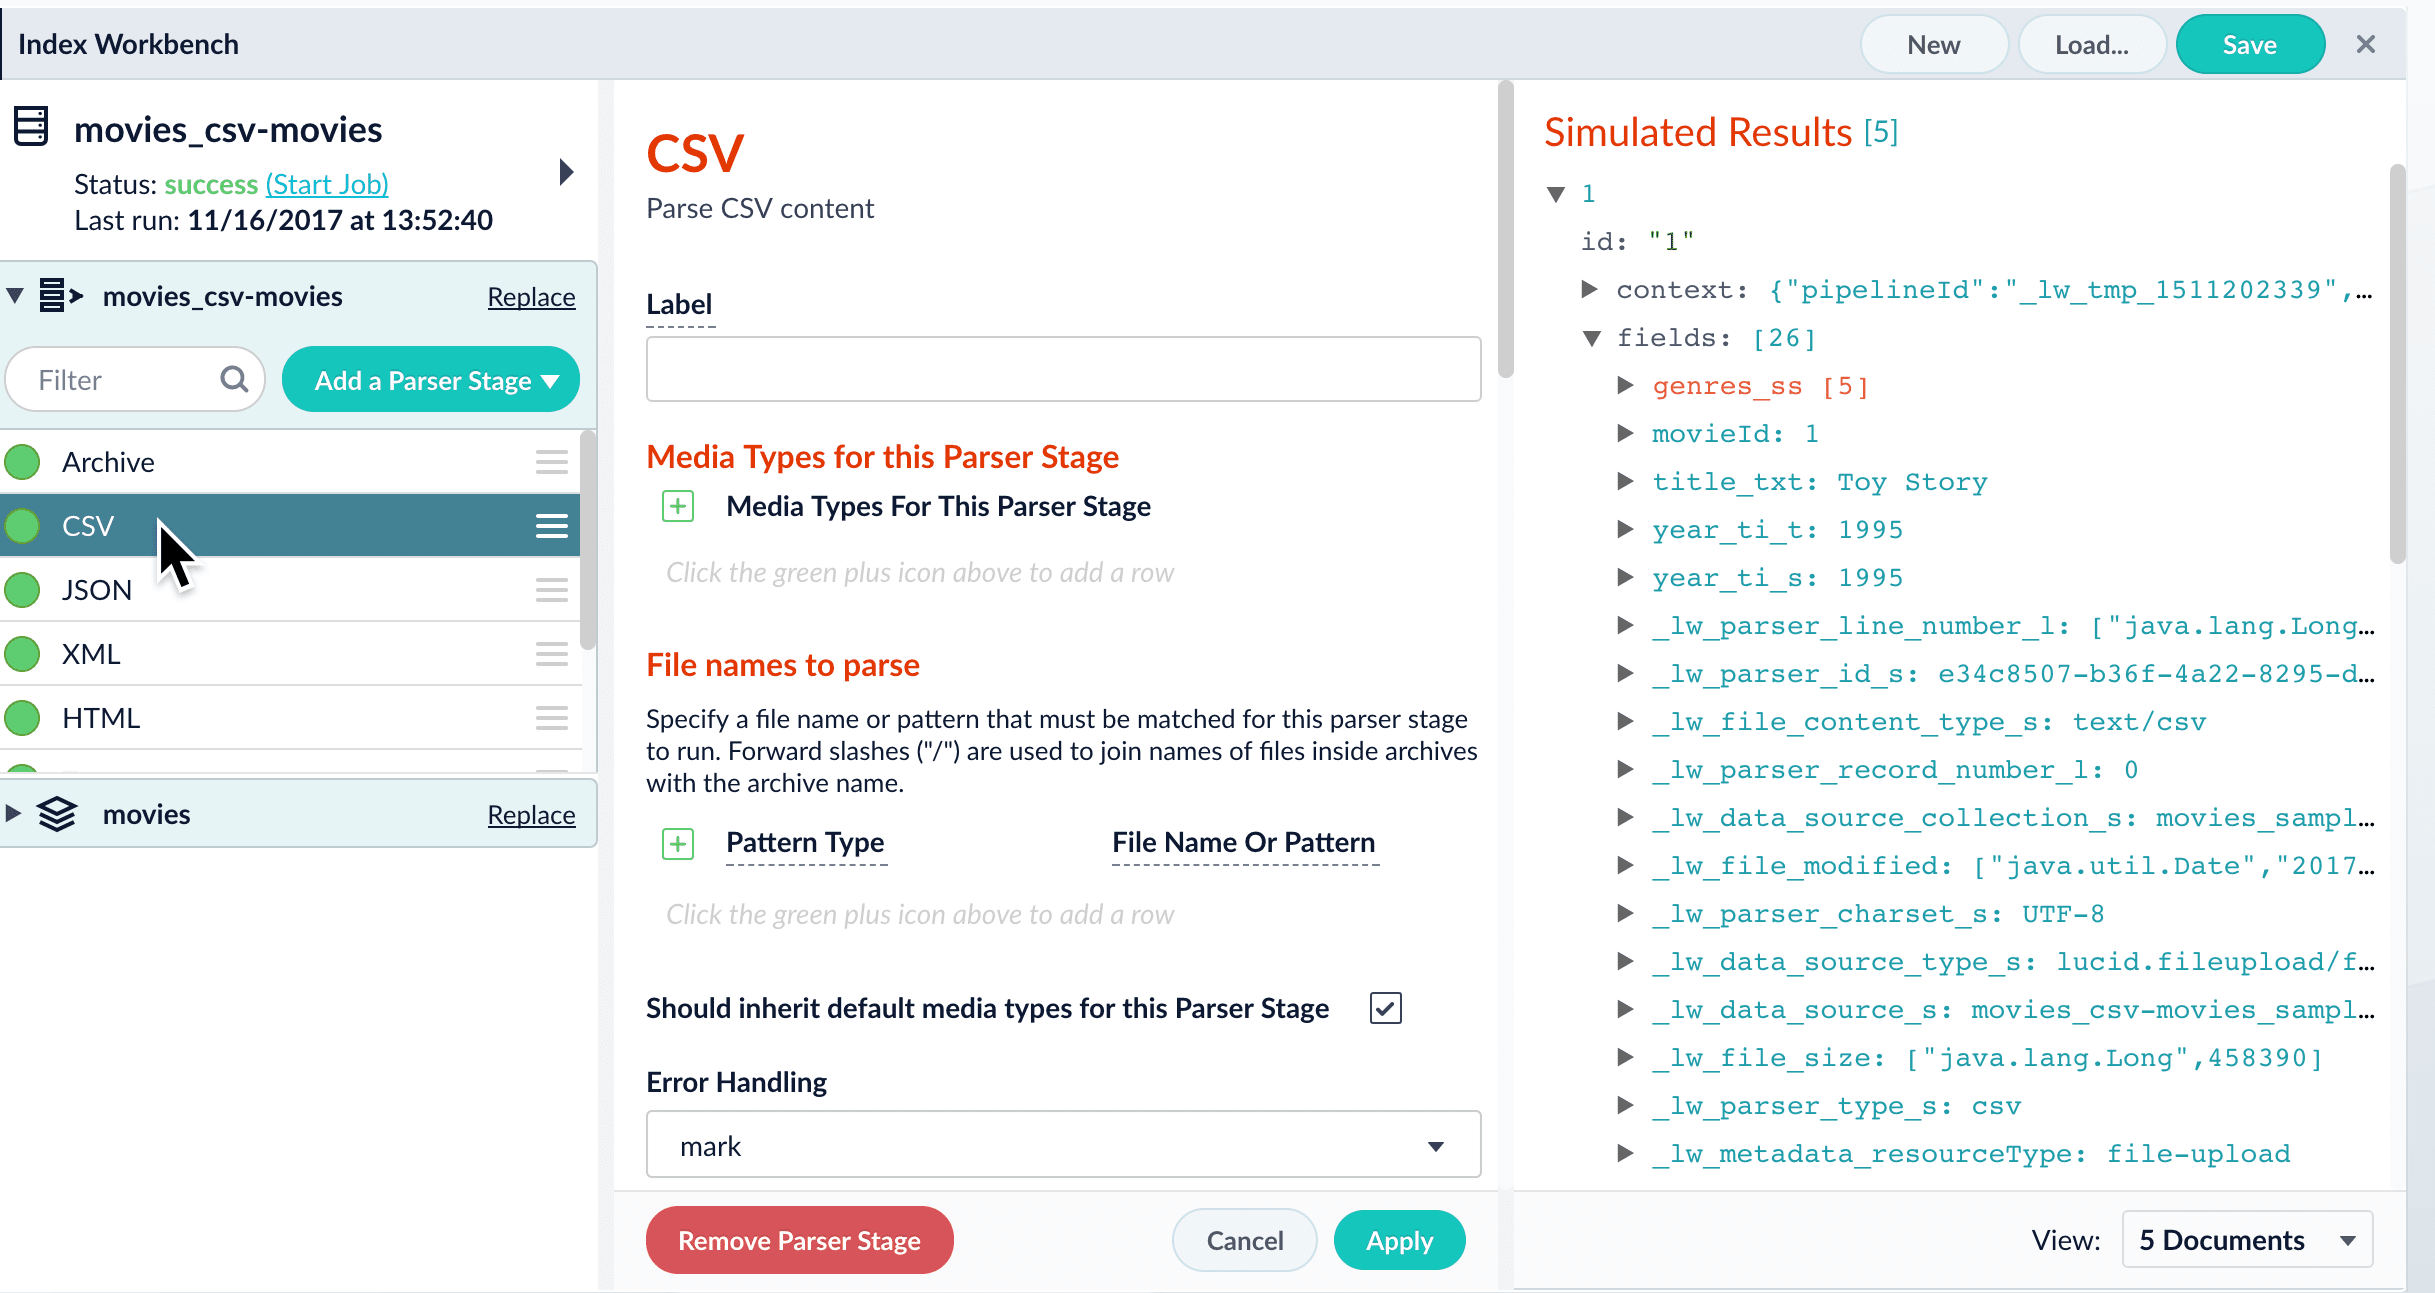
Click the parser to open its configuration:
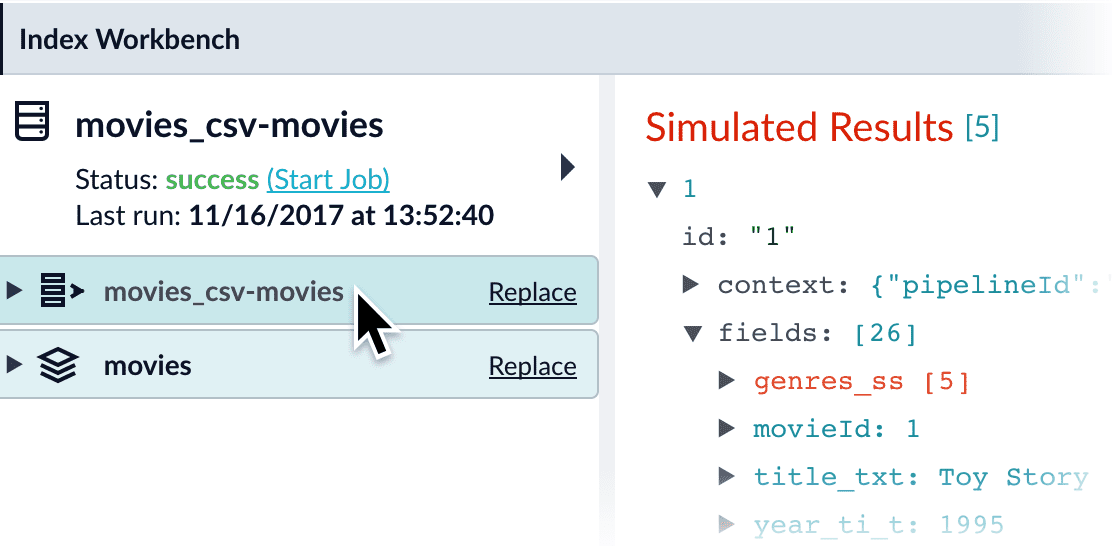
-
Click a specific stage to open its configuration panel:
Configure a parser in the Lucidworks Search UI in Parsers
Requirements
To configure each part of the indexing process separately instead of using the Index Workbench, you must complete the following:- Configure datasources in Indexing > Datasources. For more information, see Configure a new datasource.
- Configure parsers in Indexing > Parsers using the steps in this section.
- Configure index pipelines in Indexing > Index Pipelines. For more information, see Index Pipeline Stages.
Configure a new datasource
Configure a new datasource
Add the datasource and connector
- Sign in to Lucidworks Search and click any application.
- Click Indexing > Datasources > Add+.
- Select your connector. The connector configuration panel displays. The specific configuration options vary depending on the connector.
Configure the connector
If you do not see your connector in the list, you may need to install it.
- Enter a useful name for your datasource in the Datasource ID field.
- Select an option in the Pipeline ID field if different from the default.
- Select an option in the Parser fields if different from the default.
- Select your specific release and connector detail. For more information, see Connectors Configuration Reference.
- Click Save.
Test the datasource configuration
- Click Indexing > Index Workbench > Load.
- Select the datasource ID you specified when you created the datasource.
- Review the datasource configuration and a simulation of the results when you run this datasource job to index your data.
- Adjust the configurations of your datasource, parsers, and index pipeline until the simulated results are satisfactory.
- Click Save.
Index your data
- In the Index Workbench, click Start Job.
- When the job status is Finished, click Querying > Query Workbench to view the indexed documents and configure your query pipeline. For more information, see Query Workbench.
Configure a parser in Index > Parsers
- In the Lucidworks Search workspace, navigate to Indexing > Parsers.
- Click Add.
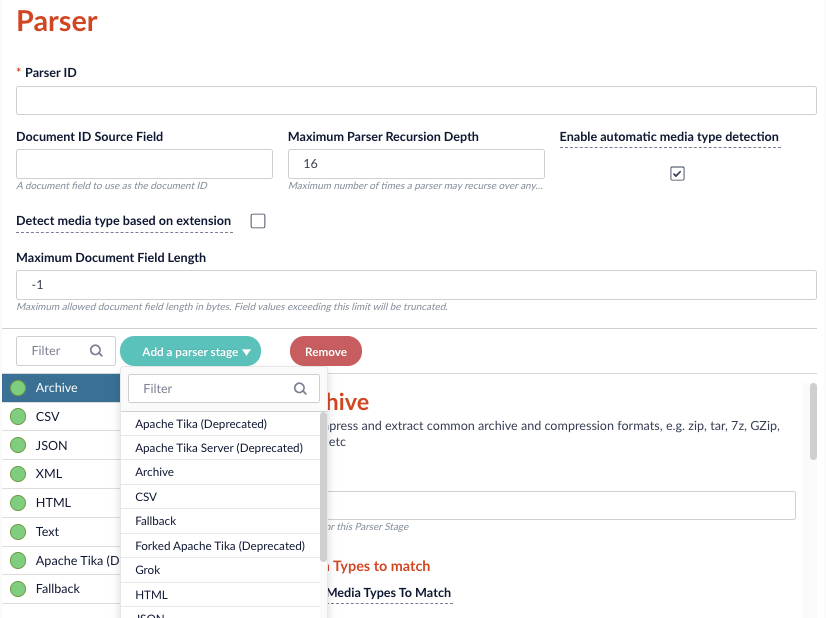
- In the Parser ID field, enter a unique identifier for the parser. For example, CSV_parser.
- In the Document ID Source Field, enter the dataset field to use as the document ID. For example,
docID. - In the Maximum Parser Recursion Depth field, enter the maximum of times this parser can recurse over any document before proceeding to the next parser. For example, 16.
- Select the Enable automatic media type detection checkbox to automatically detect the
Content-Typeof each document. If this is not selected,application/octet-streamis used. - Select the Detect media type based on extension checkbox to use the file extension to detect the
Content-Typeof a document before attempting to detect type based on content. - In the Maximum Document Field Length field, enter the maximum number of bytes allowed in the document. If a field exceeds this length, the field is truncated to this number.
- Click Add a parser stage and select the parser to open its configuration. For example, CSV. To review configuration information for each parser type, click that parser topic in the sidebar.
- Click Save.
Configure a parser in the REST API
The Parsers API provides a programmatic interface for viewing, creating, and modifying parsers, as well as sending documents directly to a parser.- To get all currently-defined parsers:
https://EXAMPLE_COMPANY.lucidworks.cloud/api/parsers/ - To get the parser schema:
https://EXAMPLE_COMPANY.lucidworks.cloud/api/parsers/_schema
Replace
EXAMPLE_COMPANY with the name provided by your Lucidworks representative.type.