Product Selector

Fusion 5.12
    Fusion 5.12

    Upload a JDBC Driver to Fusion Server

    The JDBC connector fetches documents from a relational database via SQL queries. Under the hood, this connector implements the Solr DataImportHandler (DIH) plugin.

    Fusion stores JDBC drivers in the blob store. You can upload a driver using the Fusion UI or the Blob Store API.

    • The JDBC V1 connector is supported in Fusion releases 5.3 and earlier.

    • The JDBC V2 connector is supported in Fusion releases 5.4 and later.

    How to upload a JDBC driver using the Fusion UI

    1. In the Fusion UI, navigate to System > Blobs.

    2. Click Add.

    3. Select JDBC Driver.

      Uploading a connector

      The "New 'JDBC Driver' Upload" panel appears.

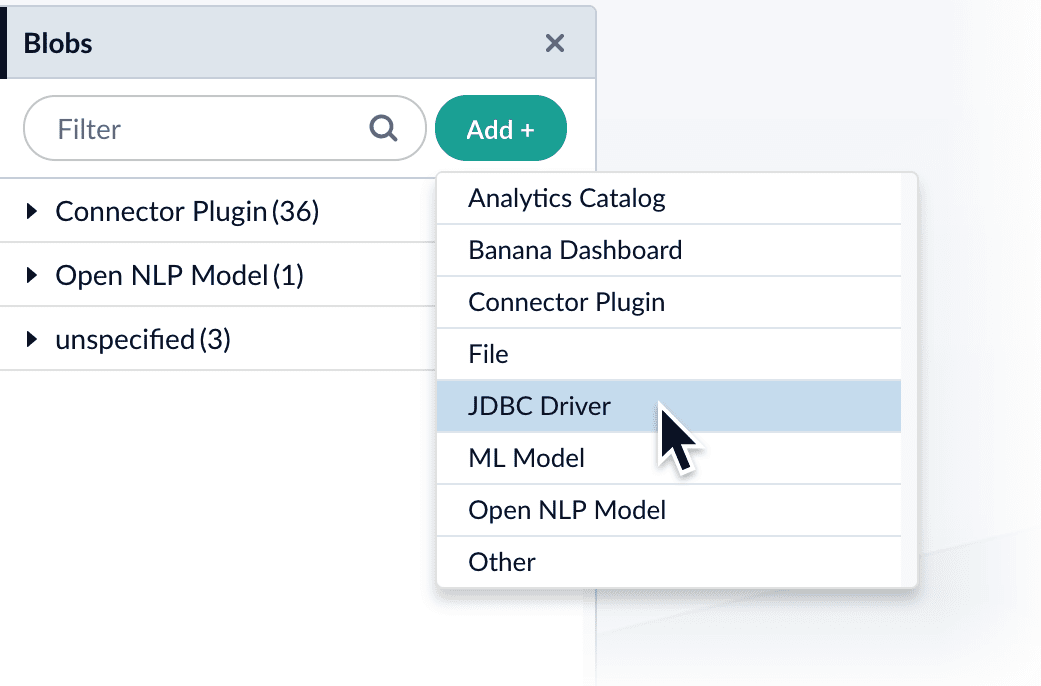
    4. Click Choose File and select the .jar file from your file system.
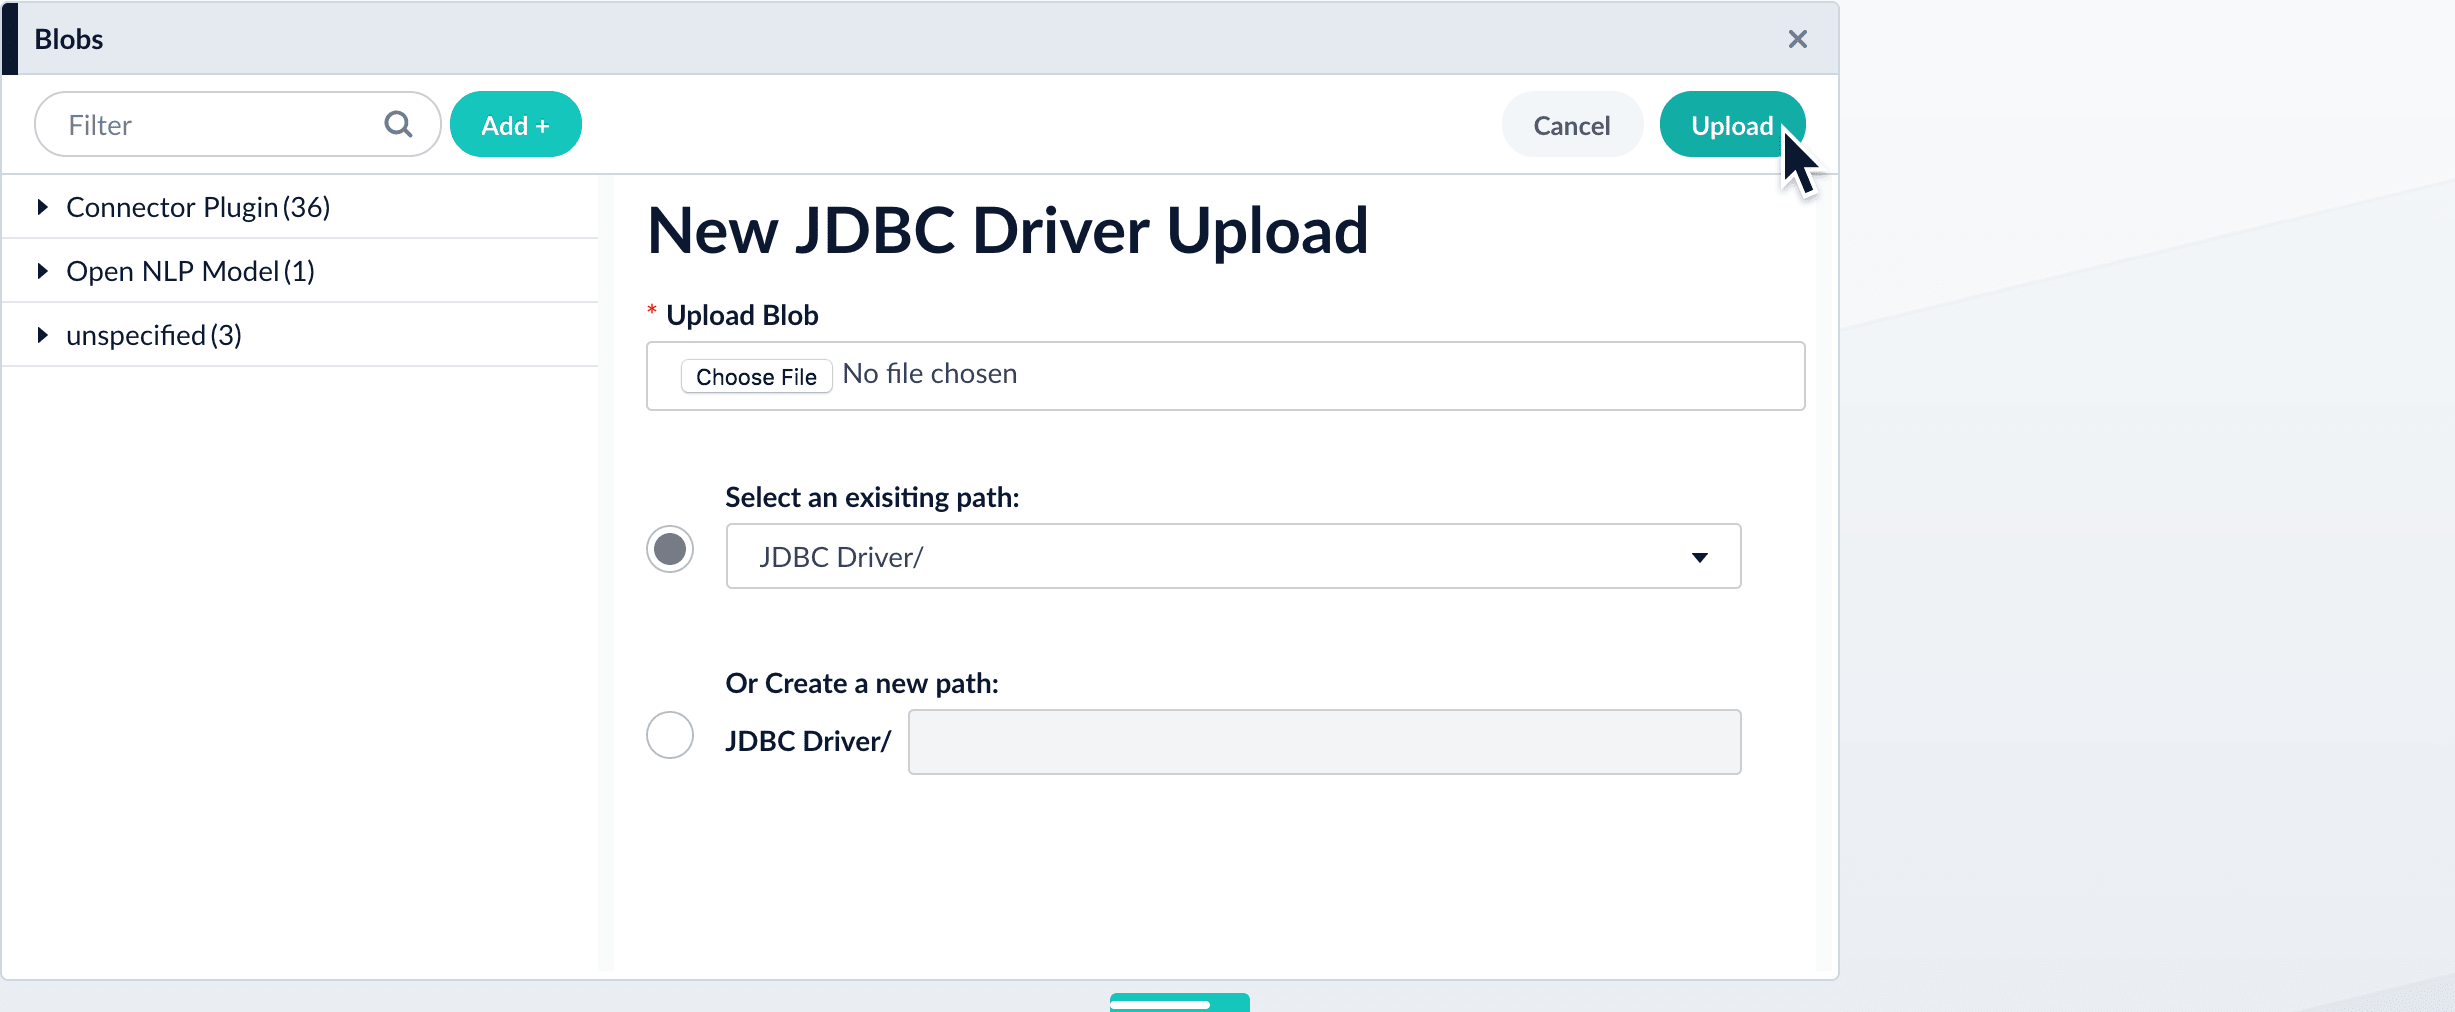
      Uploading connector

    5. Click Upload.

      The new driver’s blob manifest appears.

      Uploaded connector

      From this screen you can also delete or replace the driver.

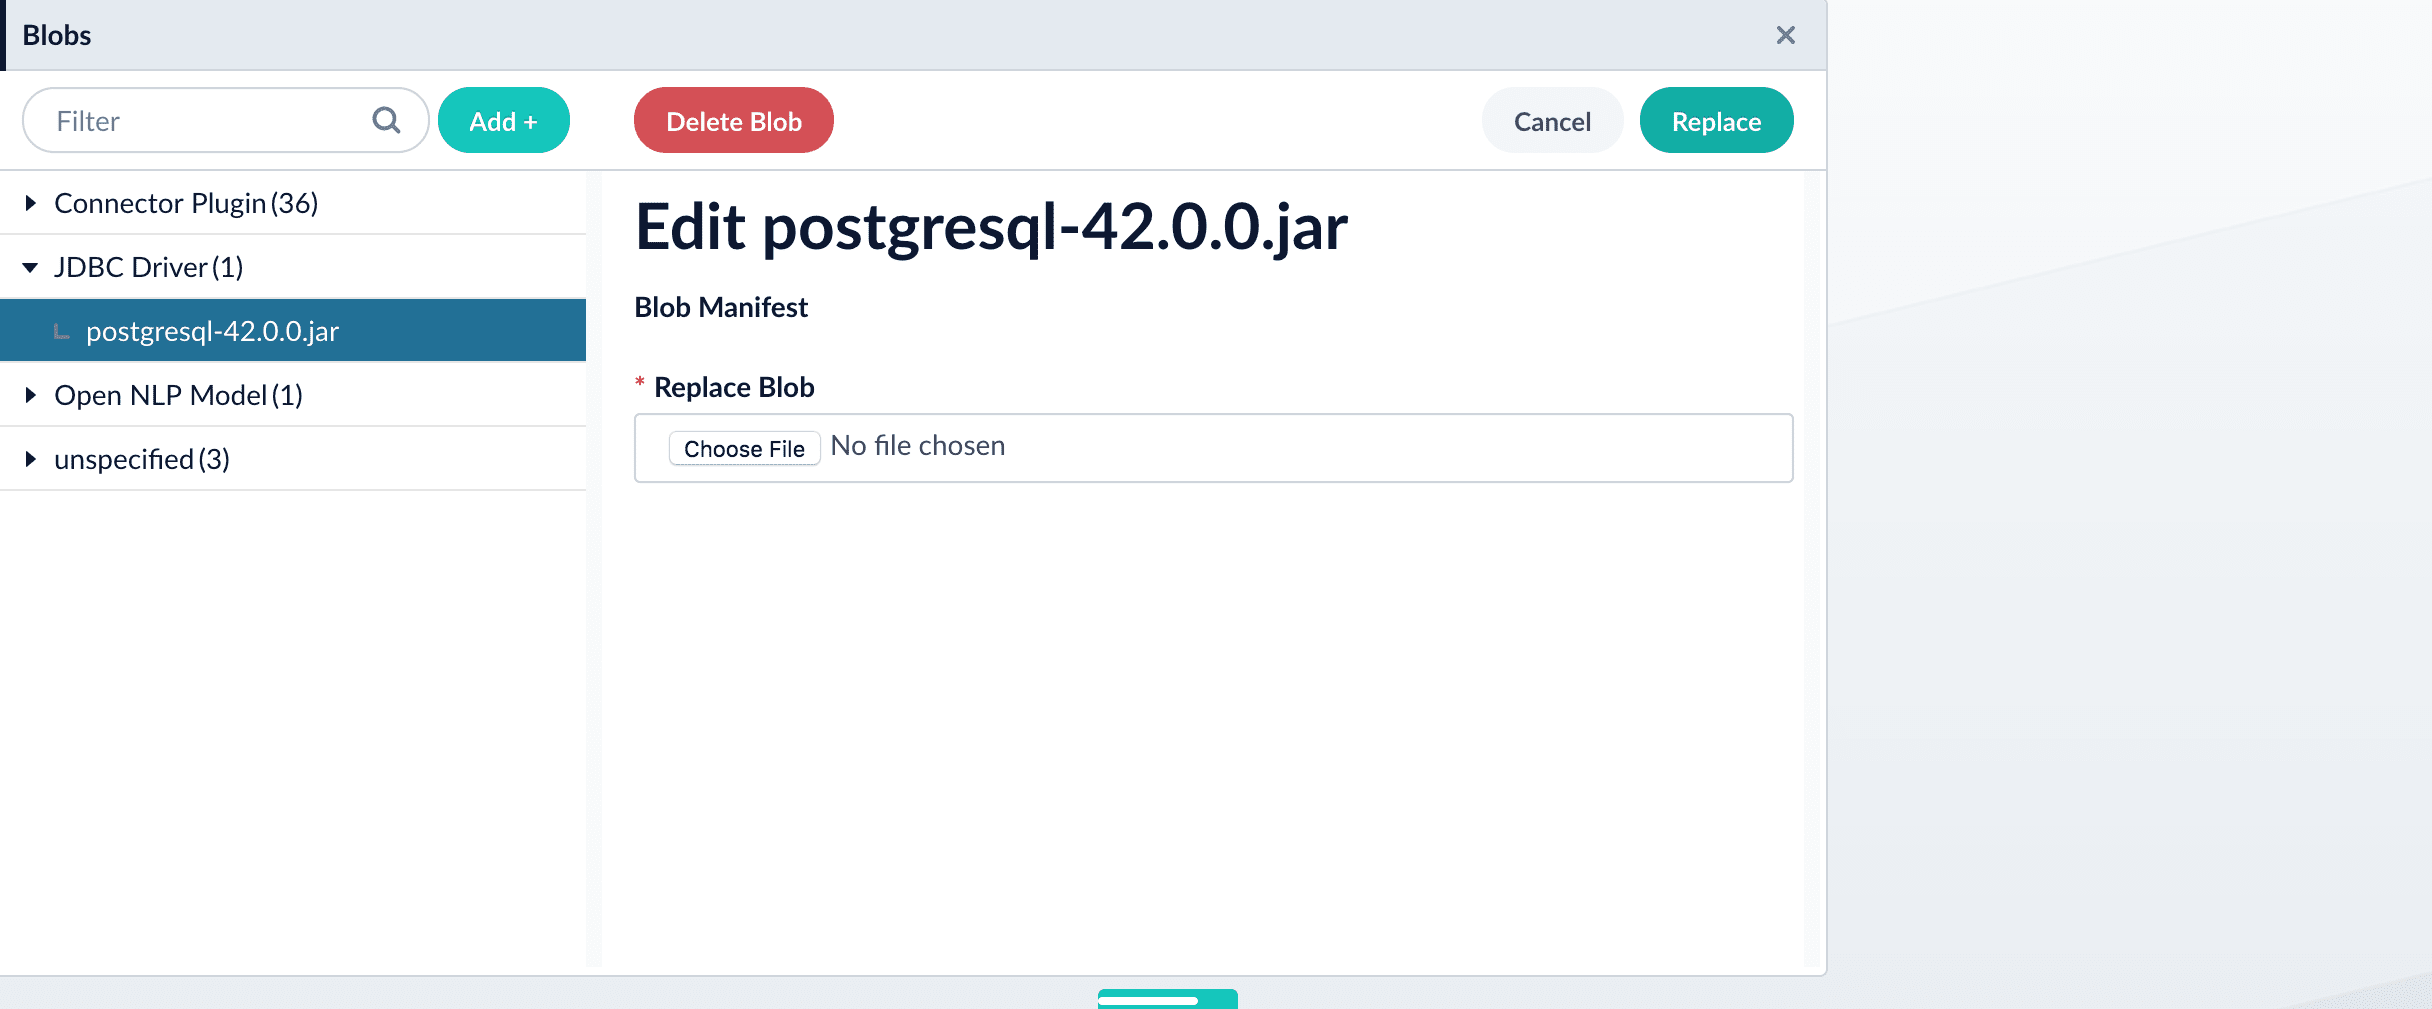
    How to install a JDBC driver using the API

    1. Upload the JAR file to Fusion’s blob store using the /blobs/{id} endpoint.

      Specify an arbitrary blob ID, and a resourceType value of plugin:connector, as in this example:

      curl -u USERNAME:PASSWORD -H "content-type:application/java-archive" -H "content-length:707261" -X PUT --data-binary @postgresql-42.0.0.jar http://localhost:8764/api/blobs/mydriver?resourceType=driver:jdbc

      Success response:

      {
        "name" : "mydriver",
        "contentType" : "application/java-archive",
        "size" : 707261,
        "modifiedTime" : "2017-06-09T19:00:48.919Z",
        "version" : 0,
        "md5" : "c67163ca764bfe632f28229c142131b5",
        "metadata" : {
          "subtype" : "driver:jdbc",
          "drivers" : "org.postgresql.Driver",
          "resourceType" : "driver:jdbc"
        }
      }

      Fusion automatically publishes the event to the cluster, and the listeners perform the driver installation process on each node.

      If the blob ID is identical to an existing one, the old driver will be uninstalled and the new driver will installed in its place. To get the list of existing blob IDs, run: curl -u USERNAME:PASSWORD https://FUSION_HOST:FUSION_PORT/api/blobs
    2. To verify the uploaded driver, run:

      curl -u USERNAME:PASSWORD https://FUSION_HOST:FUSION_PORT/api/blobs/BLOB_ID/manifest

      Where the BLOB_ID is the name specified during upload, such as "mydriver" above. A success response looks like this:

      {
        "name" : "mydriver",
        "contentType" : "application/java-archive",
        "size" : 707261,
        "modifiedTime" : "2017-06-09T19:05:17.897Z",
        "version" : 1569755095787110400,
        "md5" : "c67163ca764bfe632f28229c142131b5",
        "metadata" : {
          "subtype" : "driver:jdbc",
          "drivers" : "org.postgresql.Driver",
          "resourceType" : "driver:jdbc"
        }
      }

    How to manually upload a JDBC V1 driver for Fusion 4.x.x releases

    For Fusion 4.x.x release levels, it is recommended that you upload the JDBC driver jar files manually. This prevents some issues with dynamically loading the driver causing errors, particularly with Oracle and Microsoft SQL drivers.

    The following steps specify how to upload a JDBC driver JAR file to Fusion manually. The example uses the Microsoft SQL Server JDBC driver mssql-jdbc-6.6.2-jre8.jar file.

    1. Delete the JDBC V1 driver uploaded using the Blob store upload window.

    2. Save the JDBC V1 driver JAR file to the apps/lib folder. For example:

      apps\libs\mssql-jdbc-6.2.2.jre8.jar

    3. Open the apps/jetty/connectors-classic/webapps/connectors-extra-classpath.txt file and add the following line:

      apps/libs/mssql-jdbc-6.2.2.jre8.jar

    4. Restart connectors-classic.

    5. Specify the JDBC driver class name in the Manually uploaded JDBC Driver Name field.

    6. Enter com.microsoft.sqlserver.jdbc.SQLServerDriver in the JDBC Driver Name field.