- Latest version: v2.7.0
- Compatible with Fusion version: 5.9.0 and later
Add a JDBC driver to Fusion
Perform these prerequisites to ensure the connector can reliably access, crawl, and index your data. Proper setup helps avoid configuration or permission errors, so use the following guidelines to keep your content available for discovery and search in Fusion. Before creating your datasource, ensure Fusion can load your JDBC driver. These steps let the connector pull in the driver automatically at runtime. Fusion UI:- Navigate to
System > Blobs. - Click
Add > JDBC Driver. - Choose your JAR file and click
Upload.
ID with the name of your JAR file.
PUTyour driver JAR file to/api/blobs/ID?resourceType=driver:jdbc.- Verify with
GET /api/blobs/ID/manifest.
Upload a JDBC Driver to Fusion
Upload a JDBC Driver to Fusion
The JDBC V2 connector is supported, and fetches documents from a relational database via SQL queries. Under the hood, this connector implements the Solr DataImportHandler (DIH) plugin.Fusion stores JDBC drivers in the blob store. You can upload a driver using the Fusion UI or the Blob Store API.
How to upload a JDBC driver using the Fusion UI
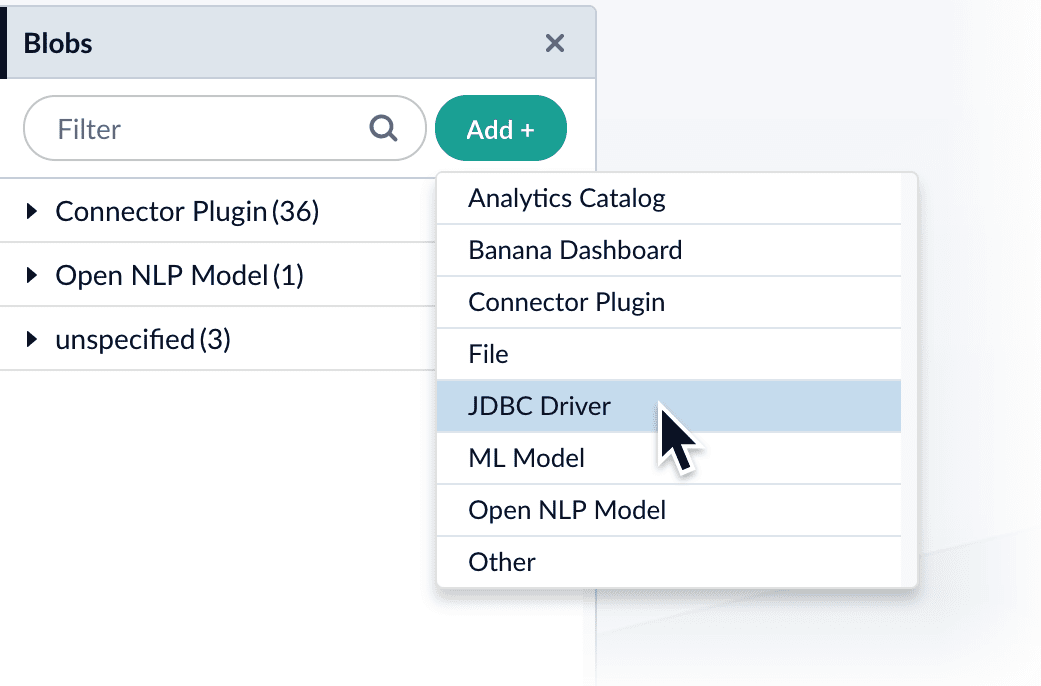
- In the Fusion UI, navigate to System > Blobs.
- Click Add.
-
Select JDBC Driver.
The “New ‘JDBC Driver’ Upload” panel appears.
-
Click Choose File and select the .jar file from your file system.
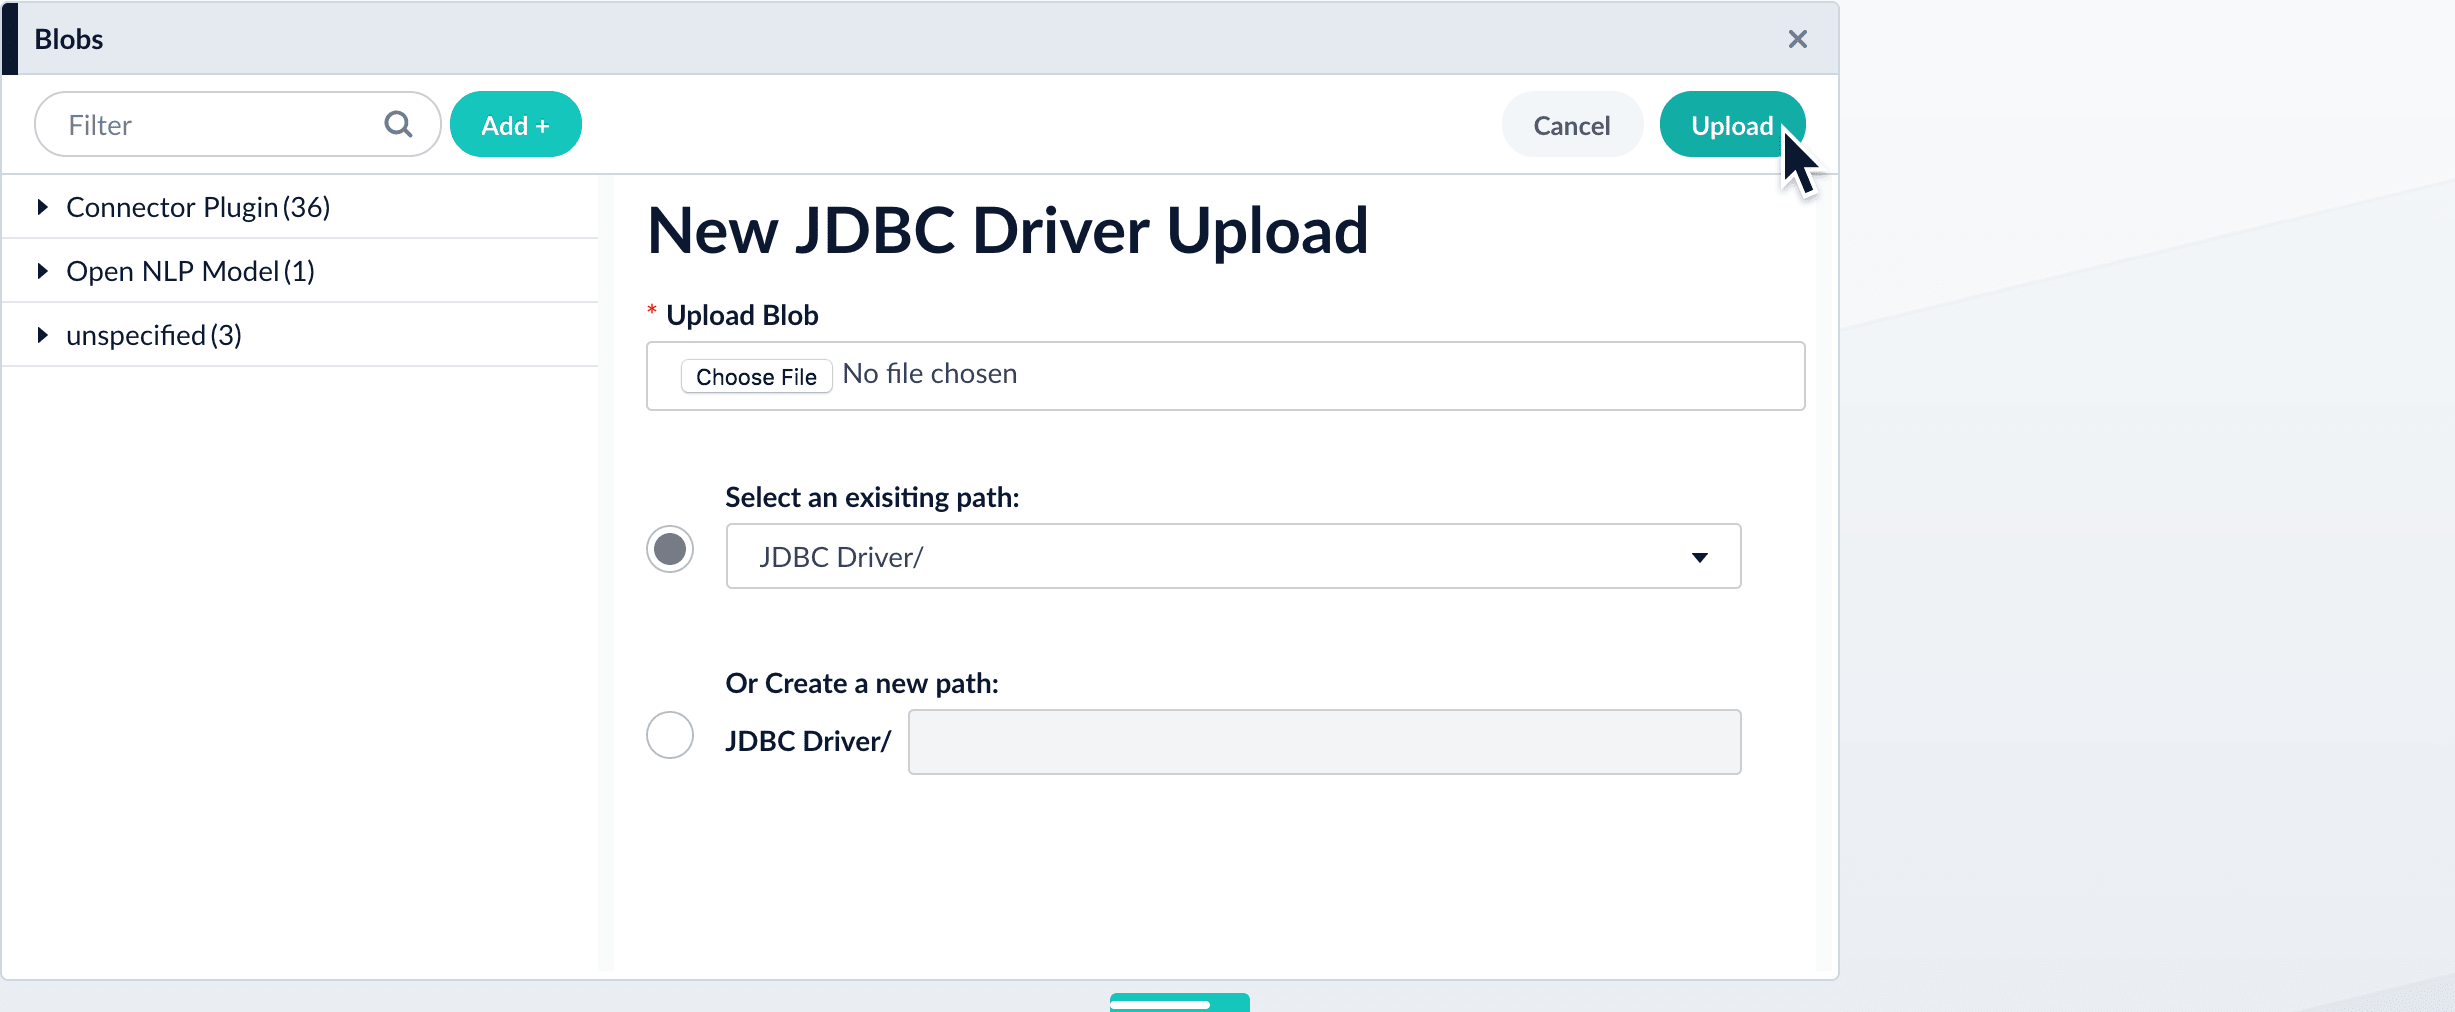
-
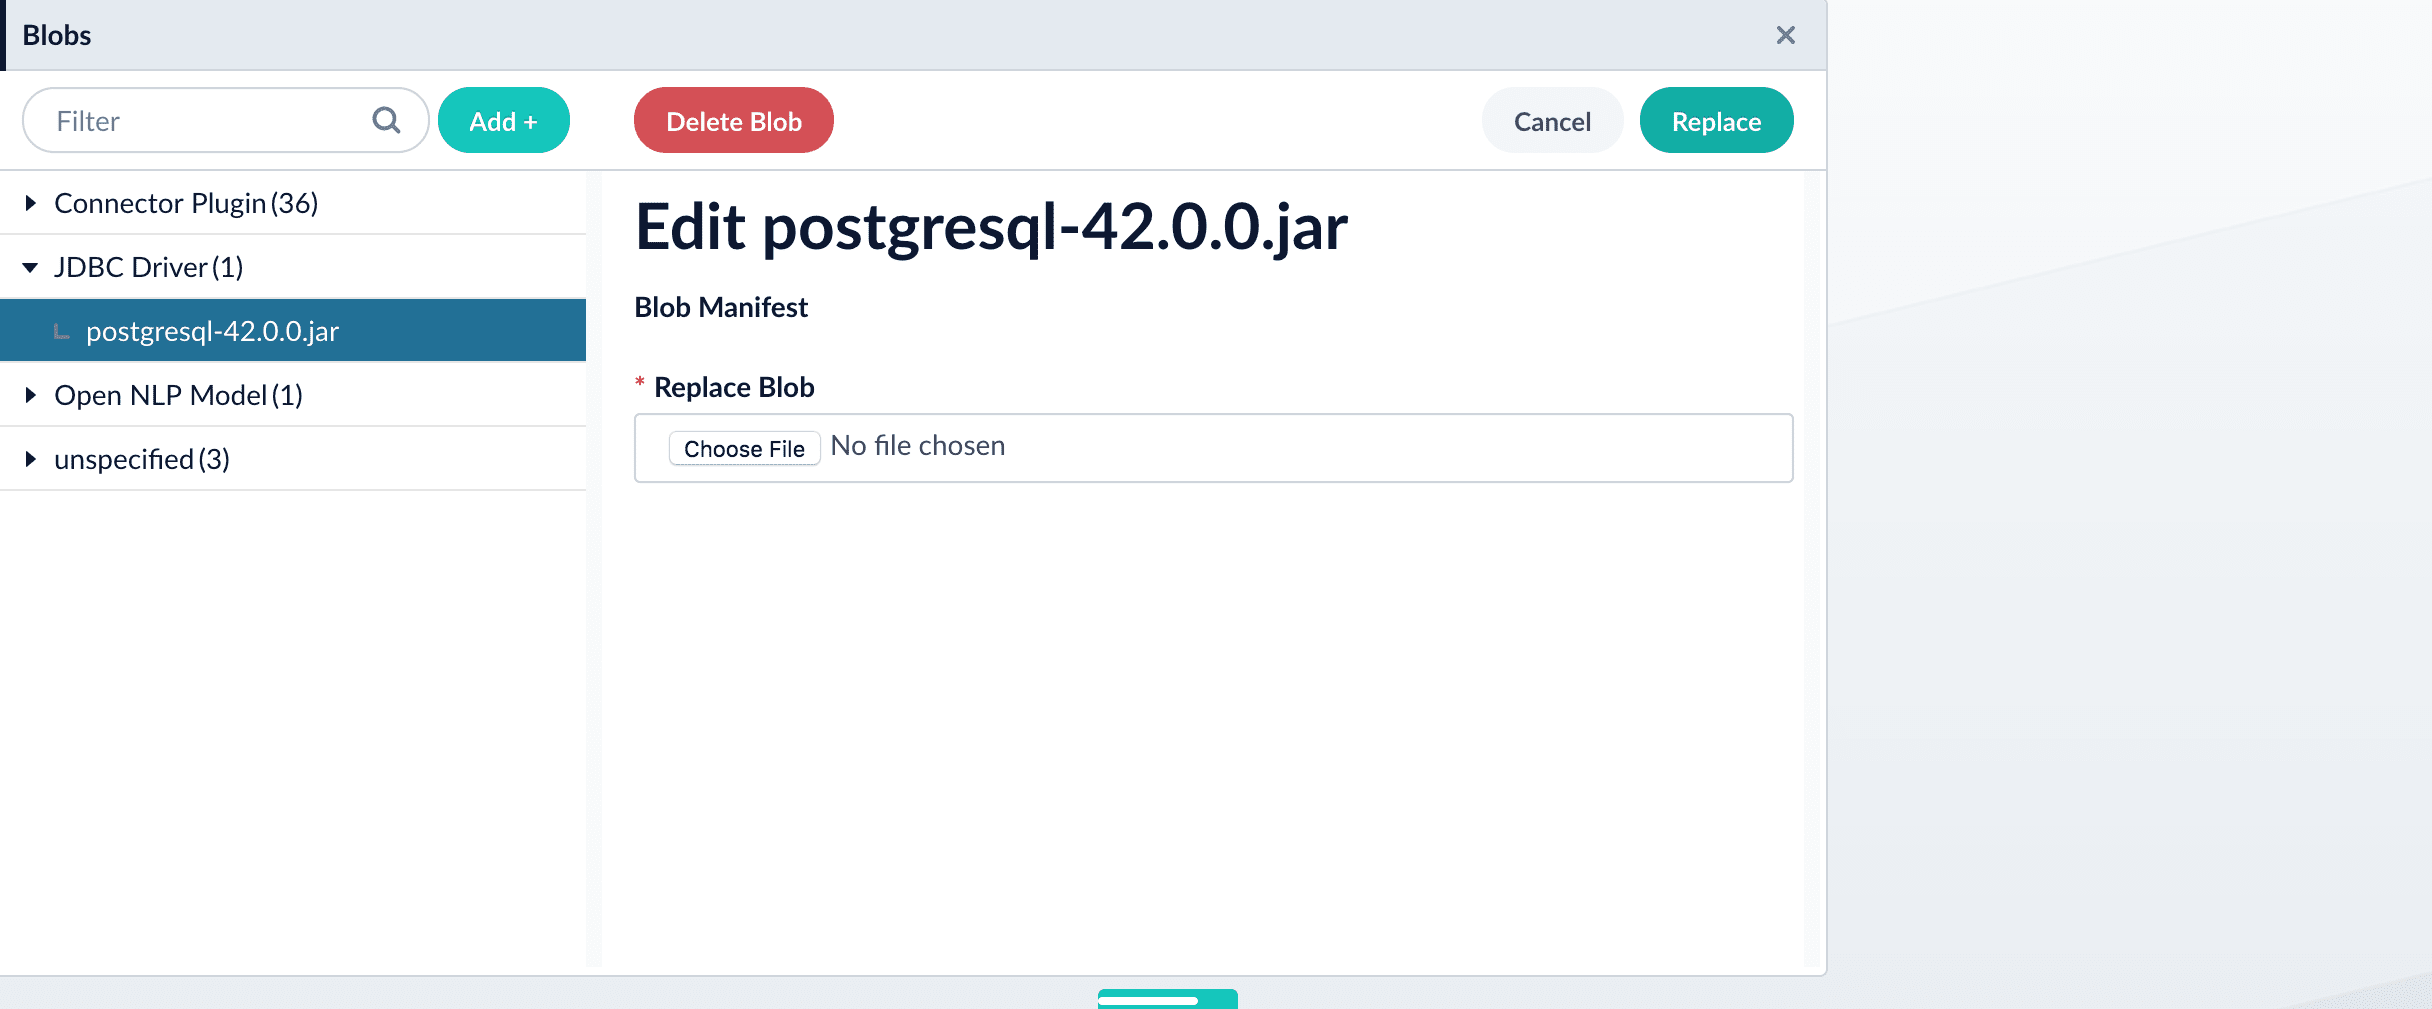
Click Upload.
The new driver’s blob manifest appears.
How to install a JDBC driver using the API
-
Upload the JAR file to Fusion’s blob store using the
/blobs/{id}endpoint. Specify an arbitrary blob ID, and aresourceTypevalue ofplugin:connector, as in this example:Success response:Fusion automatically publishes the event to the cluster, and the listeners perform the driver installation process on each node. -
To verify the uploaded driver, run:
Where the
BLOB_IDis the name specified during upload, such as “mydriver” above. A success response looks like this:
Supported JDBC drivers
This section contains a list of supported JDBC drivers that are compatible with any driver/database that implements a SQL standard.Authentication parameters may be provided as part of the connection string. It is not necessary to include a username and password in the datasource configuration.
MySQL
- Download driver
- Default driver class name:
com.mysql.cj.jdbc.Driver - Connection URL specification
- Example:
jdbc:mysql://mysql:3306/testdb
- Example:
Postgresql
- Download driver
- Default driver class name:
org.postgresql.Driver - Connection URL specification
- Example:
jdbc:postgresql://postgres:5432/testdb
- Example:
Microsoft SQL Server and Azure SQL Service
- Download driver
- Default driver class name:
com.microsoft.sqlserver.jdbc.SQLServerDriver - Connection URL specification
- Example (SQL Server):
jdbc:sqlserver://mssql:1433 - Example (cloud-based Azure SQL Service):
jdbc:sqlserver://azure-test.database.windows.net:1433;database=testdbencrypt=true;trustServerCertificate=false;hostNameInCertificate=*.database.windows.net;loginTimeout=30;
- Example (SQL Server):
Oracle database
- Download driver
- Default driver class name:
oracle.jdbc.OracleDriver - Connection URL specification
- Example:
jdbc:oracle:thin:@oracledb:1521:orc1
- Example:
IBM DB2
- Download driver
- Default driver class name:
com.ibm.db2.jcc.DB2Driver - Connection URL specification
- Example:
jdbc:db2://db2:50000/testdb
- Example:
Authentication
Setting up the correct authentication according to your organization’s data governance policies helps keep sensitive data secure while allowing authorized indexing. If authentication is required to access your data, the JDBC V2 connector uses standard database credentials to log in. In your datasource configuration, supply:usernameusing the database account’s username.passwordusing the corresponding password.
Remote connectors
V2 connectors support running remotely in Fusion versions 5.7.1 and later.Configure remote V2 connectors
Configure remote V2 connectors
If you need to index data from behind a firewall, you can configure a V2 connector to run remotely on-premises using TLS-enabled gRPC.The gRPC connector backend is not supported in Fusion environments deployed on AWS.The
Prerequisites
Before you can set up an on-prem V2 connector, you must configure the egress from your network to allow HTTP/2 communication into the Fusion cloud. You can use a forward proxy server to act as an intermediary between the connector and Fusion.The following is required to run V2 connectors remotely:- The plugin zip file and the connector-plugin-standalone JAR.
- A configured connector backend gRPC endpoint.
- Username and password of a user with a
remote-connectorsoradminrole. - If the host where the remote connector is running is not configured to trust the server’s TLS certificate, you must configure the file path of the trust certificate collection.
If your version of Fusion doesn’t have the
remote-connectors role by default, you can create one. No API or UI permissions are required for the role.Connector compatibility
Only V2 connectors are able to run remotely on-premises. You also need the remote connector client JAR file that matches your Fusion version. You can download the latest files at V2 Connectors Downloads.Whenever you upgrade Fusion, you must also update your remote connectors to match the new version of Fusion.
System requirements
The following is required for the on-prem host of the remote connector:- (Fusion 5.9.0-5.9.10) JVM version 11
- (Fusion 5.9.11) JVM version 17
- Minimum of 2 CPUs
- 4GB Memory
Enable backend ingress
In yourvalues.yaml file, configure this section as needed:-
Set
enabledtotrueto enable the backend ingress. -
Set
pathtypetoPrefixorExact. -
Set
pathto the path where the backend will be available. -
Set
hostto the host where the backend will be available. -
In Fusion 5.9.6 only, you can set
ingressClassNameto one of the following:nginxfor Nginx Ingress Controlleralbfor AWS Application Load Balancer (ALB)
-
Configure TLS and certificates according to your CA’s procedures and policies.
TLS must be enabled in order to use AWS ALB for ingress.
Connector configuration example
Minimal example
Logback XML configuration file example
Run the remote connector
logging.config property is optional. If not set, logging messages are sent to the console.Test communication
You can run the connector in communication testing mode. This mode tests the communication with the backend without running the plugin, reports the result, and exits.Encryption
In a deployment, communication to the connector’s backend server is encrypted using TLS. You should only run this configuration without TLS in a testing scenario. To disable TLS, setplain-text to true.Egress and proxy server configuration
One of the methods you can use to allow outbound communication from behind a firewall is a proxy server. You can configure a proxy server to allow certain communication traffic while blocking unauthorized communication. If you use a proxy server at the site where the connector is running, you must configure the following properties:- Host. The hosts where the proxy server is running.
- Port. The port the proxy server is listening to for communication requests.
- Credentials. Optional proxy server user and password.
Password encryption
If you use a login name and password in your configuration, run the following utility to encrypt the password:- Enter a user name and password in the connector configuration YAML.
-
Run the standalone JAR with this property:
- Retrieve the encrypted passwords from the log that is created.
- Replace the clear password in the configuration YAML with the encrypted password.
Connector restart (5.7 and earlier)
The connector will shut down automatically whenever the connection to the server is disrupted, to prevent it from getting into a bad state. Communication disruption can happen, for example, when the server running in theconnectors-backend pod shuts down and is replaced by a new pod. Once the connector shuts down, connector configuration and job execution are disabled. To prevent that from happening, you should restart the connector as soon as possible.You can use Linux scripts and utilities to restart the connector automatically, such as Monit.Recoverable bridge (5.8 and later)
If communication to the remote connector is disrupted, the connector will try to recover communication and gRPC calls. By default, six attempts will be made to recover each gRPC call. The number of attempts can be configured with themax-grpc-retries bridge parameters.Job expiration duration (5.9.5 only)
The timeout value for irresponsive backend jobs can be configured with thejob-expiration-duration-seconds parameter. The default value is 120 seconds.Use the remote connector
Once the connector is running, it is available in the Datasources dropdown. If the standalone connector terminates, it disappears from the list of available connectors. Once it is re-run, it is available again and configured connector instances will not get lost.Enable asynchronous parsing (5.9 and later)
To separate document crawling from document parsing, enable Tika Asynchronous Parsing on remote V2 connectors.connector-plugins entry in your values.yaml file:
Crawl behavior
The JDBC V2 connector retrieves data based on the user-supplied SQL query. The SQL implementation allows full use of all features, but for best results, structure the SQL query to utilize pagination.Pagination
Automatic pagination
Automatic pagination is enabled by default. You can disable it by settingenableAutomaticPagination to false.
The batchSize field sets the number of documents displayed per page of query results.
When a SQL query includes pagination terms such as OFFSET, LIMIT, or ROWS ONLY, the SQL query terms override automatic pagination.
DB2 notes
When crawling an IBM DB2 database, the pagination method depends on your database version:- IBM DB2 version < 11.5 - Pagination is performed using subqueries.
- IBM DB2 version >= 11.5 - Pagination is performed using rows and offsets.
Appending--subqueryto the SQL query statement forces the connector to paginate using subqueries regardless of the IBM DB2 database version.
Special variables for pagination
The connector uses placeholders for pagination that are updated based onbatchSize:
${limit}: used as theLIMITparamater in native SQL${offset}: used as theOFFSETparameter in native SQL
- MySQL, postgresql, and DB2:
- Microsoft, Azure, and Oracle:
Nested queries
The connector supports nested queries. Nested queries are a set of SQL queries performed on each row returned by the main query. Because they are executed on every row returned, nested queries can significantly degrade performance. Use the${id} variable to retrieve items associated with a specific primary key:
Incremental crawl
In addition to the main SQL query, users can also specify an optional delta SQL query that returns only new and modified items to increase performance during recrawls. The special${limit} and ${offset} pagination variables are the same as in normal crawls.
Special incremental crawl variable
Use the${last_index_time} for an incremental crawl as a placeholder variable that contains the time the last crawl completed.
This variable is used to filter results for items added or modified since the last time the datasource job was run and is stored as a timestamp in the format of yyyy-MM-dd HH:mm:ss.SSS
The format may not be compatible with all driver date math implementations without additional conversion steps.
${last_index_time} in single quotes. For example, '${last_index_time}'.
Stray content deletion
Stray content deletion is a plugin feature that deletes documents from a content collection that are not rediscovered on subsequent crawls after the first crawl. This process removes stale documents from the content collection and is enabled by default. Stray content deletion must be configured by the user because native SQL does not provide the ability to retrieve rows that have been deleted from a table.Binary content indexing
The JDBC V2 connector supports binary content indexing, which enables full-text search of documents, images, and other binary data stored in database BINARY, VARBINARY, IMAGE, or BLOB columns. To use binary content indexing:- Navigate to the JDBC connector.
- In the Query field, ensure that your SQL query specifies the columns explicitly with primary keys. A query such as
SELECT *is not supported in binary content indexing. The queries are case-sensitive. - Select Binary content settings. Two more text boxes display.
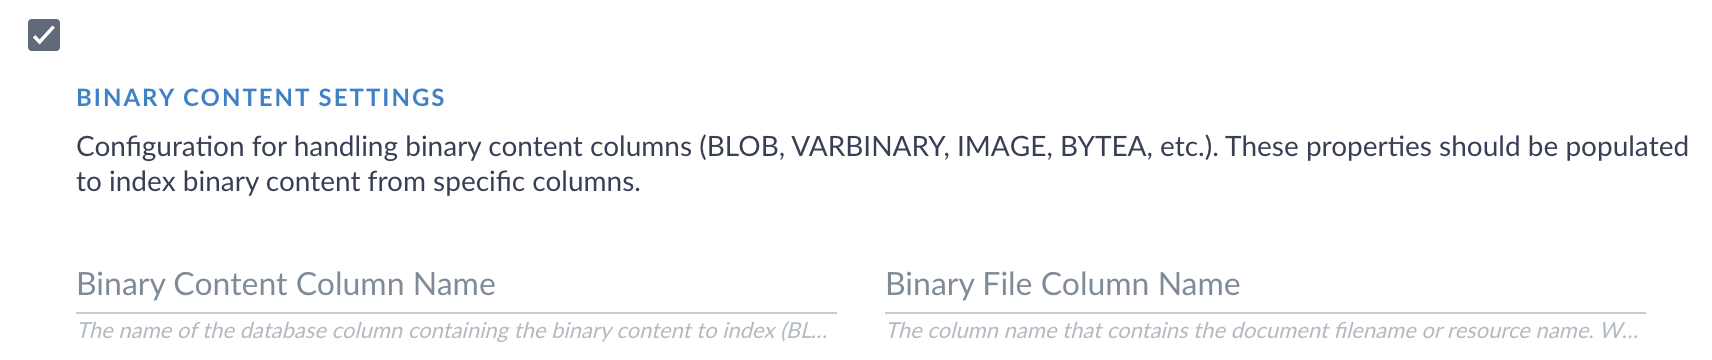
- In the Binary content column name field, enter the database column that contains your binary content. This field is required if you are using binary content indexing. The value is case sensitive.
- If your database contains a separate column with file names, enter that column name in the Binary file column name field.
- Click Save.
- Start another crawl to begin indexing the binary content.
- Navigate to the Query Workbench
- A list of documents displays. Click Show fields next to a document to view the indexing results.
- The binary content is stored in a text field. The format varies depending on the type of binary content that was indexed. Verify that the contents display.
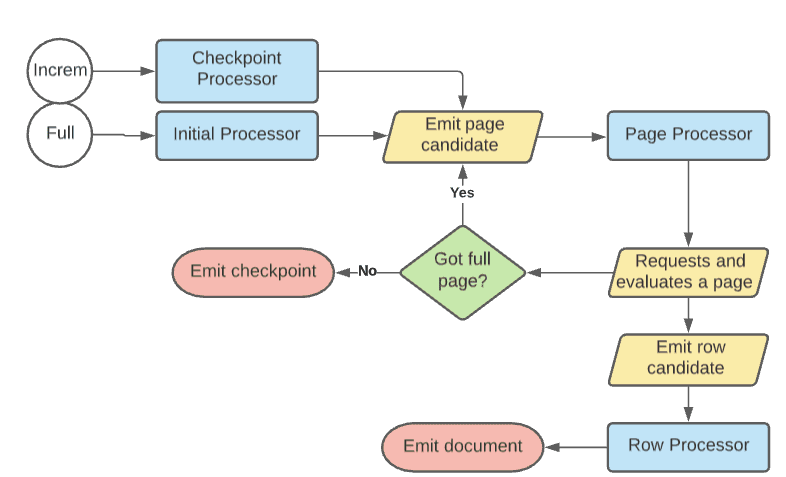
Processor flow diagram
The following diagram represents the flow for crawls. Incremental crawls follow the same basic flow as full crawls, except that they emit a page candidate from a delta SQL query if provided. If no delta query is provided, then incremental crawls use the original query.