Configure a Data Model
Data models simplify the process of getting started with Fusion by providing pre-configured objects to reduce the effort spent on basic starting tasks. This helps keep documents consistent between datasources and intuitive to the object’s type.
See the Data Models topic for more information.
1. Configure the datasource
| This section references the Slack V2 Connector, which was introduced in Fusion 5.4.0. However, Data Models were introduced in Fusion 5.3.0. The instructions on configuring the data model are valid for any connector in Fusion 5.3.0+ that indexes users. |
-
Navigate to Indexing > Datasources.
-
Click the Add button, and choose the Slack V2 connector from the list.
Some connectors include built-in data models as a standard component. Others require you to manually create data models. -
Complete the datasource configuration:
-
Ideally, use a pipeline specifically created for this data model. For now, you can create the pipeline by navigating to Indexing > Index Pipelines and clicking the Add button. Configure it later as described below.
-
Under Profiles Settings, select Index profiles:

-
Under Channels and Messages Settings, select Index channels and Index from public channels:
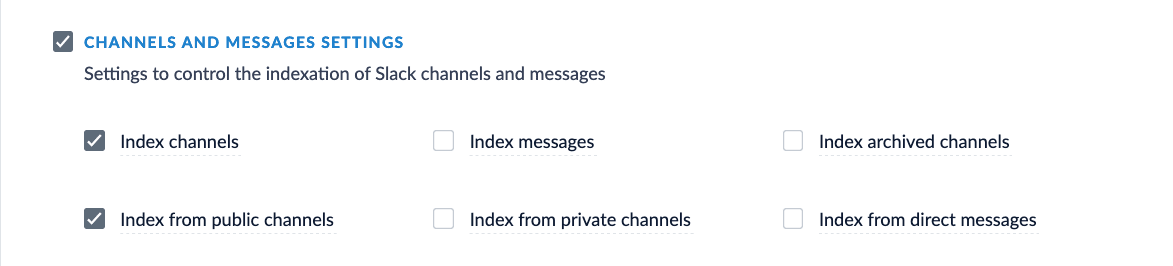
-
-
Click Save.
-
Click Run to run the indexing job.
2. Configure the data model
Some connectors include built-in data models with pre-configured object types. However, you can add new data models or customize existing ones to fit your particular needs.
-
Navigate to Indexing > Data Models.
-
Click the Add button.
-
Create a new data model,
person. -
Assign the index pipeline for the data model. In this example, create a new index pipeline named
companyDirectory-data-pipeline.This pipeline is ideally for operation with data models only. For the sake of this example, we will only be using the default stages. Applying additional logic/stages specific to the object would occur here.
-
Assign the query pipeline you will use to query the indexed documents. In this example, create a new query pipeline named
companyDirectory-query-pipeline. -
Click the New button under Fields Configuration.
-
Complete the required configurations, as detailed in Data Models API Reference. Create fields for the following:
Field Name Solr Fields first_namefirstName_t,firstName_slast_namelastName_t,lastName_semailemail_sjob_titlejobTitle_t,jobTitle_s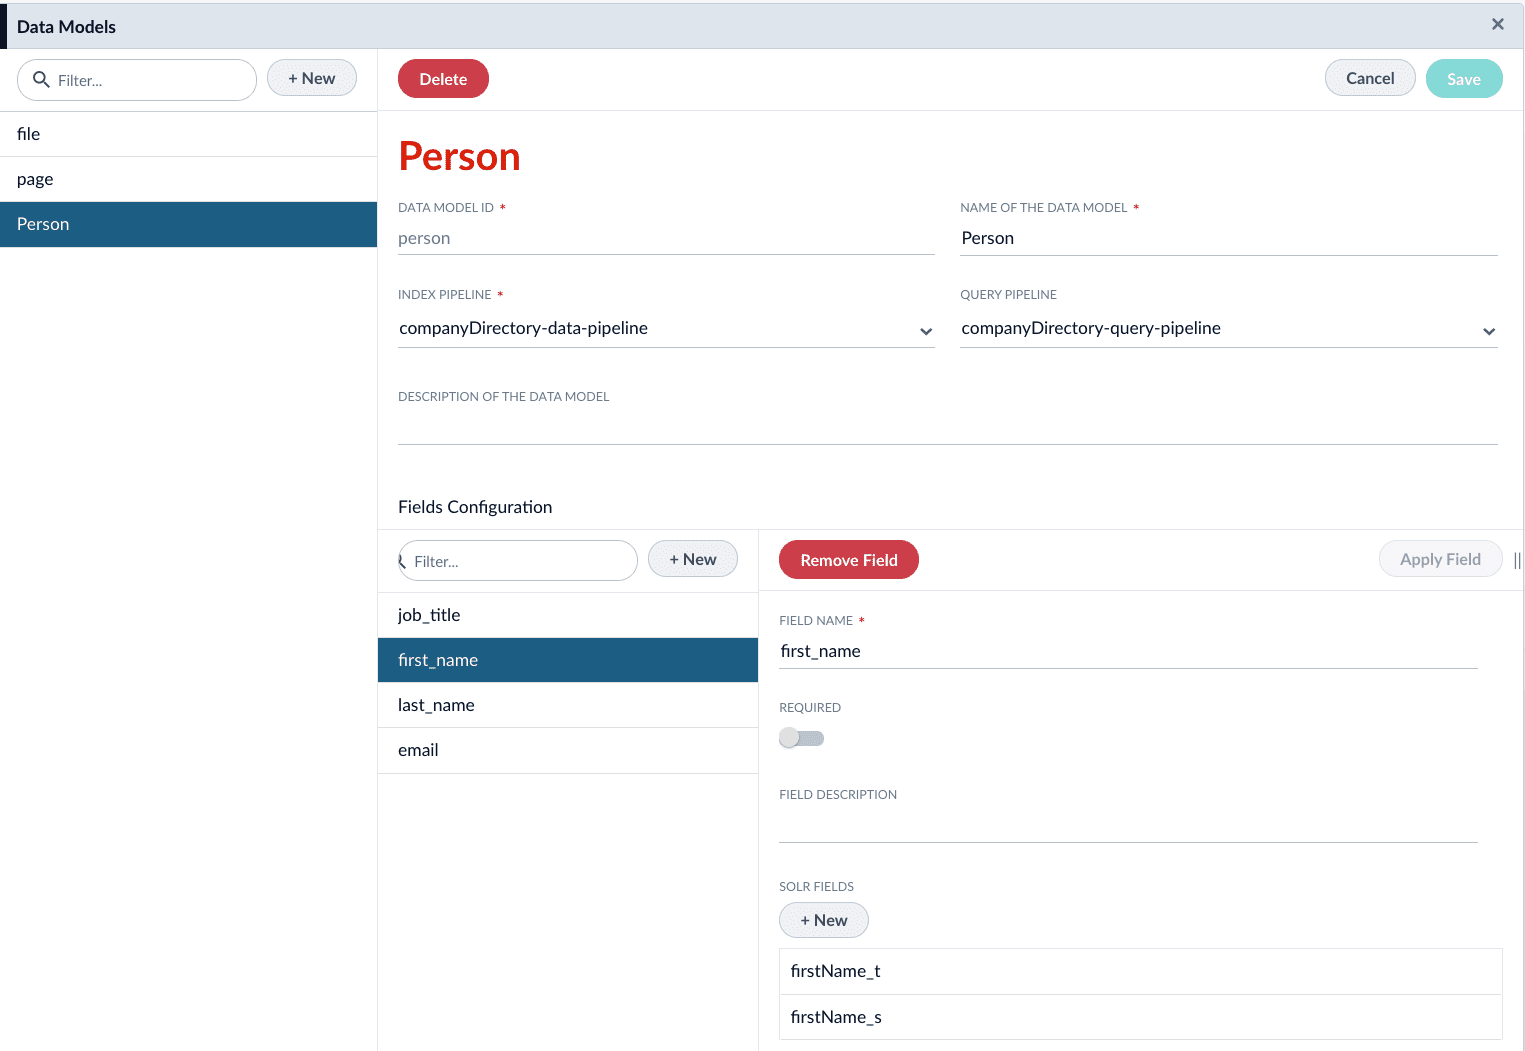
-
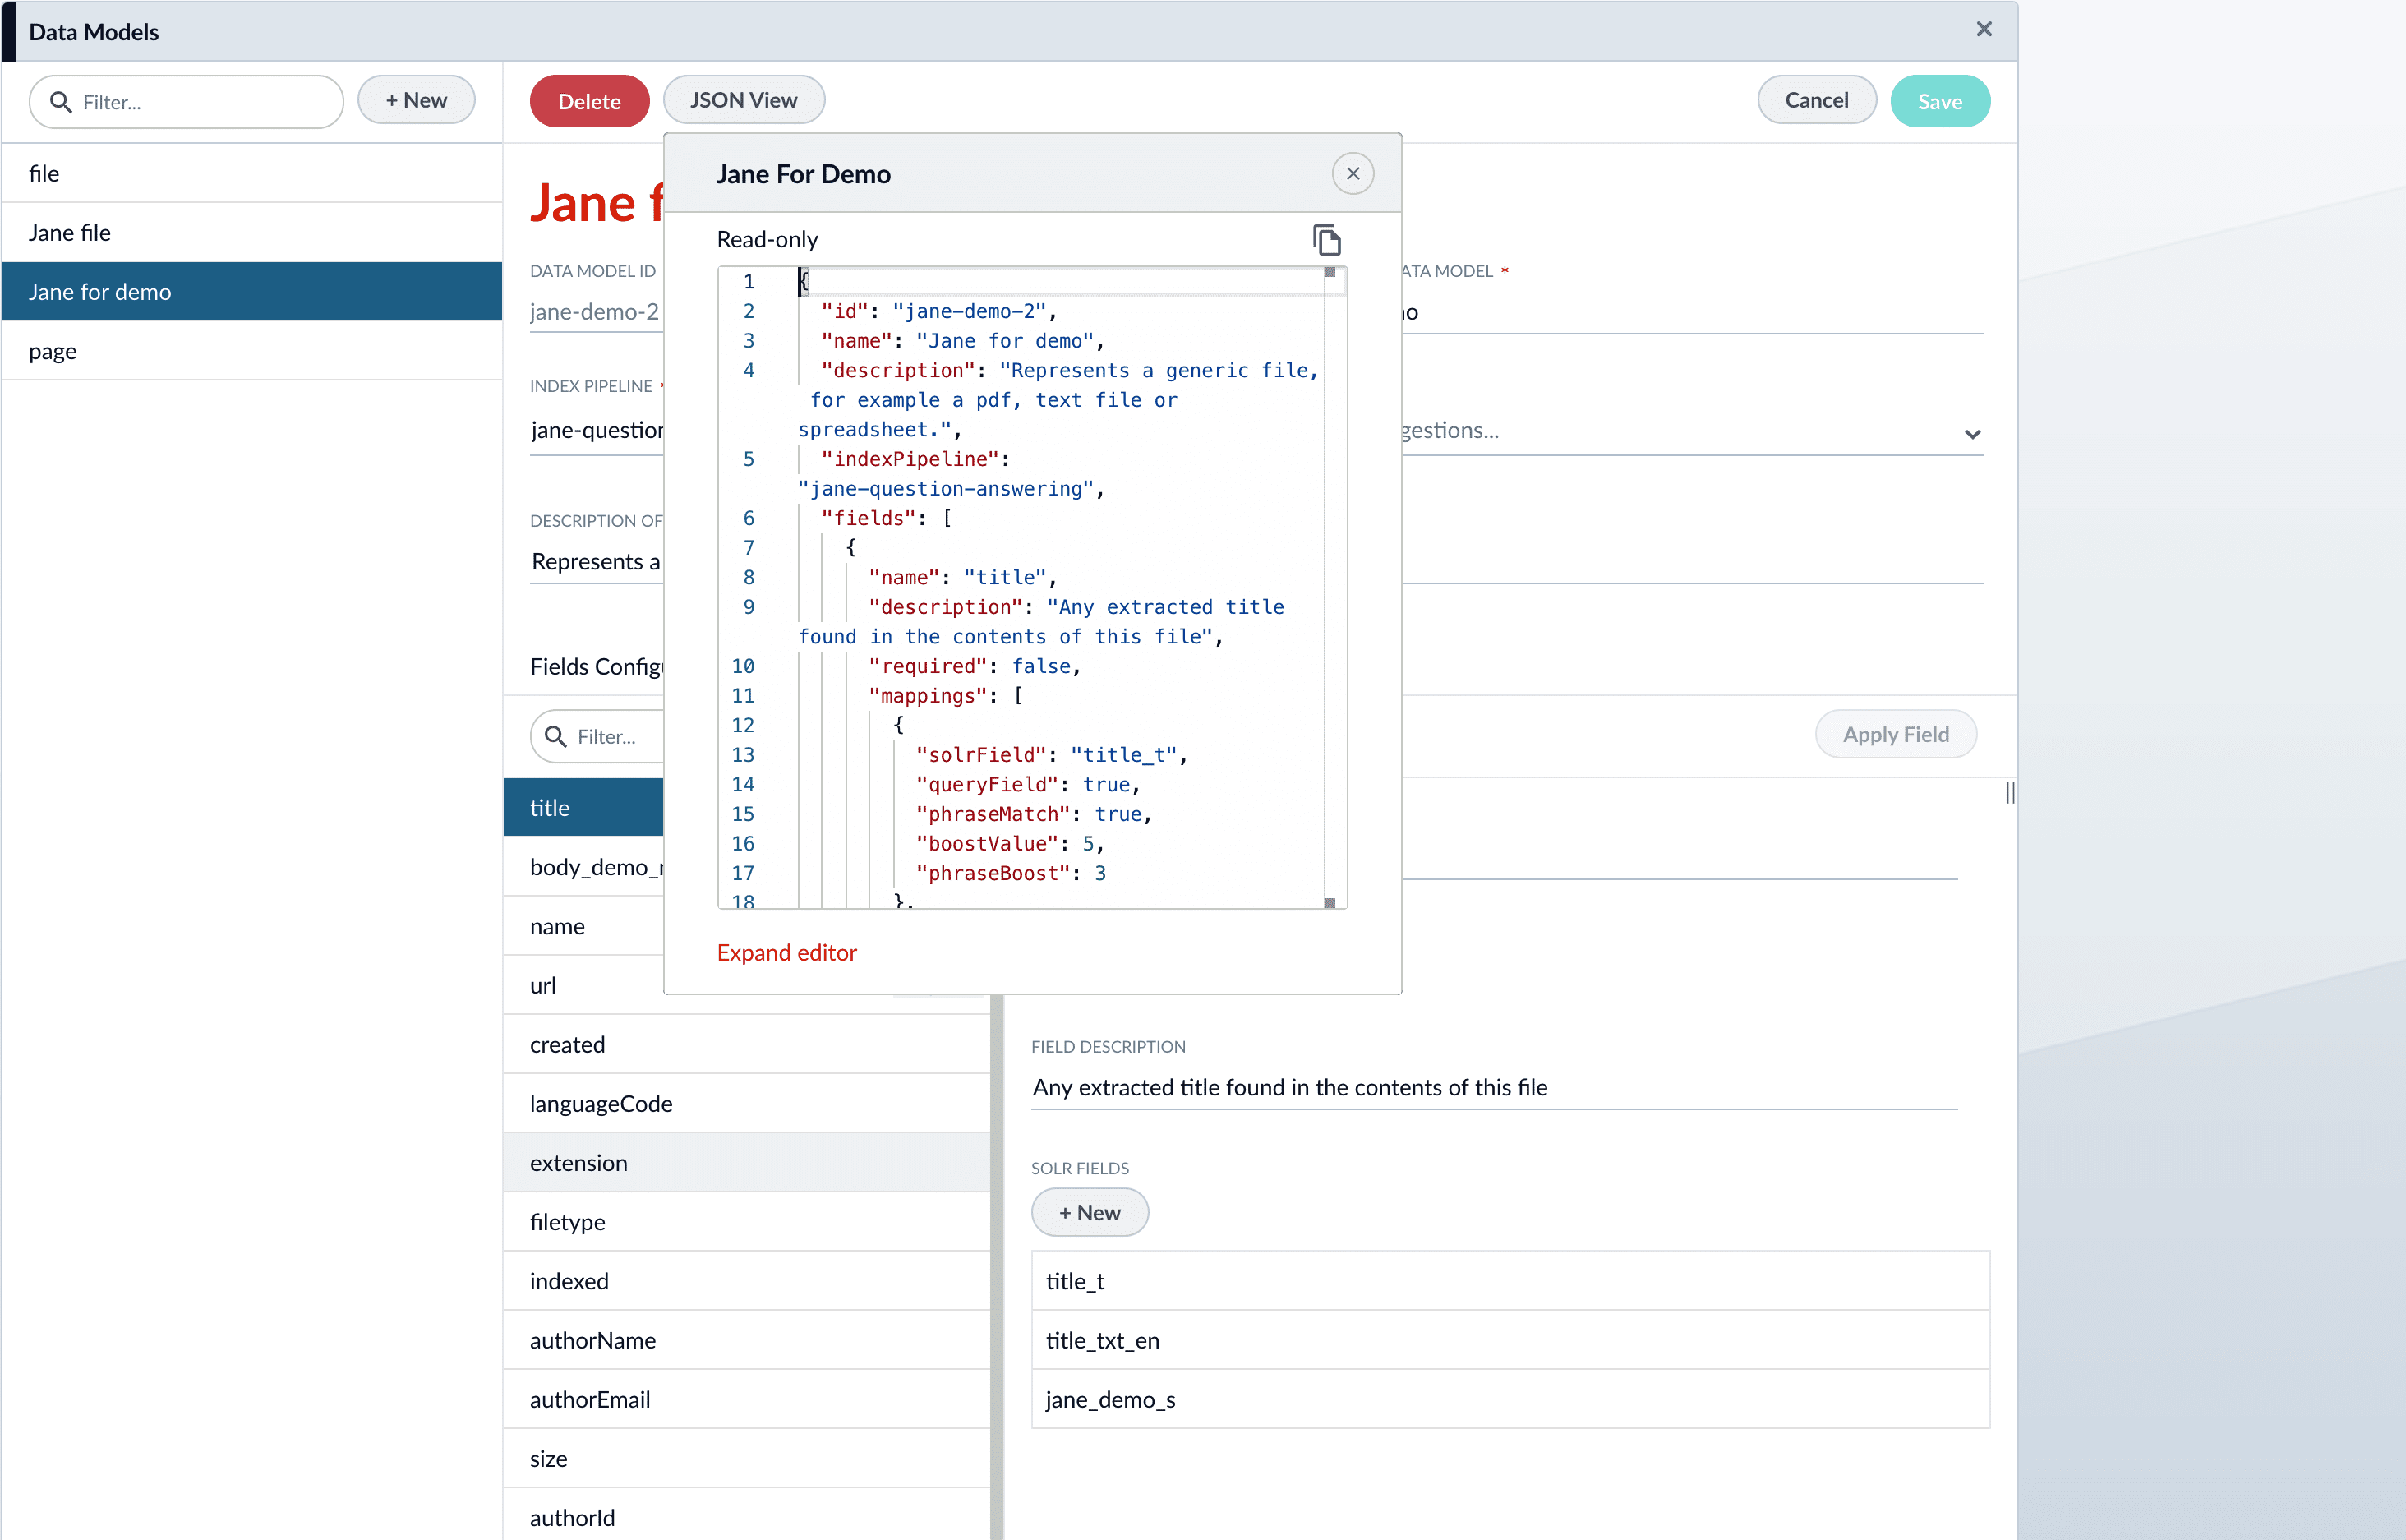
If needed, edit the JSON for the data model.
-
Click the Save button to save the data model.
3. Configure the index pipeline
To begin, navigate to Indexing > Index Workbench. Alternatively, the companyDirectory-index-pipeline pipeline can be configured in Indexing > Index Pipelines, but you are not able to preview results.
| The raw data fields in your index coming from Slack may differ from the example data fields used in this article. |
3.1. Data Model Mapping stage
-
Click the Add a Stage button, and choose Data Model Mapping from the list.
-
Use the Data Model Type dropdown to select the
persondata model. -
(optional) Check the Match Trigger checkbox and assign the following values:
Field Value Field to match
type_sValue to match
userThe Value to match field supports RegEx. You can assign multiple values. Alternatively, you can create additional Data Model Mapping stages.
-
Assign field mappings for the Slack datasource’s raw datasources:
Source Field Data Model Field first_namefirst_namelast_namelast_nameemailemail -
(optional) Check the Keep unmapped fields checkbox to preserve fields that are unmatched to the data model.
-
Click Apply.
3.2. Call Data Model Pipeline stage
| This stage must be placed after the Data Model Mapping stage. |
-
Click the Add a Stage button, and choose Call Data Model Pipeline from the list.
-
Assign the value
_lw_data_model_type_sto the Data Model Type Field field. This field is created when a document meets the criteria specified in the Data Model Mapping. -
Click Apply.
Next steps
With the index pipeline configured, you are now ready to complete the indexing job by clicking the Start Job button.
Once complete, the documents are ready for viewing in the Query Workbench:
-
Navigate to Querying > Query Workbench.
-
Click the Load button.
-
Choose the query pipeline you specified when creating the data model,
companyDirectory-query-pipeline.