> ## Documentation Index
> Fetch the complete documentation index at: https://doc.lucidworks.com/llms.txt
> Use this file to discover all available pages before exploring further.
# Predictive Merchandiser
export const LwTemplate = ({title = "Key questions to get you started", icon = "sparkles", cta = "Powered by Agent Studio", linkHref = "https://lucidworks.com/demo/?utm_source=docs&utm_medium=referral&utm_campaign=docs_cta_ai"}) => {
const [isLoaded, setIsLoaded] = useState(false);
useEffect(() => {
const timer = setTimeout(() => {
setIsLoaded(true);
}, 500);
return () => clearTimeout(timer);
}, []);
return
{isLoaded && `
}} />}
Powered by Lucidworks Agent Studio
;
};
export const InlineImage = ({src, alt = '', height = '2em'}) => {
return ;
};
[localhost link]: http://localhost:3000/docs/lucidworks-search/07-improve-your-queries/curate-search-experience/predictive-merchandiser/overview
[mintlify link]: https://doc.lucidworks.com/docs/lucidworks-search/07-improve-your-queries/curate-search-experience/predictive-merchandiser/overview
[old doc.lw link]: https://doc.lucidworks.com/managed-fusion/5.9/74h98q
Predictive Merchandiser is an AI-powered merchandising tool for Product Discovery solutions. Most often used by eCommerce sites, this solution provides insights and recommendations to optimize search results and product placement.
## User interface benefits
The Predictive Merchandiser user interface lets you:
* Connect to a data source and simulate the shopping experience of your customers.
* Pin, boost, bury, and block specific products in your catalog.
* Create business rules to display custom banners, redirect customers to a different page on your site, and activate other options to customize your customers' experiences .
* Create search rewriting strategies to manage spelling mistakes, synonym matching, phrase matching, and poorly performing queries.
* Review query rewriting strategies that were generated automatically using machine learning models.
* Deploy new business rules and search rewrites to the data source where they can be triggered by live queries.
* View analytics reports that show, for example, the variation in site visits over time, the terms most often used in searches, and the products clicked the most.
## Licensing
Predictive Merchandiser is integrated with Fusion and requires a valid license.
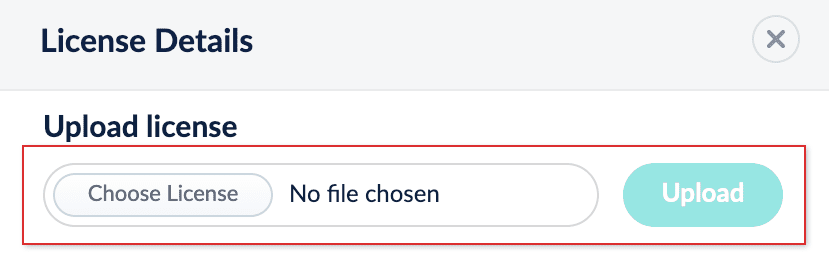
To verify your Predictive Merchandiser license, click **Account Settings** and select **License Details**.
If you have a valid Predictive Merchandiser license, an asterisk `*` displays after **Fusion AI Pm**.
To upload a valid license, click **Upload**.
## Supported browsers
Predictive Merchandiser is officially supported *only* in Google Chrome. The unsupported browsers listed in the table may provide limited features and functionality.
| Browser | Supported |
| ------------- | --------- |
| Google Chrome | ✅ |
| Firefox | |
| Safari | |
| Opera | |
| Edge | |
## Access Predictive Merchandiser
To access Predictive Merchandiser:
1. Sign in to Fusion and click **Relevance > Rules**.
2. Click the **Merchandiser** icon.
## Learn more
The course for **Predictive Merchandiser: Getting Started** focuses on surfacing products that match an individual shopper’s taste and preferences using signal-driven recommendations.
You can block a product so that it does not appear in the search results when your customers run a particular query. This is helpful if a product has been removed from your catalog, or it is not yet available, for example.
When you block a product, a new rule is created automatically.
1. Hover your cursor over a product. A menu overlay appears.
2. Hover your cursor over the **Actions** button. A dropdown menu appears.
3. Click **Block Product**.
You can also block multiple products at once by clicking the checkbox in the top-left corner of the product tiles and selecting the **Block** button above the top row of products.
You can boost a product so that it occupies a higher position in the search results when your customers run a particular query. This can be helpful if you have new products in your catalog, or large stocks of some products, for example.
Boosting a product increases the product’s position in the results, but takes other factors into consideration while doing so. As a result, it does not guarantee the product will occupy a specific position in the list. Pinning a product, however, places the product at a specified position regardless of other factors.
When you boost a product, a new rule is created automatically.
1. Hover your cursor over a product. A menu overlay appears.
2. Hover your cursor over the **Actions** button. A dropdown menu appears.
3. Click **Boost**.
You can also boost multiple products at once by clicking the checkbox in the top-left corner of the product tiles and selecting the **Boost** button above the top row of products.
You can bury a product so that it occupies a lower position in the search results when your customers run a particular query. This can be helpful if some of the products in your catalog are temporarily out of stock, for example.
Burying a product typically moves it to the end of the list. However, its exact position will depend on multiple factors, including its relevance score and user signals in relation to other products.
When you bury a product, a new rule is created automatically.
1. Hover your cursor over a product. A menu overlay will appear.
2. Hover your cursor over the **Actions** button. A dropdown menu will appear.
3. Select the **Bury** button:
You can also bury multiple products at once by clicking the checkbox in the top-left corner of the product tiles and selecting the **Bury** button above the top row of products.
You can pin a product to occupy a fixed position in the search results when your customers run a particular query. This can be helpful, for example, if you have bestsellers or popular items that you want customers to see first.
Boosting a product increases the product’s position in the results, but takes other factors into consideration while doing so. As a result, it does not guarantee the product will occupy a specific position in the list. Pinning a product, however, places the product at a specified position regardless of other factors.
When you pin a product, either a new rule is created automatically or an existing pin rule is modified.
## Use actions
1. Hold the pointer over a product.
2. In the menu that displays, hold the pointer over the **Actions** button.
3. From the menu, click .
## Drag and pin a product
1. Hold the pointer over a product.
2. In the menu that displays, click-and-hold the drag bar.
3. Move the product to the desired location.
4. Release the pointer.
## Insert and pin a product
You can search for and insert an alternative product from your catalog into a list of search results, and pin it at a fixed position. This is helpful if:
* You want to include a product that is not included in the results list generated by the query.
* The results list is long and you need to search for a particular product to locate and pin it.
* You want to pin multiple products simultaneously.
When you pin a product, either a new rule is created automatically or an existing pin rule is modified.
1. Hold the pointer between two products. A **+** button will appear:
2. Click the **+** button.
3. Locate and select one or more products you want to pin.
4. Click
## Choose pin position
1. Hold the pointer over a product.
2. Select the value of the Position parameter.
3. Enter the desired replacement value, or adjust the value using the arrows.
## Add a Facet
You can create rules that add facets by interacting directly with the Facet List in Interactive Mode. You can add facets that are set unconditionally, or facets that are only set when your customers run a particular query. For example, you might want to set a music genre facet when a customer navigates to the music section of your catalog.
Adding a facet automatically creates a new rule if a default facet rule does not already exist. If a default facet rule does exist, adding a facet updates that rule with the new facet.
### Enable the Facet Zone
Facets appear in the zone on the left panel of the Predictive Merchandiser, once enabled. Follow the steps below to turn on the facets zone:
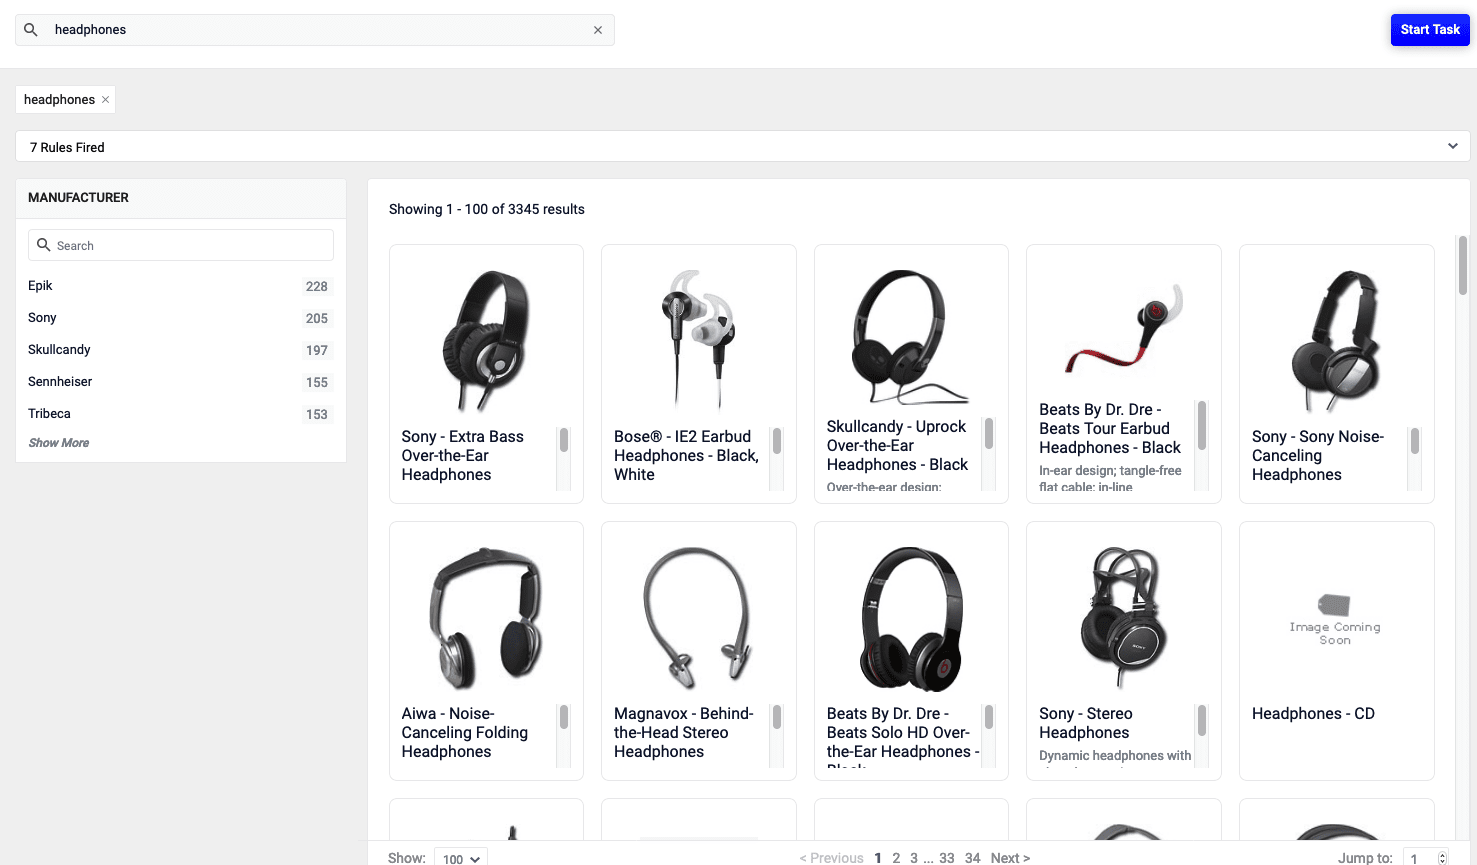
1. Click **Start Task**. The button appears.
2. In the left panel, click **+Add** and enter the desired parameters.
3. Click **Done** when you’ve finished.
You can also add facets that are not dependent on rules being triggered. To do this, edit the Facet Zone widget.
### Edit the Facet Zone widget
1. In the facet zone, click **+Add**. The **Edit Rule** dialog box appears.\\
2. Click the **Facet Field** field, and enter the desired facet parameter.
You can add multiple facet parameters by clicking the **+ Add** button:
3. Click the **Save** button to add your facet:
### Add Additional Facets
1. Hover your cursor above or below an existing facet. A **+** button appears:
2. Click the **+** button.
## Move a Facet
1. Hover your cursor over a facet. A menu overlay appears at the top.
2. Click-and-hold the drag bar:
3. Move the facet to the desired location.
4. Release the click.
## Remove a Facet
1. Hover your cursor over a facet. A menu overlay appears at the top.
2. Click the **Remove** button:
## Block a Facet Item
1. Hover your cursor over a facet item. A menu overlay appears.
2. Click the **Block** button:
## Bury a Facet Item
1. Hover your cursor over a facet item. A menu overlay appears.
2. Click the **Bury** button:
## Boost a Facet Item
1. Hover your cursor over a facet item. A menu overlay appears.
2. Click the **Boost** button:
### Reorder Boosted Facet Items
1. Hover over a boosted facet item. A drag bar appears.
2. Click and hold the drag bar:
3. Move the facet item to the desired location.
4. Release the click.
## Start a task
1. Click the **Start Task** button:
This enables Interactive Mode. In Interactive Mode, you can interact directly with some of the widgets on the Predictive Merchandiser board, creating and managing business rules as you simulate your customers' searches. You can:
* Pin, block, boost and bury products.
* Set additional facets.
* Create search rewrites from poorly performing search terms.
* See which rules and search rewrites are triggered by a search, then edit or delete them as needed.
* Sort search results by ascending or descending order, or by relevance.
* Check product information.
## Undo changes in a task
1. Click the **Undo All** button: . A confirmation dialog box will appear.
2. Select **Undo** to confirm.
## Exit a task
Exiting a task will
1. Click the **Exit** button:
## Publish a task
You can publish any changes you make to rules back to the Fusion data source where they can impact live queries.
1. Click the **Publish** button: . A confirmation dialog box will appear.
2. Select **Publish** to confirm.
Predictive Merchandiser counts unpublished changes in the top navigation bar:
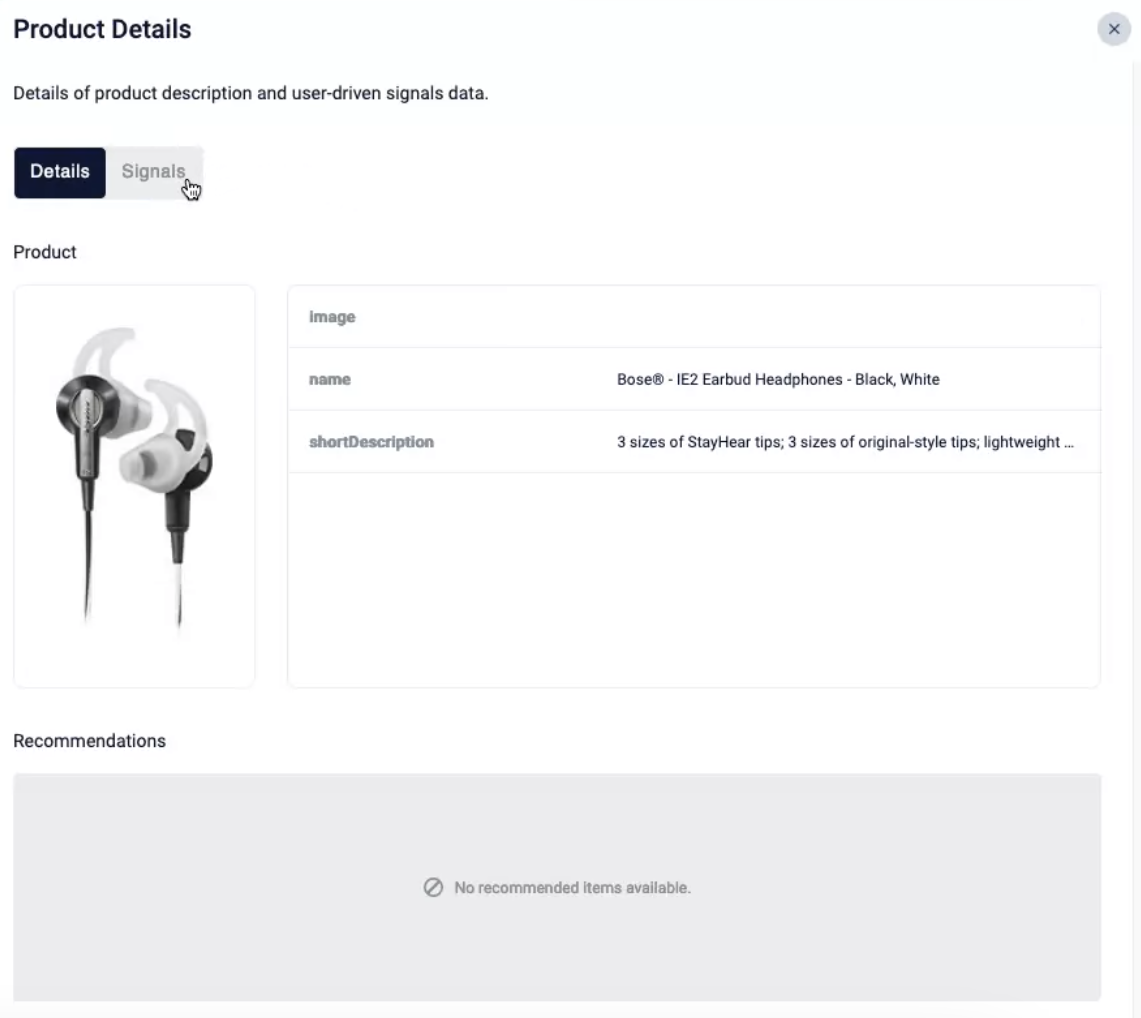
1. Hover your cursor over a product. A menu overlay will appear.
2. Hover your cursor over the **Information** button . The Product Details panel will appear.
3. Use the **Details** and **Signals** buttons to toggle between panes.\\
 ## Supported browsers
Predictive Merchandiser is officially supported *only* in Google Chrome. The unsupported browsers listed in the table may provide limited features and functionality.
| Browser | Supported |
| ------------- | --------- |
| Google Chrome | ✅ |
| Firefox | |
| Safari | |
| Opera | |
| Edge | |
## Access Predictive Merchandiser
To access Predictive Merchandiser:
1. Sign in to Fusion and click **Relevance > Rules**.
2. Click the **Merchandiser** icon.
## Learn more
## Supported browsers
Predictive Merchandiser is officially supported *only* in Google Chrome. The unsupported browsers listed in the table may provide limited features and functionality.
| Browser | Supported |
| ------------- | --------- |
| Google Chrome | ✅ |
| Firefox | |
| Safari | |
| Opera | |
| Edge | |
## Access Predictive Merchandiser
To access Predictive Merchandiser:
1. Sign in to Fusion and click **Relevance > Rules**.
2. Click the **Merchandiser** icon.
## Learn more
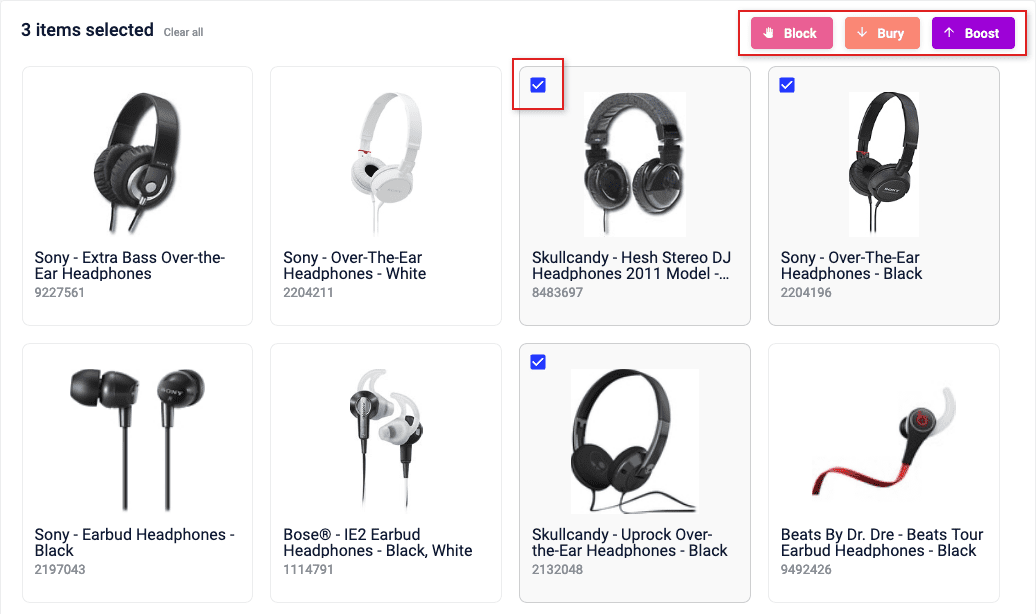
 You can also bury multiple products at once by clicking the checkbox in the top-left corner of the product tiles and selecting the **Bury** button above the top row of products.
 .
## Drag and pin a product
1. Hold the pointer over a product.
2. In the menu that displays, click-and-hold the drag bar.
3. Move the product to the desired location.
4. Release the pointer.
## Insert and pin a product
You can search for and insert an alternative product from your catalog into a list of search results, and pin it at a fixed position. This is helpful if:
* You want to include a product that is not included in the results list generated by the query.
* The results list is long and you need to search for a particular product to locate and pin it.
* You want to pin multiple products simultaneously.
When you pin a product, either a new rule is created automatically or an existing pin rule is modified.
1. Hold the pointer between two products. A **+** button will appear:
.
## Drag and pin a product
1. Hold the pointer over a product.
2. In the menu that displays, click-and-hold the drag bar.
3. Move the product to the desired location.
4. Release the pointer.
## Insert and pin a product
You can search for and insert an alternative product from your catalog into a list of search results, and pin it at a fixed position. This is helpful if:
* You want to include a product that is not included in the results list generated by the query.
* The results list is long and you need to search for a particular product to locate and pin it.
* You want to pin multiple products simultaneously.
When you pin a product, either a new rule is created automatically or an existing pin rule is modified.
1. Hold the pointer between two products. A **+** button will appear:
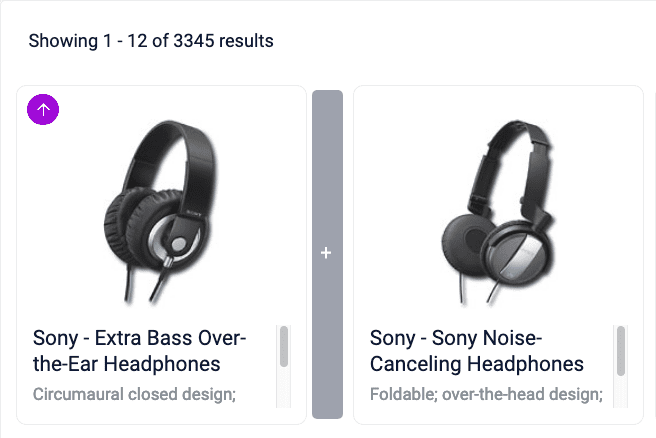 2. Click the **+** button.
3. Locate and select one or more products you want to pin.
4. Click
2. Click the **+** button.
3. Locate and select one or more products you want to pin.
4. Click  ## Choose pin position
1. Hold the pointer over a product.
2. Select the value of the Position parameter.
3. Enter the desired replacement value, or adjust the value using the arrows.
## Choose pin position
1. Hold the pointer over a product.
2. Select the value of the Position parameter.
3. Enter the desired replacement value, or adjust the value using the arrows.
 button appears.
2. In the left panel, click **+Add** and enter the desired parameters.
3. Click **Done** when you’ve finished.
You can also add facets that are not dependent on rules being triggered. To do this, edit the Facet Zone widget.
### Edit the Facet Zone widget
1. In the facet zone, click **+Add**. The **Edit Rule** dialog box appears.\\
button appears.
2. In the left panel, click **+Add** and enter the desired parameters.
3. Click **Done** when you’ve finished.
You can also add facets that are not dependent on rules being triggered. To do this, edit the Facet Zone widget.
### Edit the Facet Zone widget
1. In the facet zone, click **+Add**. The **Edit Rule** dialog box appears.\\
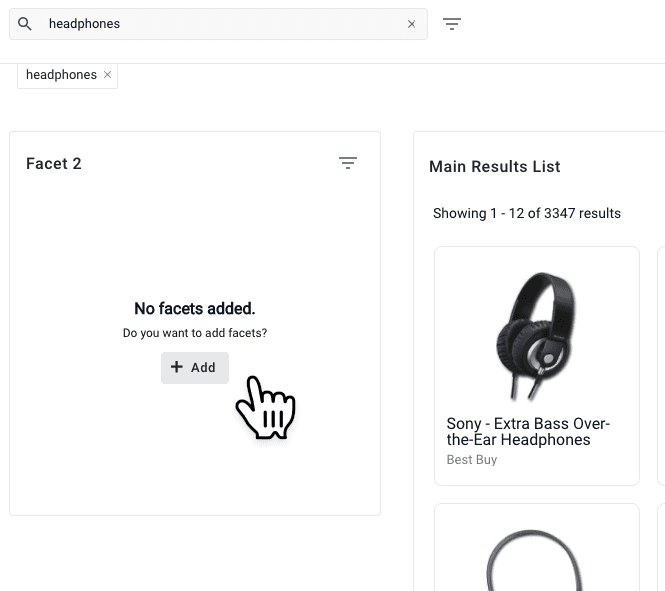 2. Click the **Facet Field** field, and enter the desired facet parameter.

 ### Add Additional Facets
1. Hover your cursor above or below an existing facet. A **+** button appears:
### Add Additional Facets
1. Hover your cursor above or below an existing facet. A **+** button appears:
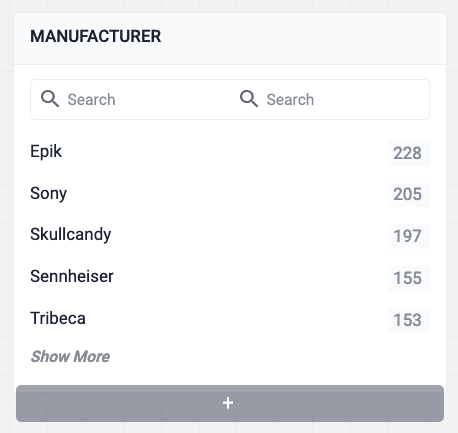 2. Click the **+** button.
## Move a Facet
1. Hover your cursor over a facet. A menu overlay appears at the top.
2. Click-and-hold the drag bar:
2. Click the **+** button.
## Move a Facet
1. Hover your cursor over a facet. A menu overlay appears at the top.
2. Click-and-hold the drag bar:  3. Move the facet to the desired location.
4. Release the click.
## Remove a Facet
1. Hover your cursor over a facet. A menu overlay appears at the top.
2. Click the **Remove** button:
3. Move the facet to the desired location.
4. Release the click.
## Remove a Facet
1. Hover your cursor over a facet. A menu overlay appears at the top.
2. Click the **Remove** button:  ## Block a Facet Item
1. Hover your cursor over a facet item. A menu overlay appears.
2. Click the **Block** button:
## Block a Facet Item
1. Hover your cursor over a facet item. A menu overlay appears.
2. Click the **Block** button:  ## Bury a Facet Item
1. Hover your cursor over a facet item. A menu overlay appears.
2. Click the **Bury** button:
## Bury a Facet Item
1. Hover your cursor over a facet item. A menu overlay appears.
2. Click the **Bury** button:  ## Boost a Facet Item
1. Hover your cursor over a facet item. A menu overlay appears.
2. Click the **Boost** button:
## Boost a Facet Item
1. Hover your cursor over a facet item. A menu overlay appears.
2. Click the **Boost** button:  This enables Interactive Mode. In Interactive Mode, you can interact directly with some of the widgets on the Predictive Merchandiser board, creating and managing business rules as you simulate your customers' searches. You can:
* Pin, block, boost and bury products.
* Set additional facets.
* Create search rewrites from poorly performing search terms.
* See which rules and search rewrites are triggered by a search, then edit or delete them as needed.
* Sort search results by ascending or descending order, or by relevance.
* Check product information.
## Undo changes in a task
1. Click the **Undo All** button:
This enables Interactive Mode. In Interactive Mode, you can interact directly with some of the widgets on the Predictive Merchandiser board, creating and managing business rules as you simulate your customers' searches. You can:
* Pin, block, boost and bury products.
* Set additional facets.
* Create search rewrites from poorly performing search terms.
* See which rules and search rewrites are triggered by a search, then edit or delete them as needed.
* Sort search results by ascending or descending order, or by relevance.
* Check product information.
## Undo changes in a task
1. Click the **Undo All** button:  . A confirmation dialog box will appear.
2. Select **Undo** to confirm.
## Exit a task
Exiting a task will
1. Click the **Exit** button:
. A confirmation dialog box will appear.
2. Select **Undo** to confirm.
## Exit a task
Exiting a task will
1. Click the **Exit** button:  ## Publish a task
You can publish any changes you make to rules back to the Fusion data source where they can impact live queries.
1. Click the **Publish** button:
## Publish a task
You can publish any changes you make to rules back to the Fusion data source where they can impact live queries.
1. Click the **Publish** button:  . A confirmation dialog box will appear.
2. Select **Publish** to confirm.
. A confirmation dialog box will appear.
2. Select **Publish** to confirm.

 . The Product Details panel will appear.
3. Use the **Details** and **Signals** buttons to toggle between panes.\\
. The Product Details panel will appear.
3. Use the **Details** and **Signals** buttons to toggle between panes.\\