> ## Documentation Index
> Fetch the complete documentation index at: https://doc.lucidworks.com/llms.txt
> Use this file to discover all available pages before exploring further.
# Page Metadata
export const LwTemplate = ({title = "Key questions to get you started", icon = "sparkles", cta = "Powered by Agent Studio", linkHref = "https://lucidworks.com/demo/?utm_source=docs&utm_medium=referral&utm_campaign=docs_cta_ai"}) => {
const [isLoaded, setIsLoaded] = useState(false);
useEffect(() => {
const timer = setTimeout(() => {
setIsLoaded(true);
}, 500);
return () => clearTimeout(timer);
}, []);
return
{isLoaded && `
}} />}
Powered by Lucidworks Agent Studio
;
};
export const InlineImage = ({src, alt = '', height = '2em'}) => {
return ;
};
[localhost link]: http://localhost:3000/docs/5/fusion/getting-data-out/curating-your-search-experience/predictive-merchandiser/page-metadata
[mintlify link]: https://doc.lucidworks.com/docs/5/fusion/getting-data-out/curating-your-search-experience/predictive-merchandiser/page-metadata
[old doc.lw link]: https://doc.lucidworks.com/fusion/5.9/d9o8jb
Metadata describe the content of a web page. The Page Metadata feature in Predictive Merchandiser lets you configure metadata using **Use Predictive Merchandiser Templates**.
This article teaches you how to use the [Templates](/docs/5/fusion/getting-data-out/curating-your-search-experience/predictive-merchandiser/templates) feature in Predictive Merchandiser, including how to:
* [Create a template](#create-a-new-template)
* [Add zones](#add-a-zone-to-a-template) to the template
* Conditionally [trigger the template](#set-triggering-options)
* [Test](#test-the-template) the template in the Predictive Merchandiser screen
In the instructions below, a new template is created with two zones for use during a Cyber Monday sales event. One zone is used to display general search results while the other is used to promote specific products for the sale.
The zones used in this article use different query profiles. To follow the instructions as described, you will need to begin with an app that has at least two query profiles.
To begin, access Templates in the [Rules Editor](/docs/5/fusion/getting-data-out/query-enhancement/rules-editor) by navigating to **Relevance** > **Rules** > **Templates**.
The course for **Predictive Merchandiser: Template Manager** focuses on how to use the templates included in Predictive Merchandiser and create your own custom templates.
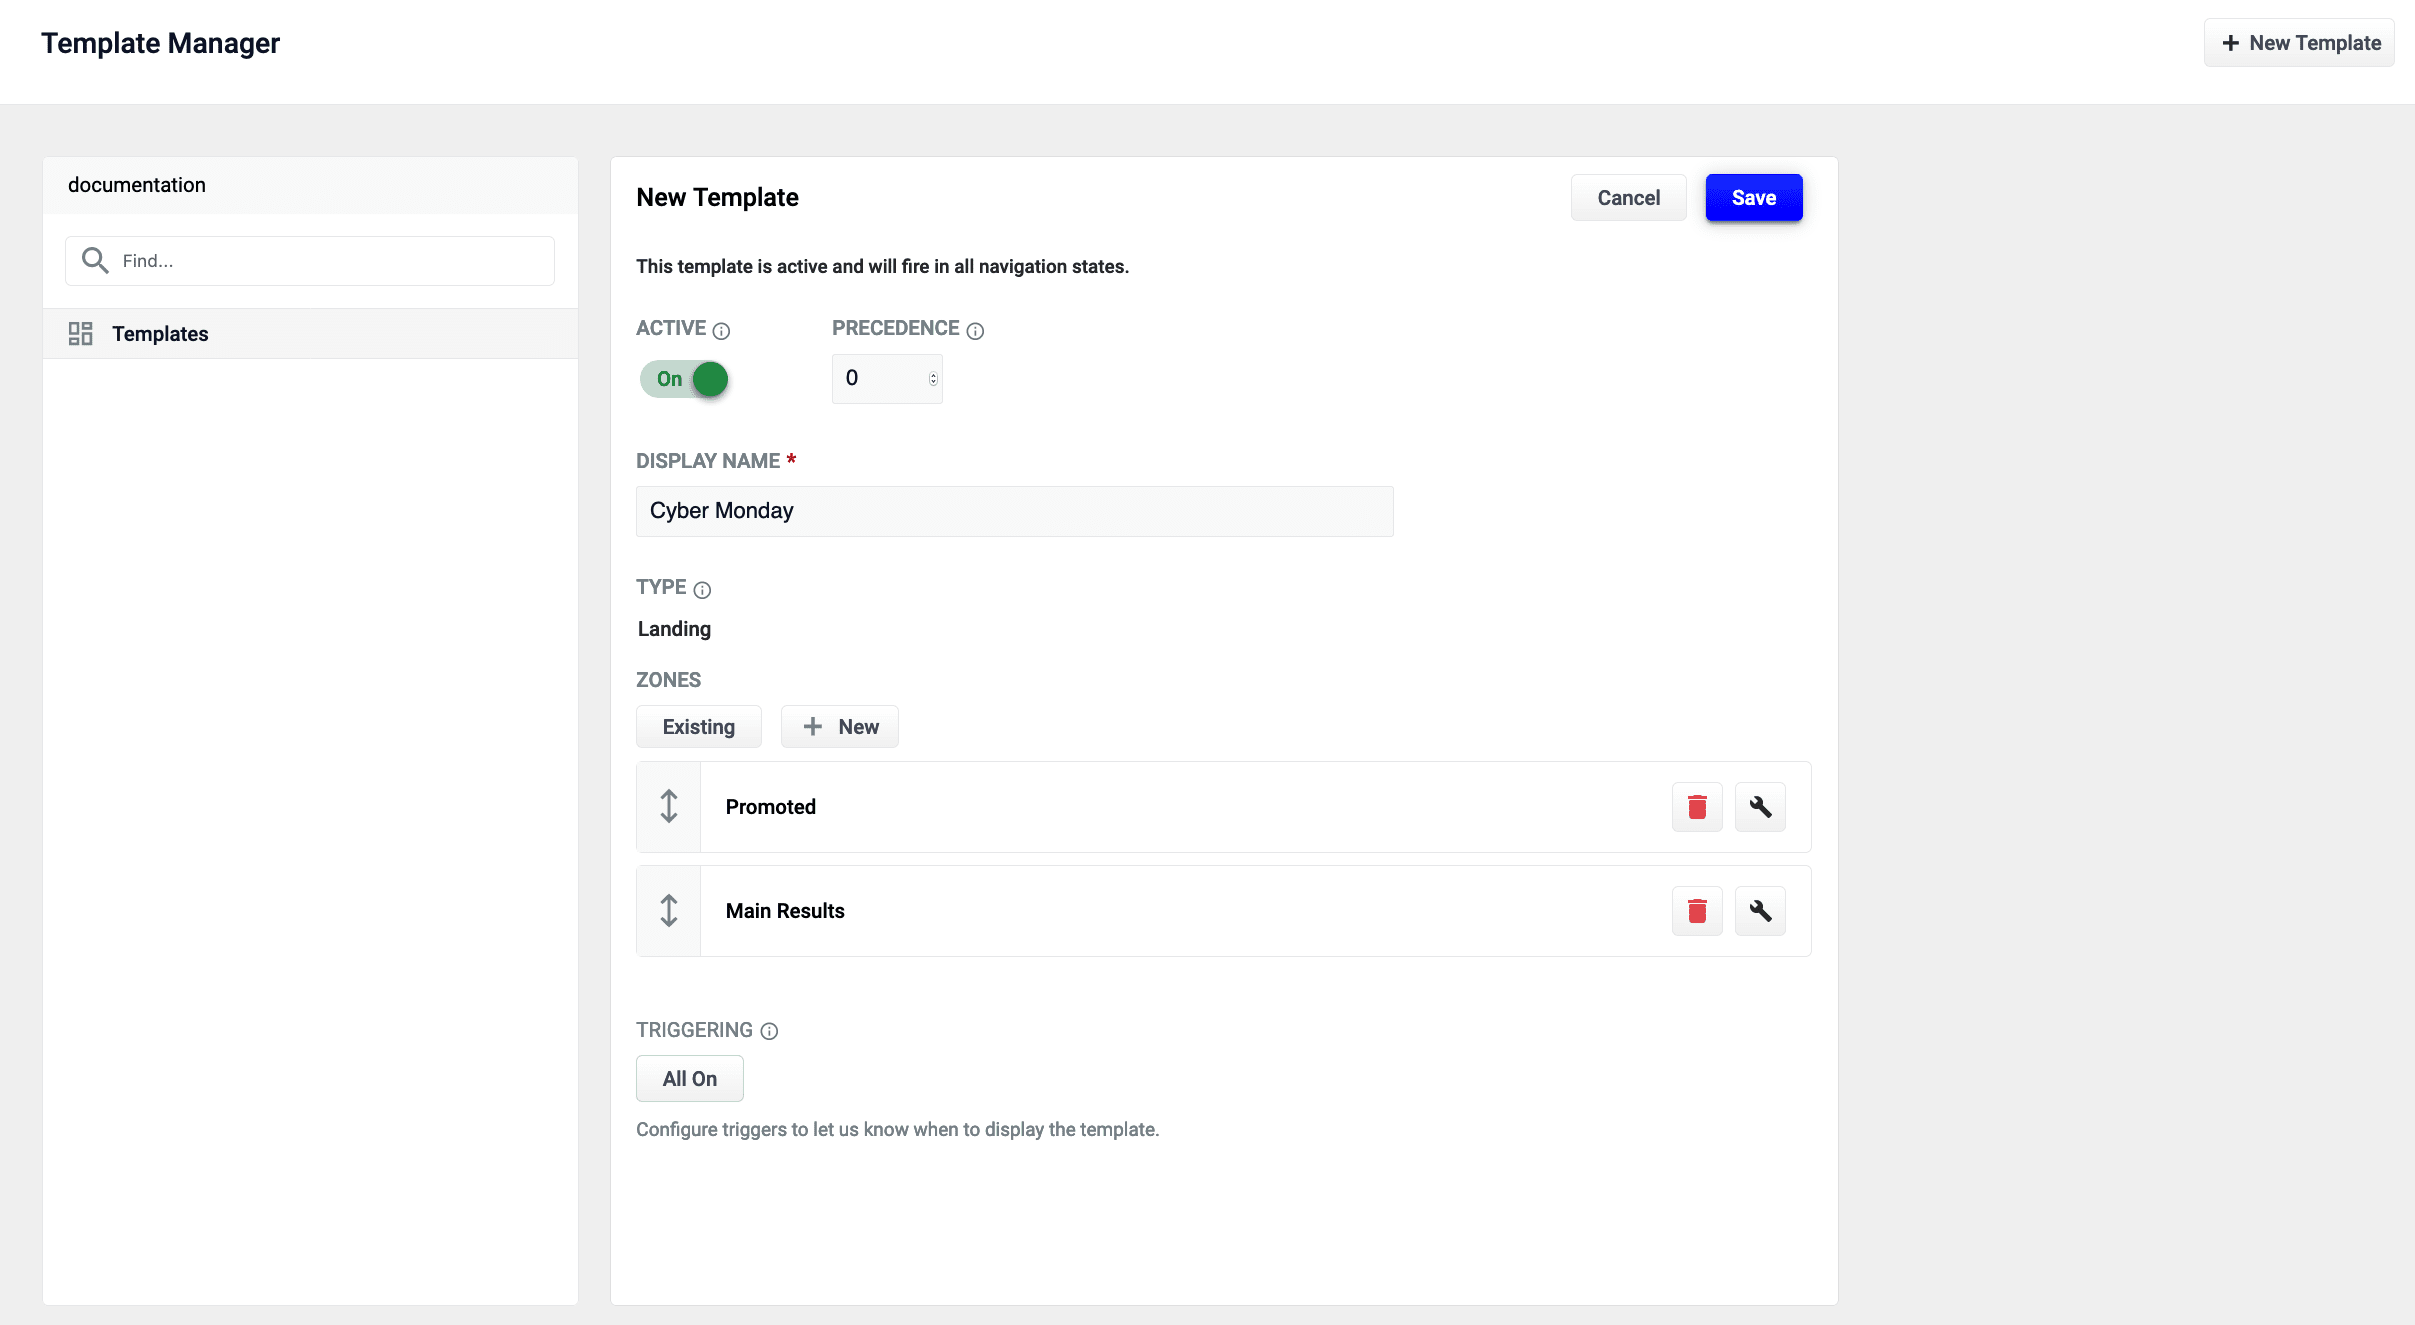
## Create a new template
1. From the Templates screen, click the **New Template** button:
2. Assign the template a unique name in the **Template Name** field. In this example, the value `Cyber Monday` is assigned.
3. Choose a **Template Type**. This example uses the `landing` template type.
This value is read-only and for informational purposes only.
4. Click the **Save** button to save the new template:
For full configuration, see:
* [Templates UI Configuration Options](/docs/5/fusion/getting-data-out/curating-your-search-experience/predictive-merchandiser/templates-config)
* [Templating API Configuration Reference](/api-reference/templates-controller/get-template-information)
Images may display other releases if the information between releases does not differ. For example, the Fusion Templating API image reflects version 5.3.5 in both the Fusion 5.2 and 5.3 releases, but reflects 5.4.0 in the Fusion 5.4 release.
## Add a zone to a template
Zones enable Fusion users to create rules designed for specific query profiles. Combined with templates, this allows a search application to display results from multiple query profiles in the same view.
In this example, two new zones are created for the **Cyber Monday** template.
1. Add an existing zone to the template by clicking the **Existing** button. In this example, the **Main Results List** zone is added by selecting the zone and clicking the **Apply** button.
{/*
The **Main Results List** zone is the default zone. This zone can be edited but cannot be deleted.
*/}
2. Create a new zone by clicking the **New** button:
3. Assign the zone a unique name in the **Display Name** field. For this example, the value `Promoted` is assigned.
4. Choose the **Query Profile** for this zone. This example uses a query profile named **promotional-results**. This query profile is configured with rules that pin products to the top of the results.
5. Choose the **Zone Type** for this zone. This example uses **main-results-list**.
This value is read-only and for informational purposes only.
6. Set the configuration options for the product image, title, and description per your preference.
7. Click the **Save** button to save the new zone:
For full zone configuration details, see [Zone Configuration Options](/docs/5/fusion/getting-data-out/curating-your-search-experience/predictive-merchandiser/templates-config).
## Edit an existing zone
You can edit a zone that was already added to a template:
1. Select the **Start Task** button.
2. Select the pencil icon to begin editing the chosen page.
3. Each zone has a trash can icon to delete the zone. Select the wrench icon to edit the zone.
4. In the form that appears, make any necessary edits.
5. Click the **Save** button to save your changes.
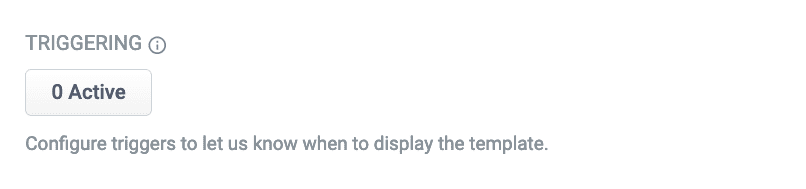
## Set triggering options
Triggers describe conditions that must be met for a template to display. Trigger options include a set date range and specific search terms. See [Triggering Configuration Options](/docs/5/fusion/getting-data-out/curating-your-search-experience/predictive-merchandiser/templates-config) for additional details.
### Date range
1. Click the **0 Active** button under **Triggering**:
If there are active triggers, this button changes to reflect that number. For example, this button will read **3 Active** when 3 triggers are active.
2. Click the date range selector and select a start and end date. For this example, choose a date range that includes today’s date.
3. Click the **Save** button to save your changes:
### Search terms
1. Click the **0 Active** button under **Triggering**.
2. Click the **Trigger** button:
3. In the **Search Terms** field, enter `cyber monday`.
4. Set the **Match Mode** field to `phrase`.
5. Click the **Add** button.
6. Repeat the process to add a second trigger with **Search Terms** set to `sales event` and **Match Mode** to `phrase`.
7. Click the **Save** button to save your changes:
## Test the template
1. Navigate to the **Merchandiser** screen.
2. Enter one of the [search terms](#search-terms) you configured in the **Set triggering options** instructions above. This example used the search terms `cyber monday` and `sales event`.
If today’s date does not fall within the template’s [date range trigger](#date-range), the template will *not* load.
If everything was configured correctly, you should see the **Cyber Monday** template is loaded. You can now create different rules for both zones, including pinning promoted products in the **Promoted** zone.
When you trigger Predictive Merchandiser templates, the page metadata is added to the response payload, which looks like this:
```json wrap theme={"dark"}
{
"triggered": {
"app": "test",
"id": "5d9cd572-5928-4a16-a9de-5bab582538a2",
"name": "example-template",
...
"name": "Metadata of example-template",
...
"inTemplates": ["5d9cd572-5928-4a16-a9de-5bab582538a2"],
"pageMetadata": [{
"metadata": {
"pageTitle": "Example page title",
"pageDescription": "Example description",
"pageKeywords": ["example"],
"imageUrl": null,
"pageUrl": null
}
}],
"neverPublished": false,
"staging": true,
"published": false
}
}
```
The Page Metadata feature also allows you to filter your facets by existing tags, clone the values of your facets, or select filters/facets with predefined metadata. If you have a large number of pages, you can also search your domain by **Path URL** using the **URL Search**.
For more information, see **Use Page Metadata**.
Use the Page Metadata feature to edit the following fields in a Predictive Merchandiser template:
* `page-title`
* `page-description`
* `page-keywords`
* `image-url`
* `page-url`
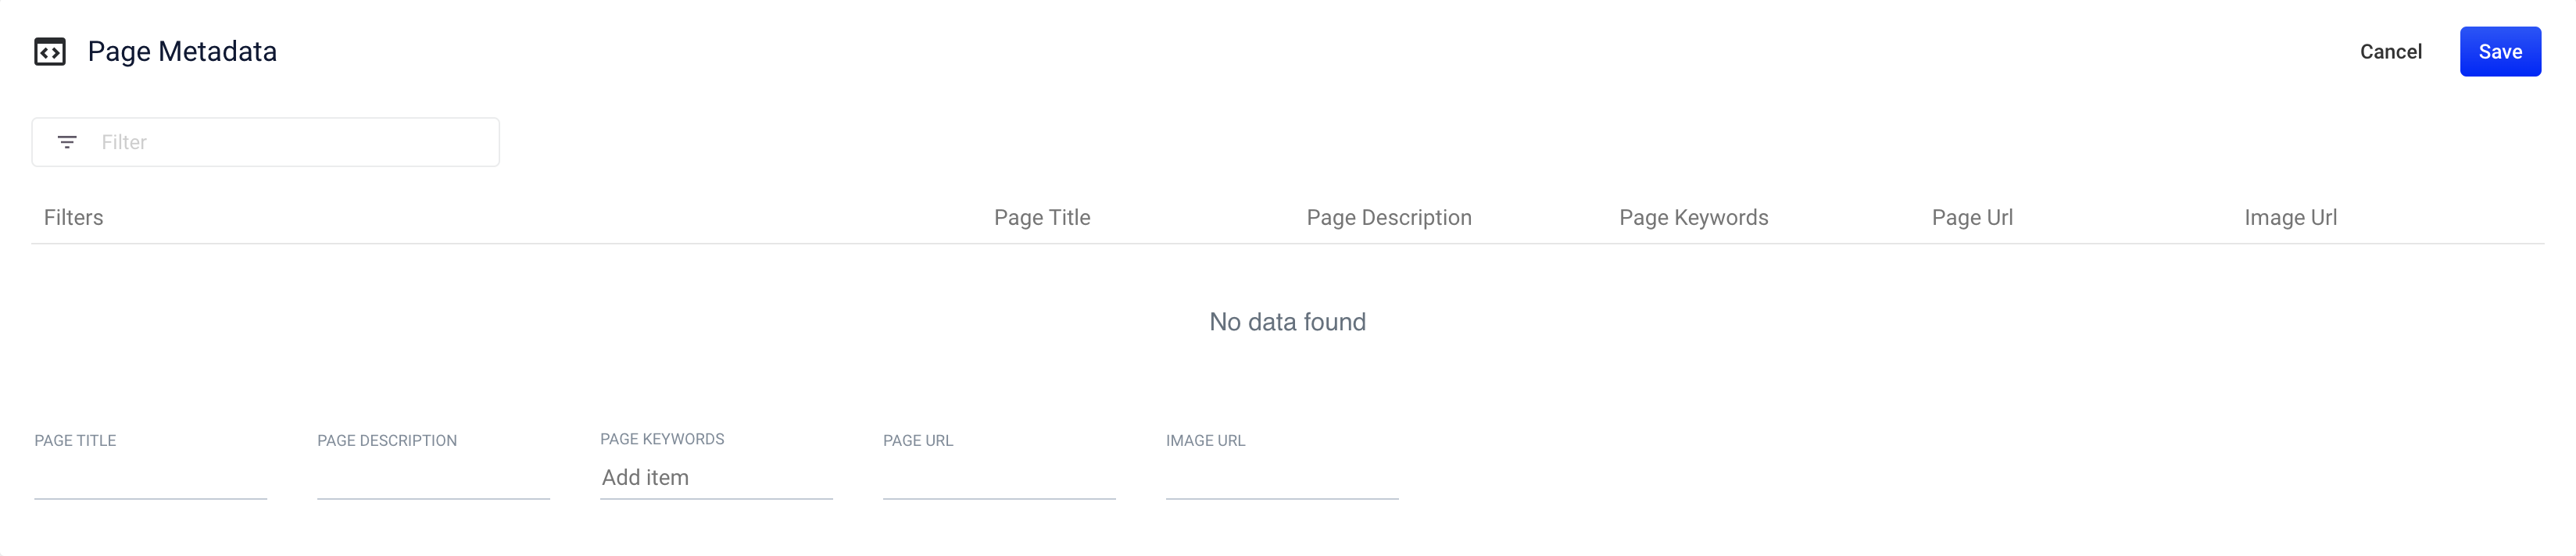
## Access and Edit Page Metadata
You must be within an active template to use the **More Menu**.
1. Choose your app and navigate to **Rules** > **Merchandiser**.
2. Click
3. Click .
This opens a dialog with predefined fields, based on the current information in place for your page.
4. Make your changes, then click **Save**.
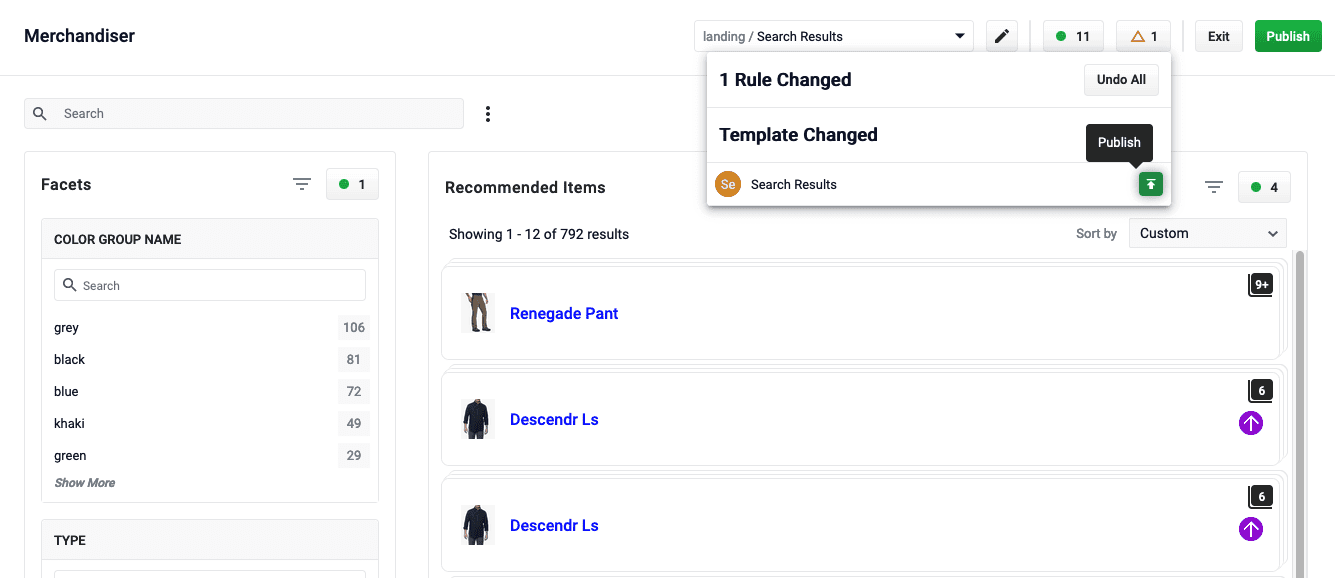
### Publish a template
After editing your page metadata, your changes will not be applied until you publish the template. The **Publish** function is available from the **Rules toolbar**:
1. Click .
In the **Template Changed** section, you will see short description of the page that you edited the metadata for.
2. Hover to the right of the page description to see the button.
3. Review the changes and click the button at the end of the dialogue to publish the template.
Your metadata changes have now been applied to your site.
## Clone Facet Values
1. In the Merchandiser tab, click the
2. Click
3. Select one or more of your existing facets and click
{/* // == Select filters or facets with predefined metadata */}
{/* // will fill in once the FUS-650 is closed */}
## Find a page using URL Search
1. In the Merchandiser tab, click
2. Click
3. In the **Domain URL** field, select the domain URL for the website you wish to search in the dropdown menu. For example, `https://www.lucidworks.com`.
4. Type the path URL you wish to search for in the **Path URL** field. For example, `/products/fusion`.
5. Click **Search**.
 For more information, see **Use Page Metadata**.
 1. Click