> ## Documentation Index
> Fetch the complete documentation index at: https://doc.lucidworks.com/llms.txt
> Use this file to discover all available pages before exploring further.
# Additional resources
export const LwTemplate = ({title = "Key questions to get you started", icon = "sparkles", cta = "Powered by Agent Studio", linkHref = "https://lucidworks.com/demo/?utm_source=docs&utm_medium=referral&utm_campaign=docs_cta_ai"}) => {
const [isLoaded, setIsLoaded] = useState(false);
useEffect(() => {
const timer = setTimeout(() => {
setIsLoaded(true);
}, 500);
return () => clearTimeout(timer);
}, []);
return
{isLoaded && `
}} />}
Powered by Lucidworks Agent Studio
;
};
[localhost link]: http://localhost:3000/docs/4/app-studio/reference/additional-resources
[mintlify link]: https://doc.lucidworks.com/docs/4/app-studio/reference/additional-resources
App Studio will send information on user clicks that trigger URL requests as well as when a user creates an annotation, for example, a bookmark or comment.
A signal event of type `click` will include, amongst other things, information about the URL that was clicked as well as the number of times that URL was clicked.
A signal event of type `annotation` will include, amongst other things, information about the annotation target, the collection, and the creator.
For a full list of properties that are stored, refer to the signals collection associated with your application.
## Authorization
Activity tracking requires authorization. Both service account impersonation and the Sessions API can be used for this purpose.
Service account impersonation requires credentials for the service account and these are stored in the Fusion platform configuration. These credentials can be accessed by setting the name of the Fusion platform configuration via the `platform-config` parameter in the Fusion activity tracking configuration.
If the credentials for a service account are not provided or cannot be found, a check will be made to see if a Fusion session cookie is available. Typically, this will be present when the user is known to the Fusion server and the Session API has been set up accordingly.
App Studio provides an advanced search capability where a user can specify one or more filters to a query. This provides a more granular search experience, allowing for users to craft tailored queries to quickly find exactly what they are looking for.
## How to Configure Advanced Search in App Studio Enterprise
1. Open `../src/main/webapp/search/app/controllers/search.controller.js`
2. Add the following code block inside the `SearchController` function:
```javascript theme={"dark"}
$scope.advancedBox = {
showAdvanced: false,
toggleAdvanced: function() {
$scope.advancedBox.showAdvanced = !$scope.advancedBox.showAdvanced;
}
};
```
3. Open `../src/main/webapp/views/partials/header.tpl.html`
4. Replace the `` element with the code block below. The original `` tag may span multiple lines and include nested elements such as `` and/or ``. You must replace the entire `` tag with the following code block:
**Note**: You must also update the `` and `` tags to point to fields in your data set. When using the `` tag for searching within field values you **must** use an untokenized field.
```javascript theme={"dark"}
Advanced Search
```
5. Replace the `` tags in any HTML files that reference `header.tpl.html` file with an `` tag.
1.Replace this line: ``
2.With this line: ``
6. Add the following code block to `../src/main/webapp/styles/includes/custom.less`:
**Note**: You may need to update the `color: rgb(255,255,255)` attribute in the `toggle` class below in order for the `Advanced Search...` text to be visible in the header.
```javascript theme={"dark"}
.tk-advanced-search {
top: -5px;
.tk-advanced-search .tk-advanced-search-input {
-webkit-box-align: center;
-ms-flex-align: center;
align-items: center;
}
.toggle {
color: rgb(255,255,255);
font-size: 0.9em;
text-decoration: underline;
float: right;
margin-top: 2px;
font-style: italic;
}
.tk-popover {
background: #fff;
&:before, &:after {
display: none;
}
.close {
float: right;
margin: -12px -8px 0 0;
}
select {
margin-bottom: 0;
margin-top: 0;
}
}
}
.tk-advanced-search .tk-advanced-search-input .entry,
.tk-advanced-search .tk-advanced-search-input .field-select,
.tk-advanced-search .tk-advanced-search-input .tk-widget-date-range .tk-from-date {
margin-right: .5em;
}
.tk-widget-date-range .tk-from-date, .tk-widget-date-range .tk-to-date {
width: 48%;
margin:0;
}
.tk-widget-date-range .tk-to-date .tk-stl-datetimepicker {
right:-40%;
}
.tk-widget-date-range .tk-from-date .tk-stl-datetimepicker {
left: -40%;
}
.tk-advanced-search-input-text .entry {
width:29.5%;
margin-right: .8em!important;
}
.tk-advanced-search .tk-popover {
.tk-advanced-search-input {
clear:both;
width: 100%;
max-width: 100%;
margin:10px 0 0;
input {
padding-left: 1em;
}
.entry {
input {
width: 100%;
margin:0;
margin-top: 2px;
display: inline-block!important;
}
}
}
select {
width: 28%;
max-width: 150px;
height: 38px;
}
.tk-widget-date-range {
label {
display: none;
}
input {
margin-bottom: 0;
}
}
}
```
7. Hard refresh the search UI in your browser. There will now be an `Advanced Search...` link under the search box in the header. Click this link to bring up the Advanced Search dialog box.
The App Studio Workflow module provides out of the box processors to manipulate queries and responses from the underlying search engine, as well as an SDK to write your own Java processors.
## Implementing processors
You need to make some configuration changes to set up processors on your platforms. There are two ways. The simplest is directly on the platform config file, when the processor requires no arguments. For more complex processors that take input arguments there are additional steps.
### Query Processor
**Example:**
Add the user name to the query filtering on the ‘username’ field. Get the username either from the query payload itself or from the security provider.
*src/main/conf/platforms/fusion/data.conf*
```java theme={"dark"}
query-profile: my-profile
workflow: twigkit.client.processor.query.AddUser
...
```
*src/main/java/twigkit/client/processor/query/AddUser.java*
```java theme={"dark"}
package twigkit.client.processor.query;
import com.google.inject.Inject;
import org.slf4j.Logger;
import org.slf4j.LoggerFactory;
import twigkit.model.Filter;
import twigkit.model.Query;
import twigkit.model.Value;
import twigkit.processor.QueryProcessor;
import twigkit.security.SecurityProvider;
public class AddUser extends QueryProcessor {
private static final Logger logger = LoggerFactory.getLogger(AddUser.class);
@Inject
private SecurityProvider securityProvider;
@Override
public Query change(Query payload) {
if (payload != null) {
Filter userFilter = new Filter();
userFilter.setField("user");
Value user = new Value();
if (securityProvider != null) {
if (securityProvider.getUser() != null) {
user.setActual(securityProvider.getUser().getName());
userFilter.setValue(user);
payload.addFilter(userFilter);
} else {
logger.error("No user retrieved from " + securityProvider.getClass().getName());
}
} else if (payload.getUser() != null) {
user.setActual(payload.getUser().getName());
payload.addFilter(userFilter);
} else {
logger.error("No SecurityProvider provided and no user on the query!");
}
}
return payload;
}
}
```
### Response processor with configuration
**Example:**
If the response has no results send the query again to a different platform.
*src/main/conf/platforms/fusion/fusion.conf*
```java theme={"dark"}
requestHandler: /select
query-profile: my-profile
workflow: processors.response.fuzzy-search
```
*src/main/conf/platforms/fusion/fuzzy.conf*
```java theme={"dark"}
requestHandler: /spell
```
*src/main/conf/processors/response/fuzzy-search.conf*
```java theme={"dark"}
name: twigkit.client.processor.response.FuzzySearch
fuzzy-platform: platforms.fusion.fuzzy
```
*src/main/java/twigkit/client/processor/response/FuzzySearch.java*
```java theme={"dark"}
package twigkit.client.processor.response;
import com.google.inject.Inject;
import org.slf4j.Logger;
import org.slf4j.LoggerFactory;
import twigkit.conf.ConfiguredPlatformProvider;
import twigkit.model.Query;
import twigkit.model.Response;
import twigkit.model.messages.Message;
import twigkit.platform.Platform;
import twigkit.processor.ResponseProcessor;
import java.util.ArrayList;
import java.util.List;
public class FuzzySearch extends ResponseProcessor {
private static final Logger logger = LoggerFactory.getLogger(FuzzySearch.class);
@Inject
private ConfiguredPlatformProvider platformProvider;
@Override
public Response change(Response response) {
String fuzzyPlatformId = getParameterStringValue("fuzzy-platform");
Platform fuzzyPlatform = platformProvider.get(fuzzyPlatformId);
if (response.getHits().getActual() > 0){
return response;
} else {
Query query = response.getQuery();
Response fuzzyResponse = fuzzyPlatform.search(query);
String queryString = query.getValue().getActualAsString();
Message fuzzyMessage = new Message();
fuzzyMessage.setType("fuzzy-results");
fuzzyMessage.setValue("No results found for the term "+queryString+". Returning results with similar words.");
List messages = new ArrayList();
messages.add(fuzzyMessage);
fuzzyResponse.setMessages(messages);
return fuzzyResponse;
}
}
}
```
App Studio is able to leverage the Solr Highlighting component to visually distinguish any hits in a search result. There are a number of parameters that can be included in any Solr queries where highlighting should take place. These parameters can be added either in an App Studio `` tag, or in a Fusion query pipeline.
App Studio also allows for custom styling of any highlighted hits, which is covered at the end of this page.
## How to Configure Solr Highlighting in App Studio
1. Open any HTML page that uses a `` tag where highlighting should take place.
2. Modify the `` tag to include the required `hl.fl` parameter (a complete list of optional parameters can be found [here](https://solr.apache.org/guide/solr/latest/query-guide/highlighting.html)):\
If not using App Studio Enterprise, an additional `hl` parameter must be included and set to `true` for highlighting to work. App Studio Enterprise sets this parameter to true by default in `../src/main/resources/conf/platforms/fusion/fusion.conf` (via `highlighting: true`).
```html theme={"dark"}
```
| | | |
| --------------------------------------------------------- | --------------- | -------------------------------------------------------------- |
| Parameter Name | Parameter Value | Description |
| **hl.fl** | description\_t | comma separated list of fields where highlighting should occur |
| **hl** (only required if not using App Studio Enterprise) | true | Boolean flag for whether or not highlighting should occur |
3. Refresh the search UI in your browser and any hits will appear highlighted.
NOTE: you must have the field(s) specified in the `hl.fl` parameter above displayed using a `` on the HTML page.
4. See the Styling Highlighted Hits section below for steps to add custom styling to search hits.
## How to Configure Solr Highlighting in a Fusion Query Pipeline
1. In the Query Workbench, add or modify an existing Additional Query Parameters stage.
2. Add the following required parameters (a full list of optional parameters can be found [here](https://solr.apache.org/guide/solr/latest/query-guide/highlighting.html)):\
If not using App Studio Enterprise, an additional `hl` parameter must be included and set to `true` for highlighting to work. App Studio Enterprise sets this parameter to true by default in `../src/main/resources/conf/platforms/fusion/fusion.conf` (via `highlighting: true`).
| | | |
| --------------------------------------------------------- | --------------- | -------------------------------------------------------------- |
| Parameter Name | Parameter Value | Description |
| **hl.fl** | description\_t | comma separated list of fields where highlighting should occur |
| **hl** (only required if not using App Studio Enterprise) | true | Boolean flag for whether or not highlighting should occur |
3. Save the query pipeline, and return to your search application.
4. Run a new search that utilizes the query pipeline modified in step 2 and any hits will appear highlighted.
NOTE: you must have the field(s) specified in the `hl.fl` parameter above displayed using a `` on the HTML page.
5. See the Styling Highlighted Hits section below for steps to add custom styling to search hits.
## Styling Highlighted Hits
1. Add the following CSS in order to add custom styling to Solr highlighting:
1. If using App Studio Enterprise, this should go in `../src/main/webapp/styles/includes/custom.less`
2. Any custom CSS can be used in place of the example attributes below.
```css theme={"dark"}
.result {
em {
background-color: yellow;
font-weight: bold;
font-style: normal;
}
}
```
The `search:result` and `search:field` tags configure which fields are displayed with each individual search result. A field can be styled as the title or description, and any additional fields can have a variety of styles.
```xml theme={"dark"}
```
When using the Appkit Social module, an Appkit application can save social data (comments, bookmarks, and saved search queries) for logged in users.
You can store the social data in a Fusion collection, have the application save the data in an in-memory database, the contents of which are lost when the application restarts, or configure Appkit to persist social data to a database that uses disk storage.
## Requirements
* Any JDBC-compliant relational database (such as Oracle, MySQL, or SQL Server) or a Fusion deployment
* Network access from the Appkit application to the relational database or to Fusion
The database doesn’t have to be empty because Appkit prefixes all of its tables with a `twigkit` identifier. But for simplicity, we recommend using a separate schema, because you probably won’t must join Appkit tables with tables in other schemas.
## Persist data in a relational database
Perform the tasks in this section to persist Appkit social data in a relational database.
### Overview of procedure
To configure a database for persistence on disk, perform these steps, which are explained in more detail below:
1. Declare a Maven POM dependency in `pom.xml` to specify the database for storing the metadata that the Social module collects.
2. Configure a `persistence.xml` file with the appropriate elements, including those for database connections.
3. If necessary, perform other steps as required for specific databases.
The sections that follow describe these steps in more detail for the default [Derby database](#use-derby) and for [other databases](#database-specific-setup-instructions).
### Use Derby
#### Declare a POM dependency
To persist social data in a disk-based database, declare a POM dependency in the file `pom.xml`, which is located at the root level of a project.
By default, the Appkit Social module uses the lightweight, in-memory Derby database to persist social data, as described in this POM dependency in `pom.xml`:
```xml theme={"dark"}
twigkittwigkit.social.provider.db.derby.memory${project.parent.version}
```
If `pom.xml` does not contain the dependency for Derby, then the app project has not been modified to support the Social module. Perform those steps before proceeding.
To persist social metadata in a disk-based Derby database, declare this POM dependency:
```xml theme={"dark"}
twigkittwigkit.social.db.provider.derby${project.parent.version}
```
#### Create and configure persistence.xml
You will must create and configure a `persistence.xml` file with the appropriate elements, including those for database connections.
Create the `persistence.xml` file here:\
`src/main/resources/META-INF/persistence.xml`
#### Specify the type of Hibernate ID generator mappings
Hibernate ID generator mappings changed in Hibernate 5. Ensure use of the correct mappings as follows:
* **Apps created with versions of Appkit that precede version 4.2.**
Ensure that both pre- and post-Hibernate 5 IDs are generated using the old mapping. Add this property to the `persistence.xml` file:
```xml wrap theme={"dark"}
```
* **Apps created with Appkit 4.2 or later.**
Apps can use new ID generator mappings. Add this property to the `persistence.xml` file:
```xml wrap theme={"dark"}
```
#### Specify the Derby system directory
You can specify the Derby system directory, which is the directory that will contain the social database, by adding this flag to your Java options:
```bash theme={"dark"}
-Dderby.system.home=*_/my/derby/directory_*
```
If the system directory that you specify with `derby.system.home` does not exist at startup, Derby creates the directory automatically.
### Use a different relational database
You can configure Appkit to persist social data in an on-disk JDBC-compliant relational database other than Derby (such as Oracle, MySQL, or SQL Server).
Other pre-configured versions are also available, including:
```bash theme={"dark"}
db.mysql
db.oracle
db.sqlserver
```
#### Declare the POM dependency
To persist social metadata in a JDBC-compliant relational database, change the POM dependency to:
**MySQL:**
```xml theme={"dark"}
twigkittwigkit.social.provider.db.mysql${project.parent.version}
```
**Oracle:**
```xml theme={"dark"}
twigkittwigkit.social.provider.db.oracle${project.parent.version}
```
**SQL Server:**
```xml theme={"dark"}
twigkittwigkit.social.provider.db.sqlserver${project.parent.version}
```
#### Create and configure persistence.xml
You will must create and configure a `persistence.xml` file with the appropriate elements, including those for database connections.
Create the `persistence.xml` file here:\
`src/main/resources/META-INF/persistence.xml`
#### Specify the type of Hibernate ID generator mappings
Hibernate ID generator mappings changed in Hibernate 5. Ensure use of the correct mappings as follows:
* **Apps created with versions of Appkit that precede version 4.2.**
Ensure that both pre- and post-Hibernate 5 IDs are generated using the old mapping. Add this property to the `persistence.xml` file:
```xml wrap theme={"dark"}
```
* **Apps created with Appkit 4.2 or later.**
Apps can use new ID generator mappings. Add this property to the `persistence.xml` file:
```xml wrap theme={"dark"}
```
## Persist Social module data in Fusion
Perform the tasks in this section to persist Appkit Social module data in Fusion.
1. Configure Fusion.
2. Enable social features.
## Troubleshooting database configuration
Use these tips to troubleshoot problems with database configuration.
### Connection issues
Many databases require the application to manage the connections, refreshing them and maintaining enough open connections to service the load on the database. In some cases the default connection management provided is inadequate for production setups.
**If you notice bad performance, connections going stale, and associated errors (usually intermittently) the default connection pooling is probably inadequate for your environment**.
To remedy this situation you can use a third-party connection pooling technology. We recommend 'C3P0', which can be configured with these simple steps:
1. Add the dependency for Hibernate c3p0 to the `pom.xml`:
```xml theme={"dark"}
org.hibernatehibernate-c3p0X.X.X.Final
```
The version of Hibernate c3p0 you should use depends on the version of Appkit you are using. To begin with, try Hibernate version 4.1.7.Final (legacy) or 5.2.2.Final.
2. Add the configuration for C3P0 to the `persistence.xml` file:
```xml theme={"dark"}
```
The settings above should be adequate for a standard Appkit application using the Social module, but they can be adjusted as desired.
You can set up social comments, bookmarks, and saved searches so that they persist to a database.
When using the Appkit Social module, the Appkit application has been designed to save comments, bookmarks, and saved searches against logged in users. By default, the application uses an in memory database, the contents of which is lost on application restart.
To persist comments, bookmarks, and searches, we can set this up to work with any relational JDBC-compliant database (such as Oracle or MySQL).
### Requirements
* Any relational JDBC-compliant database (such as Oracle or MySQL).
* Network access from the Appkit application to the relational database.
This database doesn’t have to be empty because we prefix all of our tables with a `twigkit` identifier, but for simplicity we would prefer having our own schema since you probably won’t need to join these tables with other schemas.
### Database specific setup instructions
Which database is used for storing the metadata collected using the Social module is controlled via POM dependencies. By default a lightweight, in-memory Derby database is used, as per the following `pom.xml` dependency:
```xml theme={"dark"}
twigkittwigkit.social.provider.db.derby.memory${project.parent.version}
```
To use a disk-based version of the same (persisting social metadata between restarts) change the above to:
```xml theme={"dark"}
twigkittwigkit.social.db.provider.derby${project.parent.version}
```
You can specify the Derby system directory, which is the directory that will contain the social database, by adding the following flag to your Java options:
```java theme={"dark"}
-Dderby.system.home=/my/derby/directory
```
If the system directory that you specify with `derby.system.home` does not exist at startup, Derby creates the directory automatically.
You will need to configure a `persistence.xml` file with the appropriate connection strings etc.
Other pre-configured versions are also available, including:
```bash theme={"dark"}
db.mysql
db.oracle
db.sqlserver
```
This file should be created at:\
`src/main/resources/META-INF/persistence.xml`
#### ID generator mappings in the persistence.xml
Regardless of which persistence.xml you use, please ensure the following property is added to the persistence.xml file:
```xml theme={"dark"}
```
This will ensure both pre- and post-Hibernate 5 IDs continue to be generated using the same mapping.
### Troubleshooting database configuration
#### Connection issues
Many databases require the application to manage the connections, refreshing them and maintaining enough open connections to service the load on the database. In some cases the default connection management provided is inadequate for production setups.
**If you notice bad performance, connections going stale, and associated errors (usually intermittently) the default connection pooling is probably inadequate for your environment**.
To remedy this situation you can use a third-party connection pooling technology. We recommend 'C3P0', which can be configured with the following simple steps:
1. Add the dependency for Hibernate c3p0 to the **pom.xml**:
```xml theme={"dark"}
org.hibernatehibernate-c3p0X.X.X.Final
```
The version of Hibernate c3p0 you should use depends on the version of Appkit you are using. To begin with try version 4.1.7.Final (legacy) or 5.2.2.Final.
2. Add the configuration for C3P0 to the **persistence.xml**:
```xml theme={"dark"}
```
The settings above should be adequate for a standard Appkit application using the Social module, but they can be adjusted as desired.
App Studio can be served over HTTPS using SSL encryption. You can use the default keystore for development and testing, or use your own keystore for production. Then, invoke the App Studio startup script using the SSL parameters.
## SSL keystore
We include a keystore file with a default self-signed key for development and testing.
For proper security in a production environment, import your own keystore into the `keystore.jks` file, or copy it to a new file. If you copy it to a new file, use the `-Dtwigkit.keystore.file` (described below) to specify its location.
## SSL parameters
To enable SSL, you specify the following parameters on the command line when invoking the startup script:
| | | |
| ----------------------------- | ------------------------------------------------------------------- | -------------- |
| Parameter | Description | Default |
| `-Dtwigkit.ssl=true` | Enable SSL. | `false` |
| `-Dtwigkit.https.port` | Set the port. | `8765` |
| `-Dtwigkit.keystore.file` | The keystore path/filename, relative to the `app-studio` directory. | `keystore.jks` |
| `-Dtwigkit.keystore.password` | The keystore password. | `p4ssw0rd` |
| `-Dtwigkit.keystore.alias` | The name of the key in the keystore to be used. | `default-key` |
The most important tags in every page template are the first three, which configure how App Studio connects to Fusion:
* Define which provider to use (the ["search:platform" tag](#the-search:platform-tag)).
* Create a query from the URL, or any parameters you explicitly declare (the ["search:query" tag](#the-search:query-tag)).
* Send the query to the platform and obtain a response (the ["search:response" tag](#the-search:response-tag)).
Below is an example from the default template (located at `app/views/search.html` for version 4.0):
```xml wrap theme={"dark"}
```
### The `search:platform` tag
The `search:platform` tag specifies the endpoint where App Studio obtains its data, pointing to a specific platform configuration endpoint.
In this case we declare a data provider (platform) for a particular Fusion collection and set of parameters to search through an index.
```xml wrap theme={"dark"}
```
### The `search:query` tag
The `search:query` tag constructs an App Studio query object. You can choose to build a query from scratch by passing in the parameters you want or you can have it automatically created from the page URL.
Here is how you build a query using all query string parameters, and default to 12 results per page:
```xml wrap theme={"dark"}
```
If you did not want the user to be able to specify results per page you would simply omit that parameter when building a query from the URL:
```xml wrap theme={"dark"}
```
### The `search:response` tag
The `search:response` tag brings the platform and the query together.
In the example below we refer to the previously-defined platform and query by variable name:
```xml theme={"dark"}
```
The Appkit ‘Cookie Cracker’ authentication provider allows authentication against an endpoint which implements the Appkit cookie cracking endpoint protocol. This allows single sign on via a cookie value set by a 'third party' service prior to entering the Appkit application.
## 1 Add the security provider dependency
Authentication against the cookie cracker requires the cookie cracker module. To enable this module, first remove any existing security provider dependency from the `pom.xml` file under the root of the project, and then add this within the `dependencies` tag:
```xml theme={"dark"}
twigkittwigkit.security.provider.cookie-cracker${project.parent.version}
```
Because this module packages all Spring configuration, any `spring-security.xml` configuration file should be removed for simplicity.
## 2 Configure the cookie cracking endpoint
Configure these parameters in `conf/security/cookie_cracking.conf` to specify the endpoint URL, and cookies to pass to the cracking endpoint:
```yaml theme={"dark"}
url: http://localhost:8080/twigkit/services/gsa/auth
cookies: twigkit-token
domain: localhost
```
* `url` is the URL of the cookie cracking endpoint that acts as an authentication provider.
* `cookies` specifies those cookies to pass through to the cookie cracking endpoint for inspection.
* `domain` specifies a domain to set on the cookies listed (optional except when the cookie cracking endpoint exists on a separate domain to the Appkit application, in which case it is required).
The current version of App Studio creates a single-page search application that you can further customize through the built-in code editor.
## Prerequisites
The instructions in this topic assume that you have a running instance of Fusion Server, with one or more collections of indexed data and at least one query profile.
## How to create a new Web app
1. In the Fusion workspace, navigate to **App Studio** > **Build New UI**.
2. On the **Set Query Source** page, select the query profile to use for your search UI:
3. Click **Next**.
App Studio connects to the specified collection and query profile to analyze your searchable data:
4. Click **Next**.
5. On the **Set Result Title** page, select the field to use as the title of each search result:
Optionally, you can select a **Target URL** field, which contains the URL to use as the link in each search result.
6. Click **Next**.
7. On the **Set Result Description** page, select the field to use as the description of each search result:
8. Click **Next**.
9. On the **Set Facets and Additional Fields** page, select one or more multi-valued fields to use as facets:
In some cases, facet fields are not selectable in the wizard. In this case, you can define facets later using markup.
Optionally:
* Select **Enable search within facet** to add a search box for searching the facet field names to the Facets pane.
* Enter a user-friendly label for each facet field, such as "Genre" instead of "genres\_ss".
* Select **Include in results as Additional Field** to display the values of the facet fields within each search result.
10. Click **Next**.
11. On the **Customize UI** page, enter a title and select a color theme:
12. Click **Save and Launch UI**.
A preview of your search interface and data appear:
It can take about a minute for the preview to appear. If the preview does not appear, refresh the browser tab.
After you have created a search UI, you can open it from the Fusion workspace by navigating to the **App Studio** menu and selecting the search UI:
To help protect against Cross-Site Request Forgery (CSRF) attacks on social web services, App Studio can ensure that all requests are tokenized. That is, each request is provided with a randomized Appkit request token.
**To enable protection against CSRF in your application:**
1. If it does not already exist, create a new file named `csrf.conf` and place it in `src/main/resources/conf/security`.
2. In that file, set the property `enabled` to `true`. This tokenizes the requests.
3. By default, the time-to-live of the Appkit request token is 60 minutes. You can change this by setting the property `duration` to some other value; for example, `duration: 30`. Responses received without a request token or with a request token has expired are rejected.
This configuration enables protection against CSRF attacks and sets the time-to-live of the request token to 30 minutes:
```yaml theme={"dark"}
enabled: true
duration: 30
```
You can use App Studio to deploy a search app in Fusion Server. You develop your search interface, and then publish the search app to Fusion’s Webapps service.
This deployment type leverages your existing production environment, requiring no dedicated nodes for App Studio. However, you might need to deploy additional Fusion nodes if you anticipate significant traffic to your search interface.
## UI deployment overview
Here is an overview of the steps:
1. Develop your search interface.
2. Publish your UI to Fusion Server using the instructions below.
Your webapp then becomes accessible at `http://localhost:8764/webapps/`.
## Publishing a search interface to Fusion Server
These steps publish your search interface to a Fusion instance (and its cluster) where the App Studio project already exists.
1. In the Fusion workspace, navigate to **App Studio** and select your search interface.
The configuration panel appears.
2. Next to **Publish Status**, click the toggle:
3. Click **Save**.
The interface is only published after you click **Save**, which also enables the **View Published UI** button.
4. Click **View Published UI** to launch a new window where you can view the interface as an end user.
Your published interface is available at `http://localhost:8764/webapps/#/search`.
## Migrating a search interface to other Fusion hosts
If you have published your search interface on one Fusion Host in a cluster, then it is published throughout the cluster.
There are two ways to migrate a search interface to a different Fusion cluster:
| Export and import the Fusion app | Download and upload the WAR (`.war`) file |
| ------------------------------------------------------------------------------------------------------------------------------------------------------------------------------------------------------- | --------------------------------------------------------------------------------------------------------------------------------------------------------------------------------------------------------------------------------------------------------------------------------------------------------------------------------------------------------------------------------------------------------------------------------------------------- |
| This migrates all objects in the Fusion app, such as datasources, query profiles, schedules, and so on, in addition to the search interface. The search interface will be editable on the target hosts. | This migrates only the search interface. The search interface will not be editable on the target hosts. If you are uploading the file into a Fusion app other than the one in which it was created, the new Fusion app must include a query profile and data fields whose names are identical to the ones already configured in the search interface. For instructions on downloading or building a WAR file and uploading it to Fusion, see below. |
### Download or build a WAR file
You can distribute a search interface as a WAR (`.war`) file.
You can download a WAR file from the Fusion UI or create one from a downloaded project.
#### Downloading a WAR file
1. In the Fusion workspace, navigate to **App Studio** and select your search interface.
The configuration panel appears.
2. Click **Download war**:
#### Building a WAR file
A downloaded project comes with the scripts `app-studio` (for Unix) and `app-studio.bat` (for Windows) that create WAR files.
**Unix and MacOS:**
1. In a shell window, switch to your project directory:
```bash theme={"dark"}
cd /path/to/project-directory
```
2. Create application files:
```bash theme={"dark"}
./app-studio package
```
**Windows:**
1. In a terminal window, switch to your project directory:
```bash theme={"dark"}
cd \path\to\project-directory
```
2. Create application files:
```bash theme={"dark"}
app-studio.bat package
```
**Application files created:**
The script creates the following files in the `dist` directory of your project:
* `search-app-latest.x.jar`
This is an executable Java JAR file file.
* `search-app-project.zip`
Use this file to share your project with other search interface developers.
* `search-app.war`
You can upload this file to Fusion to deploy it.
### Upload the WAR file
You can upload the WAR file through the Fusion UI or the REST API.
#### Uploading with the Fusion UI
You can upload your project (as a WAR file) in the App Studio configuration panel.
If you upload the file into a Fusion app other than the one in which it was created, the new Fusion app must include a query profile and data fields whose names are identical to the ones already configured in the search interface.
1. From the App Studio menu, select your project:
The project configuration panel appears.
2. Click **Upload**.
Fusion prompts you to confirm that you want to upload a project that will delete the existing one.
3. Click **Yes, continue**.
4. Navigate to your WAR file and select it.
After the upload is complete, you can edit or publish the uploaded project.
#### Uploading with the REST API
Use the `webapps/{id}/war` endpoint of the Webapps API to upload a WAR file, as in this example:
```bash wrap theme={"dark"}
curl -u USERNAME:PASSWORD -X PUT http://localhost:8764/api/webapps/Movie_Search/war -F 'file=@movies.war'
```
## Running a dedicated node for a search interface
When deploying Fusion nodes dedicated to serving one or more search interfaces, only the following Fusion services need to run:
* `agent`
* `api`
* `log-shipper`
* `webapps`
When starting a dedicated node, you can minimize the number of running services by starting it like this.
**Unix and MacOS:**
```bash theme={"dark"}
cd fusion/latest.x/bin
./agent start
./api start
./log-shipper start
./webapps start
```
**Windows:**
```bash theme={"dark"}
cd fusion\latest.x\bin
agent.cmd start
api.cmd start
log-shipper.cmd start
webapps.cmd start
```
## Development
In building out a search application, App Studio developers use an IDE (Intellij, eclipse, VS Code), maven for server-side dependency management and its integrated jetty plugin, NPM 9.0.2 for client-side dependency management and Java 1.8 JDK.
We first will clone the repository of our project on our local system. From there we make additions and edits to the code which we then commit to the repo.
In order to test our changes in real time, we use the integrated maven jetty plugin to serve up our local application at [http://localhost:8080](http://localhost:8080) where we can see most changes made to the code in real time.
## Environment / Profile management
For each environment, we build out a profile to overlay specific parameters to this environment. See the section entitled ‘Package the web application for different runtime environments - build profiles’ here for more details:
[https://dev.twigkit.net/docs/Getting\_started/Installation/Building\_from\_source/?q=profile](https://dev.twigkit.net/docs/Getting_started/Installation/Building_from_source/?q=profile)
Example command: `mvn clean jetty:run -Dtwigkit.profile=profileName`
In App Studio apps, we can have different profiles for each environment (Dev, QA and Prod) as well as local development. These profiles contain configuration files that should overwrite the files with the corresponding names and directory locations in the main resources directory.
## Setting up a profile
Following are the files you may want to specify for a given environment in each profile:
`message.service.fusion.conf` – This config file is responsible for the configuration of the way we send signals to the Fusion endpoint. The important property here is query-profile, which we should ensure points to the query profile that manages the main collection to which we want to send signals. I.e. – if we specify a query profile that points to the myCollection collection, App Studio will send signals to the myCollection\_signals collection (if it does exist).
`platforms.fusion.fusion.conf` – This is our base Fusion platform configuration file. It manages all the configuration settings that are common amongst each Fusion platform. These settings are inherited by any config file in the platforms.fusion directory, as this file has the same name as the directory it resides in.
`platforms.fusion.data.conf` – This is our configuration file for the main platform, by default. The only required parameter is the query-profile to send these queries to. This is included in the profiles as during the course of development, there were some differences across environments in the name of this collection, so we set them individually for each environment.
The important property to note here is query-profile which tells App Studio which query profile to fire search requests against.
`security.kerberos.conf` – This is an example of a security configuration file. In this case, the file in which Kerberos security is configured. The parameters set here are referenced in our configuration of resources/spring-security.xml when the app is loaded. The main parameters to understand are service-principal and keytab-location. The service principal should be the one used when creating the keytab file. The keytab location is the location in which the keytab resides on the server that App Studio is running.
`security.security.conf` – The function of this file is to set general parameters related to security. The type parameter should be the type of security your app should use (kerberos, spring\_security, saml etc..). The password parameter is the key that is used when hashing passwords using twigcrypt utility. It is to be used in combination with a ‘secret seed’ in order to generate the hash.
`services.api.fusion.conf` – This is the main file in which the connection to the Fusion API is configured. The host, port and protocol values are all given independently. The credentials given are that of a service account that has POST rights to enable the sending of signals to Fusion.
`logback.xml` – In this file, we can add additional `` tags to print out additional logging on specific classes in the webapps or local logs. The main logging comes from the root package `twigkit`.
## Packaging and Deployment
### Packaging
To deploy our code to the server, we build and package the source code and dependencies into a WAR file using maven.
Command: `mvn clean package`
In order to package the app with the proper connection details and other configuration settings for the particular environment (dev, prod, etc..) see the section above re the profile parameter.
Command: `mvn clean package -Dtwigkit.profile=profileName`
You can watch the logs for any compilation errors. If it’s not already, rename the resulting WAR file to ROOT.war.
### Deployment
#### Create a new App Studio context in Fusion
Prerequisites:
1. Fusion is installed
2. A Fusion App is created
Execute the following command using a user who has Admin rights:
```xml wrap theme={"dark"}
curl -v -u USERNAME:PASSWORD -H 'Content-type: application/json' -X POST 'http://localhost:8764/api/apollo/apps/my-fusion-app-name/webapps' -d '{"id": "myasapp","name": "My AS App","contextPath": "/"}'
```
#### Upload the WAR to the Fusion webapps service
```xml wrap theme={"dark"}
curl -v -u USERNAME:PASSWORD -H 'Content-type: application/zip' -X PUT 'http://localhost:8764/api/apollo/apps/my-fusion-app-name/webapps/myasapp/war' --data-binary @ROOT.war
```
This will put the WAR file into the Fusion blob store, and tell the Webapps service that this is the file that should be started in the specified context.
## Troubleshooting
### Data is not appearing on the page as expected
#### Check response data
If you open your browser’s dev tools, choose the ‘Network’ tab, and look for an XHR request similar to the one shown below (starting with platforms.fusion…) you can navigate through the values being returned from Fusion.
To determine which response is which (as you may have multiple) you will need to look at the platform that populates the response, that populates the element on your page.
You can then track down the value you are looking for in here. So if looking at results, a result list iterates through the results, so we should look inside a result. In each result, there’s a set of fields and associated values.
Note that other processing may happen in between receiving the response and displaying it on the page (response processors, modifications in the HTML, security trimming, etc..)
#### Get query from webapps/servlet logs and fire it against Fusion
If the data in your response object is not as you expect, you can get the query from the App Studio logs to fire directly against the Fusion endpoint, without App Studio as a middle-man. Note that you’ll need your logger configured to print out debug logging for the twigkit class in logback.xml in your environment profile. Or if not using a profile, in the main resources directory.
``
Look in the webapps logs are under **fusion/version/var/log/webapps/**. You can sort them by date `(ls -l)` and view the latest one with the suffix of stderrout. In here you will see some entries that should follow the format of the following:
```xml wrap theme={"dark"}
08:57:41.058 DEBUG twigkit.search.solr.SolrPlatform - Searching Solr with start=0&rows=20&hl=true&q=match&facet=true&facet.field={!ex%3Dgenre_ss}genre_ss&facet.field=year_i&fl=*,score&fq={!tag%3Dgenre_ss}genre_ss:(Animation)&username=admin&session=37045658-9052-4ba4-b1d2-0221be5e2d02&spellcheck=true&spellcheck.collate=true&q.op=OR took 200 ms
```
To determine which entry is the correct one, you’ll need to check the query that populates the response you’re interested in, and match the parameters you’re setting in the tag as well as any Solr parameters being applied to the query via interaction on the page (keyword = q, facet filters = fq, etc..).
You can then go to the query workbench in Fusion and select the Published URI in the URI tab.
Remove every parameter given in this URL after ‘select?’, append the parameters from the webapps logs and put this URL into your browser. The result will be response of the query fired by App Studio, but unaltered by App Studio.
### Page is totally blank/elements look broken or strange
### Check browser console
If you open your browser’s dev tools, choose the ‘Console’ tab, you can check for any issues related to client side components. If you see the following error, you should wipe your node modules directory and reinstall them before building. Otherwise typically an error here suggests there is a problem in your Javascript code.
```xml wrap theme={"dark"}
Uncaught Error: [$injector:modulerr] Failed to instantiate module myApp due to:
Error: [$injector:modulerr] Failed to instantiate module lightning due to:
Error: [$injector:nomod] Module 'lightning' is not available! You either misspelled the module name or forgot to load it. If registering a module ensure that you specify the dependencies as the second argument.
```
Perform the following steps to reinstall the node modules.\\
1. `rm -rf node_modules package-lock.json`\\
2. `pm cache clear -f`\\
3. `npm install`
Ensure there are no errors in any of your custom javascript code.
In a downloaded project, the `bin/twigcrypt/twigcrypt.sh` utility is available to encrypt sensitive string values, such a passwords, at the command line. It uses a two-way encryption mechanism, so anywhere in the code this is used the value can be decrypted.
To encrypt a value, run the following (note the single quotes around `yourSensitiveValue`):
```bash theme={"dark"}
./twigcrypt.sh yourSecretSeed 'yourSensitiveValue'
```
This outputs an encrypted string. You must copy the whole string and paste into your configuration file.
For example, in your `src/main/resources/conf/platforms/fusion/fusion.conf` file, add:
```bash theme={"dark"}
username:jbloggs
password:Enc(ABC123==)
```
Then you must also configure the seed in the application’s security configuration, in `src/main/resources/conf/security/security.conf`:
```bash theme={"dark"}
password: yourSecretSeed
```
Wherever this configuration parameter is used, it will be decrypted back to plain text at the time it is used.
Lucidworks recommends using a randomly-generated **alphanumeric** seed (special characters can cause problems).
## Adding sensitive configuration parameters to Spring Security XML files
Two options for handling sensitive configuration parameters with Appkit and App Studio Spring Security XML files are:
* Environment variables
* Configuration parameters
### Passing environment variables
Assuming there is already a configuration file wired up for property lookup, you can use the following property using the environment variable `USER_TEST`:
```bash theme={"dark"}
my property: \#{systemEnvironment['USER_TEST']}
```
### Passing in configuration parameters
Use a system property passed at startup with `-Duser_test=myvalue`:
```bash theme={"dark"}
my property: \#{systemProperties['user_test']}
```
## App Studio
You can get started with App Studio in just minutes when you have a Fusion app that includes some indexed data.
App Studio creates a single-page search application that you can further customize through the built-in markup editor.
If you have created apps in prior versions of App Studio or with prior versions of Appkit, you can upgrade those apps to use the latest version of Appkit.
## App Studio 4.0
You can get started with App Studio in just minutes by expanding the zip file, editing a few basic configuration parameters, and running the startup script. The application runs in an embedded Jetty servlet, by default on port 8080.
App Studio creates a single-page search application that you can further customize through the built-in markup editor.
App Studio has two scripts for startup and shutdown in the root directory of an App Studio project (`app-studio`):
* `app-studio.sh`. A Bash script for Linux and macOS
* `app-studio.bat`. A batch file for Windows
You also use these scripts to get the status of an App Studio server.
**Linux and macOS:**
```bash theme={"dark"}
./app-studio.sh status
```
**Windows:**
```bash theme={"dark"}
app-studio.sh status
```
In the case of no search results, the `search:no-results` tag displays a default message:
```xml theme={"dark"}
```
The header of the default view is a partial file that is included with the `layout:include` tag:
```xml wrap theme={"dark"}
```
The `header.tpl.html` file, in turn, contains a number of `layout` tags, plus the important `search:box` tag.
## Sidebar with facet list
The sidebar is rendered using the simple `layout:sidebar` tag. Within the sidebar, the `search:facet-list`, and `search:facet` tags contain the parameters that configure the facet fields and their display.
```xml wrap theme={"dark"}
```
### 1 Add the Fusion Signals dependency
Signals tracking in Fusion requires the Fusion Signals module. To enable this module, insert this within the `dependencies` tag of your `pom.xml`:
```xml theme={"dark"}
twigkittwigkit.activity.fusion-signals${project.parent.version}
```
### 2 Add fusion.conf to activity tracking resources
To access this module when Appkit starts up, create a `fusion.conf` file in `resources/conf/activity/tracking/`. In that file, configure the `signals-endpoint`. This is the REST-API endpoint that will ingest signal data into a signals collection. For example:
```yaml wrap theme={"dark"}
signals-endpoint: http://localhost:8764/api/apollo/signals/image_catalog
signals-index-pipeline:
commit: true
async: false
platform-config: platforms.fusion
```
Here, `image_catalog` is the name of a primary collection that will be used to generate an auxiliary collection consisting of activity tracking data.
When accessing Fusion using a service account, the parameter `platform-config` is required. This is the name of the Fusion platform configuration that includes the necessary parameters required for basic authentication. For example, if the configuration file for the Fusion platform, `fusion.conf` is stored in `resources/conf/platforms/fusion/` then the `platform-config` parameter would be set as shown above. If, however, the configuration file for the Fusion platform was named `myFusion.conf` and again stored in `resources/conf/platforms/fusion/`, then the `platform-config` parameter would be `platforms.fusion.myFusion`. For quick reference, the platform configuration should contain these parameters to enable basic authentication:
```yaml theme={"dark"}
impersonate: true
userName: joebloggs
password: Enc()
```
For more information about how authentication is used when accessing the Fusion Signals endpoint, see the [Authentication](/docs/4/app-studio/concepts/overview/signals#authentication) section.
Several optional parameters are also provided as shown. The first, `signals-index-pipeline`, can be used to define an index pipeline that will to be used to convert the raw JSON signal data into a set of Solr documents. If no pipeline is defined, then the preconfigured `_signals_ingest` pipeline will be used. Both the remaining two parameters, `commit` and `async`, are booleans. If `commit` is set to true, a Solr commit will occur at the end of indexing allowing a persistent record of the activity to be kept. If `async` is set to true, signals will be indexed in asynchronous mode. In this mode, an autoCommit is issued with each signal and failures are not reported. The default is false.
## Version 4.1
App Studio is licensed and installed with Fusion Server.
## Version 4.0
You can get started with App Studio in just minutes by expanding the zip file, running the startup script and following the steps of the setup wizard. The application runs in an embedded application server, by default on port 8080.
### Licensing
App Studio comes with a trial license file, located at `app-studio/twigkit.lic`. This trial license is valid for 30 days. Contact Lucidworks to obtain a commercial license.
To install a commercial license, copy the new license file to `app-studio/twigkit.lic`, overwriting the trial license. Commercial licenses support multiple instances of App Studio. Lucidworks issues a separate license for each App Studio instance.
### Requirements
App Studio is a standalone application with the following requirements:
* [Oracle Java JDK](https://www.oracle.com/technetwork/java/javase/downloads/index.html) 1.8 or later
* A running instance of Fusion Server, with one or more collections of indexed data
### Installation
1. Download App Studio.
2. Copy the App Studio zip file to any convenient path.
3. Expand the archive: `unzip app-studio-latest.x-zip-package.zip`
This creates an `app-studio` directory.
## What is next
* See Startup and Shutdown for information about using the App Studio scripts.
* See Create a New Web App to learn how to create your first search app.
The `layout` tags determine the layout and structure of the page. Using these ensures that the application will work equally well on desktops, mobiles and other devices (like high-resolution screens).
App Studio uses a grid layout to control how large sections appear on the screen, and how they behave when the visible area or resolution changes.
A simple grid:
```xml theme={"dark"}
Narrow section on large screens.
Wide on large screens.
```
In the content area, `layout` tags are used again to construct the grid layout. For brevity, we will omit those from the code samples below.
The `search:result-list` tag lays out the grid of search results:
```xml wrap theme={"dark"}
...
```
This topic explains how to build an app from source for deployment as a standalone app.
Before building and deploying an app, check the software requirements.
Package your app as a standalone app for deployment to a production server. The standalone app embeds an Apache Tomcat servlet container.
**Unix or MacOS:**
```bash theme={"dark"}
./app-studio dist
```
**Windows:**
```bash theme={"dark"}
app-studio.bat dist
```
### Standalone app directory
**Unix or MacOS:**
The standalone app for deployment is in the `_app-name_/search-app-standalone` directory.
```bash theme={"dark"}
search-app-standalone/
README.md
app/
build/
config/
keystore.jks
lib
search-app-start.bat
search-app-stop.bat
search-app-stop.ps1
search-app.sh
```
**Windows:**
The standalone app for deployment is in the `_app-name_\search-app-standalone` directory.
```bash theme={"dark"}
search-app-standalone\
README.md
app\
build\
config\
keystore.jks
lib
search-app-start.bat
search-app-stop.bat
search-app-stop.ps1
search-app.sh
```
When using the Appkit Social module, an Appkit application can save social data (comments, bookmarks, and saved search queries) for logged in users. By default, the application saves the data in an in-memory database, the contents of which are lost when the application restarts.
You can configure Appkit to persist social data to a database that uses disk storage.
## Requirements
* Any JDBC-compliant relational database (such as Oracle, MySQL, or SQL Server) or a Fusion deployment
* Network access from the Appkit application to the relational database or to Fusion
The database doesn’t have to be empty because Appkit prefixes all of its tables with a `twigkit` identifier. But for simplicity, we recommend using a separate schema, because you probably won’t need to join Appkit tables with tables in other schemas.
## Persist data in a relational database
Perform the tasks in this section to persist Appkit social data in a relational database.
### Overview of procedure
To configure a database for persistence on disk, perform the following steps, which are explained in more detail below:
1. Declare a Maven POM dependency in `pom.xml` to specify the database for storing the metadata that the Social module collects.
2. Configure a `persistence.xml` file with the appropriate elements, including those for database connections.
3. If necessary, perform other steps as required for specific databases.
The sections that follow describe these steps in more detail for the default [Derby database](#use-derby) and for [other databases](#use-a-different-relational-database).
### Use Derby
#### Declare a POM dependency
To persist social data in a disk-based database, declare a POM dependency in the file `pom.xml`, which is located at the root level of a project.
By default, the Appkit Social module uses the lightweight, in-memory Derby database to persist social data, as described in the following POM dependency in `pom.xml`:
```xml theme={"dark"}
twigkittwigkit.social.provider.db.sqlserver.memory${project.parent.version}
```
If `pom.xml` does not contain the dependency for Derby, then the app project has not been modified to support the Social module. Perform those steps before proceeding.
To persist social metadata in a disk-based Derby database, declare this POM dependency:
```xml theme={"dark"}
twigkittwigkit.social.db.provider.sqlserver${project.parent.version}
```
#### Create and configure persistence.xml
You will need to create and configure a `persistence.xml` file with the appropriate elements, including those for database connections.
Create the `persistence.xml` file here:\
`src/main/resources/META-INF/persistence.xml`
#### Specify the type of Hibernate ID generator mappings
Hibernate ID generator mappings changed in Hibernate 5. Ensure use of the correct mappings as follows:
* **Apps created with versions of Appkit that precede version 4.2.**
Ensure that both pre- and post-Hibernate 5 IDs are generated using the old mapping. Add this property to the `persistence.xml` file:
```xml wrap theme={"dark"}
```
* **Apps created with Appkit 4.2 or later.**
Apps can use new ID generator mappings. Add this property to the `persistence.xml` file:
```xml wrap theme={"dark"}
```
#### Specify the Derby system directory
You can specify the Derby system directory, which is the directory that will contain the social database, by adding this flag to your Java options:
```java theme={"dark"}
-Dderby.system.home=*_/my/derby/directory_*
```
If the system directory that you specify with `derby.system.home` does not exist at startup, Derby creates the directory automatically.
### Use a different relational database
You can configure Appkit to persist social data in an on-disk JDBC-compliant relational database other than Derby (such as Oracle, MySQL, or SQL Server).
Other pre-configured versions are also available, including:
```bash theme={"dark"}
db.mysql
db.oracle
db.sqlserver
```
#### Declare the POM dependency
To persist social metadata in a disk-based Derby database, change the POM dependency to:
**MySQL:**
```xml theme={"dark"}
twigkittwigkit.social.db.provider.sqlserver${project.parent.version}
```
**Oracle:**
```xml theme={"dark"}
twigkittwigkit.social.db.provider.sqlserver${project.parent.version}
```
**SQL Server:**
```xml theme={"dark"}
twigkittwigkit.social.db.provider.sqlserver${project.parent.version}
```
#### Create and configure persistence.xml
You will need to create and configure a `persistence.xml` file with the appropriate elements, including those for database connections.
Create the `persistence.xml` file here:\
`src/main/resources/META-INF/persistence.xml`
#### Specify the type of Hibernate ID generator mappings
Hibernate ID generator mappings changed in Hibernate 5. Ensure use of the correct mappings as follows:
* **Apps created with versions of Appkit that precede version 4.2.**
Ensure that both pre- and post-Hibernate 5 IDs are generated using the old mapping. Add this property to the `persistence.xml` file:
```xml wrap theme={"dark"}
```
* **Apps created with Appkit 4.2 or later.**
Apps can use new ID generator mappings. Add this property to the `persistence.xml` file:
```xml wrap theme={"dark"}
```
## Troubleshooting database configuration
Use these tips to troubleshoot problems with database configuration.
### Connection issues
Many databases require the application to manage the connections, refreshing them and maintaining enough open connections to service the load on the database. In some cases the default connection management provided is inadequate for production setups.
**If you notice bad performance, connections going stale, and associated errors (usually intermittently) the default connection pooling is probably inadequate for your environment**.
To remedy this situation you can use a third-party connection pooling technology. We recommend 'C3P0', which can be configured with the following simple steps:
1. Add the dependency for Hibernate c3p0 to the **pom.xml**:
```xml theme={"dark"}
org.hibernatehibernate-c3p0X.X.X.Final
```
The version of Hibernate c3p0 you should use depends on the version of Appkit you are using. To begin with try version 4.1.7.Final (legacy) or 5.2.2.Final.
2. Add the configuration for C3P0 to the **persistence.xml**:
```xml theme={"dark"}
```
The settings above should be adequate for a standard Appkit application using the Social module, but they can be adjusted as desired.
By default, the alerting module produces "in-memory" alerts, meaning that any alerts registered will only be sent for the duration of the application lifecycle.
For static configuration based alerts this is not an issue as they are registered again on application startup. However for alerts configured by a user with the 'saved query alert form' all alerts will be lost when the application is shut down or redeployed. Therefore on a production system, it makes sense to configure persistence of alerts using a database. This is simple to configure with these steps.
### 1: Configure your alerting module database
1. Add this dependency to your `pom.xml`:
```xml theme={"dark"}
twigkittwigkit.social.runtime${project.parent.version}twigkittwigkit.alert.db.derby.memory${project.parent.version}
```
2. Remove any existing reference to `twigkit.social` modules. Currently the in-memory database and MySQL are supported (`twigkit.alert.db.mysql`).
### 2: Add alerting module ORM mapping to your persistence configuration
Assuming you have configured your social datastore in a `persistence.xml` file, add this entry right after the existing `mapping-file` XML element:
```xml theme={"dark"}
META-INF/alert/orm.xml
```
### 3: Tell the Quartz scheduler how to connect to the database
Add a `quartz.properties` file to the root of your class path (typically, in `src/main/resources` when building a Maven project form source) that contains the database configuration for the Quartz scheduler.
This is a sample `quartz.properties` file with placeholder values for the database-specific parameters you must fill in. For example:
```bash theme={"dark"}
org.quartz.scheduler.instanceName = AlertScheduler
org.quartz.threadPool.threadCount = 4
org.quartz.jobStore.class = org.quartz.impl.jdbcjobstore.JobStoreTX
org.quartz.jobStore.driverDelegateClass = org.quartz.impl.jdbcjobstore.StdJDBCDelegate
org.quartz.jobStore.dataSource = AlertDataSource
org.quartz.dataSource.AlertDataSource.driver = ${javax.persistence.jdbc.driver}
org.quartz.dataSource.AlertDataSource.URL = ${javax.persistence.jdbc.url}
org.quartz.dataSource.AlertDataSource.user = ${javax.persistence.jdbc.user}
org.quartz.dataSource.AlertDataSource.password = ${javax.persistence.jdbc.password}
org.quartz.dataSource.AlertDataSource.maxConnections = 30
org.quartz.jobStore.tablePrefix = qrtz_
```
Replace the variables in curly braces on the right with their respective values from your `persistence.xml` file.
This deployment type has an embedded Tomcat server and is ready to deploy.
## Compiling a self-contained application
To compile the application, run the `app-studio` script with the `dist` target, like this:
**Unix:**
```bash theme={"dark"}
./app-studio dist
```
**Windows:**
```bash theme={"dark"}
app-studio.bat dist
```
You can find the output in the `dist` directory:
```bash theme={"dark"}
search-app-project.zip
search-app-standalone/
README.md
app/
build/
config/
keystore.jks
lib
search-app-start.bat
search-app-stop.bat
search-app-stop.ps1
search-app.sh
```
The `search-app-project.zip` is a snapshot of your project at the time you compiled the application. The `search-app-standalone/` directory is the self-contained application.
In this deployment type, your search interface runs within the Java runtime environment (JRE).
## Compiling a .jar file
A downloaded project comes with an `app-studio` script that creates a `.jar` file.
1. In a shell window, switch to your project directory:
```bash theme={"dark"}
cd /path/to/Project_Directory
```
2. Run the following command:
```bash theme={"dark"}
./app-studio package
```
The script creates the following file in the `dist` directory of your project:
`search-app-VERSION.x-y.y.y.jar`
This is your self-executing application file.
## Launching a self-executing deployment
```bash theme={"dark"}
java -jar search-app-VERSION.x-y.y.y.jar
```
Email alerts can be configured statically in `conf` files to be sent at regular intervals throughout the lifecycle of an application. Use these steps to get up and running with the Alerting module:
1. Add this dependency to your `pom.xml` file:
```xml theme={"dark"}
twigkittwigkit.alert.runtime${project.parent.version}
```
2. Set up `conf/alert/email/smtp.conf`; see below for an example configuration:
```bash theme={"dark"}
# User to log into Appkit
twigkit-user: foo
twigkit-password: bar
# User to send emails as
from: foobar@twigkit.com
password: foobar
# Override to address for all config-based alerts
to: reporting@some-alerting-domain.com
# SMTP details
mail.smtp.host: smtp.gmail.com
mail.smtp.port: 587
mail.smtp.auth: true
mail.smtp.starttls.enable: true
```
3. Set up `conf/alert/email/alerts/alerts.conf`; see below for an example configuration:
```
email-template: http://localhost:8080/email/
```
4. Add the alert `.conf` files to `conf/alert/email/alerts/my-alert-name-here.conf`; see below for an example:
```bash theme={"dark"}
to: foobar@twigkit.com
subject: New documents on brewing
query: ?q=homebrew
cron-expression: 30 * * * * ?
```
Here, the `cron-expression` defines how often to send the alert as described in this [Quartz tutorial](http://www.quartz-scheduler.org/documentation/quartz-2.3.0/tutorials/tutorial-lesson-06.html).
5. Create a JSP, in this case configured as above, on a standard Appkit application would be in `src/main/webapp/WEB-INF/pages/email.jsp` and the content would include:
```xml theme={"dark"}
<%@ page contentType="text/html" pageEncoding="UTF-8" %>
<%@ include file="/WEB-INF/tags/client/taglibs.jspf" %>
Automated alert for query ${query.value}
```
You can set up Appkit to provide user-specified email alerts in an app.
1. Add this dependency to your `pom.xml`. Remove any previous reference to `twigkit.social` modules.
```xml theme={"dark"}
twigkittwigkit.social.runtime${project.parent.version}twigkittwigkit.alert.db.derby.memory${project.parent.version}
```
2. Add a configuration file in `conf/alert/email/smtp.conf`; see below for an example configuration:
```bash theme={"dark"}
# User to log into Appkit (service account)
twigkit-user: admin
twigkit-password: password
# Email account to use to send alert emails
from: foobar@twigkit.com
password: foobar
# SMTP details
mail.smtp.host: smtp.gmail.com
mail.smtp.port: 587
mail.smtp.auth: true
mail.smtp.starttls.enable: true
```
3. Add another configuration file for the email template in `conf/alert/email/alerts/alerts.conf`; see below for an example configuration:
```bash theme={"dark"}
email-template: http://localhost:8080/email/
subject-prefix: New report for saved query
```
4. Add the saved query alert scheduling form to the search header (header.tag):
```xml theme={"dark"}
<\%-- Bookmarks --%>
<\%-- Saved Searches --%>
```
5. Create the email template JSP, in `src/main/webapp/WEB-INF/pages/email.jsp`. For example:
```html theme={"dark"}
<%@ page contentType="text/html" pageEncoding="UTF-8" %>
<%@ include file="/WEB-INF/tags/client/taglibs.jspf" %>
Automated alert for query ${query.value}
```
Note the following:
* The 'alert seen' functionality is reliant on a field in the data specifying the date the document was last updated, in this case named `updated`
* The 'to address' of the email alert will either be chosen by the user via the form (default) or can be set by using the `toAddress` attribute on the saved query alert form tag.
* Appkit includes full user impersonation, so any security trimming is applied automatically.
## Scripts
App Studio has two scripts for startup and shutdown in the root directory of an App Studio project (`app-studio`):
* `app-studio.sh`. A Bash script for Linux and macOS
* `app-studio.bat`. A batch file for Windows
You also use these scripts to build an app from source.
### Obtain usage information about the scripts
For usage information, enter:
* Linux and macOS: `./app-studio.sh -help`
* Windows: `app-studio.bat -help`
For command-specific usage information, enter:
* Linux and macOS: `./app-studio **_command_** -help`
* Windows: `app-studio.bat **_command_** -help`
Below, optional parameters are indicated by square brackets, which you do not type.
### Shutdown commands
* Linux and macOS: `./app-studio stop [-p port] [-V]`
* Windows: `app-studio.bat stop [-p port] [-V]`
### Parameters
Bold italic text is a placeholder for a value. For example, for `-m **_memory_**` you might use `-m 4g`.
| Parameter | Description |
| --------------- | ------------------------------------------------------------------------------------------ |
| `-p **_port_**` | Specify the port on which the App Studio web server will listen. The default port is 8080. |
| `-V` | Output verbose messages from the script. |
### Stopping multiple App Studio instances
You can run multiple instances of App Studio on a single host by specifying different ports for all instances on startup, at the command line, using the `-p` parameter.
When running multiple instances, also use the `-p` flag to indicate which instance of App Studio to shut down, for example:
```bash theme={"dark"}
./app-studio.sh stop -p 9000
```
## Version 4.0
| |
| ------------------------------------------------------------------------------------------------------------------ |
| Stop the server |
| `./app-studio.sh stop` Optionally: \* `-s` or `--stop-port` The port to use when issuing the `stop` command. |
| app-studio-standalone-stop.bat |
## What is next
* See Create a New Web App to learn how to create your first search app.
## Scripts
App Studio has two scripts for startup and shutdown in the root directory of an App Studio project (`app-studio`):
* `app-studio.sh`. A Bash script for Linux and macOS
* `app-studio.bat`. A batch file for Windows
You also use these scripts to build an app from source.
### Obtain usage information about the scripts
For usage information, enter:
* Linux and macOS: `./app-studio.sh -help`
* Windows: `app-studio.bat -help`
For command-specific usage information, enter:
* Linux and macOS: `./app-studio **_command_** -help`
* Windows: `app-studio.bat **_command_** -help`
Below, optional parameters are indicated by square brackets, which you do not type.
### Startup commands
* Linux and macOS: `./app-studio start [--production] [-f] [-p port] [-m memory] [-t timeout] [-V]`
* Windows: `app-studio.bat start [-f] [-p port] [-m memory] [-t timeout] [-V]`
### Parameters
Bold italic text is a placeholder for a value. For example, for `-m **_memory_**` you might use `-m 4g`.
| Parameter | Description |
| ------------------ | --------------------------------------------------------------------------------------------------------------------------------------------------- |
| `--production` | Start the app in production mode, which disables the configuration wizard and the code editor. |
| `-f` | Start App Studio in the foreground. By default, App Studio starts in the background. |
| `-p **_port_**` | Specify the port on which the App Studio web server will listen. The default port is 8080. |
| `-m **_memory_**` | Set the minimum (-Xms) and maximum (-Xmx) heap size for the JVM. For example, `-m 4g` results in: `-Xms4g -Xmx4g`. The default heap size is `512m`. |
| `-t **_timeout_**` | Set the startup timeout in seconds. |
| `-V` | Output verbose messages from the script. |
### Starting multiple App Studio instances
You can run multiple instances of App Studio on a single host by specifying different ports for all instances. Do this on startup, at the command line, using the `-p` parameter, for example:
```bash theme={"dark"}
./app-studio.sh start -p 9000
```
## Version 4.0
Before starting App Studio, verify that Fusion Server is running and that it has one or more collections of indexed data.
Run App Studio at the command line from the `app-studio` directory, like this:
| | | |
| ------------------ | ---------------------------------------------------------------------------------------------------------------------------------------------------------------------------------------------------------------------------------------------------------------------------------------------------------------------------------------------------------------------------------------------------------------------------------------- | ----------------------------------------------- |
| | Unix | Windows |
| Start the server | `./app-studio.sh start` Options: \* `--production` Run the server in production mode. \* `--extraJvmArguments` Space character-delimited additional JVM arguments; multiple arguments must be quoted. Example: `"-Xms2G -Xmx5G"` \* `-p` or `--port` The port on which to run the server. \* `-s` or `--stop-port` The port to use when issuing the `stop` command; it must be re-specified when running `stop`. | app-studio-start.bat |
| Stop the server | `./app-studio.sh stop` Optionally: \* `-s` or `--stop-port` The port to use when issuing the `stop` command. | app-studio-standalone-stop.bat |
| Restart the server | `./app-studio.sh restart` | app-studio-stop.bat app-studio-start.bat |
### Starting in production mode
App Studio’s standalone mode can be used for small production deployments, by starting in production mode.
Production mode disables the configuration wizard and the code editor.
To use standalone mode in a production environment, start App Studio with the `--production` flag:
```bash theme={"dark"}
./app-studio-standalone.sh start --production
```
## What is next
* See Create a New Web App to learn how to create your first search app.
Email alerts can be configured statically in `conf` files to be sent at regular intervals throughout the lifecycle of an application. Use these steps to get up and running with the Alerting module:
1. Add this dependency to your `pom.xml` file:
```xml theme={"dark"}
twigkittwigkit.alert.runtime${project.parent.version}
```
2. Set up `conf/alert/email/smtp.conf`; see below for an example configuration:
```bash theme={"dark"}
# User to log into Appkit
twigkit-user: foo
twigkit-password: bar
# User to send emails as
from: foobar@twigkit.com
password: foobar
# Override to address for all config-based alerts
to: reporting@some-alerting-domain.com
# SMTP details
mail.smtp.host: smtp.gmail.com
mail.smtp.port: 587
mail.smtp.auth: true
mail.smtp.starttls.enable: true
```
3. Set up `conf/alert/email/alerts/alerts.conf`; see below for an example configuration:
```bash theme={"dark"}
email-template: http://localhost:8080/email/
```
4. Add the alert `.conf` files to `conf/alert/email/alerts/my-alert-name-here.conf`; see below for an example:
```bash theme={"dark"}
to: foobar@twigkit.com
subject: New documents on brewing
query: ?q=homebrew
cron-expression: 30 * * * * ?
```
Here, the `cron-expression` defines how often to send the alert as described in this [Quartz tutorial](http://www.quartz-scheduler.org/documentation/quartz-2.3.0/tutorials/tutorial-lesson-06.html).
5. Create a JSP, in this case configured as above, on a standard Appkit application would be in `src/main/webapp/WEB-INF/pages/email.jsp` and the content would include:
```js theme={"dark"}
<%@ page contentType="text/html" pageEncoding="UTF-8" %>
<%@ include file="/WEB-INF/tags/client/taglibs.jspf" %>
Automated alert for query ${query.value}
```
For communication between separate system components, Appkit uses an *event bus* architecture. The event bus handles local events, within the same virtual machine. The event model is quite flexible and allows for any POJO to be transmitted on the event bus. Our current implementation uses Google Guava as the event bus provider.
## Sending event notifications
To post an event notification onto the event bus, you must obtain a copy of the global event bus and submit an instance of the class that describes the event. In this example, we assume that a Java class named `MyEvent` captures the event details.
```java theme={"dark"}
import com.google.common.eventbus.EventBus;
import com.google.inject.Inject;
@Inject
EventBus eventBus;
...
eventBus.post(new MyEvent());
```
## Subscribing to events
To subscribe for an event of a particular type, you create a new subscriber class (or use an anonymous class) that has a single-argument method annotated with the `@Subscribe` annotation.
```java theme={"dark"}
import eventBus.register.Subscribe;
public class MyEventSubscriber {
@Subscribe
public void newEvent(MyEvent event) {
// implement your business logic here
}
}
```
Next, you must register the subscriber on the event bus, so that events of the given type are routed correctly. This is typically done in your application module or controller.
```java theme={"dark"}
import com.google.common.eventbus.EventBus;
import com.google.inject.Inject;
@Inject
EventBus eventBus;
...
eventBus.register(new MyEventSubscriber());
```
## Standard event types
This types of event are built into the AppKit core framework. You can register your own subscriber to receive notifications of each. See details in our JavaDocs on which attributes are available in each case.
* `twigkit.security.event.LoginEvent`: User logs into the system.
* `twigkit.event.ResponseEvent`: A search response was retrieved from a data provider.
In addition, this events are available if activity tracking is enabled:
* `twigkit.event.QueryEvent`: A search query was formulated and submitted to a data provider.
* `twigkit.event.ClickEvent`: User clicked a link on a page, possibly linked to a search query.
This topic provides troubleshooting tips for issues that can arise when developing web apps using App Studio.
## Data is not appearing on the page as expected
### Check the response data
1. Open your browser’s developer tools.
2. Click the **Network** tab.
3. Look for an XHR request similar to the one shown below (starting with `platforms.fusion…`) and select it.\
\
Here you can navigate through the values being returned from Fusion.
4. To determine which response is which (as you may have multiple) look at the platform that populates the response, which also populates the element on your page.\
You can then track down the value you are looking for. So if looking at results, a result list iterates through the results, so we should look inside a result. In each result, there’s a set of fields and associated values:\
\
Note that other processing may happen in between receiving the response and displaying it on the page (response processors, modifications in the HTML, security trimming, and so on).
### Get query from webapps/servlet logs and fire it against Fusion
If the data in your response object is not as you expect, you can get the query from the App Studio logs to fire directly against the Fusion endpoint, without App Studio in the middle.
1. Make sure your logger is configured to print out debug logging for the `twigkit` class in `logback.xml` in your environment profile (or if not using a profile, in the main resources directory):
```xml theme={"dark"}
```
2. In `fusion/version/var/log/webapps/`, sort by date `(ls -l)` and view the latest one with the suffix of `stderrout`.\
Here you will see some entries that should follow the format of the following:
```bash theme={"dark"}
08:57:41.058 DEBUG twigkit.search.solr.SolrPlatform - Searching Solr with start=0&rows=20&hl=true&q=match&facet=true&facet.field={!ex%3Dgenre_ss}genre_ss&facet.field=year_i&fl=*,score&fq={!tag%3Dgenre_ss}genre_ss:(Animation)&username=admin&session=37045658-9052-4ba4-b1d2-0221be5e2d02&spellcheck=true&spellcheck.collate=true&q.op=OR took 200 ms
```
3. To determine which entry is the correct one, check the query that populates the response you’re interested in, and match the parameters you’re setting in the tag as well as any Solr parameters being applied to the query via interaction on the page (keyword = `q`, facet filters = `fq`, and so on).
4. Go to the Query Workbench in Fusion and select the Published URI in the URI tab:\\
5. Remove every parameter given in this URL after `select?`.
6. Append the parameters from the webapps logs.
7. Put the resulting URL into your browser.\
The result will be the response of the query fired by App Studio, but unaltered by App Studio.
## Page is totally blank/elements look broken or strange
### Check the browser console
1. Open your browser’s developer tools.
2. Click the **Console** tab.\
Here you can check for any issues related to client-side components.
3. Look for the following error:
```bash theme={"dark"}
Uncaught Error: [$injector:modulerr] Failed to instantiate module myApp due to:
Error: [$injector:modulerr] Failed to instantiate module lightning due to:
Error: [$injector:nomod] Module 'lightning' is not available! You either misspelled the module name or forgot to load it. If registering a module ensure that you specify the dependencies as the second argument.
```
* If you see the error above, you should wipe your `node_modules` directory and reinstall the modules before building:
1. `rm -rf node_modules package-lock.json`
2. `npm cache clear -f`
3. `npm install`
* If you do not see this error, then typically there is a problem in your Javascript code.
When you upgrade Fusion Server, that also upgrades App Studio to its latest version, and its embedded Appkit to the Appkit version in the App Studio release. The App Studio version might differ from the Fusion Server version. Not all Fusion Server upgrades have a new version of App Studio.
An App Studio release might not contain the latest version of Appkit. Check the App Studio Release Notes and Appkit Release Notes to confirm the versions. To upgrade a new app to a more recent version of Appkit than the version that an App Studio release contains, create the app and then \[Upgrade Appkit in existing apps.
The App Studio upgrade does not upgrade the version of Appkit used in existing apps. For that procedure, see Upgrade Appkit in existing apps.
These steps are only required if you are currently using the Appkit Social module - this is indicated by the presence of a `` block in the `pom.xml` file at the root of your project that has an `` entry that starts with `twigkit.social`. If you are not using the Appkit Social module (i.e. there is no `twigkit.social` entry in your `pom.xml`), then you do not need to follow the steps in this section.
**How to upgrade the Appkit Social module**
1. Remove the existing `twigkit.social` `` block from your `pom.xml` file and replace it with the following:
```xml theme={"dark"}
twigkittwigkit.social.provider.platform${project.parent.version}
```
2. Create a configuration file named `src/main/resources/conf/social/social.conf` with the following contents:
```bash wrap theme={"dark"}
# Use conf/platforms/fusion/social.conf for Social module platform configuration
platform: platforms.fusion.social
```
The `platform` value indicates the name of the platform configuration file to use, which you will create in the next step.
3. Create a configuration file named `src/main/resources/conf/platforms/fusion/social.conf` that contains the following (note that the name of the file matches the `platform` value configured in the previous step):
```bash wrap theme={"dark"}
# For every Fusion App, a corresponding YOUR_FUSION_APP_user_prefs collection is automatically created.
# Appkit uses this collection for storing collaboration user-data.
# Name of the collection to store user data in
collection: YOUR_FUSION_APP_user_prefs
# Name of the Query & Index pipelines to use - _system is the Fusion default
# pipeline: _system
# Enable writing new Social entities into the platform
readOnly: false
# Prevent users from searching this platform directly
webservice-enabled: false
```
Replace the string `YOUR_FUSION_APP` in the `collection` parameter with the name of the Fusion app you want to associate your social data with.
You can set up Appkit to provide user-specified email alerts in an app.
## Setup
To set up user-specified alerts:
1. Add this dependency to your `pom.xml`. Remove any previous reference to `twigkit.social` modules.
```xml theme={"dark"}
twigkittwigkit.social.runtime${project.parent.version}twigkittwigkit.alert.db.derby.memory${project.parent.version}
```
2. Add a configuration file in `conf/alert/email/smtp.conf`; see below for an example configuration:
```bash theme={"dark"}
# User to log into Appkit (service account)
twigkit-user: admin
twigkit-password: password
# Email account to use to send alert emails
from: foobar@twigkit.com
password: foobar
# SMTP details
mail.smtp.host: smtp.gmail.com
mail.smtp.port: 587
mail.smtp.auth: true
mail.smtp.starttls.enable: true
```
3. Add another configuration file for the email template in `conf/alert/email/alerts/alerts.conf`; see below for an example configuration:
```bash theme={"dark"}
email-template: http://localhost:8080/email/
subject-prefix: New report for saved query
```
4. Add the saved query alert scheduling form to the search header (header.tag):
```xml theme={"dark"}
<%-- Bookmarks --%>
<%-- Saved Searches --%>
```
5. Create the email template JSP, in `src/main/webapp/WEB-INF/pages/email.jsp`. For example:
```js theme={"dark"}
<%@ page contentType="text/html" pageEncoding="UTF-8" %>
<%@ include file="/WEB-INF/tags/client/taglibs.jspf" %>
Automated alert for query ${query.value}
```
Note the following:
* The 'alert seen' functionality is reliant on a field in the data specifying the date the document was last updated, in this case named `updated`
* The 'to address' of the email alert will either be chosen by the user via the form (default) or can be set by using the `toAddress` attribute on the saved query alert form tag.
* Appkit includes full user impersonation, so any security trimming is applied automatically.
### Saved Query Alert Form tag attributes
`**query (twigkit.model.Query)**`\
The Query object to be registered for alerting.
`**defaultTitle (java.lang.String)**`\
Default title of a saved query (if no query supplied).
`**scheduleAlertText (java.lang.String)**`\
Text to display above schedule component.
`**toAddress (java.lang.String)**`\
The email address to which the alert should be sent. If not supplied (left empty), the user will be presented with a field to specify this (default behavior).
`**toAddressPlaceholderText (java.lang.String)**`\
Placeholder text for 'to' email address field which is displayed if toAddress attribute is blank
`**toAddressLabelText (java.lang.String)**`\
Label text for 'to' email address field which is displayed if toAddress attribute is blank
`**deliveryFrequencyLabelText (java.lang.String)**`\
Text for label above scheduling component
The ConfiguredPlatformProvider is a Java class that lets you gain access to an instance of a platform configured via the 'conf' files specified in an Appkit project. This is useful when writing custom code which you would like to have access to a platform already defined in an Appkit application, for example indexing or storing documents in a platform.
To use this, simply inject the ConfiguredPlatformProvider into the class in which you want to gain access to the platform’s programmatic API:
```java theme={"dark"}
@Inject
private ConfiguredPlatformProvider myPlatformProvider;
You can then access a configured platform using this method
public Platform get(String name)
```
For example, if you have a platform configured in `src/main/resources/conf/platforms/gsa/gsa.conf`, in your code you would have:
```java theme={"dark"}
Platform myPlatform = myPlatformProvider.get("platforms.gsa");
myPlatform.search(X) //search the platform
myPlatform.store(X) //post a document to the platform
```
Most platforms support these general methods that you might want to use within the custom code that interfaces with the platform:
```java theme={"dark"}
public twigkit.model.Response search(twigkit.model.Query query) throws twigkit.platform.PlatformException;
public void store(twigkit.model.Content... contents) throws twigkit.platform.PlatformException;
public twigkit.model.Content load(java.lang.String s) throws twigkit.platform.PlatformException;
public void delete(twigkit.model.Query query) throws twigkit.platform.PlatformException;
```
A `PlatformOperationNotSupportedException` will be thrown if the method is not supported by the underlying platform. See the Javadoc for the `twigkit.model.Platform` interface for more information.
## Deploying your service
Appkit uses Guice to inject dependencies into Java classes. The easiest way to let Guice know about your new Java class (service) so that it can inject the ConfiguredPlatformProvider is to define your class as a managed Appkit service. This is done by adding a configuration file with the fully qualified name of the Java class under:
```java theme={"dark"}
/META-INF/
/services/
twigkit.service.AppkitService <-- this is a file
```
You can enter a fully qualified Java class per line for each managed service you want to deploy.
An alternative is to use the AppkitApplication class to get an instance of the ConfiguredPlatformProvider:
```java theme={"dark"}
ConfiguredPlatformProvider platformProvider = TwigKitApplication.getInstance().getInjector().getInstance(ConfiguredPlatformProvider.class);
```
This creates code that is more tightly coupled, so is generally less desirable, but still completely functional.
At Lucidworks, we use [GitHub](https://github.com) for hosting and [Git](http://git-scm.com/) for version control of our code and customers' code. There are several good guides on the web to using Git detailed below, along with some high level instructions for getting started.
## Getting access to the project
To gain access to a project, you must sign up for a [free GitHub account](https://help.github.com/articles/signing-up-for-a-new-github-account/). After you are signed up, [contact Lucidworks Support](https://support.lucidworks.com/hc/en-us/requests/new) and tell us who you are, your GitHub username, and which project you work on, and we can add you to the right project.
## Using the Fork-and-Branch Git workflow
When working with multiple developers on a single codebase, we use a Fork-and-Branch model. This lets you create a copy of a repository, make your changes and then submit them back to the original repository for review by the owner before they are merged in.
### GitHub Desktop App (Windows and Mac)
If you use the GitHub desktop application ([details and install guide](https://desktop.github.com/)) there is a good [Github guide](https://guides.github.com/activities/forking/) on how forking with the GitHub desktop app works.
### Command Line (Windows and Mac)
If you use the command-line git tools then the “fork and branch” workflow process is documented well in this [blog post](http://blog.scottlowe.org/2015/01/27/using-fork-branch-git-workflow/):
The article above covers it really well, but at a high level the process is as follows:
1. Fork a GitHub repository.
2. Clone the forked repository to your local system.
3. Add a Git remote for the original repository.
4. Create a feature branch in which to place your changes.
5. Make your changes to the new branch.
6. Commit the changes to the branch.
7. Push the branch to GitHub.
8. Open a pull request from the new branch to the original repo.
9. Keeping Your Fork in Sync.
If you are stuck, search for a specific command in the [Pro Git book](https://git-scm.com/book/en/v2); it is a useful resource.
### Forking a GitHub Repository
Forking a repository is really straightforward:
Make sure you’re logged into GitHub with your account. Find the GitHub repository with which you’d like to work.
Click the Fork button on the upper right-hand side of the repository’s page. That’s it — you now have a copy of the original repository in your GitHub account.
### Making a local clone
Even though you have a copy of the original repository in your GitHub account, you must copy it (clone it) locally so you can work on it. Navigate to the forked repository on github.com (this is the copy of the original repository residing in your GitHub account) and look on the right-hand side of the web page. You should see an area that is labeled “HTTPS clone URL”. Simple copy the URL there and use as follows:
```bash theme={"dark"}
git clone https://github.com/username/projectname.git
```
Here, **username** is your GitHub username and **projectname** is the specific name of the project (GitHub provides you the URL to copy and paste for ease).
Git will copy down the repository, both contents and commit history, to your system. Git will also add a Git remote named `origin` that points back to the forked repository in your GitHub account.
### Adding a Git Remote
Git already added a Git remote named `origin` to the clone of the Git repository on your system, and this will let you push changes back up to the forked repository in your GitHub account using `git commit` (to add commits locally) and `git push`.
To use the “fork and branch” workflow, you’ll must add a Git remote pointing back to the original repository (the one you forked on GitHub).
You’d want to add a Git remote that points back to the original repository, like this:
```bash theme={"dark"}
git remote add upstream https://github.com/twigkit/projectname.git
```
Of course, you’d want to replace the URL after `git remote add upstream` with the appropriate clone URL for the original project repository.
### Keeping Your Fork in Sync
Your forked repository does not stay in sync automatically - you must take care of this yourself - it is good practice to do this before you start work to pull in changes from other developers. To ensure your code has the latest upstream code changes, first make sure you are on your local master branch:
```bash theme={"dark"}
git checkout master
```
Then either pull the latest changes in - these commands pull (fetch and merge) the most recent changes from the upstream repository, and pushes them back to your repository:
```bash theme={"dark"}
git pull upstream master
git push origin master
```
Or explicitly fetch and merge the most recent changes from the upstream repository:
```bash theme={"dark"}
git fetch upstream
git merge upstream/master
git push origin master
```
### Working with feature branches
The master branch is the master copy of the code. When working on individual features, it is better to work in branches. Using branches, you can switch between different development tasks easily mid-flow.
#### Create a new branch
```bash theme={"dark"}
git checkout -b
```
For example, suppose you are working on ISSUE-1234. Then before doing any code changes, make sure you create a new feature branch like so:
```bash theme={"dark"}
git checkout -b ISSUE-1234
```
#### Commit changes
1. See what files you have changed and what is queued up to commit:
```bash theme={"dark"}
git status
```
2. Add some changes you have made to commit:
```bash theme={"dark"}
git add
```
3. Make your changes and then commit the changes to the branch:
```bash theme={"dark"}
git commit -m 'short descriptive note about my changes'
```
#### Push changes back to your repository
When you’re ready to commit your changes, push those changes up to the corresponding feature branch on your remote fork. This does not push the changes back to Appkit - just to your forked copy:
```bash theme={"dark"}
git push -u origin
```
See [https://help.github.com/articles/pushing-to-a-remote/](https://help.github.com/articles/pushing-to-a-remote/) and [https://git-scm.com/book/en/v2/Git-Basics-Working-with-Remotes](https://git-scm.com/book/en/v2/Git-Basics-Working-with-Remotes).
Other useful commands are `git branch` (lists what branches you have created) and `git remote -v` (lists what remote repositories you are linked to).
### Sending changes back to the master repository - opening a Pull Request
When your feature branch is ready to have its changes brought into the master branch, you must go to your GitHub fork and issue a new pull request from that feature branch. If the branch does not already exist in GitHub, a pull request will automatically be created when you push the new branch up to your repository - GitHub will prompt you to create a pull request when you view the repo online (I’m assuming you’re using your browser and not the GitHub native apps). The maintainers of the original project can use this pull request to pull your changes across to their repository and, if they approve of the changes, merge them into the main repository. See [this guide on how to create a pull request in GitHub](https://help.github.com/articles/creating-a-pull-request/) for more details.
It is good practice to ensure the pull request has a clear description of what it entails, and it should refer back to the issue that is being resolved in either the title or the description.
#### Code review
After you have created the pull request, you should assign it to a colleague for peer review. If any issues are identified during the review, the reviewer can add code comments, and assign the pull request back to you to fix. After the pull request has passed its code review, the reviewer can assign the pull request to a dedicated merge master who can do the final merge.
### Milestones and releases
GitHub lets you tag your work and keep track of which tasks should be completed by specific milestones or releases. You might also want to consider following this practice to ensure development work on your codebase is sufficiently prioritized.
## Learn more - great Git resources
The best reference on the web is the [git SCM book - https://git-scm.com/book/en/v2](https://git-scm.com/book/en/v2) - covers everything you must know about Git - a great reference if you are stuck or if you are getting started, a simplified [Git Guide](http://rogerdudler.github.io/git-guide/).
To help protect against Cross-Site Request Forgery (CSRF) attacks on social web services, App Studio can ensure that all requests are tokenized. That is, each request is provided with a randomized Appkit request token.
**How to enable protection against CSRF in your application:**
1. If it does not already exist, create a new file named `csrf.conf` and place it under `src/main/resources/conf/security`.
2. In that file, set the property `enabled` to `true`. This tokenizes the requests.
3. By default, the time-to-live of the Appkit request token is 60 minutes. You can change this by setting the property `duration` to some other value; for example, `duration: 30`. Responses received without a request token or with a request token has expired are rejected.
This configuration enables protection against CSRF attacks and sets the time-to-live of the request token to 30 minutes:
```bash theme={"dark"}
enabled: true
duration: 30
```
In some cases, you might want to apply custom business logic for authorization after a user has been authenticated in Appkit. For example, you might want to load group and role information from an external database or directory, in those cases where the authentication provider does not provide this information.
This is relatively easy to do in Appkit, if you follow these steps.
## 1. Implement your own authorization filter
### MyAuthorizationFilter.java
```java wrap expandable theme={"dark"}
import com.google.inject.Singleton;
import twigkit.model.auth.AnonymousUser;
import twigkit.model.auth.Role;
import twigkit.model.auth.User;
import twigkit.security.SecurityContext;
import twigkit.security.filter.AuthorisationFilter;
import javax.servlet.http.HttpServletRequest;
import javax.servlet.http.HttpServletResponse;
import java.util.List;
@Singleton
public class MyAuthorizationFilter implements AuthorisationFilter {
@Override
public void init() {
}
@Override
public boolean filter(HttpServletRequest servletRequest, HttpServletResponse servletResponse) throws Exception {
if (SecurityContext.getUser() != null && !(SecurityContext.getUser() instanceof AnonymousUser)) {
User user = SecurityContext.getUser();
List roles = null; // implement your own business logic here
for (Role role : roles) {
user.addRole(role);
}
}
return true;
}
@Override
public void destroy() {
}
}
```
## 2. Bind your authorization filter in Guice
Assuming you already have a Guice application module, add your authorization filter to the authorization bindings like so:
### MyAppModule.java
```java theme={"dark"}
import com.google.inject.multibindings.Multibinder;
import twigkit.AbstractTwigKitModule;
import twigkit.security.filter.AuthorisationFilter;
public class MyAppModule extends AbstractTwigKitModule {
@Override
protected void configure() {
Multibinder authorisationBinder = Multibinder.newSetBinder(binder(), AuthorisationFilter.class);
authorisationBinder.addBinding().to(MyAuthorizationFilter.class);
}
}
```
If you do not already have a Guice app module, simply create one like above, and add an entry to `src/main/resources/META-INF/services/twigkit.TwigKitModule` (note the capitalization of TwigKitModule) containing the Fully-Qualified Class Name of the module. That is, in `src/main/resources/META-INF/services/twigkit.TwigKitModule` add the entry:
```java theme={"dark"}
your.package.MyAppModule
```
 ```xml theme={"dark"}
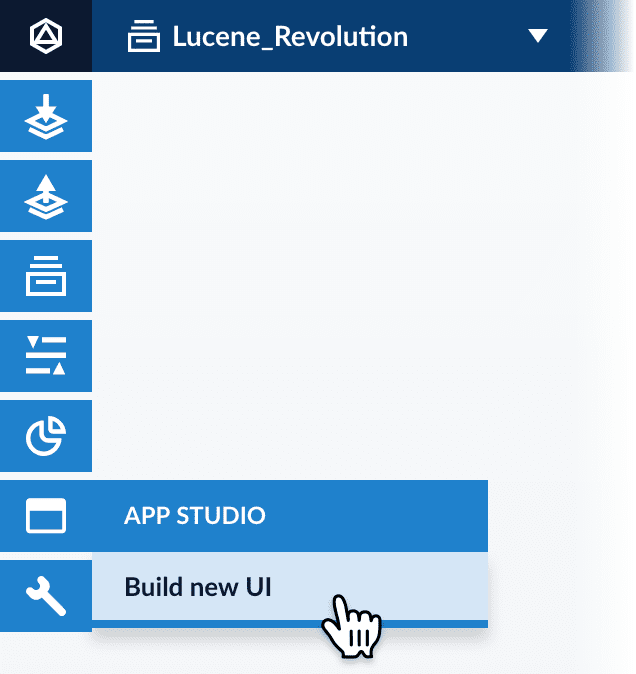 2. On the **Set Query Source** page, select the query profile to use for your search UI:
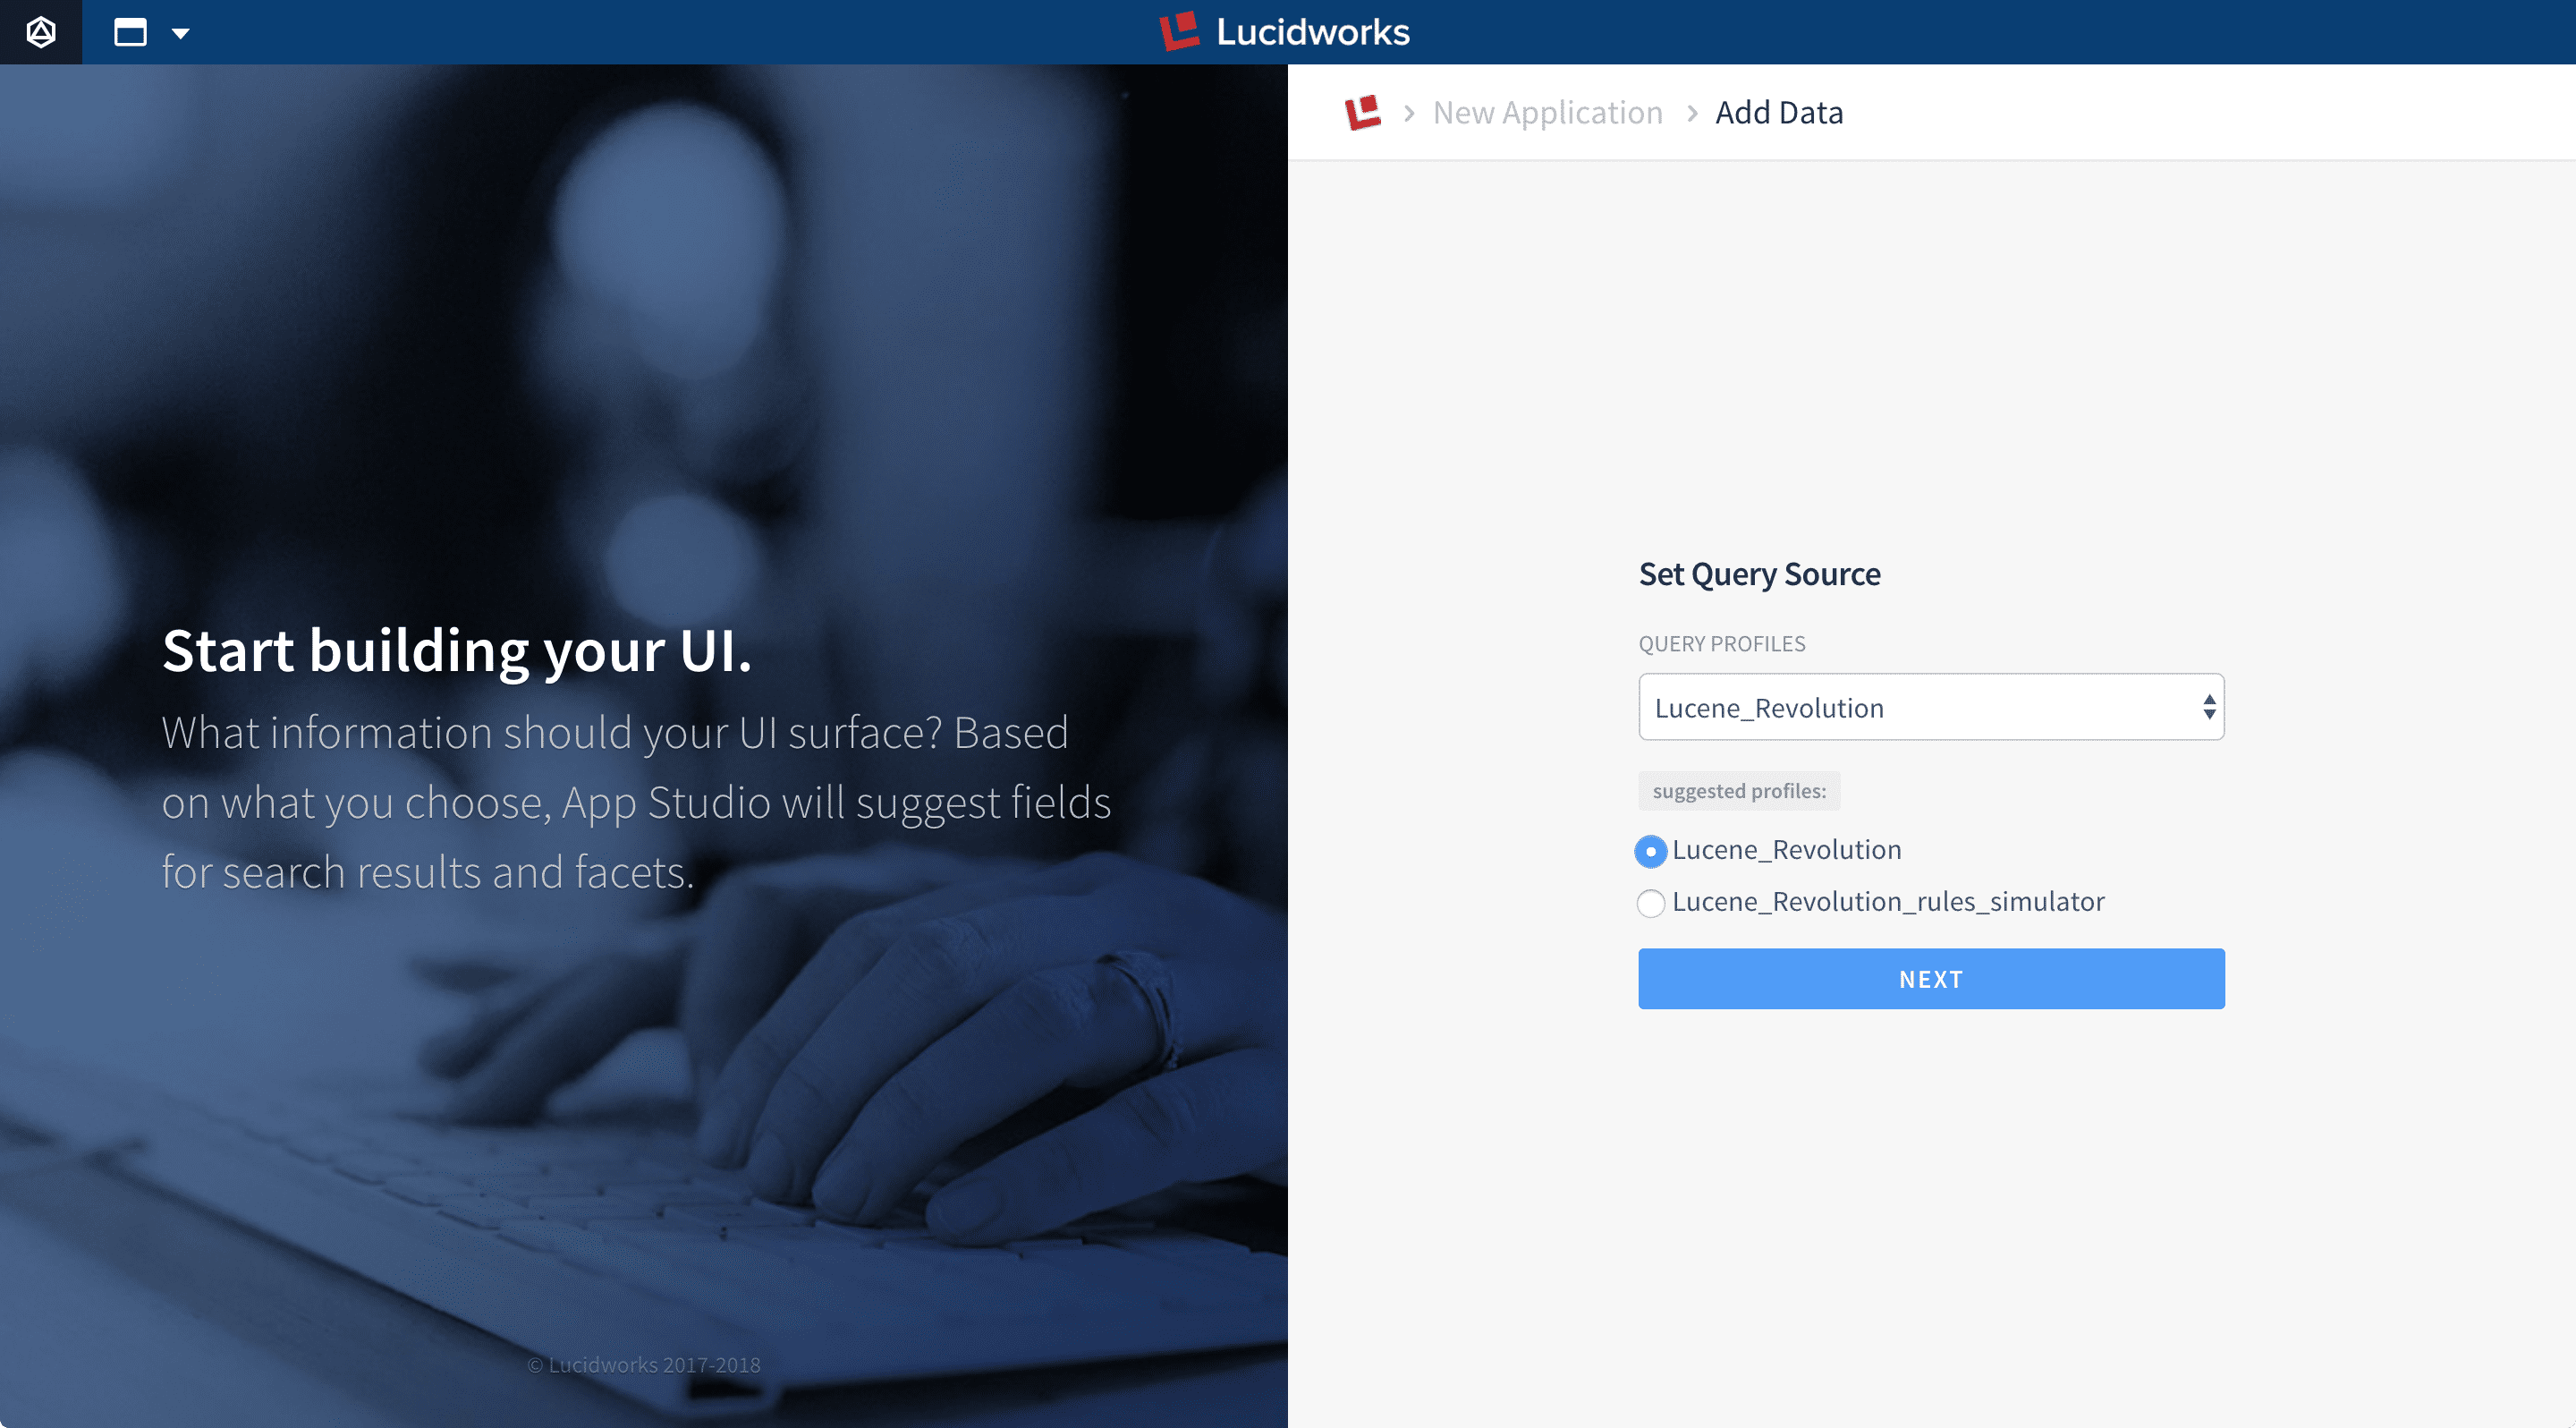 3. Click **Next**.
App Studio connects to the specified collection and query profile to analyze your searchable data:
3. Click **Next**.
App Studio connects to the specified collection and query profile to analyze your searchable data:
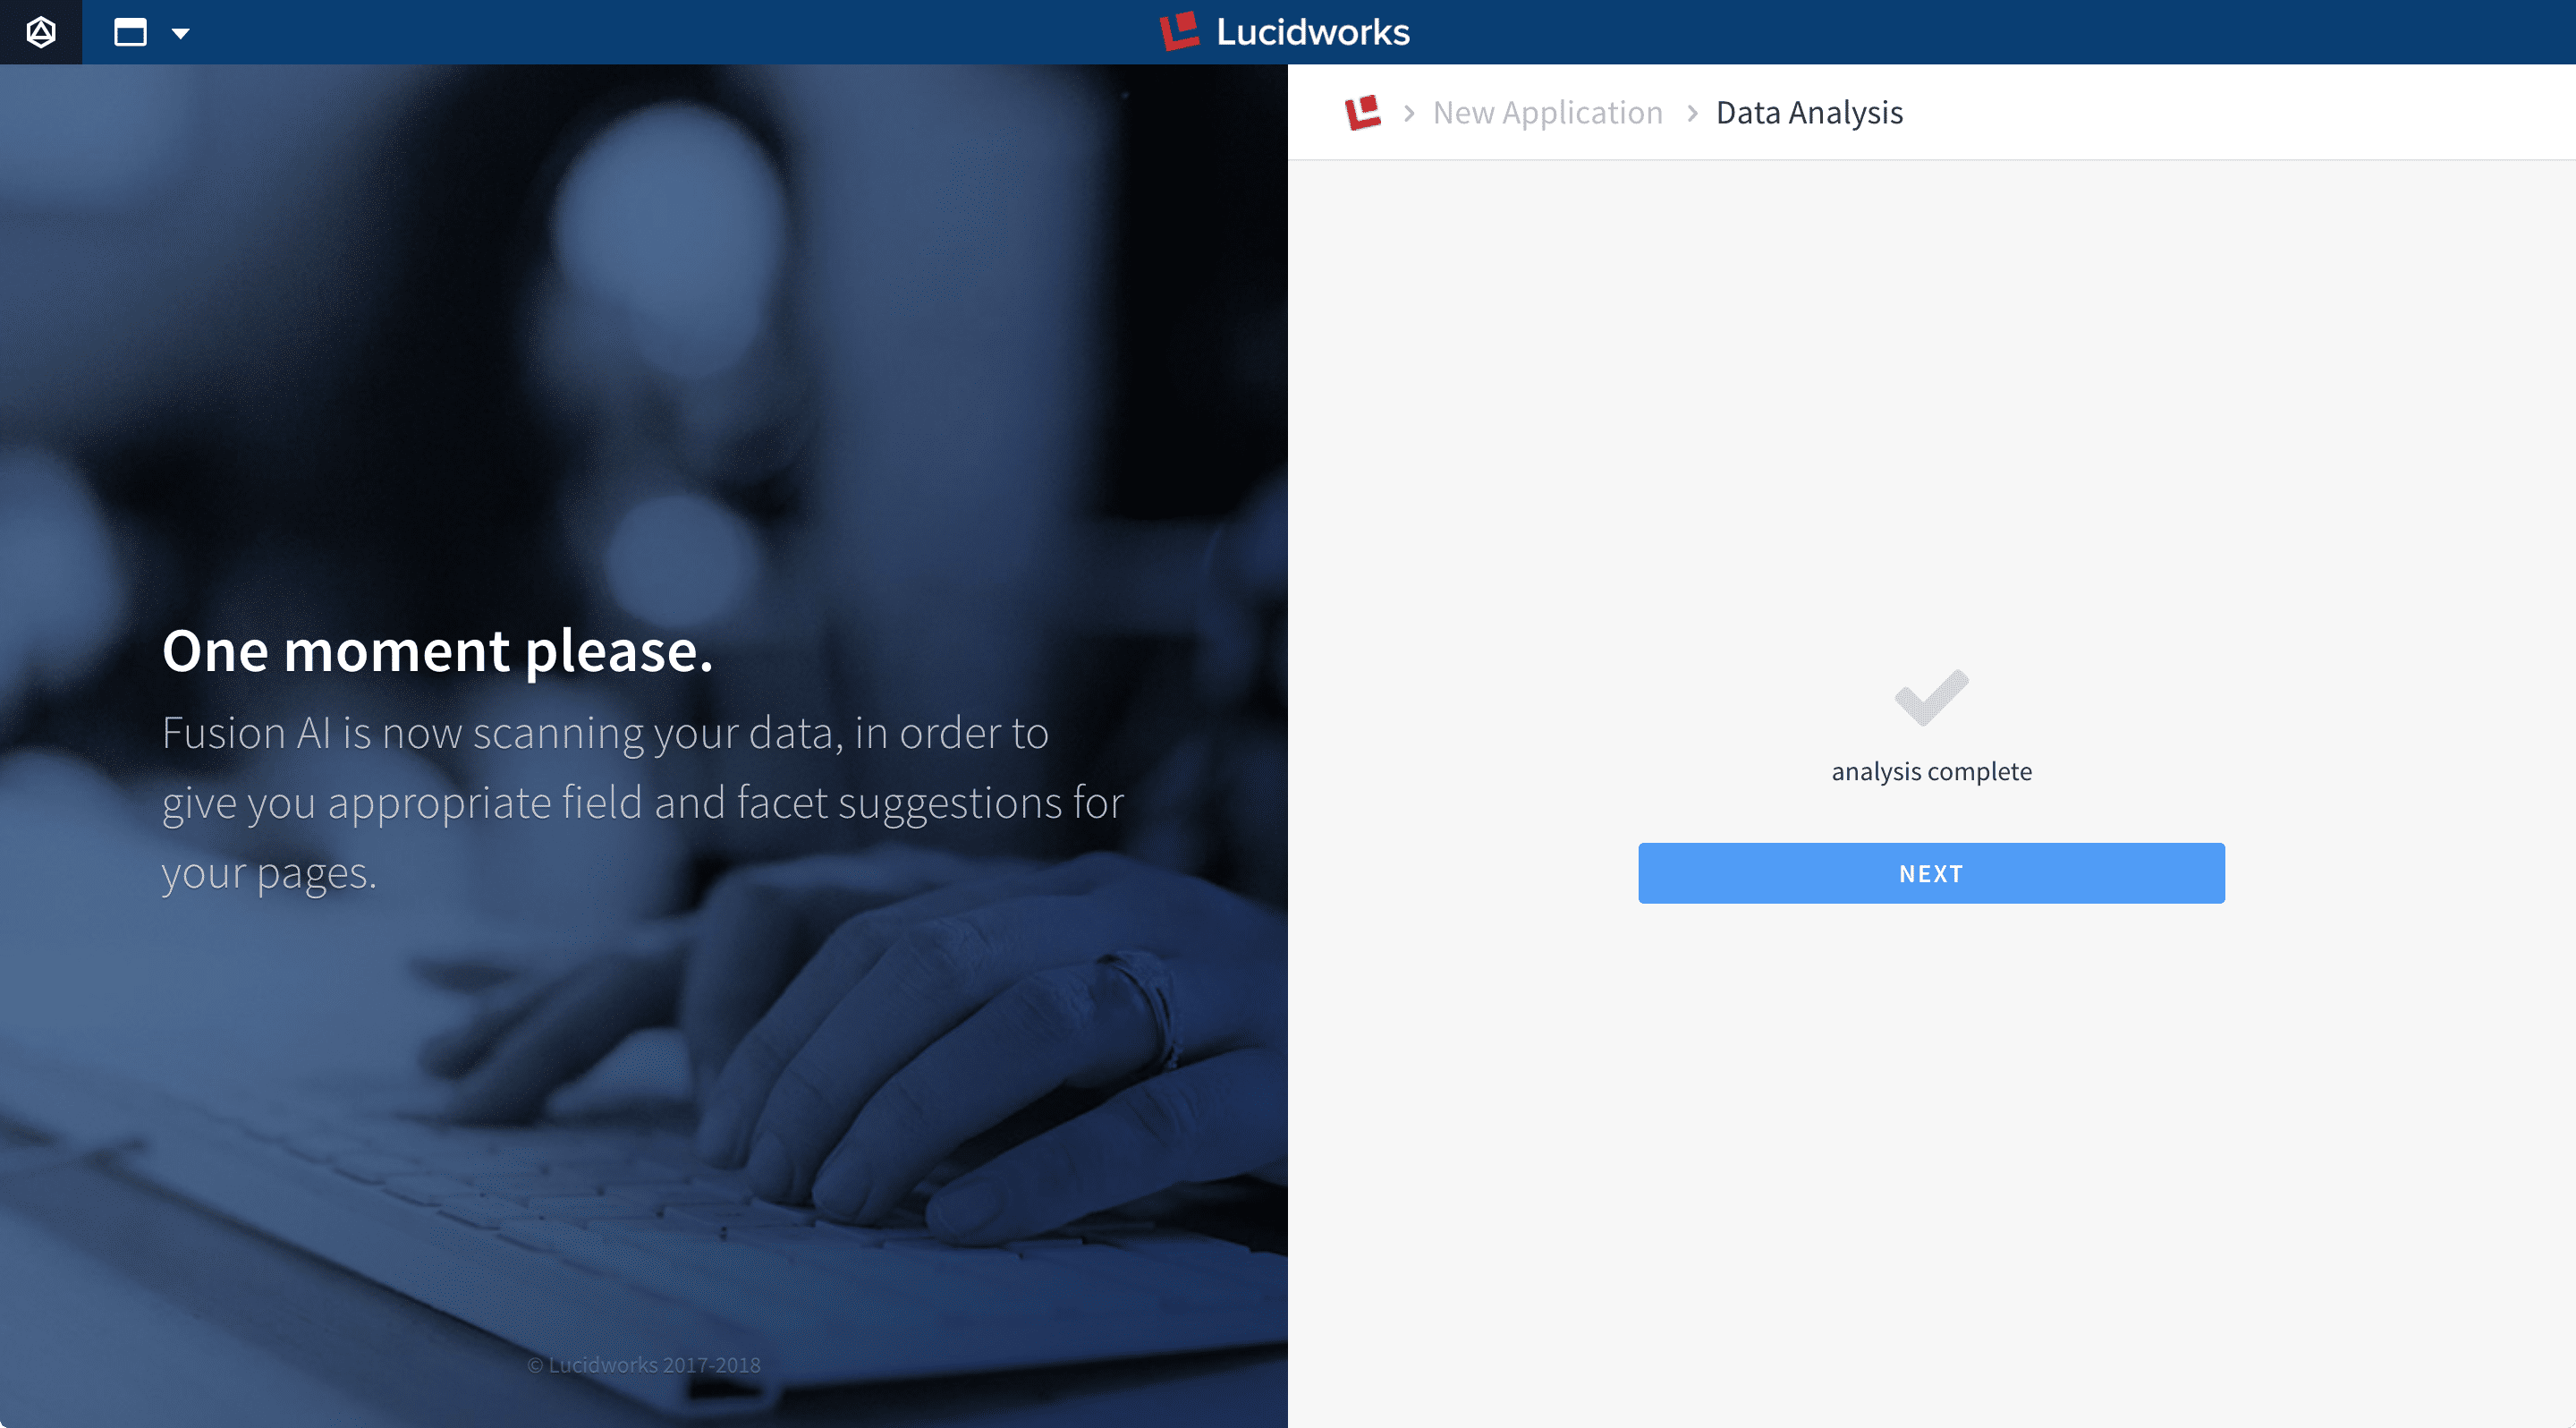 4. Click **Next**.
5. On the **Set Result Title** page, select the field to use as the title of each search result:
4. Click **Next**.
5. On the **Set Result Title** page, select the field to use as the title of each search result:
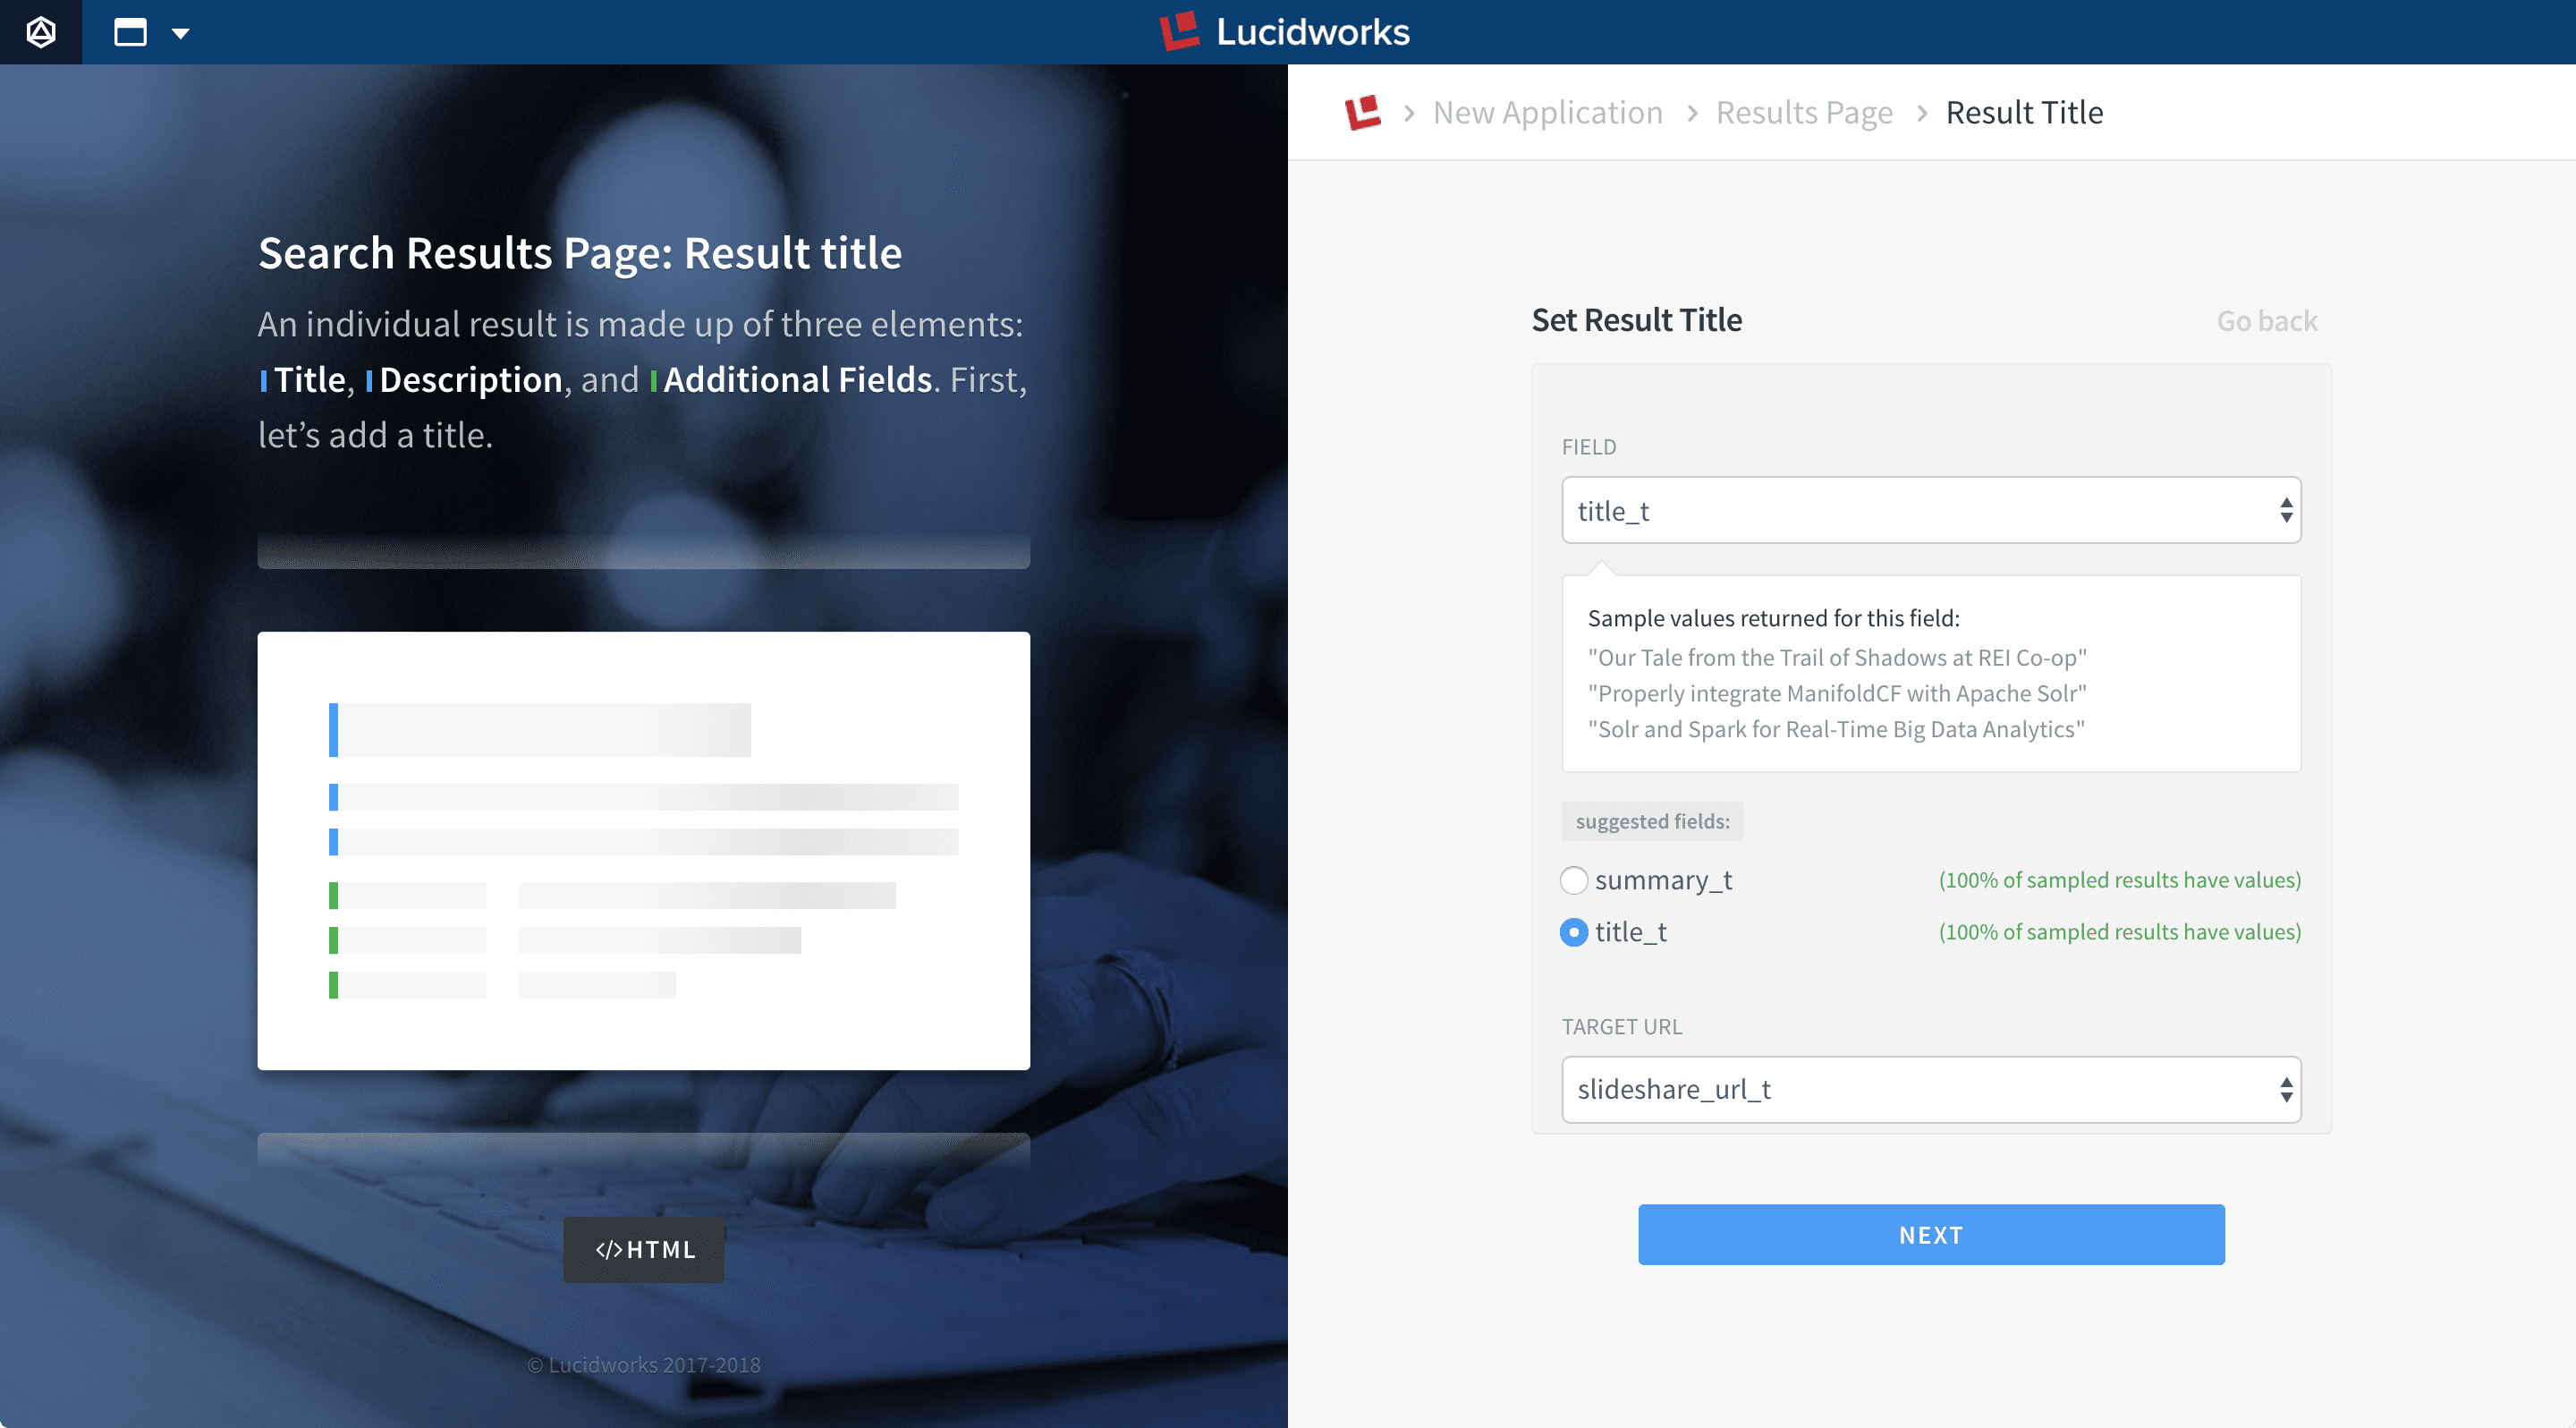 Optionally, you can select a **Target URL** field, which contains the URL to use as the link in each search result.
6. Click **Next**.
7. On the **Set Result Description** page, select the field to use as the description of each search result:
Optionally, you can select a **Target URL** field, which contains the URL to use as the link in each search result.
6. Click **Next**.
7. On the **Set Result Description** page, select the field to use as the description of each search result:
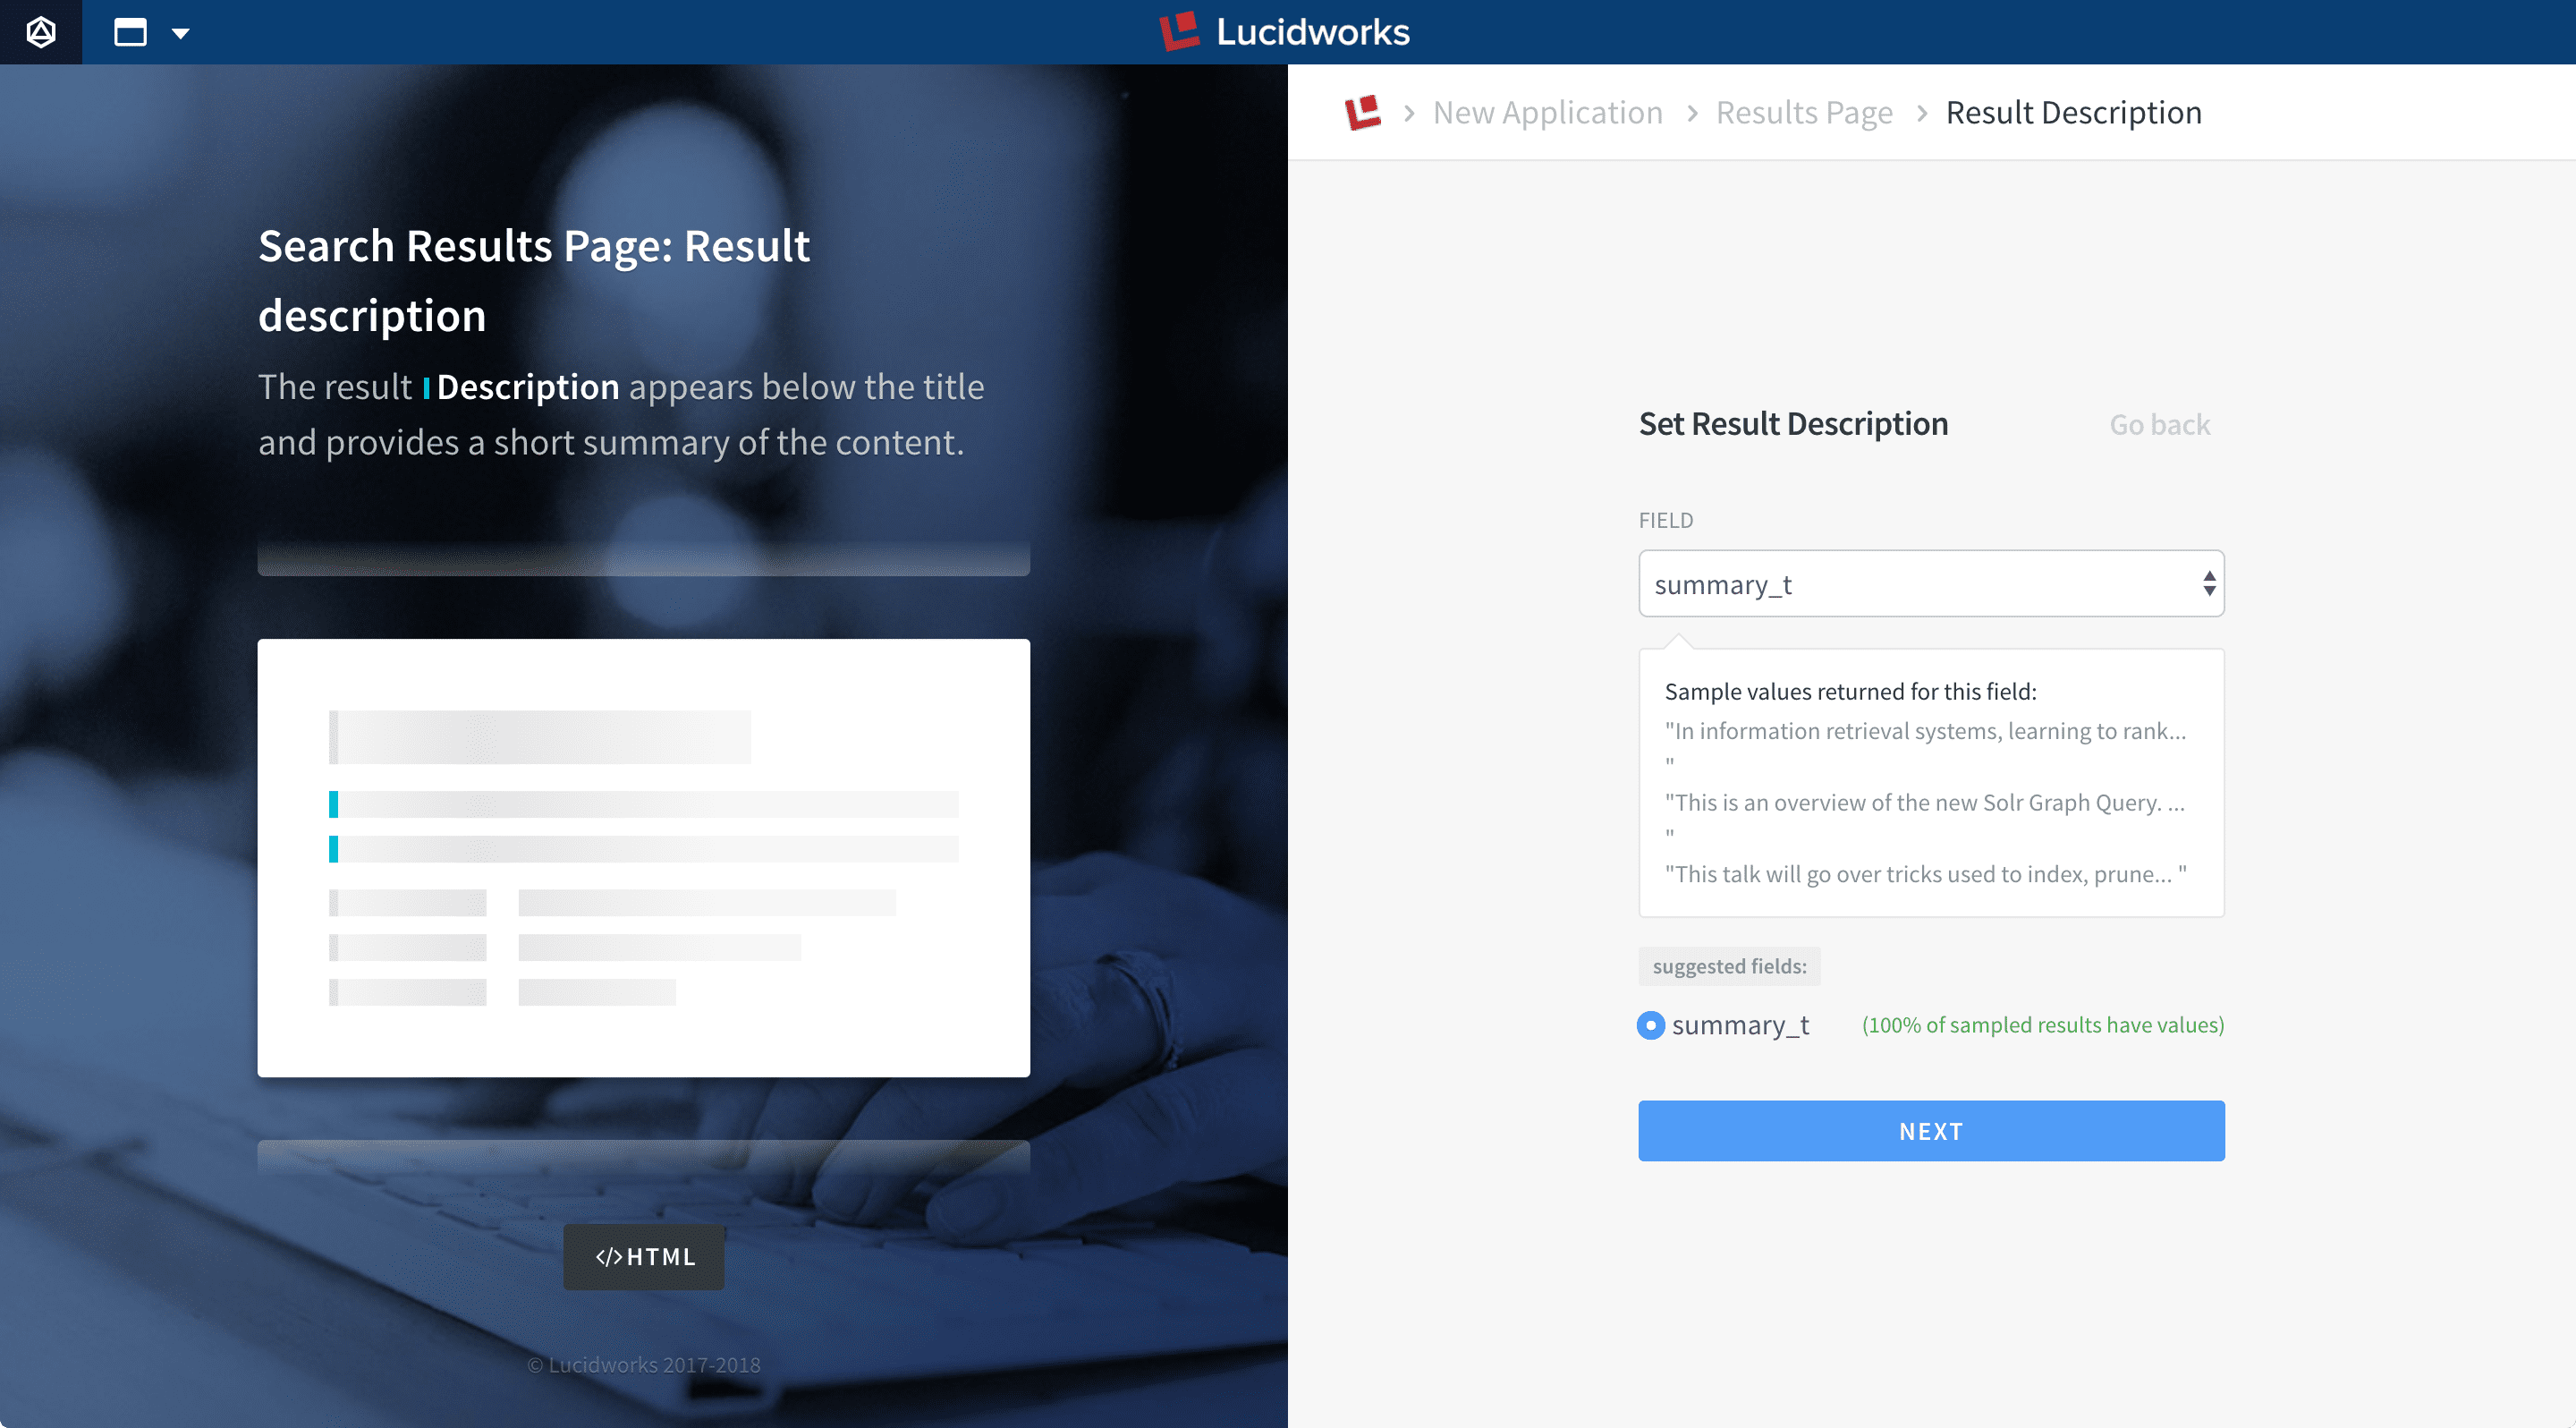 8. Click **Next**.
9. On the **Set Facets and Additional Fields** page, select one or more multi-valued fields to use as facets:
8. Click **Next**.
9. On the **Set Facets and Additional Fields** page, select one or more multi-valued fields to use as facets:
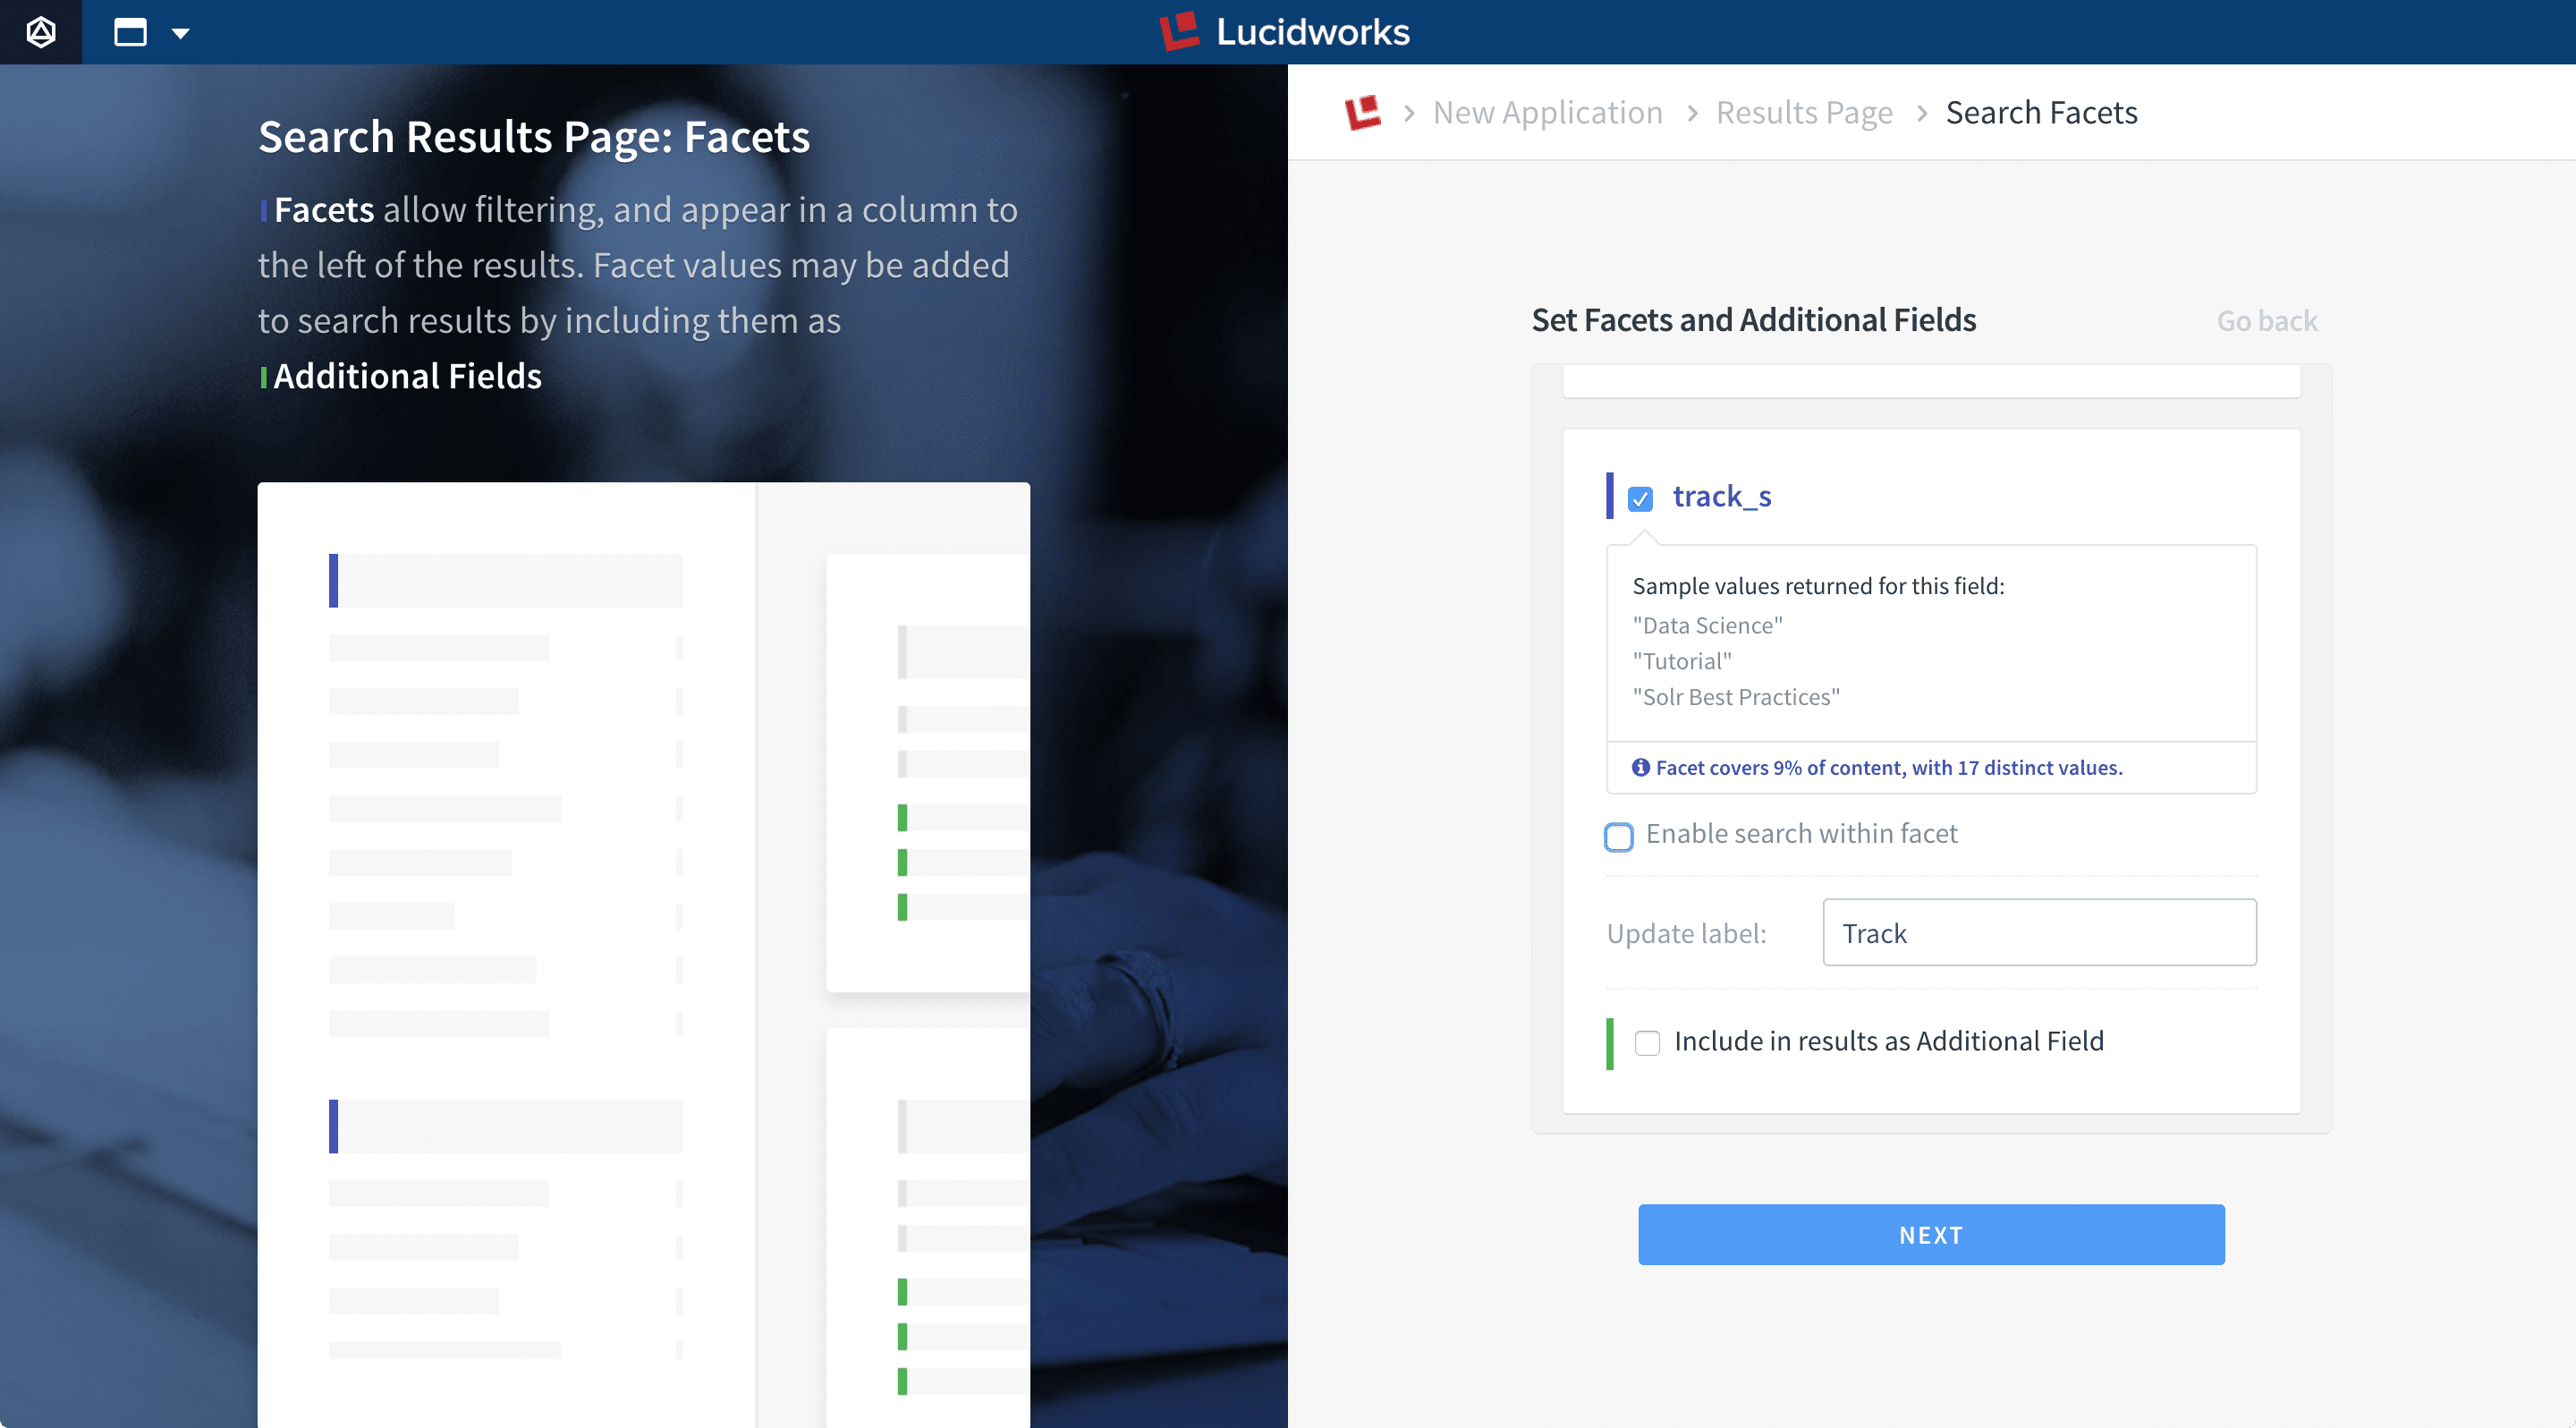
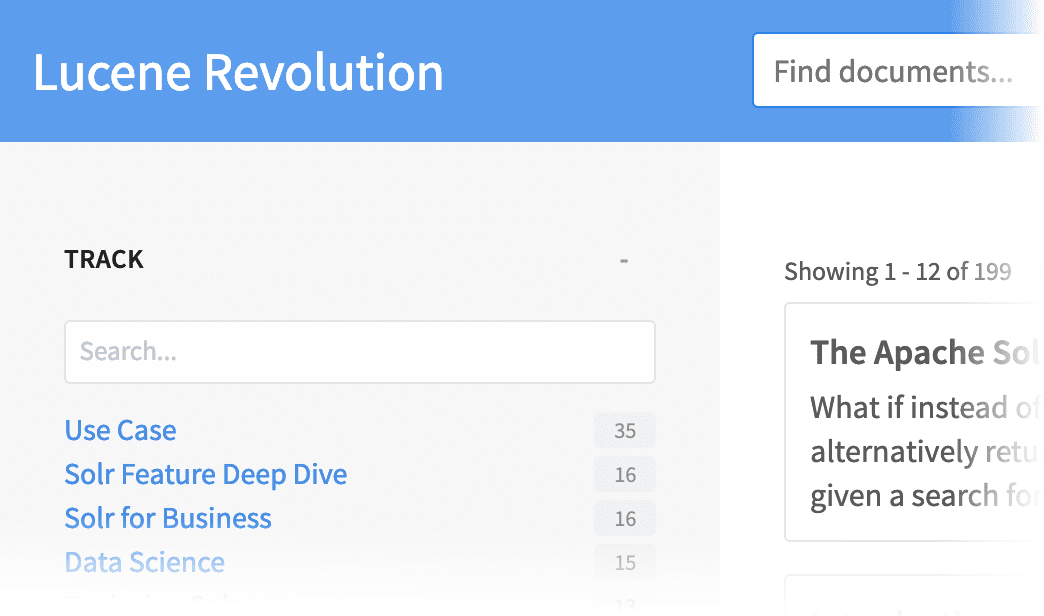 * Enter a user-friendly label for each facet field, such as "Genre" instead of "genres\_ss".
* Select **Include in results as Additional Field** to display the values of the facet fields within each search result.
10. Click **Next**.
11. On the **Customize UI** page, enter a title and select a color theme:
* Enter a user-friendly label for each facet field, such as "Genre" instead of "genres\_ss".
* Select **Include in results as Additional Field** to display the values of the facet fields within each search result.
10. Click **Next**.
11. On the **Customize UI** page, enter a title and select a color theme:
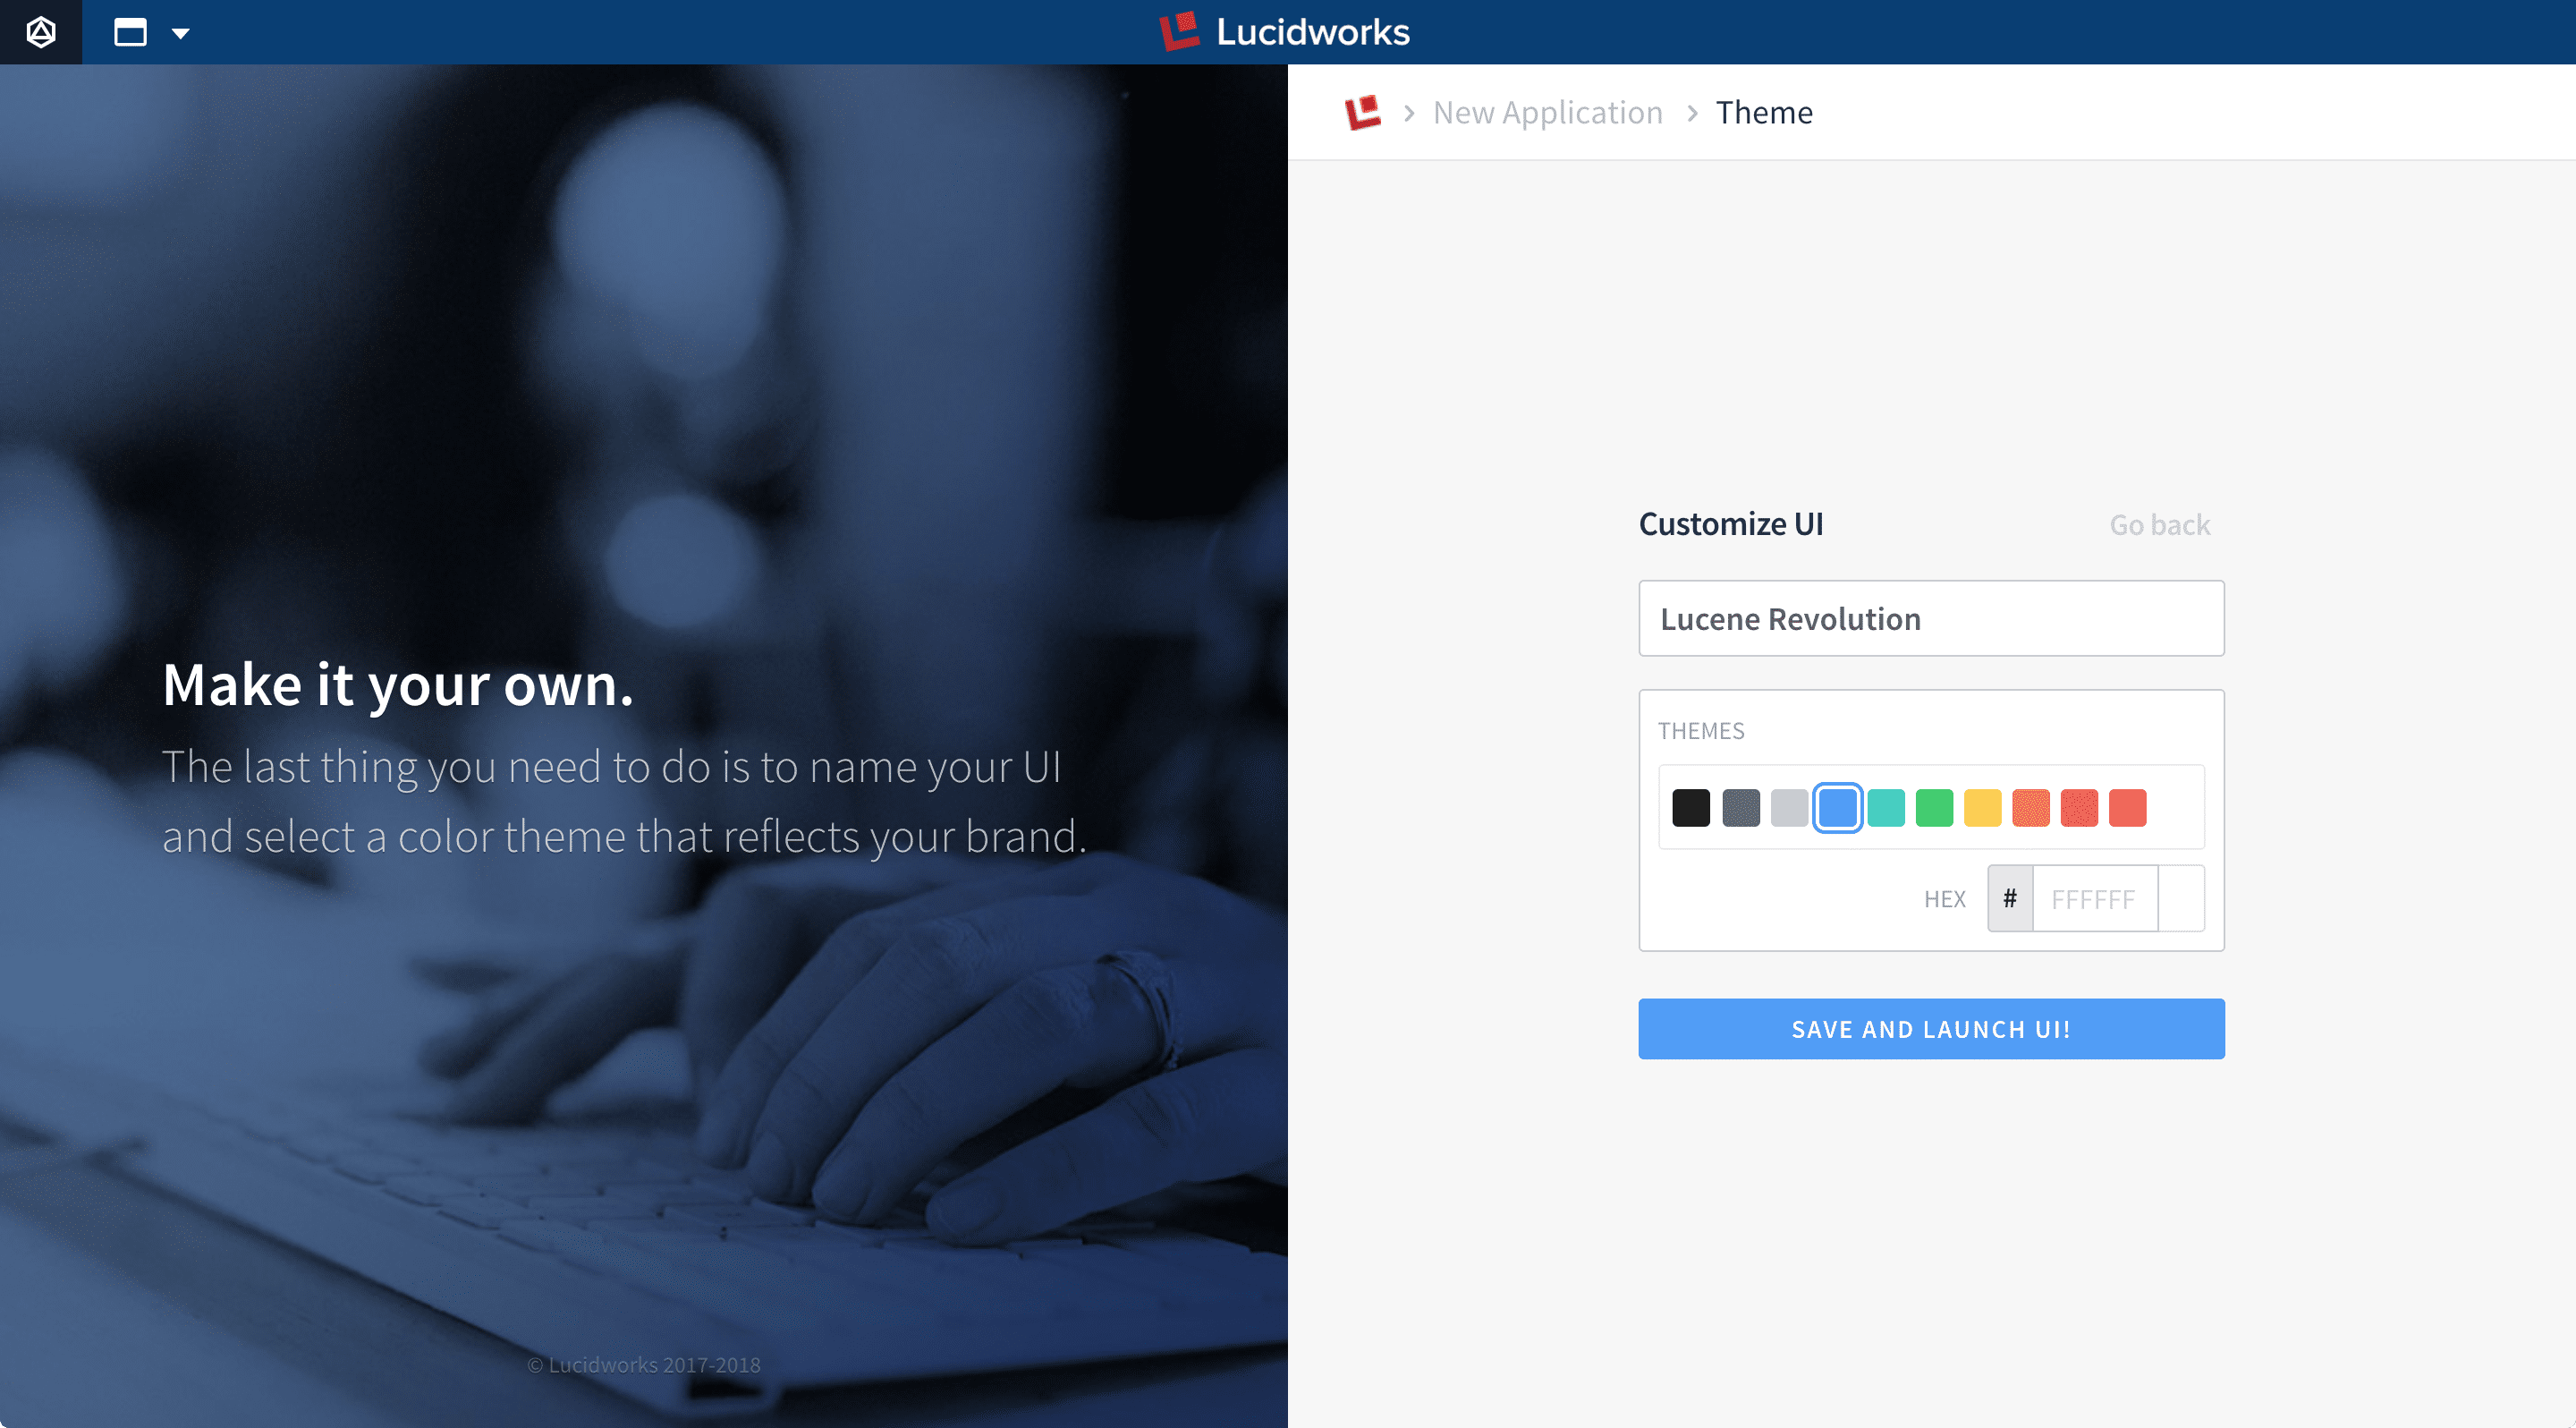 12. Click **Save and Launch UI**.
A preview of your search interface and data appear:
12. Click **Save and Launch UI**.
A preview of your search interface and data appear:
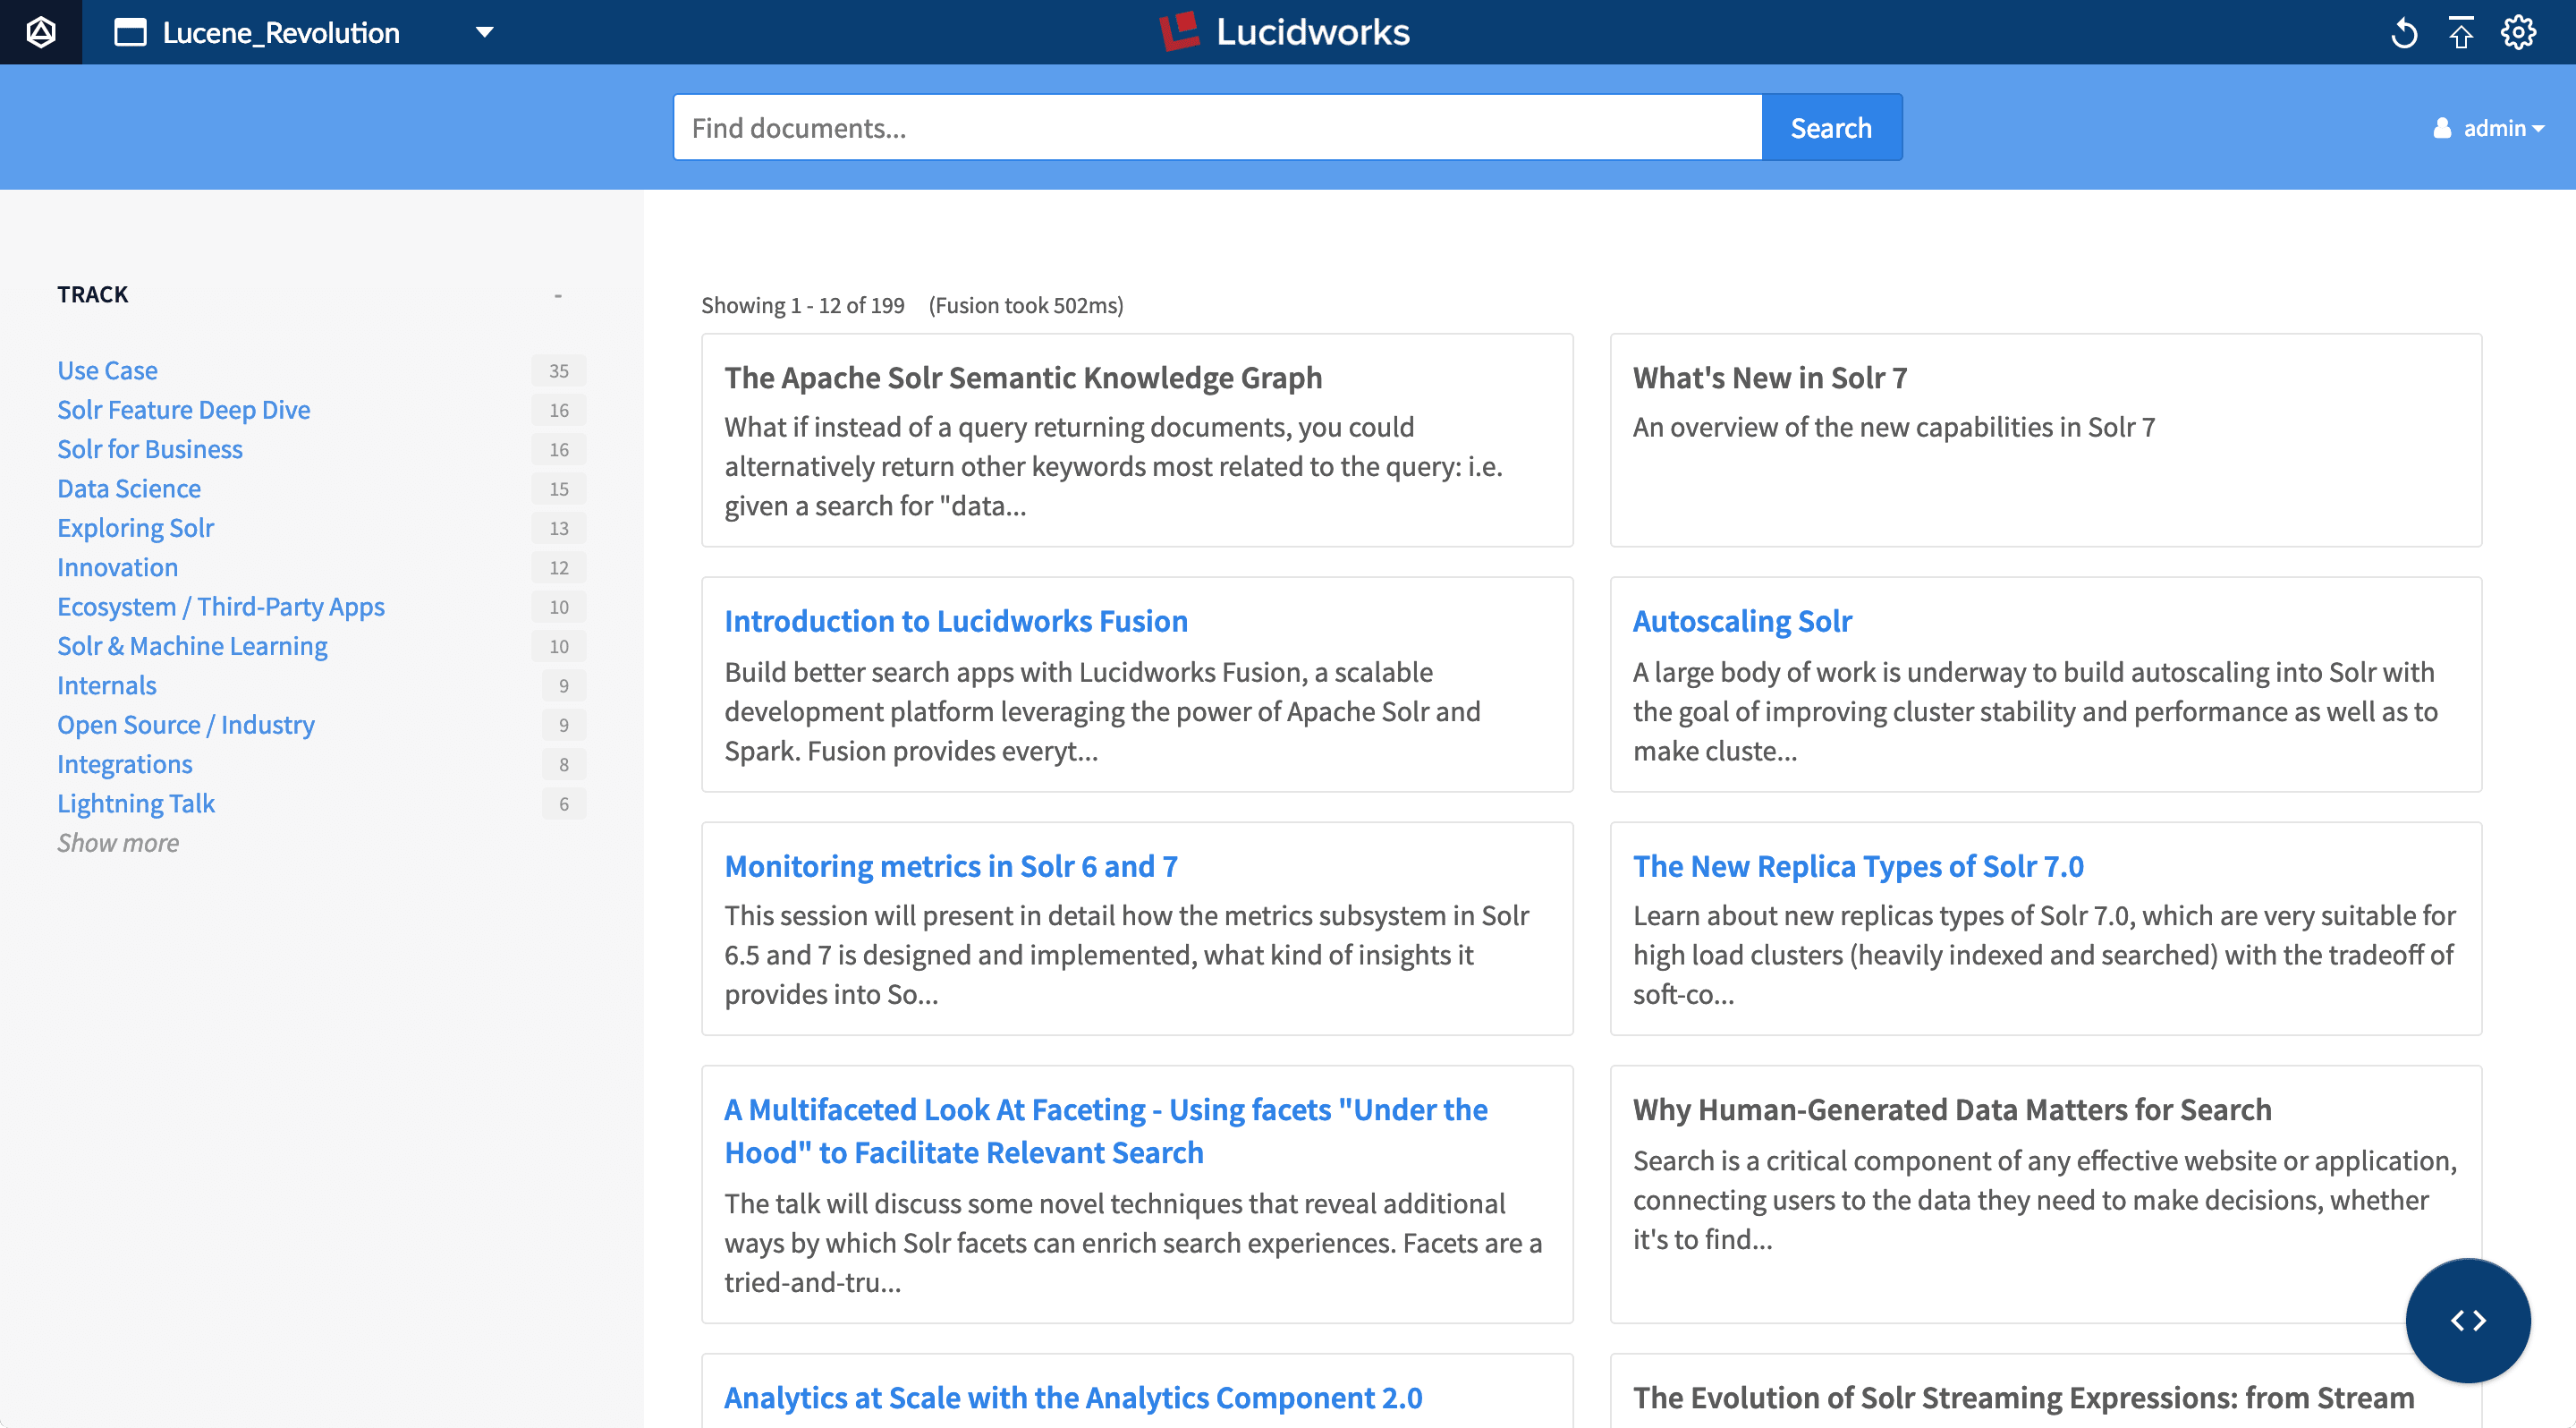
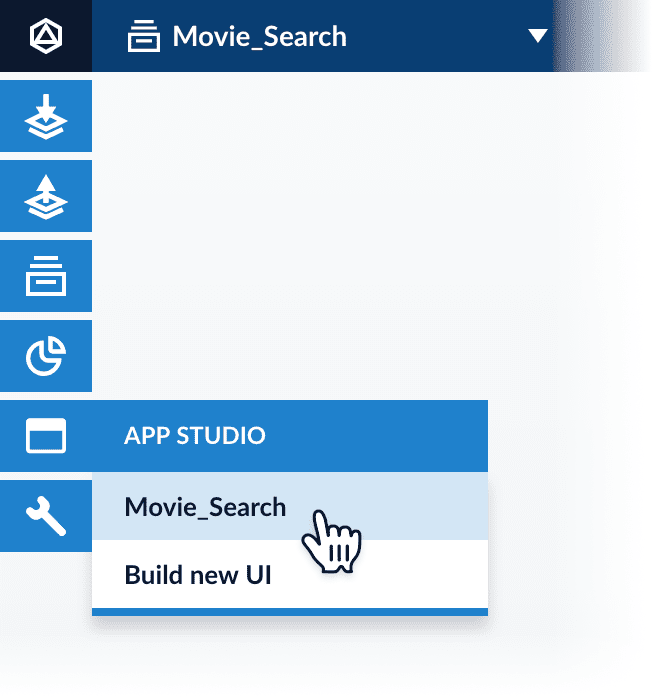
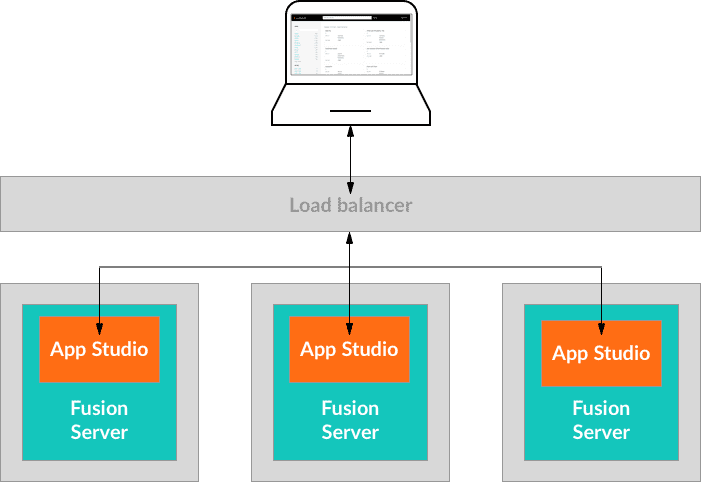 Here is an overview of the steps:
1. Develop your search interface.
2. Publish your UI to Fusion Server using the instructions below.
Your webapp then becomes accessible at `http://localhost:8764/webapps/
Here is an overview of the steps:
1. Develop your search interface.
2. Publish your UI to Fusion Server using the instructions below.
Your webapp then becomes accessible at `http://localhost:8764/webapps/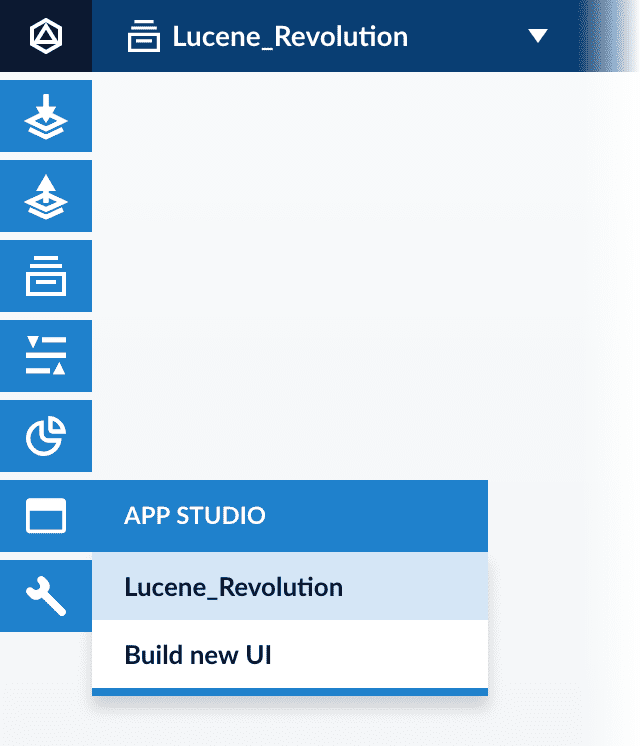 The configuration panel appears.
2. Next to **Publish Status**, click the toggle:
The configuration panel appears.
2. Next to **Publish Status**, click the toggle:
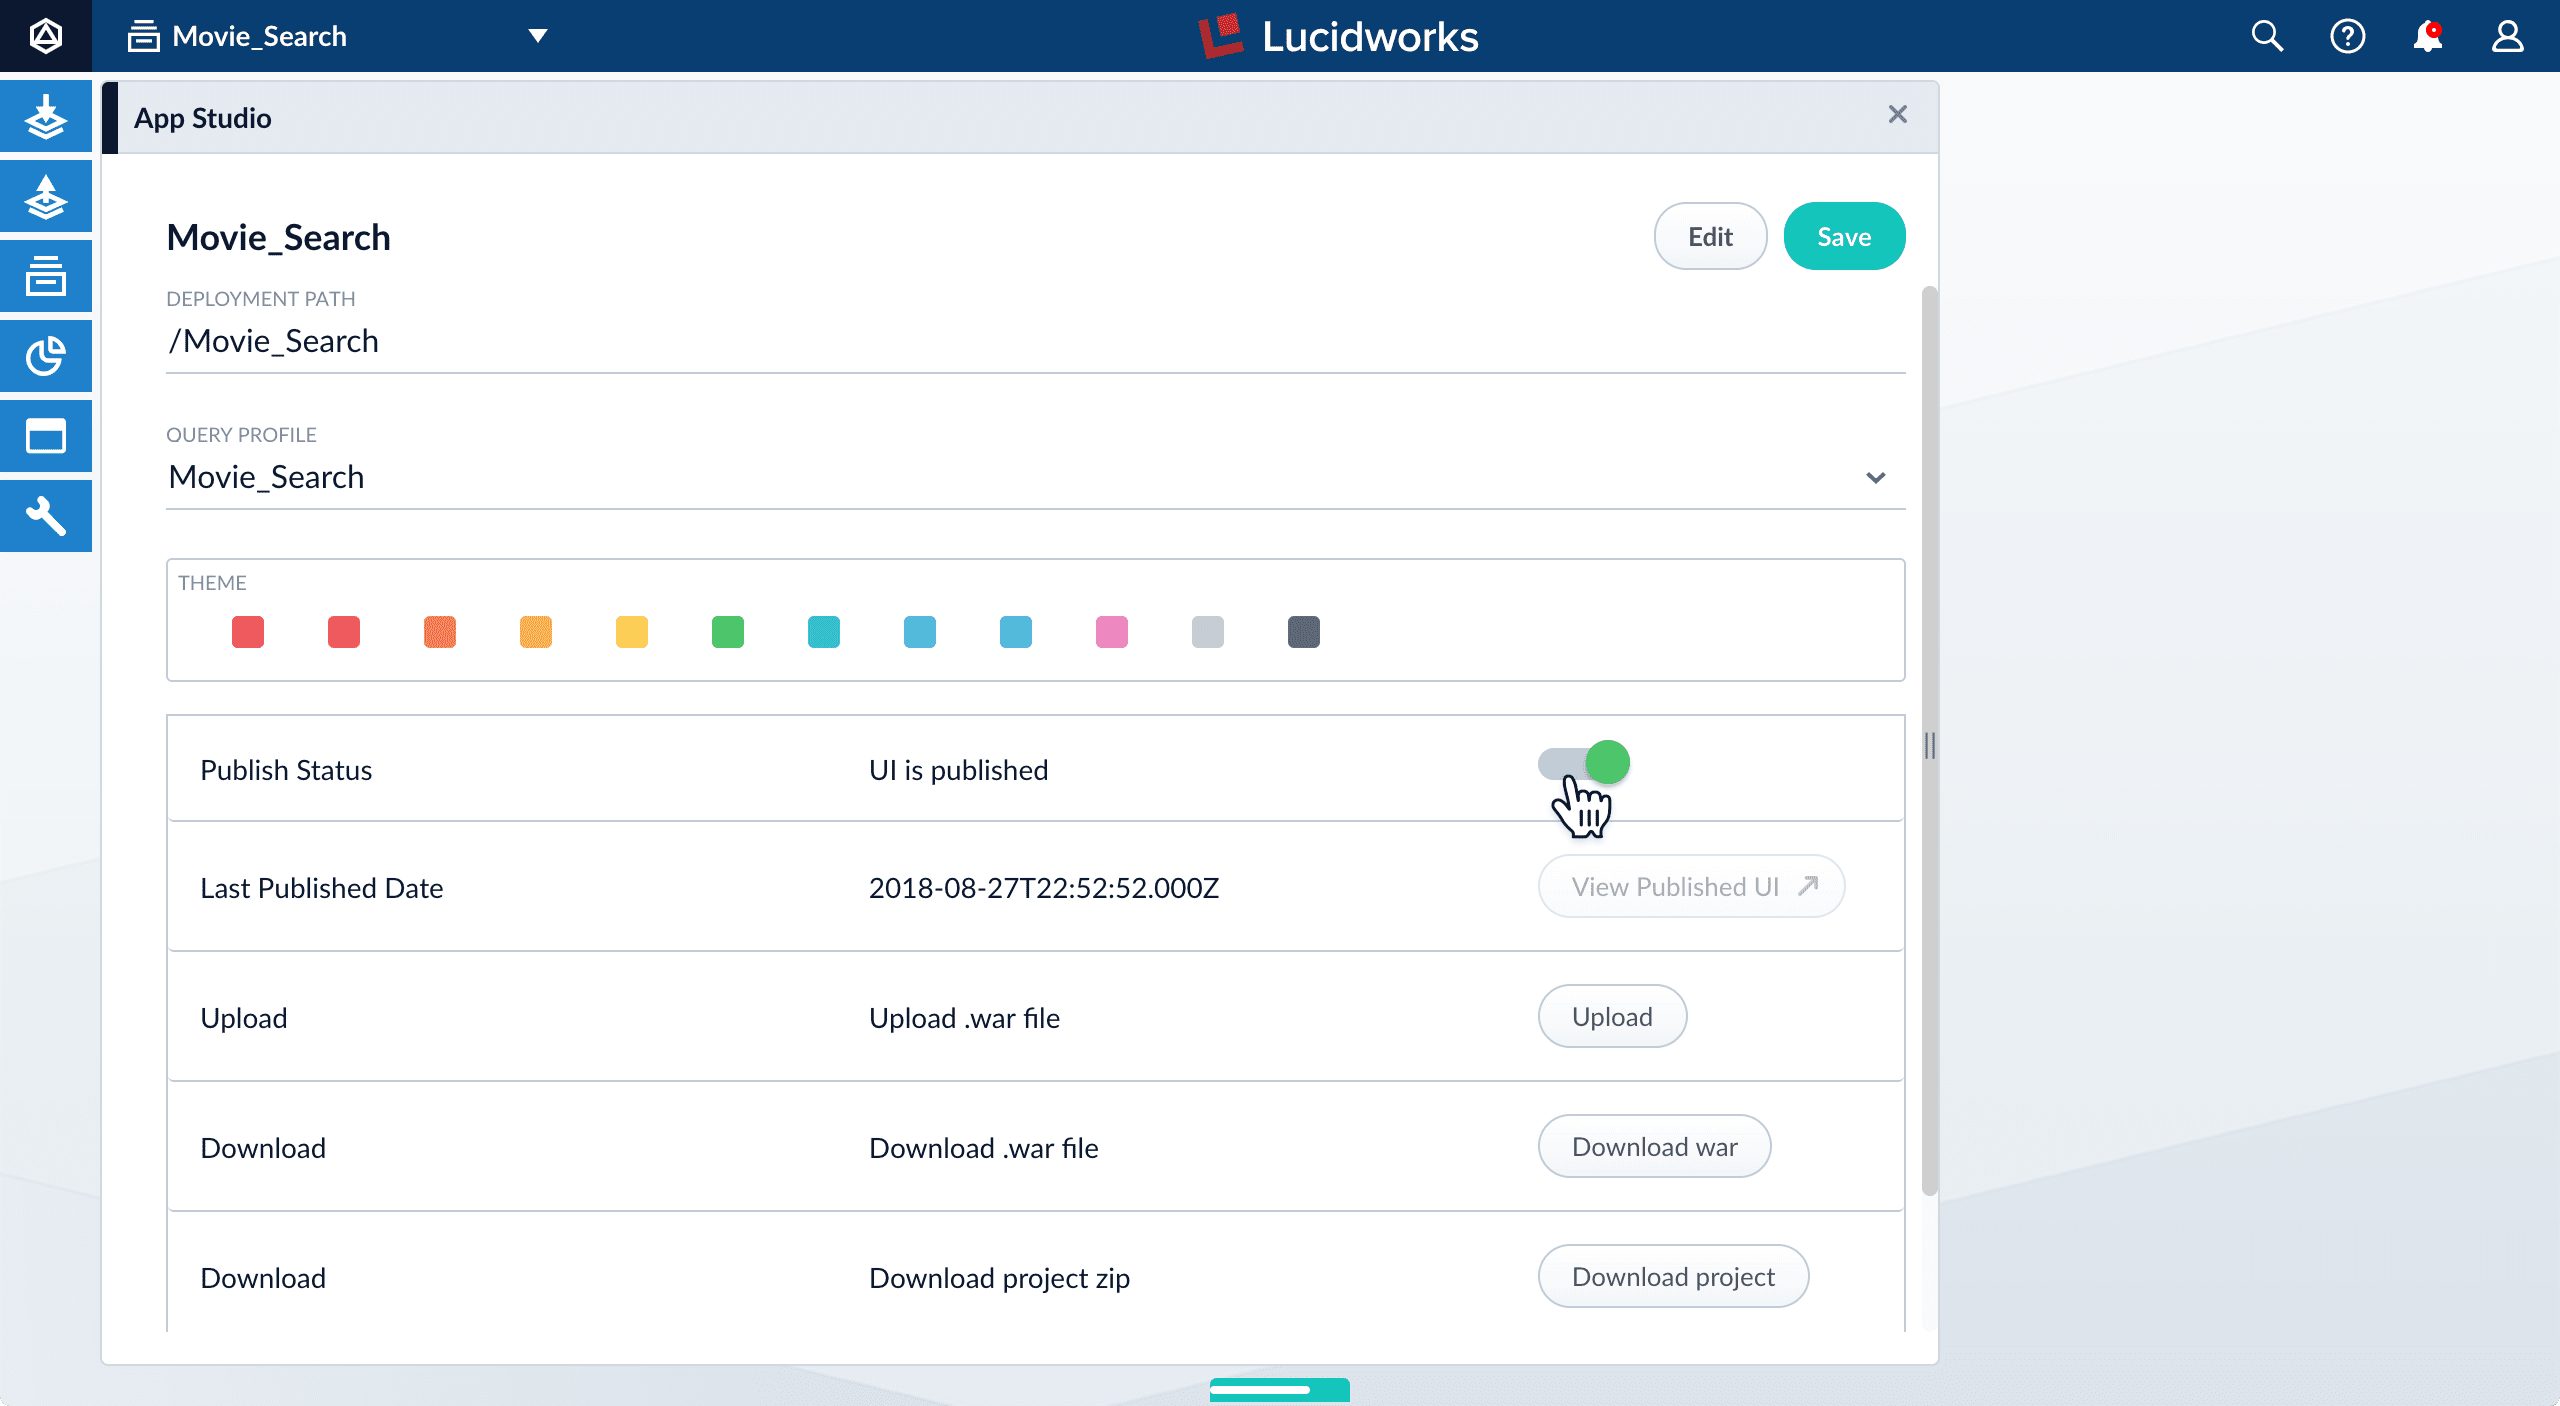 3. Click **Save**.
The interface is only published after you click **Save**, which also enables the **View Published UI** button.
4. Click **View Published UI** to launch a new window where you can view the interface as an end user.
Your published interface is available at `http://localhost:8764/webapps/
3. Click **Save**.
The interface is only published after you click **Save**, which also enables the **View Published UI** button.
4. Click **View Published UI** to launch a new window where you can view the interface as an end user.
Your published interface is available at `http://localhost:8764/webapps/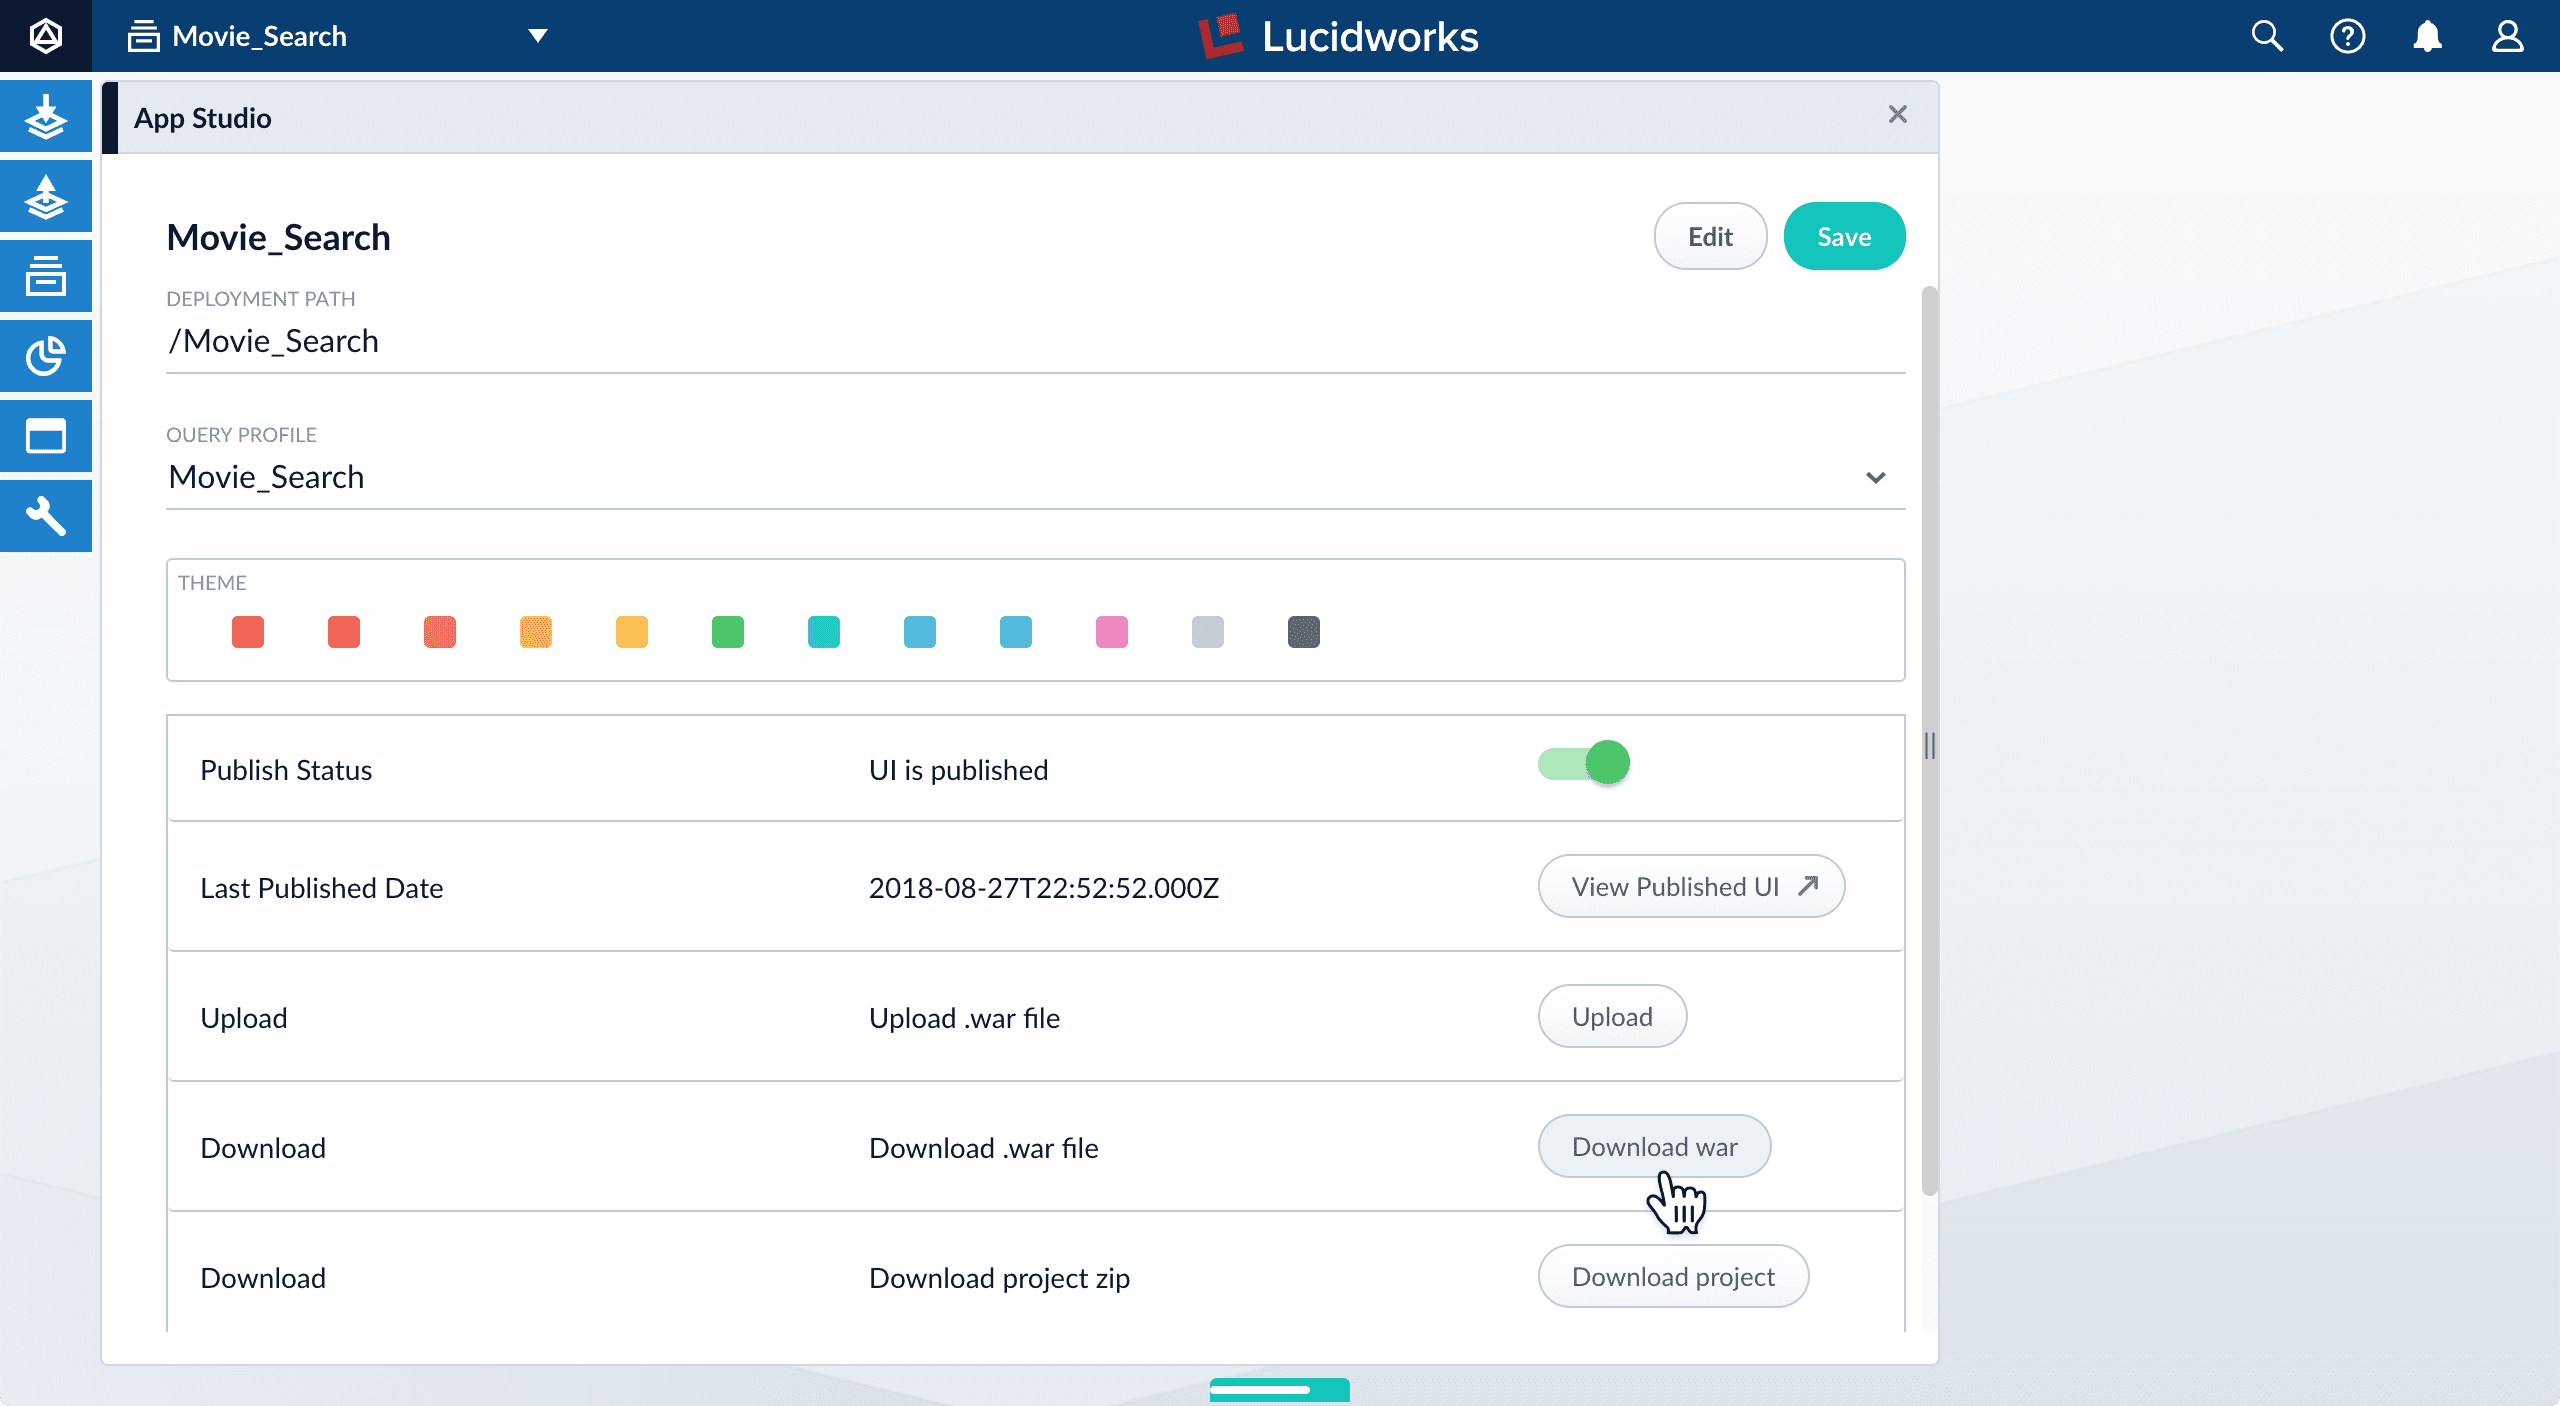 #### Building a WAR file
A downloaded project comes with the scripts `app-studio` (for Unix) and `app-studio.bat` (for Windows) that create WAR files.
**Unix and MacOS:**
1. In a shell window, switch to your project directory:
```bash theme={"dark"}
cd /path/to/project-directory
```
2. Create application files:
```bash theme={"dark"}
./app-studio package
```
**Windows:**
1. In a terminal window, switch to your project directory:
```bash theme={"dark"}
cd \path\to\project-directory
```
2. Create application files:
```bash theme={"dark"}
app-studio.bat package
```
**Application files created:**
The script creates the following files in the `dist` directory of your project:
* `search-app-latest.x.jar`
This is an executable Java JAR file file.
* `search-app-project.zip`
Use this file to share your project with other search interface developers.
* `search-app.war`
You can upload this file to Fusion to deploy it.
### Upload the WAR file
You can upload the WAR file through the Fusion UI or the REST API.
#### Uploading with the Fusion UI
You can upload your project (as a WAR file) in the App Studio configuration panel.
#### Building a WAR file
A downloaded project comes with the scripts `app-studio` (for Unix) and `app-studio.bat` (for Windows) that create WAR files.
**Unix and MacOS:**
1. In a shell window, switch to your project directory:
```bash theme={"dark"}
cd /path/to/project-directory
```
2. Create application files:
```bash theme={"dark"}
./app-studio package
```
**Windows:**
1. In a terminal window, switch to your project directory:
```bash theme={"dark"}
cd \path\to\project-directory
```
2. Create application files:
```bash theme={"dark"}
app-studio.bat package
```
**Application files created:**
The script creates the following files in the `dist` directory of your project:
* `search-app-latest.x.jar`
This is an executable Java JAR file file.
* `search-app-project.zip`
Use this file to share your project with other search interface developers.
* `search-app.war`
You can upload this file to Fusion to deploy it.
### Upload the WAR file
You can upload the WAR file through the Fusion UI or the REST API.
#### Uploading with the Fusion UI
You can upload your project (as a WAR file) in the App Studio configuration panel.
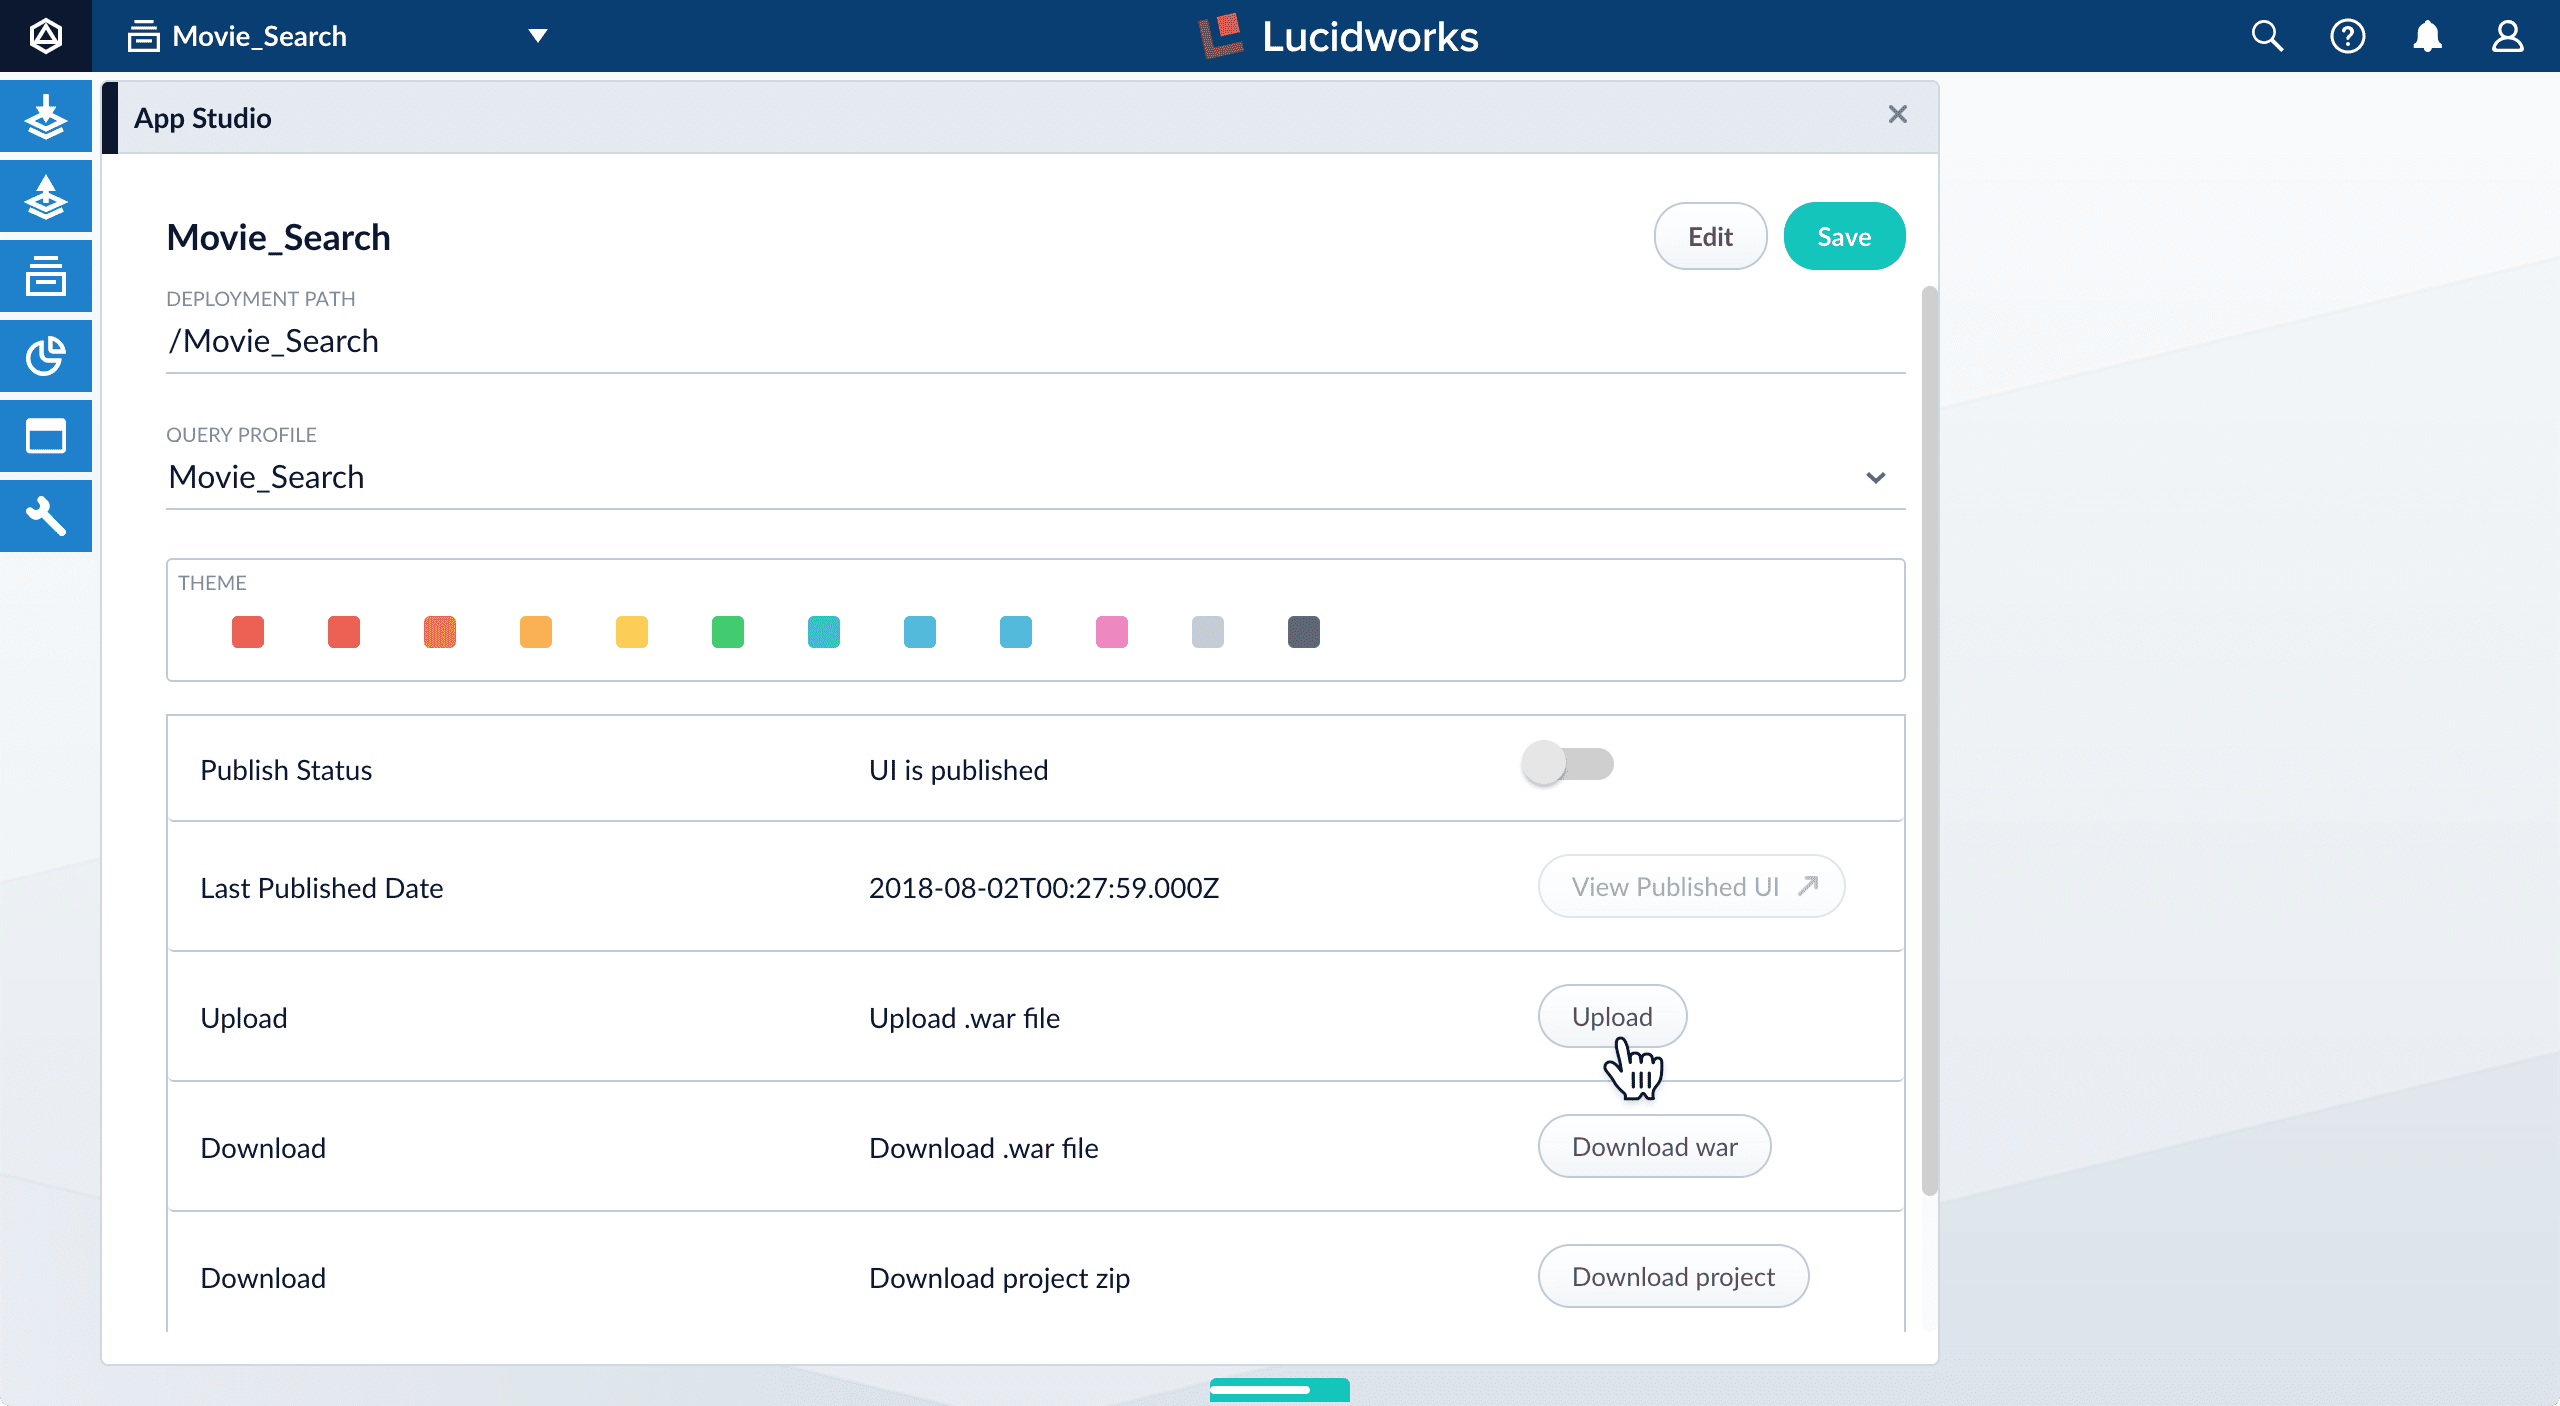 Fusion prompts you to confirm that you want to upload a project that will delete the existing one.
3. Click **Yes, continue**.
4. Navigate to your WAR file and select it.
After the upload is complete, you can edit or publish the uploaded project.
#### Uploading with the REST API
Use the `webapps/{id}/war` endpoint of the Webapps API to upload a WAR file, as in this example:
```bash wrap theme={"dark"}
curl -u USERNAME:PASSWORD -X PUT http://localhost:8764/api/webapps/Movie_Search/war -F 'file=@movies.war'
```
## Running a dedicated node for a search interface
When deploying Fusion nodes dedicated to serving one or more search interfaces, only the following Fusion services need to run:
* `agent`
* `api`
* `log-shipper`
* `webapps`
When starting a dedicated node, you can minimize the number of running services by starting it like this.
**Unix and MacOS:**
```bash theme={"dark"}
cd fusion/latest.x/bin
./agent start
./api start
./log-shipper start
./webapps start
```
**Windows:**
```bash theme={"dark"}
cd fusion\latest.x\bin
agent.cmd start
api.cmd start
log-shipper.cmd start
webapps.cmd start
```
Fusion prompts you to confirm that you want to upload a project that will delete the existing one.
3. Click **Yes, continue**.
4. Navigate to your WAR file and select it.
After the upload is complete, you can edit or publish the uploaded project.
#### Uploading with the REST API
Use the `webapps/{id}/war` endpoint of the Webapps API to upload a WAR file, as in this example:
```bash wrap theme={"dark"}
curl -u USERNAME:PASSWORD -X PUT http://localhost:8764/api/webapps/Movie_Search/war -F 'file=@movies.war'
```
## Running a dedicated node for a search interface
When deploying Fusion nodes dedicated to serving one or more search interfaces, only the following Fusion services need to run:
* `agent`
* `api`
* `log-shipper`
* `webapps`
When starting a dedicated node, you can minimize the number of running services by starting it like this.
**Unix and MacOS:**
```bash theme={"dark"}
cd fusion/latest.x/bin
./agent start
./api start
./log-shipper start
./webapps start
```
**Windows:**
```bash theme={"dark"}
cd fusion\latest.x\bin
agent.cmd start
api.cmd start
log-shipper.cmd start
webapps.cmd start
```
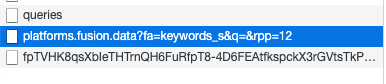
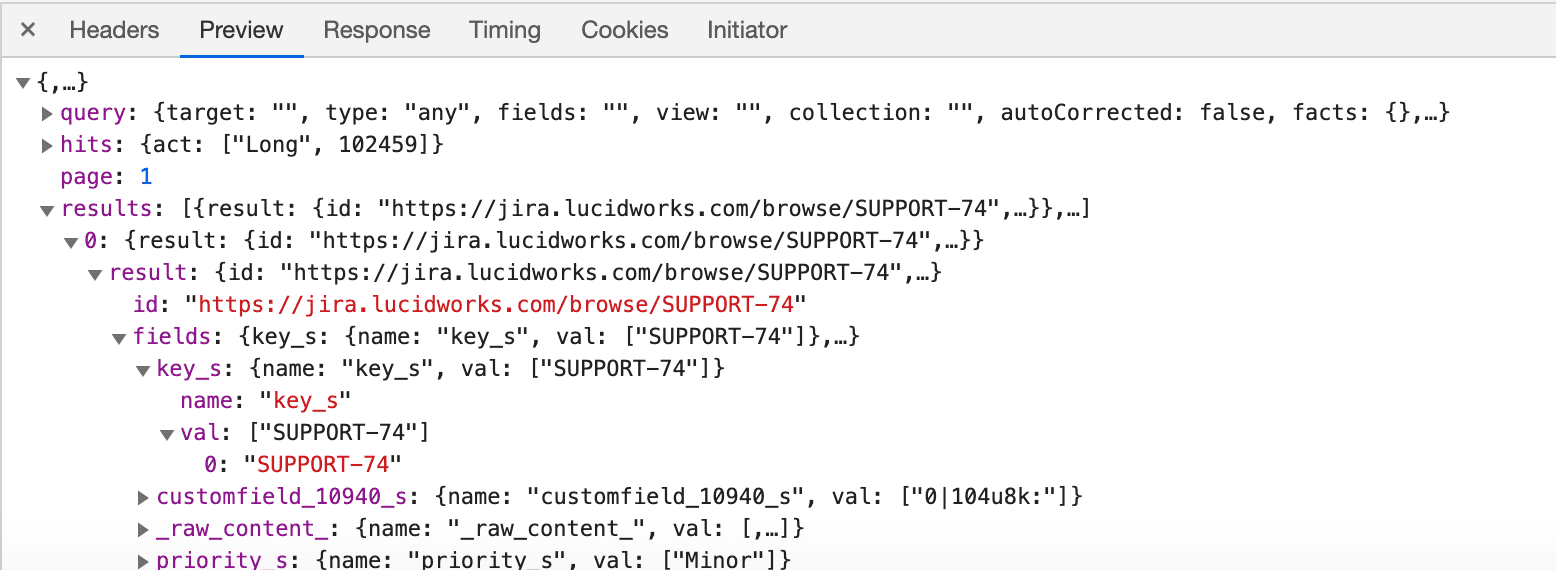 #### Get query from webapps/servlet logs and fire it against Fusion
If the data in your response object is not as you expect, you can get the query from the App Studio logs to fire directly against the Fusion endpoint, without App Studio as a middle-man. Note that you’ll need your logger configured to print out debug logging for the twigkit class in logback.xml in your environment profile. Or if not using a profile, in the main resources directory.
`
#### Get query from webapps/servlet logs and fire it against Fusion
If the data in your response object is not as you expect, you can get the query from the App Studio logs to fire directly against the Fusion endpoint, without App Studio as a middle-man. Note that you’ll need your logger configured to print out debug logging for the twigkit class in logback.xml in your environment profile. Or if not using a profile, in the main resources directory.
`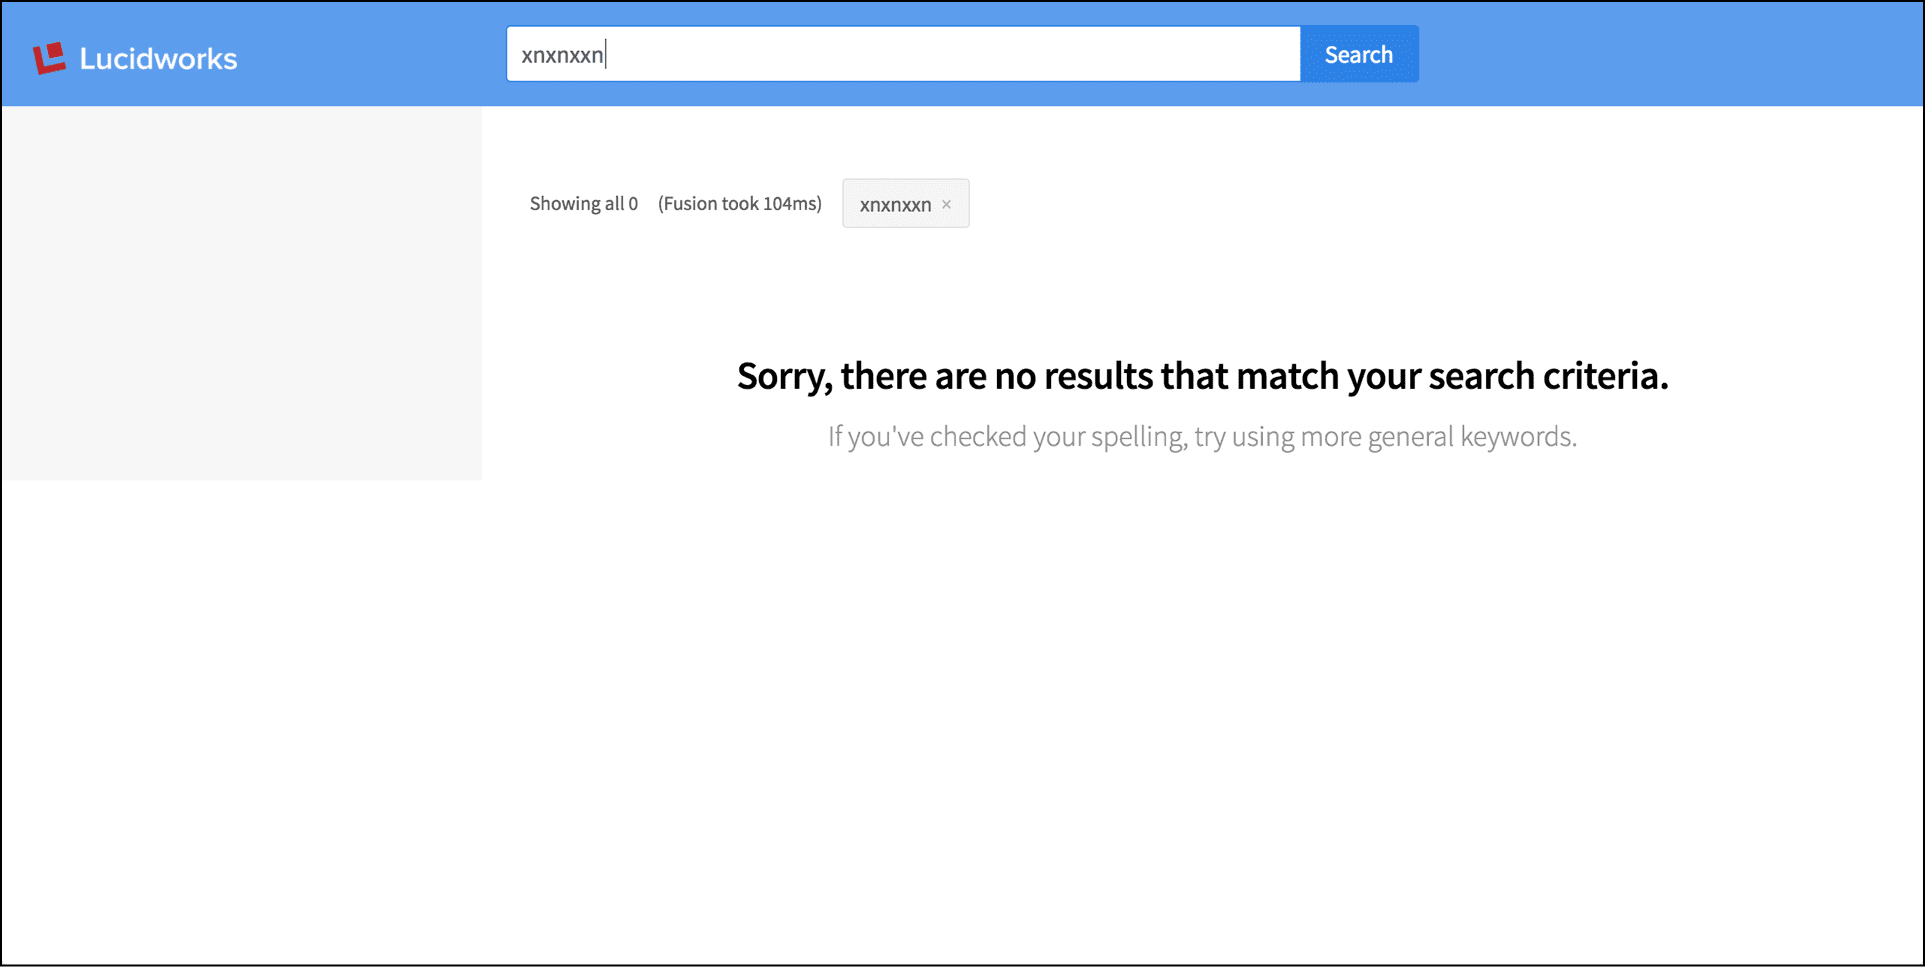
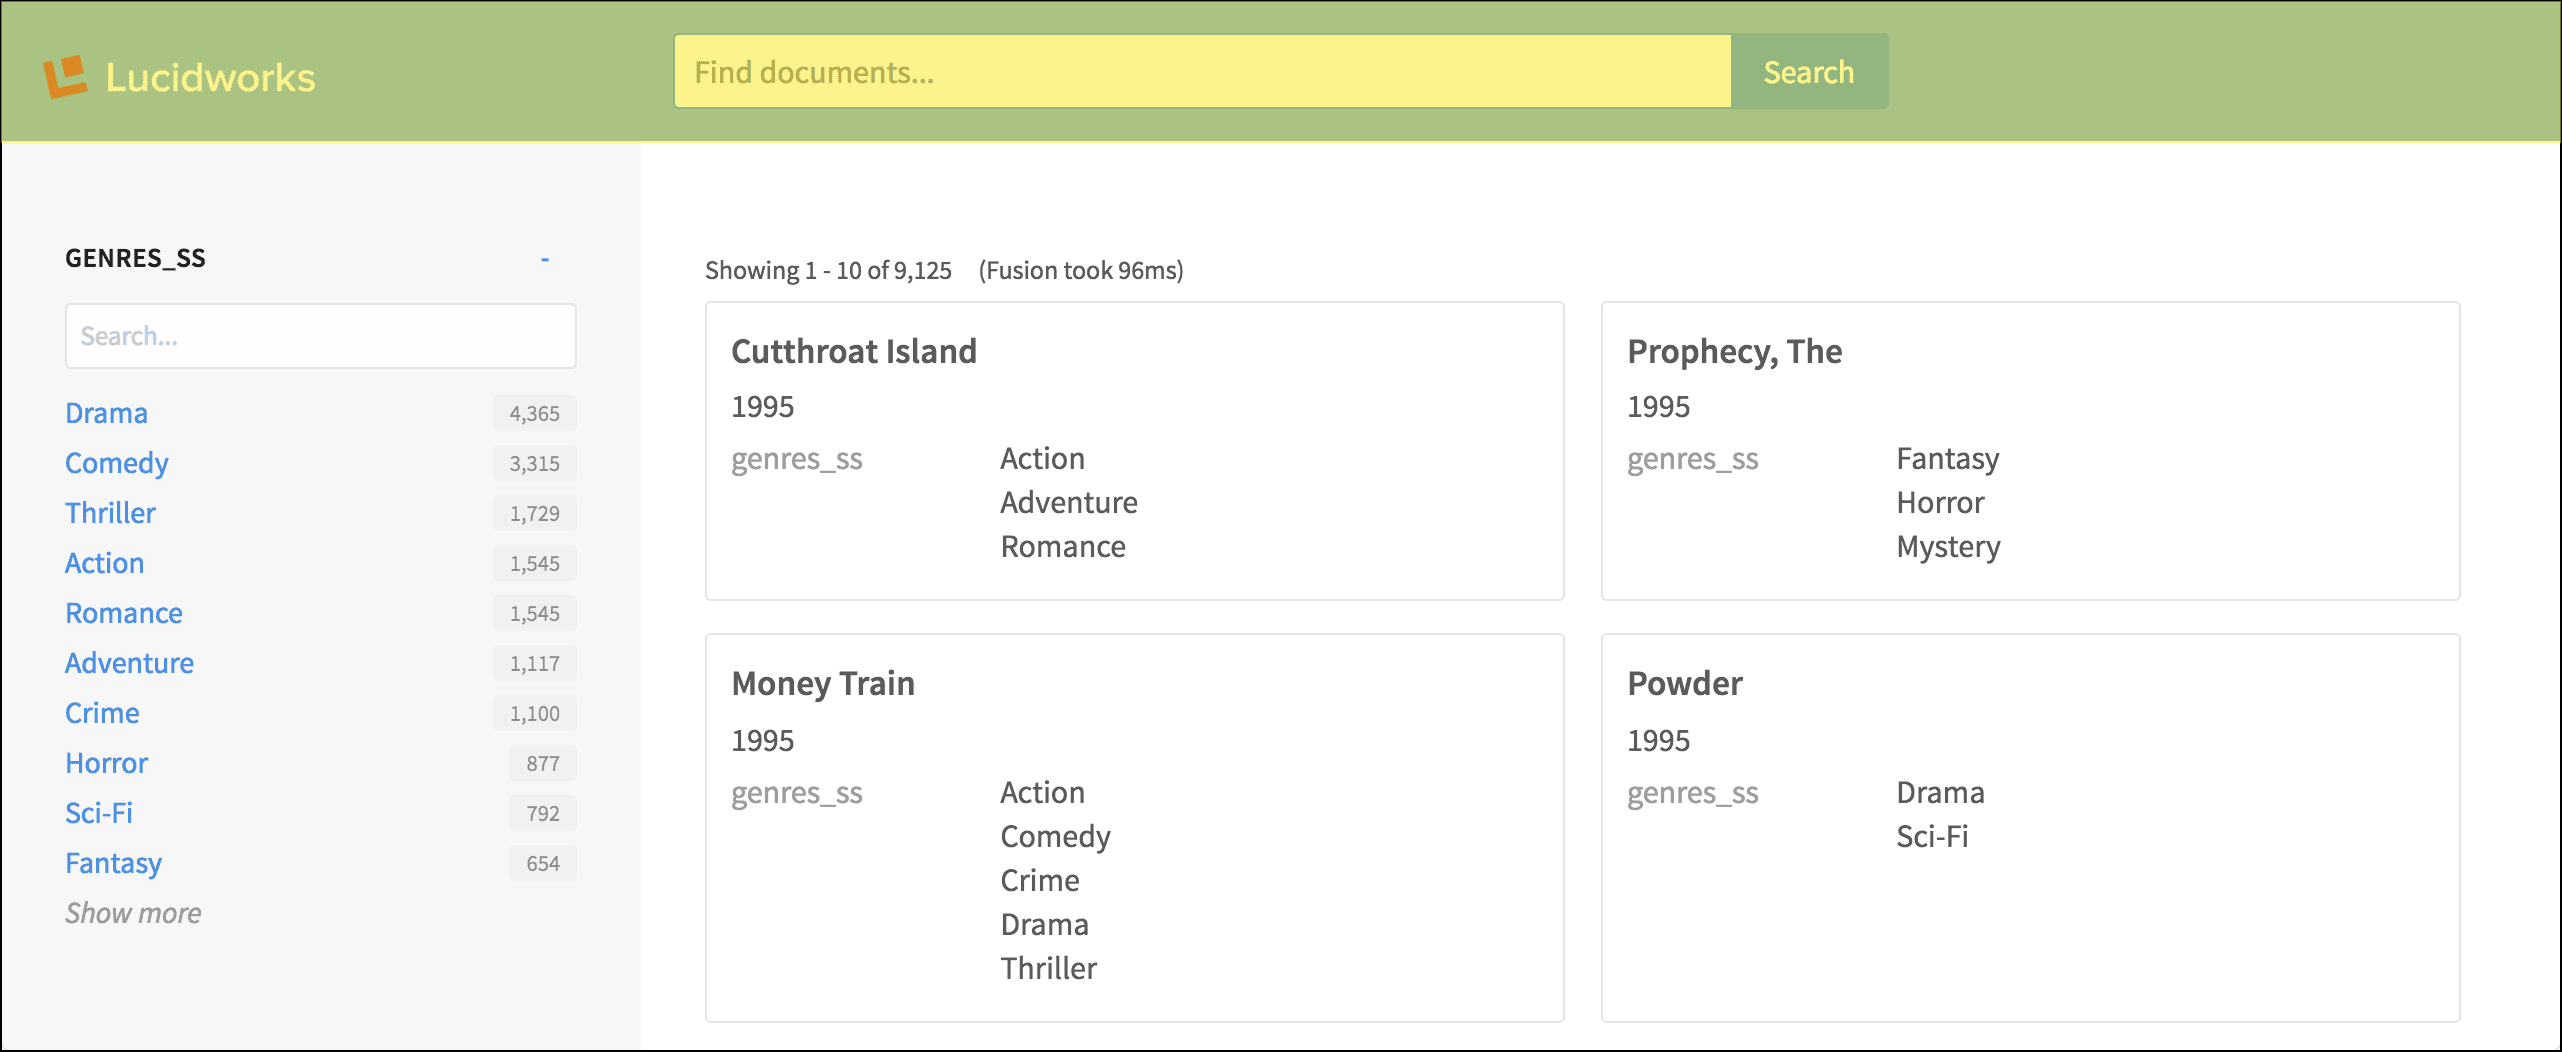 The `header.tpl.html` file, in turn, contains a number of `layout` tags, plus the important `search:box` tag.
## Sidebar with facet list
The sidebar is rendered using the simple `layout:sidebar` tag. Within the sidebar, the `search:facet-list`, and `search:facet` tags contain the parameters that configure the facet fields and their display.
The `header.tpl.html` file, in turn, contains a number of `layout` tags, plus the important `search:box` tag.
## Sidebar with facet list
The sidebar is rendered using the simple `layout:sidebar` tag. Within the sidebar, the `search:facet-list`, and `search:facet` tags contain the parameters that configure the facet fields and their display.
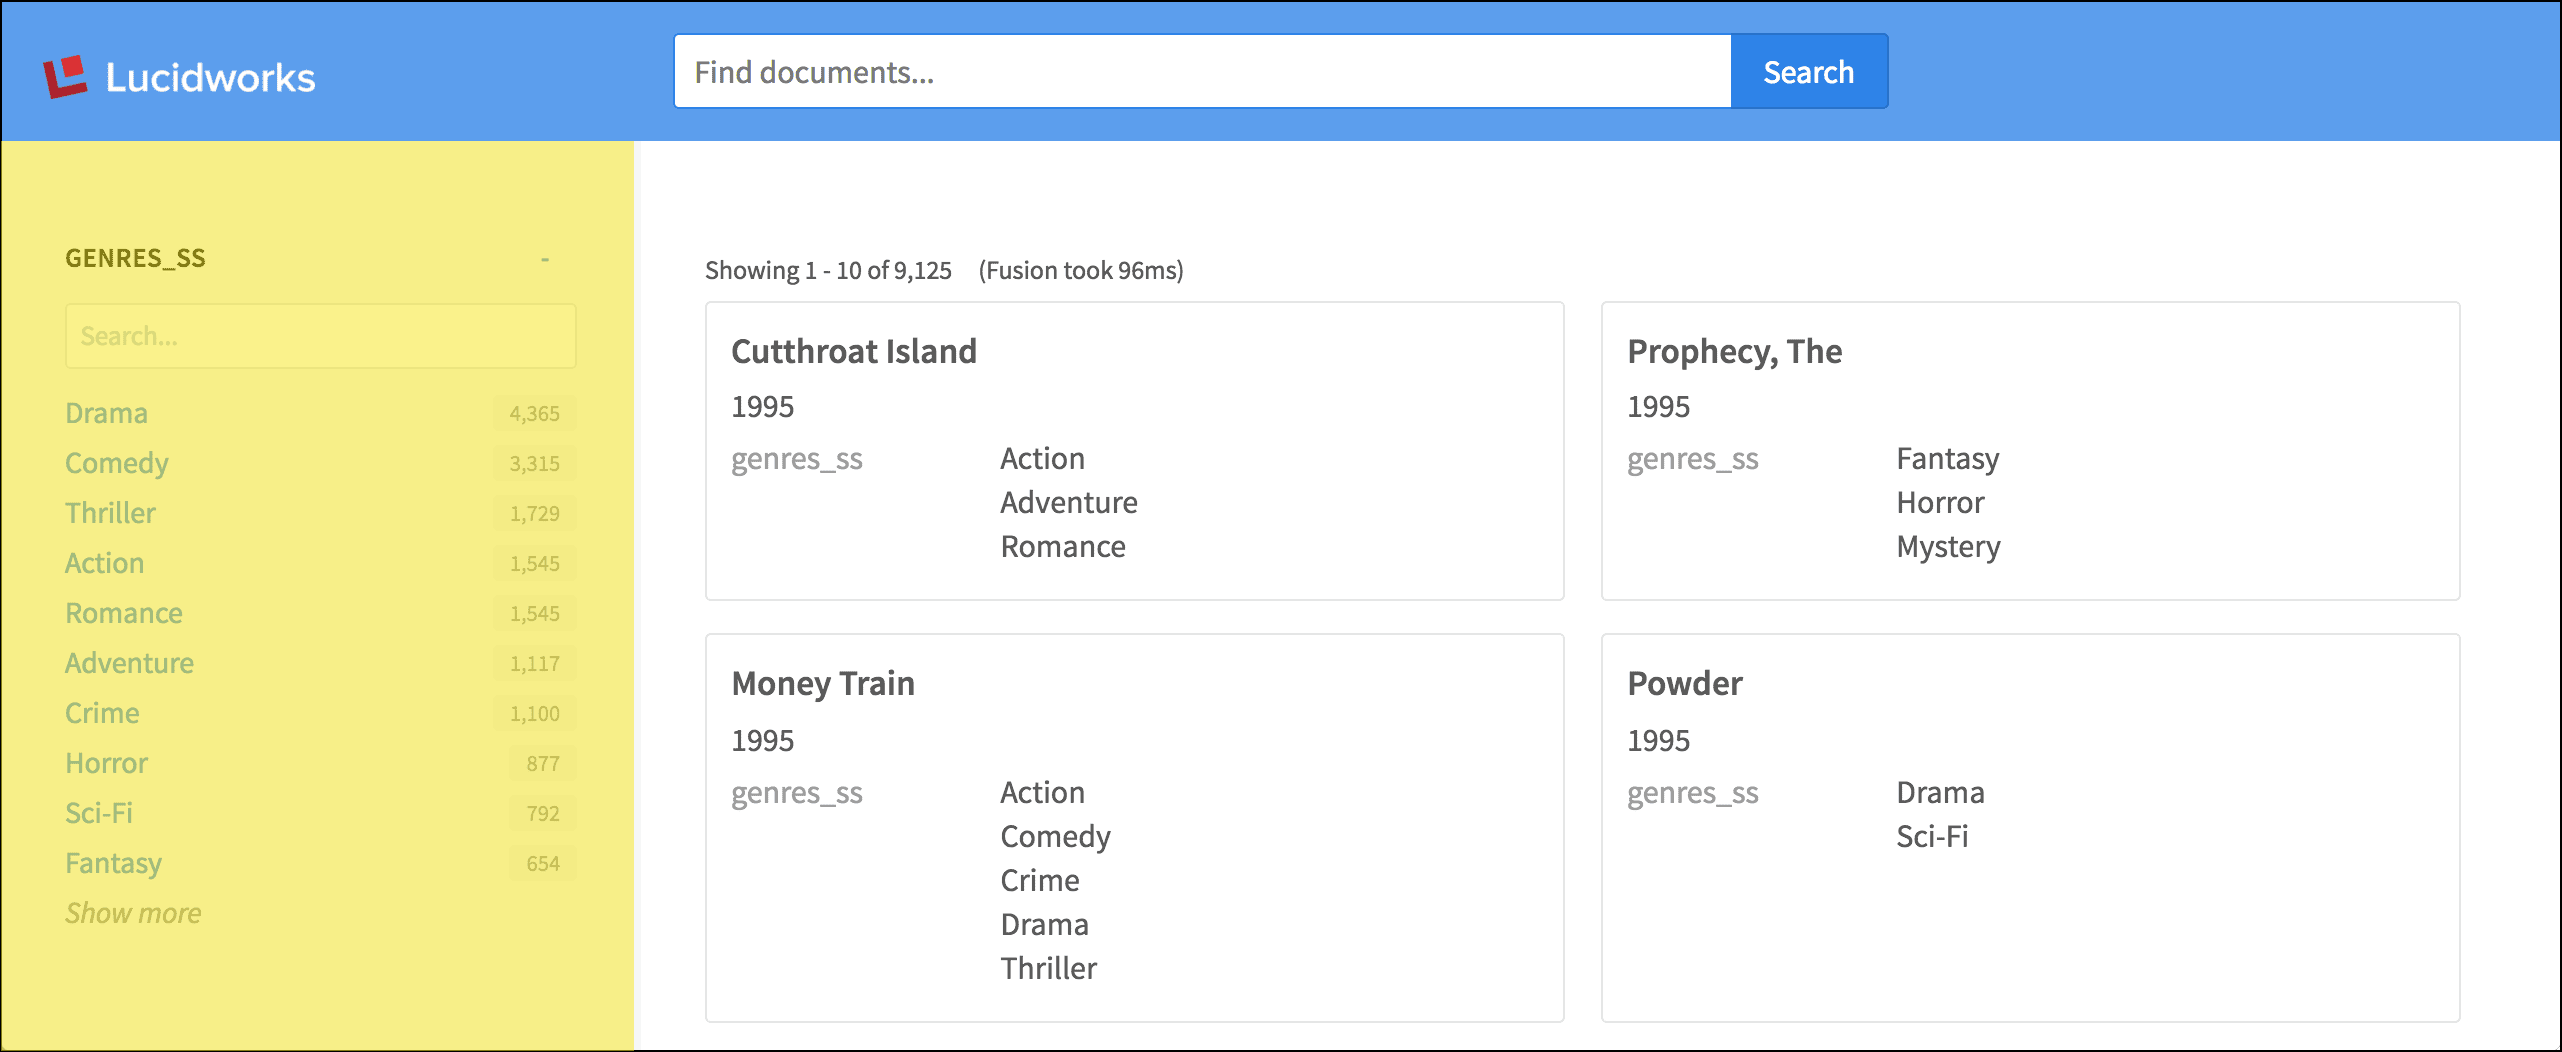 ```xml wrap theme={"dark"}
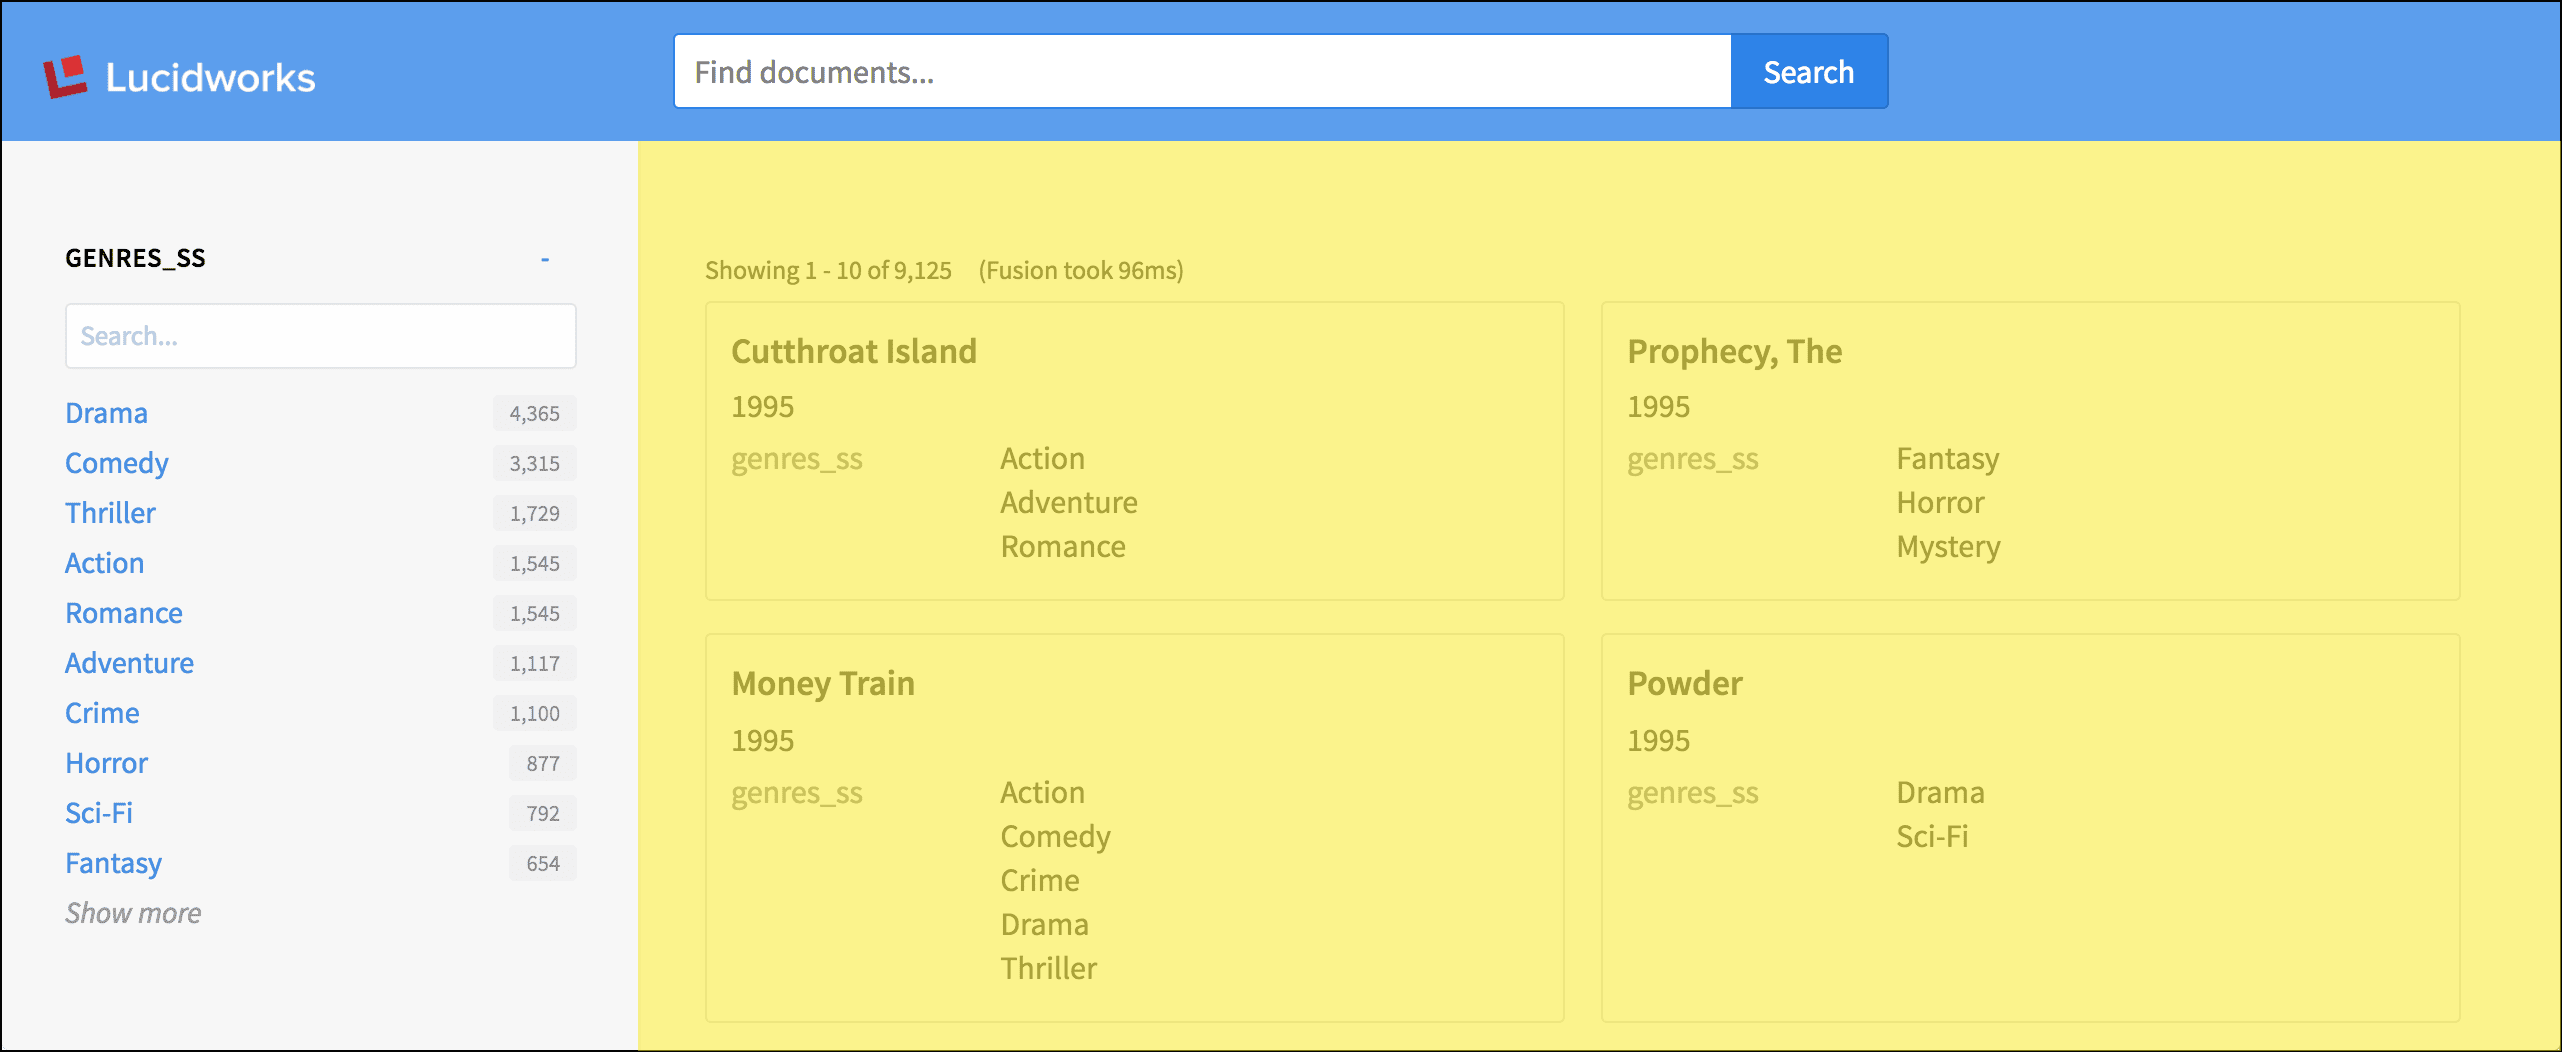 The `search:result-list` tag lays out the grid of search results:
```xml wrap theme={"dark"}
The `search:result-list` tag lays out the grid of search results:
```xml wrap theme={"dark"}
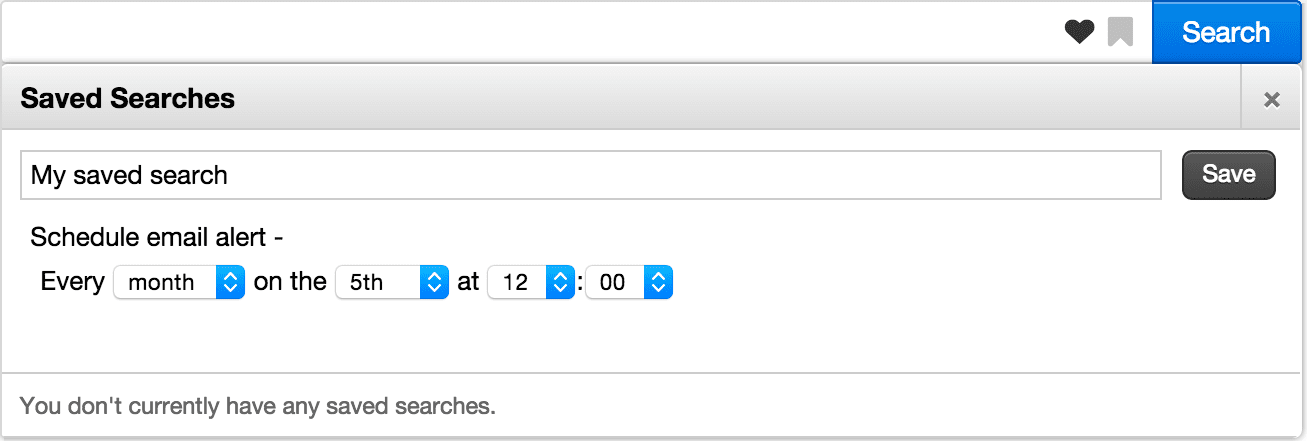 1. Add this dependency to your `pom.xml`. Remove any previous reference to `twigkit.social` modules.
```xml theme={"dark"}
1. Add this dependency to your `pom.xml`. Remove any previous reference to `twigkit.social` modules.
```xml theme={"dark"}
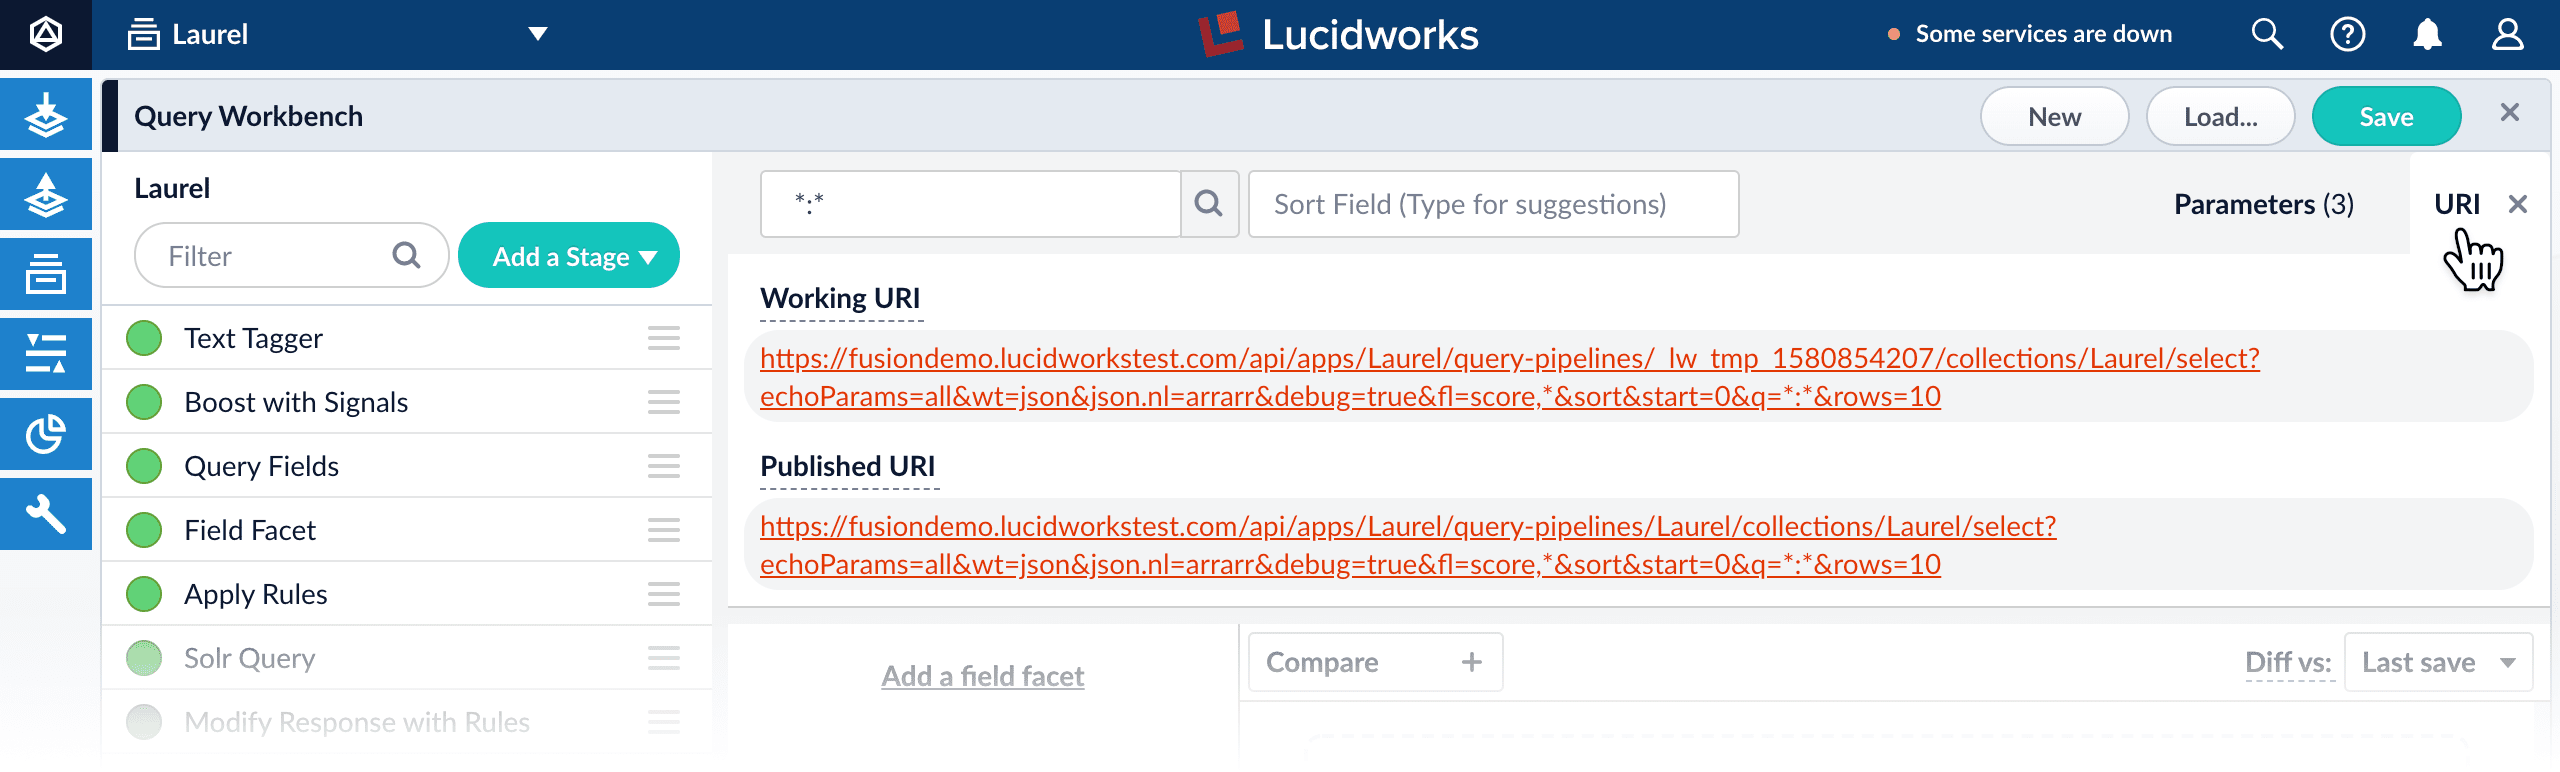 5. Remove every parameter given in this URL after `select?`.
6. Append the parameters from the webapps logs.
7. Put the resulting URL into your browser.\
The result will be the response of the query fired by App Studio, but unaltered by App Studio.
## Page is totally blank/elements look broken or strange
### Check the browser console
1. Open your browser’s developer tools.
2. Click the **Console** tab.\
Here you can check for any issues related to client-side components.
3. Look for the following error:
```bash theme={"dark"}
Uncaught Error: [$injector:modulerr] Failed to instantiate module myApp due to:
Error: [$injector:modulerr] Failed to instantiate module lightning due to:
Error: [$injector:nomod] Module 'lightning' is not available! You either misspelled the module name or forgot to load it. If registering a module ensure that you specify the dependencies as the second argument.
```
* If you see the error above, you should wipe your `node_modules` directory and reinstall the modules before building:
1. `rm -rf node_modules package-lock.json`
2. `npm cache clear -f`
3. `npm install`
* If you do not see this error, then typically there is a problem in your Javascript code.
5. Remove every parameter given in this URL after `select?`.
6. Append the parameters from the webapps logs.
7. Put the resulting URL into your browser.\
The result will be the response of the query fired by App Studio, but unaltered by App Studio.
## Page is totally blank/elements look broken or strange
### Check the browser console
1. Open your browser’s developer tools.
2. Click the **Console** tab.\
Here you can check for any issues related to client-side components.
3. Look for the following error:
```bash theme={"dark"}
Uncaught Error: [$injector:modulerr] Failed to instantiate module myApp due to:
Error: [$injector:modulerr] Failed to instantiate module lightning due to:
Error: [$injector:nomod] Module 'lightning' is not available! You either misspelled the module name or forgot to load it. If registering a module ensure that you specify the dependencies as the second argument.
```
* If you see the error above, you should wipe your `node_modules` directory and reinstall the modules before building:
1. `rm -rf node_modules package-lock.json`
2. `npm cache clear -f`
3. `npm install`
* If you do not see this error, then typically there is a problem in your Javascript code.